All Purpose Salt & Pepper Blend

I discover that a rib rub actually makes an excellent everyday seasoning.

A few weeks ago, I watched a cooking video titled “Salt & Pepper Spare Ribs” by Allrecipes.com‘s Chef John. Although Chef John’s sing-songy narration drives me bonkers, he shares a lot of good recipes and this was definitely one of them. (You can find the recipe without listening to his voice here.) I made the ribs, using baby backs because St. Louis (which I prefer) weren’t available, and they were great.

I did find myself with some extra rub after preparing the ribs. (Baby backs are smaller than St. Louis.) I put it in a jar in my pantry. This morning, on a whim, I sprinkled some on my breakfast scramble. Today, that included bacon; onions, yellow squash, and potatoes from my garden; spinach; and tomatoes with an egg on top. The small amount of “rib rub” I put on my breakfast really made the flavor explode. I regret not putting more on. (Tomorrow is another day.)

The blend is easy. Just mix these five ingredients together:

  • Ingredients
    Just five ingredients. Can’t get any easier than that!

    4 teaspoons kosher salt. I actually used regular iodized salt, which is I had in my pantry and wanted to use up.

  • 1 tablespoon freshly ground black pepper. Sadly my pepper mill doesn’t properly grind pepper — it cracks it. Not what I wanted in this recipe so I used pre-ground pepper. (Do not use flake pepper. Ever. If you have any, throw it away. It’s garbage.)
  • 1 teaspoon freshly ground white pepper. I wouldn’t even know where to buy white peppercorns in the rural area where I live. I consider myself lucky to find ground white pepper so that’s what I used.
  • 1 teaspoon cayenne pepper. I’ll admit I used a little less than this because I don’t like super spicy food. The ribs were definitely spicy enough for me.
  • 1/2 teaspoon garlic powder. Honestly, I think this is what made it so good on my breakfast.

Put it in a jar that you can seal tightly. I try to save spice jars with sprinkle tops just for this purpose. Then use it on anything you would normally sprinkle with salt and pepper. You won’t be disappointed.

That rib recipe won’t disappoint you, either. It’s especially good if you don’t have a smoker or just want something different. It can’t be any easier to make.

Helicopter Flight: Nick Over the Rocks, Part 7

The final installment of my series of geology videos with Nick Zentner on YouTube.

COME FLY WITH ME as I finish up my hour+ flight with Central Washington University geology professor and star of “Nick on the Rocks” (and “Nick at Home”) Nick Zentner on a helicopter tour of the Columbia River Valley downriver from Wenatchee, WA. This is the seventh part of our second flight together and we start just downriver from Wanapum Dam and head upriver, making our way back to Wenatchee. Along the way, we make a detour up Rock Island Creek and over Badger Mountain before landing at the airport. The nosecam footage is stunning and Nick points out many geological features along the way. This is the last (and longest) part of a multi-part series.

Note: In parts of this video, you’ll hear Nick and I talking about unreliable video cameras. That’s because of the camera failure I had on my first flight with Nick, which you can see for yourself in Part 2.

Places mentioned in this video:

  • Wanapum Dam and Lake
  • Sunrise Highway
  • Frenchman’s Coulee
  • Gorge Amphitheater
  • Mouth of Lower Moses Coulee
  • Rock Island Dam
  • Rock Island Creek
  • Badger Mountain
  • Pangborn Bar

If you like this video please GIVE IT A THUMBS UP and SHARE IT WITH A FRIEND. I’m trying hard to build my channel and I need views and subscribers to get my videos suggested on YouTube’s pages.

Helicopter Flight: Nick Over the Rocks, Part 6

Another video from the FlyingMAir YouTube channel.

COME FLY WITH ME as I take Central Washington University geology professor and star of “Nick on the Rocks” (and “Nick at Home”) Nick Zentner on a helicopter tour of the Columbia River Valley downriver from Wenatchee, WA. This is the sixth part of our second flight together and we start just upriver from Vantage, WA and head south along the river over Wanapum Dam, along the north face of Saddle Mountain, over the Walluke slope, and then through the Gap in the mountain just north of Mattawa. The nosecam footage is stunning and Nick points out many geological features along the way. This is part 6 of a multi-part series.

Note: In Parts, 3, 4, 5, and 6 and beyond of this video, you’ll hear Nick and I talking about unreliable video cameras. That’s because of the camera failure I had on my first flight with Nick, which you can see for yourself in Part 2.

Places mentioned in this video:

  • Vantage
  • Saddle Mountain
  • Walluke Slope

If you like this video please GIVE IT A THUMBS UP and SHARE IT WITH A FRIEND. I’m trying hard to build my channel and I need views and subscribers to get my videos suggested on YouTube’s pages.

My Life During the Coronavirus Age

Life isn’t that different for some of us.

As COVID-19 continues to rage throughout most of the world — with the notable exception of New Zealand these days — I’ve been doing what I can to avoid getting the virus and, if I have a mild, undiagnosed case, prevent spreading it.

Precautions

The primary way I “stay safe” is to stay home as much as possible. This isn’t difficult because I don’t have anywhere else I need to go other than the supermarket or other shops to get necessities.

For grocery shopping, I occasionally use the pickup service at Fred Meyer, which enables me to place a grocery order and pick it up in a predetermined time slot. If I do go to the store in person, I go in the morning, right after it opens, and I wear a mask.

Wear a mask.

For the folks who can’t be bothered to wear a mask indoors in public places, I say fuck you.

People who wear masks do so to protect others, including you. The very least you can do is wear a mask to protect them.

No excuses. Wear a fucking mask.

Until recently, more than half the customers were wearing masks when I shopped, but things have slacked off here. What bothers me more is that although the store employees are required to wear masks, about half of them do not cover their noses. This includes the checkout staff, who touch everyone’s food and money. On a recent trip, I brought my own bags, which they refuse to pack, specifically so they wouldn’t touch my food more than they had to. When the girl who does the packing — who had a loose-fitting mask that didn’t cover her nose — started handing me my groceries, I told her pointedly not to touch my stuff. I don’t care if she was offended; if she can’t wear her mask properly, she shouldn’t be touching anything.

I’ve been working on various yard projects that need building materials. Every time I needed something, I’d place an order at Home Depot or Lowes and go pick it up. I quickly learned that Home Depot didn’t get it; they required me to go into the store and wait on line to pick up my lumber order; clearly this could have been handled curbside. When they refused to let me exit through the closest door, thus forcing me to walk through the crowded checkout area where no one was wearing masks, I decided that I didn’t need to shop at Home Depot anymore. Lowes had better pickup systems in place and that’s where I now shop for lumber and garden supplies.

Pressure Reducer
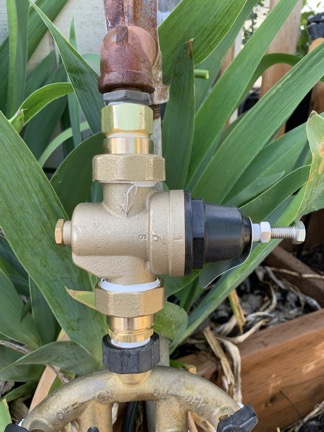
I finally put a good pressure reducer on my garden hydrant, which has unregulated pressure over 100 psi.

I had to visit an irrigation supply store to pick up a pressure reducer for my irrigation system and was pleased to see that they were limiting the number of people inside the shop to the number of sales folks they had. The waiting spots outside were marked with tape 6 feet apart. Because the line was outdoors and spaced properly, I wasn’t wearing my mask. Some jackass parked, got out of his SUV, and stood right next to me. He wasn’t wearing a mask. “It’s all a hoax,” he said to me. I looked at him, said “Sure,” and moved six feet away. I was glad when it was my turn to go in.

I have had to meet with clients to pick up checks or maps. One of them handed me a mask when I came into his office; I’d left mine in the truck because it was supposed to be a quick stop. The next time I visited, I wore mine and I know he appreciated it.

(I should note here that since beginning this blog post in mid-June, Washington is now under a mandatory mask order. As you might expect, the brainwashed, flag-waving Fox News viewers around here are already screaming bloody murder about that. I don’t care. I’ll wear mine in public, walk out of stores where people aren’t wearing them, and spend the vast majority of my time at home.)

Social Isolation

The “social isolation” that so many folks are having trouble dealing with isn’t a bother at all to me. I’ve been living alone nearly full-time since May 2012 and, before that, was alone for one quarter to half the time for the previous 14 years because of either my wasband’s extensive travel schedule or mine. I’m not only used to being alone, but I enjoy it. I make my own flexible schedule and get a lot done. I’m free to do what I like when I want to do it, whether it’s mealtime, spontaneous trips, or just going to bed early once in a while.

And are we really socially isolated? Most folks are stuck at home with their families — and I pity them; at this point in my life I’d go nuts if I were stuck at home with anyone. Those of us who live alone can still communicate with friends and family members via telephone, text, and Skype/Zoom calls. I’ve always been active on Twitter, which I’ve considered my “office water cooler” for years; I’ve actually become closer to Twitter friends. I’ve participated in more than a few Zoom gatherings in the past few months where I’m able to socialize with people from all over the world. (Well, mostly the US, Canada, and UK.)

For personal contact, I still meet up with folks who are following the same precautions I am — mostly neighbors and a few smart friends. Before cherry season started, we met up once in a while for an afternoon glass of wine. Alcohol is out of the question for me until August, so our meetups have been less structured, but that’s okay. Because of the limited number of folks in my neighborhood and the simple fact that we all have the same sort of work-at-home lifestyle, I don’t feel worried when I’m visiting any of them. We’re not dumb and we’re all doing our best to avoid infection.

Finances

Sunset Out Front
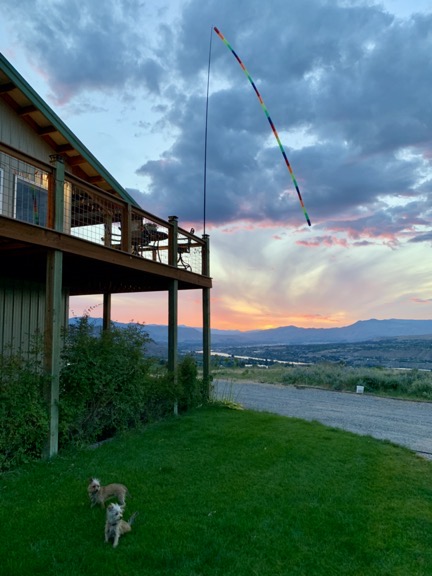
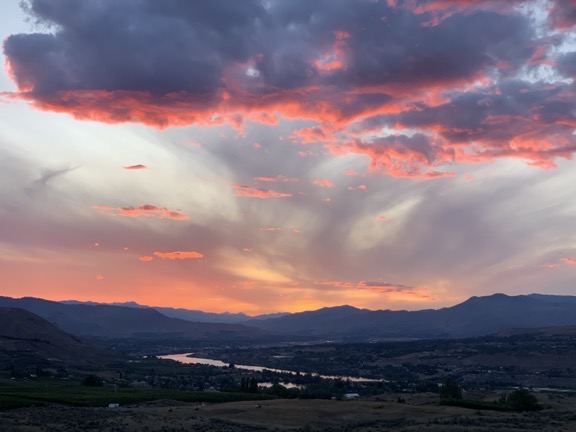
My pups go out for a walk on the front lawn before bed. We’ve been having some awesome sunsets lately.

Virus lockdowns haven’t affected me nearly as much as many other people. Although it has pretty much dried up two of my revenue streams — AirBnB management and jewelry sales — my primary source of income — drying cherry trees with my helicopter after it rains — has not been affected at all. So while I’ll take a revenue hit this year, it won’t be much of a burden.

I realize that I’m extremely fortunate to be in this situation, but I also know that it’s not just “luck” that put me here. After 30+ years being self-employed, I learned the importance of multiple revenue streams. I don’t think a year has gone by when all my income came from just one source. The benefit is that if one or two revenue streams dry up, I still have money coming in from other places and work I do. This year, I added a website client for the first time in at least 10 years; it isn’t much money overall, but it’s a nice replacement for my AirBnB revenue stream.

I’m also well insulated against financial hardship because I carry very little debt. My home is paid for; the loan on my truck will be paid off within the next year. (I’m actually tripling payments on it now with the goal of having it paid up by December.) I have a small loan on the land I live on and am doubling payments on that to get that paid off quickly, too. That’s it. I have no credit card debt or any other debt.

One thing I learned early in life — which was reinforced during my relationship with a man who just didn’t “get it” — is that when you have a lot of debt, you become a slave to it. How can you take the risk of starting a new job or career or business when you need the income from the job you have to keep your head above water? When you need every paycheck to pay bills or maintain a certain (possibly extravagant) lifestyle, how can you break free if you want to? The answer is, you can’t. And if that job evaporates, you’re pretty much sunk, possibly stuck with taking a less desirable job with a smaller paycheck that does little to relieve the stress of all those bills. I saw it happen over and over in the last years of my marriage.

I think a lot of folks are going through that now and I feel bad for them. Some honestly can’t help it because of personal or family circumstances that they really can’t control. But I’m equally sure that others could have softened the blow by staying out of the deep debt trap. The key is living a life that’s well within your means and saving what you don’t need to spend. Saving for a rainy day make sense when the rain comes.

Sorry to lecture but this is something that I’ve always felt strongly about. My wasband’s inability to live within his means trapped him in a series of jobs he didn’t really like, making him a bitter old man who blamed me for his unhappiness later in life. I have to wonder how many relationships in this country are similarly torn apart by a simple lack of financial wisdom on the part of one or both partners.

Killing Time

Drying Cherries
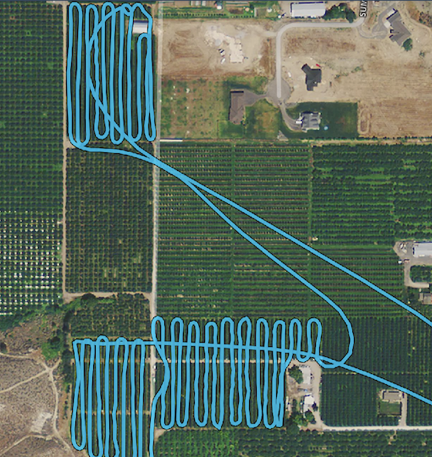
I’ve been out drying cherries a few times since my season started in late May. You can watch the video for this flight here.

Overall, my life in the Coronavirus Age isn’t very different from what it was before that. After all, every summer is pretty much the same: organize cherry drying contracts, get together a team of pilots, and hang around at or near my home, on call during daylight hours for about two and a half months, waiting for calls after it rains. I’ve got a total of four guys working with me this year, all with R44s. It’s a good team of professional pilots and, so far, my clients have been very happy with our service.

Veggies
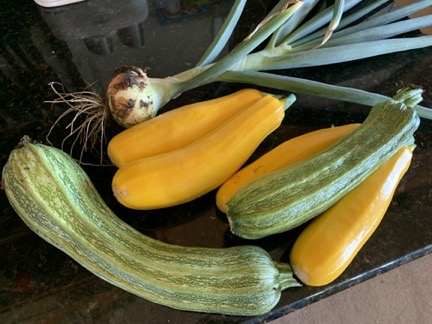
Here’s some of June’s harvest. I got an early start on my garden and have been eating food I’ve grown since the beginning of the month.

Since I’m stuck at home, I spend a lot of time on home projects. This year, my garden is bigger and better than ever, finally set up with eleven neatly placed plastic cherry bins as raised planter beds. I replaced the border around the gravel part of my gravel parking apron. I planted more trees and put them on irrigation. I moved my bee yard closer to my house, caught three bee swarms, and put two more bee packages into new homes. I’m finally getting around to finishing the stairwell in my entry area. I replaced my Wink home automation hub with a SmartThings hub. I sold a bunch of beekeeping equipment I didn’t need anymore. I’ve done my duty as a weed spray person for the association and used my DR mower to help a neighbor get rid of weeds along her 1/3 mile long driveway.

Bighorn Sheep
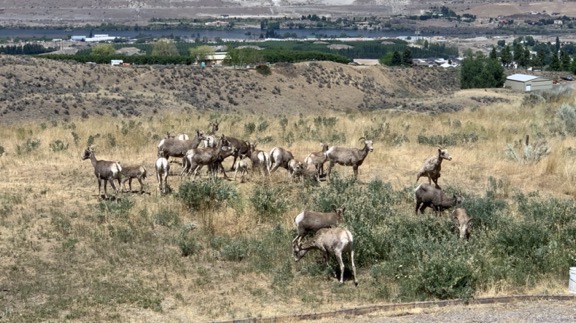
Being home all the time makes it tough to miss when the local bighorn sheep come down off the cliffs and graze in my yard. I took this photo yesterday from my deck.

I’m also making videos for the FlyingMAir YouTube channel. Cherry drying videos, tour videos, 360° videos, cross country flight videos. Videos of me moving the helicopter from the airport to my landing zone or from my landing zone to an orchard. YouTube has become a small revenue stream for me, but it’s unforgiving: disappoint your audience and you’ll lose them. It’s a lot of work.

Cherry season will end in the middle of August. Unless things get dire, I’ll take my usual week-long trip to celebrate the end of the season. This year, I think I’ll camp with my pups in my truck camper with my little boat at Banks Lake. I might ask a friend of mine to join me with his dog.

I do have some dates scheduled to sell my jewelry at Leavenworth’s Village Art in the Park, which has started up with a lot of restrictions. I think I have four weekends scheduled between the middle of August until the middle of October. We’ll see if they actually happen.

I’ve also booked a trip to Alaska in September, but as the virus situation worsens, I’m having second thoughts. I might cancel or at least put it off until next year.

I am having serious concerns about my winter travels. I normally go south to Arizona, where I camp with friends and travel around a bit, soaking up sun when there’s very little at home. But Arizona — with its flag-waving Fox News viewers — is apparently in denial about the virus and has become a hot spot. I only have one art show scheduled there so far — and I haven’t paid for my booth yet — so it’s easy enough for me to skip it this year. But where would I go? With the helicopter going in for overhaul this winter, I’m on a bit of a budget. Camping out in the desert would be cheap and safe, but I honestly don’t think I could do it for three months straight. I’ll take a wait-and-see approach.

Another Awesome Sunset
Did I mention the awesome sunsets we’ve been having lately? Look closely and you’ll see four of the helicopters on this year’s team of pilots.

Life Goes On

Like most of Americans — hell, most of people all over the world — I’m looking forward to a day when an effective vaccine and treatment is widely available. I wish my fellow Americans would stop whining and complaining and start taking the virus seriously. Wear a mask. Stay out of large gatherings. Wash your hands and your clothes after being exposed to others. Eventually, we’ll lick this thing and life will go back to normal. We all have to do our part.

And that’s basically it. My life hasn’t changed substantially since I normally work at/from home and have a solitary lifestyle. I’m not taking a serious financial hit. I’m one of the “lucky” ones, I guess.

But we all know that we make our own luck.

One Cherry Drying Flight, Two Different Videos

With three cameras running on board, I do a quick cherry drying flight and make two very different videos from it.

This week, I’m releasing two videos from the same flight.

Helicopter Cherry Drying Flight w/Tailcam Views

Hop on board for a standard cockpit POV view of a cherry drying flight, from start to finish. In this video, I take off from a landing zone in Malaga, WA, fly to an orchard up Squilchuck Canyon in Wenatchee, and settle down over the treetops to dry 3.3 acres of rainier cherry trees. Along the way, I talk on the intercom and radio to point out things of interest, explain what I’m doing, and give position calls. On some of the new tailcam views, you can see the trees shaking like crazy as I fly past. When I’m finished, I fly back to my landing zone in Malaga.

360° Helicopter Cherry Drying Flight

Hop on board — virtually — for a 360° view of a cherry drying flight, from start to finish. In this interactive video, I take off from a landing zone in Malaga, WA, fly to an orchard up Squilchuck Canyon in Wenatchee, and settle down over the treetops to dry 3.3 acres of rainier cherry trees. By using two cameras to record video, I was able to get an audio track of me talking on the intercom and radio to point out things of interest, explain what I’m doing, and give position calls. If you look out the back windows while I’m flying low over the trees, you should see them shake like crazy as I fly past. When I’m finished, I fly back to my landing zone in Malaga.

To experience the 360° features of this video, you need to watch it one of three ways:

  • On a computer in a Web browser, use your mouse to change the view by clicking and dragging. You may also be able to zoom in or out.
  • On a mobile device IN THE YOUTUBE APP (not a mobile browser), tilt or swipe your app to change the view.
  • On a smart TV viewing the YouTube channel, you should be able to use your remote’s arrow keys to change the view.

Behind the Scenes

How did I make these two videos? Here’s what went on behind the scenes.

Cameras

I started with three GoPro Cameras:

  • Cockpit Cam Instrument View (or just InstrumentCam) – a GoPro Hero7 mounted on a pole on the bar between my front seats. This provides a view out the front cockpit window, along with the helicopter’s instrument stack and cyclic. I show off this modified camera mount in “Behind the Scenes: Cockpit Cam Instrument View Setup” on YouTube; you can read more about it in the description for that video. This camera is also hooked up to my helicopter’s intercom, so it provides the cockpit audio.
  • TailCam – a GoPro Hero7 mounted at the very end of the helicopter’s stinger, in this case, pointing forward and down. This provides a view of the lower half of the back of the helicopter and the ground between it and the helicopter. It also records ambient audio: engine, rotor, and wind. (I did not use this audio track.)
  • 360° Cam – a GoPro Fusion mounted inverted from the tiny window over the passenger seat. This camera records everything a front seat passenger might see in flight, even if he moved around to look out various windows, straight down (provided he was invisible), and straight up. This camera also records ambient audio: engine and rotor.

Audio

If you read this blog regularly, you might know that I’ve been struggling with one-channel audio being recorded through the NFlightCam audio cable I rely on for cockpit audio. There is nothing they can do to “fix” the cable so I have to “fix” the audio by combining the live left and nearly dead right channels into mono audio. Filmora Pro, which I switched to, does not include a feature to do this. I explained what I do in “The Video Editing Audio Workaround” on this blog.

The net result: for both of these videos, I used the post-processed (mono) audio track from the InstrumentCam.

Since most viewers like to hear the engine and rotors, I also used the audio track from the 360° Cam — although I could have used the audio from the TailCam. The difference between them? The TailCam includes wind noise, which I don’t think we needed.

But it’s important to keep in mind that for both videos the audio tracks were completely detached from the video tracks, thus adding the need to sync them with the video and keep them synced.

360° Video

I made this video first, using Filmora Pro. I obtained Filmora specifically to edit 360° video; I later discovered that other, possibly cheaper packages might also do the job. 🙄 I also discovered that Filmora doesn’t export the edited 360° video in a format that is recognizable as 360° on YouTube or in apps. Fortunately, I found an excellent YouTube video that explains all the steps I needed to edit and format for 360°: “How to edit 360 video in Filmora – Fail-proof method.” It required an additional software tool which, fortunately, was available for Macs and free.

To make the video, here’s what I did:

  1. Import the video from the 360° Cam into Filmora Pro, allowing it to change the resolution as necessary.
  2. Change the rotation of the camera view by 180° (it had been inverted).
  3. Detach the audio track from the video track but keep the two tracks synced.
  4. Dial down the audio track by 8db.
  5. Import the Instrument Cam video.
  6. Detach and discard the InstrumentCam audio track. (Remember, it’s left channel only.)
  7. Import the processed audio from the InstrumentCam and line it up exactly with the video track so it’s synced.
  8. Lock the two tracks together to keep them synced.
  9. Resize the InstrumentCam video so I can see it and the 360° Cam video at the same time.
  10. In the timeline, move the InstrumentCam audio/video tracks so they sync with a specific motion captured by both cams. If I’d been smart about this, I would have used my clapper, but I didn’t when I recorded the video, but I didn’t. 🙄 Instead, I had to rely on a specific movement — I think it was when I adjusted my headset. This, by the way, is the most time consuming and tedious part of making any of my videos — syncing two cameras — and it’s considerably easier when I just use the damn clapper.
  11. Trim the beginning and end of all audio and video clips to cut out what’s not going to appear in the final video.
  12. Hide the video track from the InstrumentCam. (I hid it rather than delete it so I could use the same video editing file for the other video, as you’ll learn below.)
  13. Add beginning titles, Member Wall, etc.
  14. Add to the render queue, adjust settings for 360° video, and render. The rendering process for this 15-minute video took just over one hour.
  15. Run the resulting video through the Spatial Media Metadata Injector. (I’ll let you watch the video I linked to above for details if you want to know what the heck that is and why it’s important.)
  16. Test the video with GoPro VR Player to make sure it looks and works OK.
  17. Discover that the opening titles and Member Wall are completely FUBAR. Go back to the step where I inserted them, fix them, and repeat remaining steps.
  18. Repeat previous step. (So yes, I rendered the video 3 times.)

You might say, Wait a minute, M. Doesn’t GoPro offer software for editing that video?

Yes, it does, but it’s extremely limited. My channel viewers want cockpit audio and the GoPro solution does not enable me to combine multiple audio tracks. So this is what I have to do.

Is it time-consuming? Hell yes. This video is about 15 minutes long and took a total of at least 3 hours of my time plus 3 hours of rendering time to produce. And that doesn’t include the hour of pre-editing stitching time or the bad stereo to good mono audio processing time or 30 minutes of YouTube upload time.

But I’m very pleased with the results. I just wish the final video started facing forward instead of backwards. (More experimentation is obviously needed to fix that in future videos.)

InstrumentCam Video w/TailCam Views

When the 360° video was done and uploaded for certain tiers of channel members, I took a day off and then got back to editing. My goal was to have both videos ready for Sunday public release.

This one was considerably easier because I already had some of the tracks prepared. Here’s what I did.

  1. Duplicate the 360° Cam video’s editing file and rename it.
  2. Delete the 360° video (but not audio) track. Its audio track is already synced with the InstrumentCam video.
  3. Adjust the screen resolution to 2704 x 1520. (I shoot in 2.7k these days but will likely start working with 4K video soon.)
  4. Unhide the InstrumentCam video track and resize it to fill the video screen.
  5. Import the TailCam video.
  6. Detach the audio track and delete it.
  7. Following pretty much the same procedure I outlined in a step above, sync the TailCam video with the InstrumentCam video. I used the moment the helicopter lifted from the ground, although I might be off by a few frames.
  8. Using a variety of cuts and transitions, place the TailCam video in a PIP inset where it makes sense to show it: takeoff, movement over trees, landing. Note that I masked parts of the video I didn’t need to show depending on where I showed it.
  9. Fix titles for new video resolution.
  10. Redo and add the Member Wall. (I had one new member since I made the previous video.)
  11. Add to the render queue, adjust render settings, and render. Rendering still took about an hour.
  12. Test the video in QuickTime player to make sure it looks good. Fortunately, I nailed it on the first try.

I uploaded this one on Friday for certain tiers of channel members.

Results

It’s a lot of work, but I think the results speak for themselves. I’m not a professional video editor. I’m a professional pilot. I’m fortunate that I have excellent computer skills from my previous career. But that doesn’t mean I have professional video editing skills. It just means that I can use software to produce decent (but not perfect) results.

I hope my viewers appreciate the time that goes into making these videos. They can show their appreciation by sharing my videos, subscribing to my channel, and considering membership.