Walking

My new morning routine.
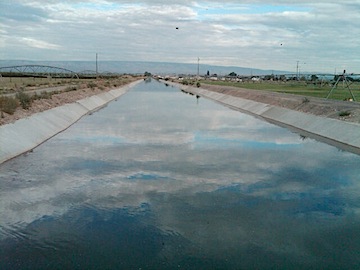
Canal
A shot looking west up the canal from the first bridge.
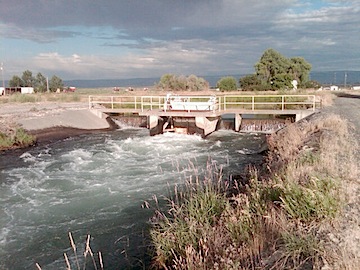
Second Bridge
The second bridge is exactly 1.3 miles from my RV.
Apple Orchard
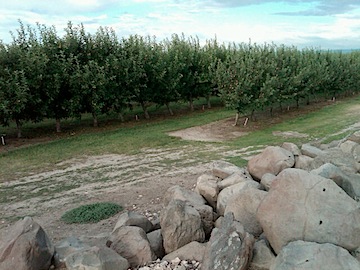
I walk for about a half mile alongside this apple orchard. This morning, I saw three woodchucks in rocks like these along the canal edge.

Last week, I began walking regularly. It’s part — the only part, I should admit — of an exercise regime. I know it’s not much, but it’s more than I was doing the week before.

I usually get out between 6:30 and 7:00 AM, when it’s still nice and cool. I’m back within 45 minutes.

I should be clear here: I don’t go for a short stroll. I walk 2.6 miles at an average speed of 3.6 miles per hour. How do I know this so precisely? Simple: I monitor my progress using the trip computer on my handheld GPS.

(While other people are relying on a touch-screen GPS with computerized voice to find their way around town, I use my GPSes for things I can’t easily do on my own. But let’s not go there, huh? That’s fodder for a whole other blog post.)

I took the photos you see here on this morning’s walk. The pauses brought my average speed down to 3.3 miles per hour.

I start at my RV at Colockum Ridge Golf Course. I cut through the golf cart staging area and past the maintenance shed. That puts me on a two-track gravel road between a narrow drainage ditch full of clear-running water and the golf course. I walk about .3 miles south, then make a right onto another gravel road that runs along the north side of a canal. If I’m lazy, I cross the canal at the first bridge and come back along the other side for a 1.2 mile walk. But if I’m serious about exercise, I continue to the second bridge. The whole time, I’m walking alongside the golf course and then the 55+ trailer community beyond it. When I cross the second bridge, I walk back along the south side of the canal with an apple orchard and then an alfalfa field on my right. I cross back over the first bridge and retrace my route back to my RV.

Here’s what it looks like in satellite view on Google Maps:
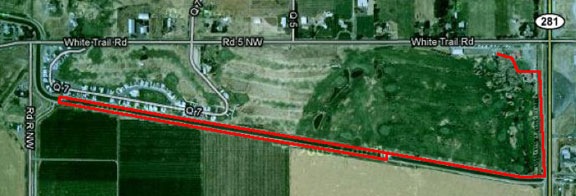
My Walk

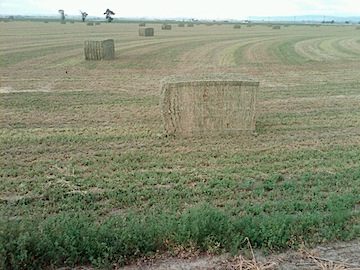
Alfalfa Bales
These aren’t the little wimpy alfalfa bales we bought for our horses. These probably weigh 500 pounds each and stand nearly as tall as me.
Canal and Golf Course
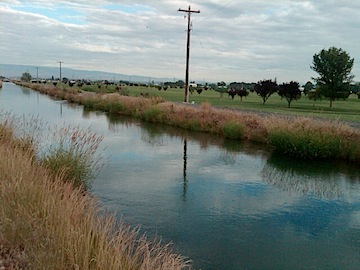
A view of the golf course from the opposite side of the canal.

I really enjoy the scenery. I love the changes in the farmland. Yesterday, the alfalfa was cut and piled. Today it was baled. The apples are ripening. Some farm equipment off in the distance was harvesting soybeans or something. The groundhogs are kind of cute.

3.6 miles per hour is a good walking pace. It’s probably the pace I used regularly when I walked the streets of New York. If you don’t walk fast in Manhattan, you get run over by other pedestrians or messengers on bikes or guys pushing racks of clothing. (I spent a bunch of time in the garment district one summer.) I’d like to get my walking speed up to 4 miles per hour, but it would likely kill me.

I listen to music when I walk. I have a little iPad shuffle and keep it stocked with an ever-changing mix of my favorite music. I discovered the other day that my walking pace is at the same tempo as Paul Simon’s “Late in the Evening.” I have long legs so I have long strides. I feel it in my knees and hips.

When I get back to the trailer, I’m sweating like a pig. (Do pigs really sweat?) I force myself to drink water or vitamin water before jumping in the shower. When I’m that hot and sweaty, the shower feels like heaven and makes the walk worthwhile. Afterwards, I have breakfast: high fiber cereal with fresh berries and low-fat milk. I have coffee before the walk — I am human, after all.

According to the Walking Calories Calculator on About.com, I burn at least 259 calories each time I do my walk. That’s not very much, but it is better than nothing. I’m hoping the regular brisk walk will also help me recover some of my muscle tone, which is quickly melting away.

I’m middle-aged now, and I’m not going down without a fight.

Interlacing Woes

One part of my current troubleshooting effort.

I’m trying very hard to create an SD DVD based on original 1080i HD footage. I have the latest version of Final Cut Studio, which should have all the tools I need to get the job done. But when I build a DVD, it looks like crap on my HD TV. Other standard DVDs look fine — actually, great — on that TV. For the past two days, I’ve been banging my head against the wall, trying to figure out the problem. Not having a standard TV handy for testing purposes, I have no idea what it looks like on one of those.

I hate learning by trial and error. I watched Lynda.com video courses about Final Cut Pro and DVD Studio Pro and they helped me build my movie and DVD. But they failed to explain how to get my kind of video (1920x1080i60 AVCHD) into standard DVD format. Do I convert video before bringing into FCP? If so what do I convert it to? How about interlacing? Downsizing? What compression schemes? What settings? And what about the anamorphic setting? Does that still apply with current technology?

To make matters worse, answers in forums tend to be vague. They’ll recommend a compression scheme, but when you go to the menu of options, what they mentioned doesn’t appear exactly as they referred to it. Instead, there are four or ten or twelve options it could be. Other times, when you make changes they recommend, the appearance of the video changes drastically; for example, turning on the anamorphic check box in FCP sequence settings squishes the picture, making everyone look short and fat. Do I need to change the shape of the pixels, too?

And what about the contradictions? One guys says do A while another guy says do B, which is completely different.

What I need is a recipe, a starting point, a list of steps that should work. Then, like a chef, I can fine-tune the recipe to see if I can make it any better.

Right now, the challenge is focusing around interlacing. Interlacing is one method of scanning video; progressive is the other. My camera shoots interlaced video. There’s no progressive option. TVs supposedly can de-interlace on the fly; I don’t know if modern HD TVs can, though. Computers can’t. The result is a kind of flicker anywhere there’s motion. Like in a video clip of a cherry orchard filled with trees that have leaves that flutter in the wind. Ugh.

One source says I must de-interlace before the video is downsized to SD for DVD. Another source, supposedly an “expert,” says de-interlacing “doesn’t work.” (WTF does that mean?) How do I know what’s right?

I decided to give it a try. FCP has a de-interlace filter. It took a while to figure out how to use it. FCP’s documentation doesn’t discuss all of its settings, making it just a little bit more challenging to figure out. I wound up running the filter once on the sequence and then again on the same sequence to see if there was any improvement. Here’s a series of three screenshots of a full-sized clip on my iMac monitor:

This is the “before” shot. You can clearly see the interlacing in the picker’s hat:
Interlaced

This is the first “after” shot. In this example, I’ve run the de-interlace filter on the video to remove interlacing. There’s an immediate improvement.
Deinterlaced

This is the second “after” shot. In this example, I ran the de-interlace filter twice. The first time was to remove interlacing (as above) and the second was for “max” flicker removal.
Deinterlaced and Deflickered

I don’t see a difference between the second and third screenshots — do you? I’m assuming the difference would be in motion. But I can’t view both videos at the same time; my computer chokes on the task. (Remember, they’re both 1920×1080 pixels.

And, stepping back to look at the big picture, I’m not even sure I’m supposed to de-interlace this video as part of my workflow. This could be a big waste of time!

If you have experience with this and can advise me, please do. Use the comments link. Also let me know if you know of any good, recent online resources to help me understand HD to SD conversion, interlacing, and anamorphic settings. Reading “how-to” information written 5+ years ago doesn’t help much, given the changes in technology and software capabilities since then.

Two More Video Camera Accessories

One for sound, one for video.

HandyCam.jpgAbout a year and a half ago, I bought a Sony HDR-CX12 Handycam. It’s a mid-range consumer model that shoots in full 1080i HD. I bought it to fill in the gaps of the video needed to finish up a video project and, since then, have been using it on and off to shoot stock video footage. The quality of the video is amazing for such a compact and relatively inexpensive device. These days, you can get something even smaller and less costly that does the same thing.

I shot all of Cherries: From Tree to Truck with this camera. Once you get past the inconvenience inherent with the AVCHD format and have the right tools to edit, it’s really a pleasure to work with. One feature that few people talk about is the ability to archive the 4GB Memory Stick PRO Duo cards to DVDs. You can later mount up a DVD and import media into your computer, just as if you’d attached the camera or inserted a card into a card reader.

Last year I started a project that required me to do some interviews. I used a friend as a guinea pig (so to speak), interviewing him outdoors in front of his helicopter, using my camera on a tripod and a wireless microphone clipped onto his shirt. The result was disaster. The sound was gawdawful, rendering the “talking head” video completely worthless. Clearly, I needed a better sound solution.

Sony ECM-HST1Of course, the camera is a consumer model and is extremely limited in compatible accessories. But today I poked around on the Sony Web site and tracked down a stereo microphone that might do the job — if I keep the camera out of the wind. It’s a Sony ECM-HST1 microphone, which fits into the camera’s hot shoe and draws power directly from the camera. It’s not what I really wanted — I wanted a lapel mic — but it’ll have to do.

Opteka OPT-SC37FEWhile I was surfing around for the best price, I stumbled upon this little gem: the Opteka OPT-SC37FE Ultra Fisheye Lens for Digital Video Camcorders. I already have a wide-angle lens for my camcorder, but there’s nothing like a very wide angle lens to get interesting effects or get up close and personal with your subject matter. The video clip on Opteka’s Web site certainly makes it look like a useful and fun accessory. Since I owed myself a birthday present anyway, I sprung for that, too.

What’s all this for? Well, in addition to finally getting to the big project I started nearly two years ago, I have a smaller, related project in mind. Both of these tools will help me capture the video I need to do it.

At least that’s what I keep telling myself. We’ll see.

How to Set Up and Share a SPOT Messenger Page

It’s included in the Track Progress service, so why not?

SPOT Personal TrackerI’ve been using a SPOT Personal Tracker for the past two years. It was recommended to me by a helicopter pilot friend. We both fly in remote areas — the kinds of places that if you go down, rescuers are probably not going to find you before it’s too late.

Think I’m kidding? Check out this Cessna, which was not located for 31 months. I was just one of dozens of local area pilots who looked for this plane whenever I was in the area where it disappeared.

And what pilot can forget the disappearance of Steve Fawcett? Millions of dollars and lots of high-tech search techniques were used to try to find his plane. Over a year passed before a hiker found Fawcett’s ID and the wreckage was eventually found.

I didn’t want to end up like either one of these unfortunate flights. Even if I suffered a fatal crash, I wanted to be found as soon as possible. And if I simply went down and needed help, I wanted help to be able to find me without relying on cell phone signals.

The SPOT Service

So I bought a SPOT Personal Tracker and subscribed to two services:

  • Basic Service enables the SOS (AKA 911), Help, and Check-in/OK features of the unit. That requires a button push to send the message. This service costs $100/year and is required to use the device.
  • Track Progress drops “breadcrumbs” of your location every 10 minutes so others can track you. The track progress feature automatically plots your location signals on a map that’s accessible online. You can create a shared page, give the URL to whoever you want, and let them track you. The benefit of this — as far as I’m concerned as a pilot — is that if I go down suddenly and am incapacitated, people tracking me will not only know where I was within the previous 10 minutes of my mishap, but they’ll likely know which way I was going. Plus, if the unit is intact, it will continue to broadcast my location every 10 minutes. This non-moving signal should help them pinpoint my location — even if I’m dead. This extra service costs $50/year. While I have another pilot friend with a SPOT who doesn’t use it, I think every pilot who uses this device should cough up the extra dough for this service. You can’t always press a button when you need help.

I need to stress here that this is not a device designed for aviation. It’s really designed for “adventure activities” or travel — for hikers and campers and mountain climbers and kayakers. For folks who get out in the wilderness. Of course, pilots who fly in remote areas can benefit from the device and there are plenty of stories of how it may have saved aviator lives. Just keep in mind that it is not an approved FAA tracking device and that flight plans should always be filed and opened for remote area flights. And, if you’re an airplane pilot who flies at altitudes where FSS Flight Following is possible, why not use that service? Unfortunately, Flight Following is not usually available at the altitudes at which I fly my helicopter.

Creating a Shared Page

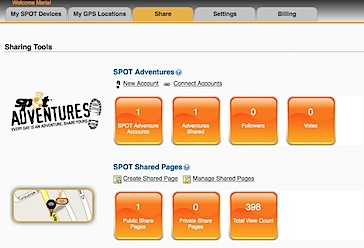
Of course, having a SPOT Personal Tracker with the Track Progress feature means a Share Page (example shown below) is included with your subscription fee. It makes sense to set up this page and share it’s URL with the folks who need to know where you are. You can also share it with the world at large if you’re like me and don’t care who knows where you are when you’re on the go.

Shared Page
Some recent activity; I did 20-minute helicopter rides the other day.

Setting up a SPOT shared page is easy. Assuming you’ve already set up your account on the SPOT Web site and have activated your device, just follow these steps:

  1. Sign into you account at FindMeSpot.com.
  2. Share TabClick the Share tab near the top of the page.
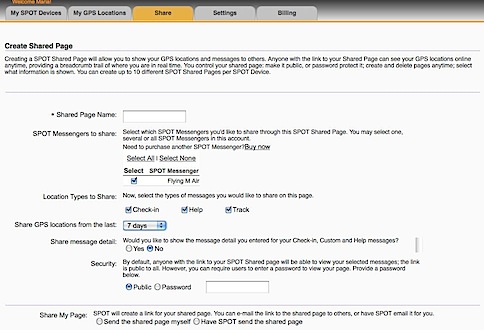
  3. Under SPOT Shared Pages, click the Create Shared Page link.
  4. Create Page SettingsSet the options in the Create Shared Page window that appears. Be sure to enter a Shared Page Name and select your SPOT device. Under Security, you can specify whether the page is Public or requires a Password to access. Personally, I recommend keeping it Public. You can always limit who you give the URL to. It would be terrible if someone needed to access the information and couldn’t remember the password.
  5. Select one of the options at the bottom of the page to determine how you’ll notify the people you want to share the page with about the page’s URL:
    • If you select Send the shared page myself option (recommended), a message appears, telling you that anyone with the link can view your shared page. Click Create Now to complete the process.
    • If you select Have SPOT send the shared page, a form appears for you to enter up to 50 e-mail addresses and create a custom e-mail message. Be sure to keep the Send a copy to you check box turned on so you get the URL, too. Click Send Now to complete the process.
  6. URL CreatedAt the bottom of the page, a very long URL should appear. Triple-click it to select it and chose Edit > Copy (or press Command-C (Mac) or Control-C (Win)) to copy it to the clipboard. We’ll use it in a moment to test the link and create a short URL.

Shared PagesIf, for some reason, you didn’t get the URL or you need to access it again in the future, click the Shared tab (shown above) and then click the Manage Shared Pages link under SPOT Shared pages. You can click the name of the shared page to display it. You can then copy the link for that page from the Web browser’s address bar.

Creating a Short URL

http://share.findmespot.com/shared/faces/viewspots.jsp?glId=0aISLWHRq9KlETLqzcfFGQuD8VboS6R8O is not exactly the kind of URL that’s easy to share with friends. Fortunately, URL shortening services enable you to create a custom URL for any page. Although this step isn’t required, it’s certainly recommended.

Although I originally created my short URL with the TinyURL service, you can use any service you like. Bit.ly makes even shorter URLs, but it requires an account to create a customized one. So in this example, I’ll use TinyURL again.

  1. Point your browser to TinyURL.com.
  2. TinyURLPaste the URL for your shared page in the top text box.
  3. Enter a short word or phrase that’s easy to remember in the bottom text box. In this example, I’ve entered the N-number for my helicopter. My original URL used FindMaria.
  4. New TinyURLClick Make TinyURL!
    A message like the one shown here appears, confirming that the new URL was created. You can now give this much shorter URL to family and friends.

Share Your SPOT Page!

Are you already using a SPOT device? If you’ve got a page set up, share it here. Use the Comments link or form for this post. No need to enter any HTML tags; just enter the complete URL. Once your comment has been approved, your shared page will appear. I’d also love to hear comments about the device — good or bad.

Cherries: From Tree to Truck

A mini-documentary.

I need to start off by saying that I didn’t do a mini-documentary about the cherry harvest process because I felt the world had a need for such information. I did it as an exercise, as practice using my video camera and Final Cut Pro. I wanted to see if I had the ability to put together a documentary. This 5-minute video is the result.

This was my second summer experiencing the harvest process at one of the orchards I dry. The Schroeders are great people, friendly and a pleasure to work with. I dried their orchard four times this year. Being present for part of the harvest gave me an opportunity to see whether the work I’d done made a difference. It did.

The Schroeders were kind enough to let me walk the orchard and packing shed area with my Sony Handycam for a total of about 8 hours over two days. I also stopped in around sunset one evening to take some of the establishing shots with the soft “golden hour” light. They and their workers explained the process to me. I shot a total of about an hour of video footage. That that was barely enough. I still wish I’d gotten better shots of some parts of the process.

I found the cherry harvest fascinating — and I think you might, too. We’re all spoiled — we go into the supermarket in the summertime and find cherries waiting in the produce section, already bagged and ready to take home. But how many of us consider how the cherries get from the tree to the supermarket? It’s a complex process that requires hundreds of people and specialized equipment. This video shows part of the story, following the cherries from the trees in one orchard as they’re picked, gathered, chilled, and packed into a refrigerator truck. Take a moment to see for yourself:

Done? Not bad for a first serious effort.

From this point, the cherries go to the processing plant in Wenatchee, WA. They’re run through more cold water and lots of custom equipment before they’re picked through by several lines of people who toss out the bad ones. Then they’re sorted by size, run through more clean water, and eventually bagged and boxed up by even more people for shipment. I was fortunate enough to get a tour of that facility (and five more pounds of fresh cherries) a few days after I shot the video for this one. I may do a video of that facility and its process next year.

The amazing part of all this: the cherries are normally ready to ship to stores the same day they are picked.

More amazing stuff: the cherries I saw at the packing facility were headed for Korea and would be there within 18 hours of my tour. Whoa.

The point of all this is that there’s a lot that goes into getting fresh food into stores. Cherries are unlike many fruits — they have a very short shelf life. With proper care, they might last a week. That’s why everything is rushed and why so much effort is put into keeping them cool as soon as they’re picked.

I hope you enjoyed this. Comments are welcome.