The Pallet Planter

Reusing is better than recycling.

One of the things I wanted at my new home was a nice, neat garden. And there’s nothing that keeps a garden neater than raised beds for the plants.

But what to make them out of? A friend offered me railroad ties stacked up in his backyard, but they’re ugly and dirty and I was worried about tar or other nasty stuff they could have been treated with.

And then I thought of pallets.

I’ve got this thing about pallets. There’s something about a nice, clean, well-designed pallet that just makes me very happy. Come to think of it, it gives me almost the same feeling I get from unused paper. Is it the wood?

As I wrote the other day, my chicken coop was made, in part, with three pallets. My beehives are kept off the ground on pallets. And, in the past, I’ve made a “porch” for my RV with pallets and a deck for my poor man’s hot tub with pallets. To me, pallets are the ultimate free building material and I’m always on the lookout for good ones.

I hit the jackpot yesterday morning when I attended a “surplus sale” at the local school. Not only did I score two really nice media carts that’ll be perfect for my shop ($15 each), but I also bought a 4×10 foot magnetic white board in mint condition ($20) and a Sony boom box with AM/FM/CD/dual cassette ($5). And stacked outside were about 2 dozen of the nicest pallets I’d ever seen. I picked 7 of those and took them home for free.
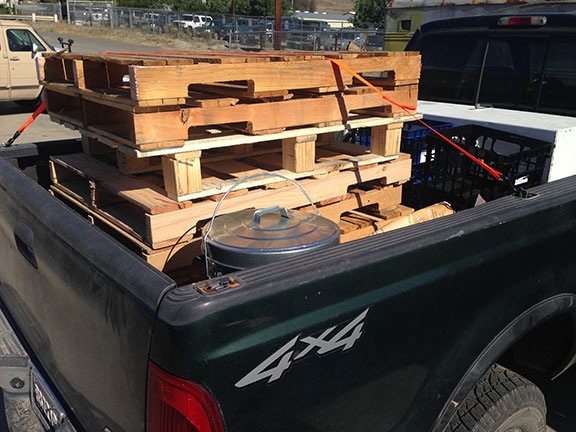
Pallets in a Truck
I have a truck for a reason: I haul stuff.

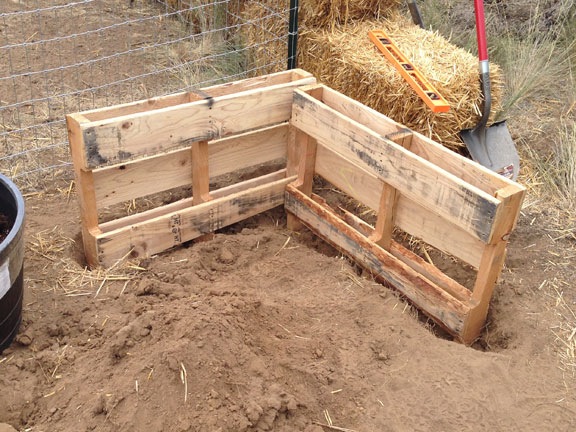
Figuring out how to use them to create raised garden beds was a bit of a challenge until I took the time to see how they were configured. Then it was just a matter of cutting them in half and standing the pieces up in a square, partially buried in my garden. These photos and captions pretty much tell the story.
Pallet Garden
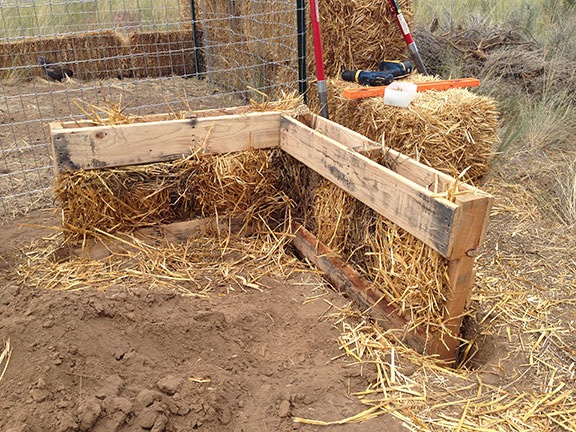
I started by digging a trench just wide enough to stand up the pallet halves. I used a level to keep them relatively level on sloped ground.
Pallet Garden
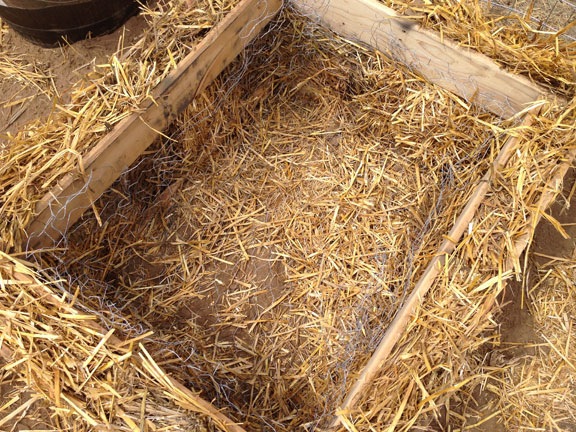
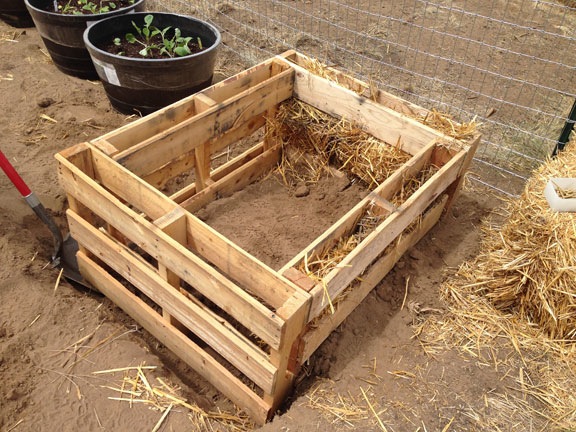
I needed something to prevent the dirt from coming out through between the slats. Because I have no shortage of straw, it was the logical choice. I really packed it in.
Pallet Garden
Because the dirt at the base (inside and out) would do most of the work holding the pallet halves together, I only needed four screws — one in each corner — at the top.
Pallet Garden
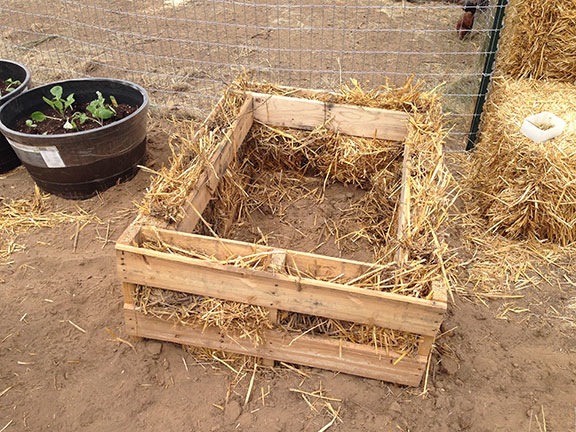
I filled in the straw all around.

Pallet Garden
Then I lined the inside with chicken wire to “discourage” moles (or voles or gophers or whatever the hell keeps digging on my property) from coming up through the bottom.
Pallet Garden
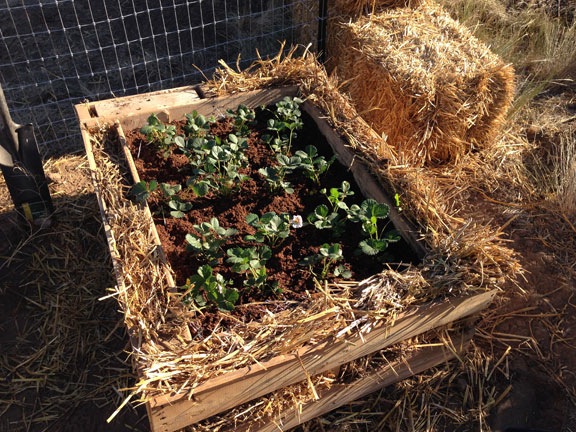
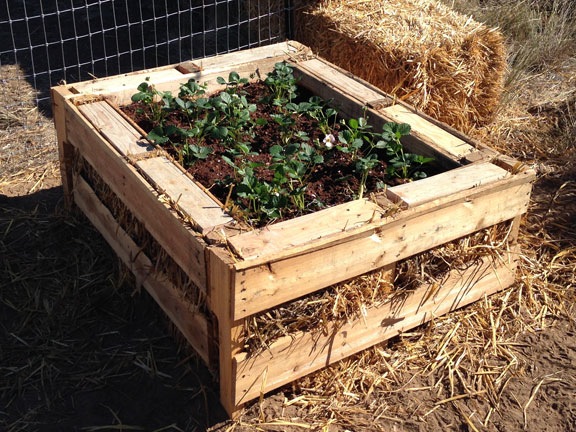
I filled the inside with the dirt from the trenches, some leftover compost, some leftover topsoil, and a big bag of Miracle Gro potting soil. before planting 18 strawberry plants.
Pallet Garden
For a finishing touch, I cut some scrap 2×4 lengths and set them into the groove at the top of the planter, hiding most of that messy straw.

Someone mentioned rabbits — they’d have to be pretty tall to reach these planters. And they’d have to get past my faithful garden watchdog, Penny. I’m more worried about birds. I’ll be making a chicken wire cover to keep the birds out before the plants begin to show fruit.

I’m very happy with the way this turned out. It took about 2 hours to build. The hardest part was digging the trench — which was actually quite easy because there are few rocks in my garden. The most costly part was filling the planter with dirt; I probably put about $15 worth of store-bought materials in there.

I’ll be building more of these. My goal is to eventually have three rows of six of them in my garden area.

What do you think?
About the Windows

The best of both worlds.

On May 20, 2014, I began blogging about the construction of my new home in Malaga, WA. You can read all of these posts — and see the time-lapse movies that go with them — by clicking the new home construction tag.

The windows arrived at my building site this afternoon. They left them stacked in two groups against what will soon be my shop wall.

Even though I didn’t pick the windows out of a catalog, they’re perfect! I described what I wanted to the ever-patient Tanya at Western Ranch and she ordered them. It couldn’t be easier.

New Windows
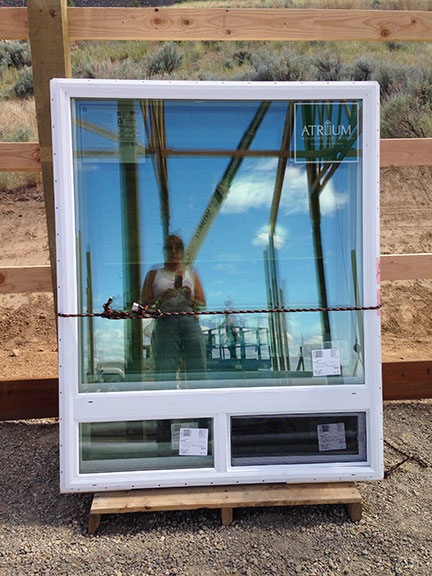
My new windows are exactly what I wanted.

Three of the windows in my old house in Arizona were 4 x 8 sheets of glass that didn’t open. They let in lots of light and nice views to the northeast, but no air. And, sadly, because two of them weren’t shaded on the outside, they also let in a lot of heat from the brutal Arizona sun. Indeed, we had to keep blinds closed over them during the morning hours from the first day of spring to the first day of autumn. Such a shame.

These windows are 4 x 4 square, double-paned glass with 1 x 4 sliders at the bottom. I wanted to look through big windows at my big view. I didn’t want to look through a screen or a sash. But I wanted to be able to open every window to let fresh air in.

These windows give me everything I wanted. There are 11 of them for my living space, along with two glass doors. The seven windows and one door facing north will also be shaded by the roof of my deck, so even in the summer, when the sun creeps far to the north, I won’t have to worry about direct sunlight radiating heat into my living space.

I’ll be letting in lots of light and air and a nearly unobstructed look at my wonderful view.

The further along we move with this project, the more excited I am about what’s to come.

Construction, Day 6: RV Garage/Shop Girts

Half the building framed.

On May 20, 2014, I began blogging about the construction of my new home in Malaga, WA. You can read all of these posts — and see the time-lapse movies that go with them — by clicking the new home construction tag.

A “pole building” is built with post-frame construction. The entire building is hung on a series of vertical posts that, in my case, are set 3 feet down into 4-foot holes and anchored with concrete. The holes were dug and the posts were set last week. The roof over one half of the building is built with triangular trusses that are tied together with rafters. The construction and raising of the roof over the RV garage/shop side of the building kept the builders busy on Day 3, Day 4, and Day 5.

Installing Girts
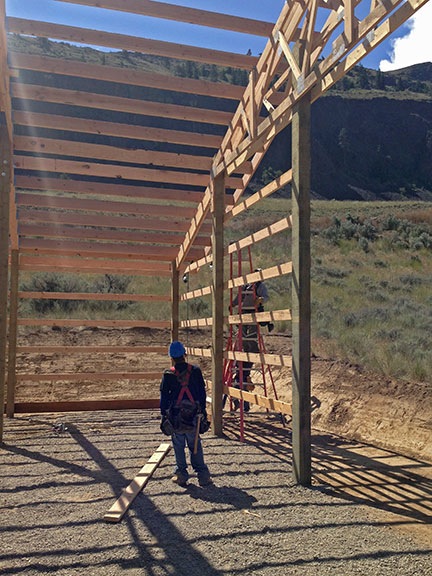
The crew framed out half the building yesterday with horizontally placed girts.

Yesterday, the crew worked on the wall framing of the RV garage/shop. In a pole building, this is done with horizontally placed beams called girts. The girts are nailed right into the posts, evenly spaced. This is what the workers did yesterday, on the sixth day of construction. They also finished off the framing of the roof and the place where the roof meets the walls on that side of the building.

Although I’ve got 10 acres of land, the area around the building site is quite crowded. The workers need to clear some space to make room for the steel delivery, which will be on a Wednesday or a Friday. I’m hoping they clear space by continuing to use up the lumber scattered in neat piles around the base of the building and my RV. They may, however, start storing construction materials inside the base of the building. Doesn’t matter to me, as long as they keep up the good pace.

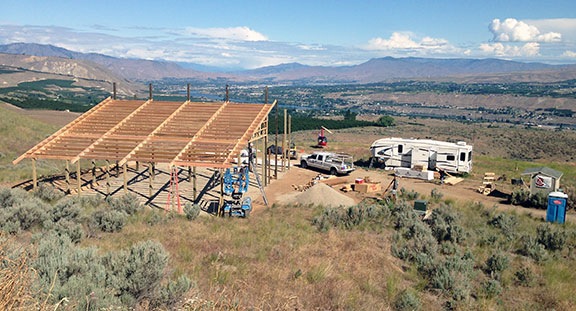
Day 6 Site Photo
I shot this photo of the building site on my way home from some errands mid-morning. I’d flown in my helicopter the previous afternoon.

I’m hoping that they begin work on the other roof for Day 7. I suspect that will be quite a challenge, given the height and the fact that they can’t use pre made trusses.

Until then, here’s the time-lapse for Day 6:

Construction, Day 5: More Roof Work

The workers shifted one roof and built another.

On May 20, 2014, I began blogging about the construction of my new home in Malaga, WA. You can read all of these posts — and see the time-lapse movies that go with them — by clicking the new home construction tag.

My building has two roofs covering four distinct areas. The 24 x 48 RV garage and 12 x 48 shop share one roof while the 4-car garage and 1200 square foot living space above it share another.

Last week, the builders raised the roof over the RV garage section of the building. Next up was the extension of that roof over the shop area.

But first they had to shift the roof trusses 1 inch down. That was determined by the boss, who stopped by on Sunday to check.

Meanwhile, when I told the workers about how I’d wanted to use the Bobcat to move some gravel, they fixed me right up. They put the bucket on and left the engine running for me. After Angel told me how to release the parking break (duh-oh!), I proceeded to make two trips to the gravel pile, driving through the building to get there and back. I dumped the gravel near the helicopter’s temporary landing zone and used the bucket, to the best of my ability, to spread the gravel. Then I shut down, got out, and did it right with a rake.

Bobcat Driver
Yep, that’s me driving the bobcat to fetch gravel.

Extending the Roof
The workers are almost finished extending the roof out over the shop area in this image.

Once the guys finished shifting the roof — which you can actually see in the time-lapse video below if you look very carefully — they went to work extending that roof out over the shop area.

The work went remarkably quick. They’re using hangers to hang all the beams — we have boxes and boxes of them all over the place here — and they have a hammer guns that make the work a lot easier (and quieter) than constantly banging with a hammer. These guys have obviously done this many times before.

Building from Lookout Point
From Lookout Point halfway to the northern boundary of my 10 acres, my building doesn’t look quite so big.

While they worked, I went down to “lookout point” to paint my bench. It had come hidden away in my shed, painted with school colors — apparently orange and dark green; who thinks of these things? — and I wanted it a more sedate color that would blend in with my surroundings. That meant the same sage green I’ve been using for my beehives, which is very similar to the color of the chicken coop. (I sure hope I don’t get tired of that color.) At one point, I turned back to look at my building. It didn’t look so big from halfway to my property line.

The workers finished up on time — they always do; I’m beginning to think they pace themselves just right — and left for the day. Here’s the time-lapse, I’ve begun trimming them down to only include work done:

Construction, Day 4.5: Measurements, Prep Work

The roof is off by 1 inch.

On May 20, 2014, I began blogging about the construction of my new home in Malaga, WA. You can read all of these posts — and see the time-lapse movies that go with them — by clicking the new home construction tag.

I was very surprised on Sunday — Memorial Day Weekend, mind you — when Corey, the owner of the company building my new home, showed up in his truck with a new worker and the worker’s daughter. Corey told me that he thought there might be a 1-inch error and that he was there to make measurements and set up the work for the guys when they arrived on Tuesday. He was unable to come Tuesday because he had to be in Chelan to take delivery of some steel.

The word “error” put me on alert, but he didn’t seem too concerned. I let him do his measurements while the other guy helped him. I’d just finished work on my chicken coop and was doing odd jobs around the yard. The worker’s daughter, whose name I’ve forgotten, spent her time looking at the chickens and climbing some of the equipment.

I decided to replace the GFCI outlet on my temporary power pole. I’d never done anything like that before and although I was confident I could do it without any problems, there was something comforting about having people around in case I electrocuted myself.

The guys did their work, with Corey climbing the ladder multiple times while his other guy mostly watched and listened to what Corey told him. I got the feeling the worker was new and being trained. I really didn’t pay attention. After a week of construction guys on the property, I can pretty much tune anything out. Then he told me that there were two ways to fix the problem, which was minor. One way made a lot of extra work. The other way was to simply shift the trusses by one inch — which is what he was going to tell the crew to do on Tuesday.

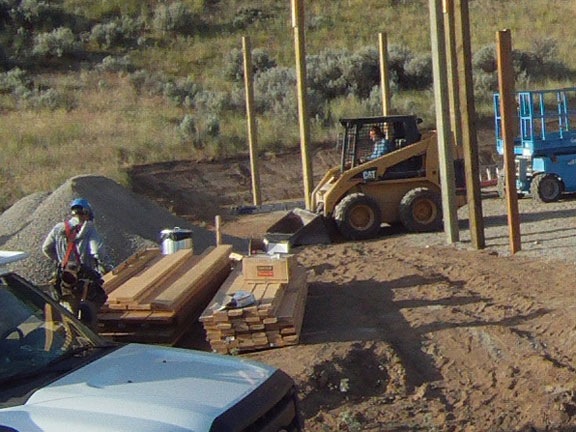
Afterwards, he and his worker started looking through the piles of wood beams that had been stacked near the building. They found what they were looking for in the middle of the stack. And then they used the bobcat to rearrange the stack of beams.

This is exactly what I didn’t want to see. You see, they’d left the keys in the bobcat — which was really a Caterpillar Skid Steer Loader (with wheels instead of treads) — and I’d been eyeing it with the idea of using it to move some of the gravel around for dust control. I knew I’d be bringing my helicopter in soon and the ground beyond the grassy landing zone I’d prepped was about a foot thick with fine dust. When I landed, I’d create a dust cloud visible from space. I wanted to spread some of that gravel over the dust and I didn’t want to use a hand shovel to move it. The previous evening, I’d even climbed aboard and gotten it started. But when I realized I didn’t know how to drive it — it doesn’t drive the same as a Bobcat, which I had a tiny bit of experience with — I shut it down and turned to Google for help. I’d found a how-to article online that explained how it worked and planned to tackle the job later that day.

Trouble is, when they used it to move the beams around, they removed the bucket and attached the forklift. Then they moved some of the beams so they blocked the path back to the bucket. Even if I could figure out how to swap the two, I couldn’t drive to the bucket. (There was no way I’d try to use the forklift to move the beams.)

So there was no earth moving for me that weekend.

After laying out the beams for the other workers, they all climbed back into the truck and drove off. They’d been at the site less than three hours.

And yes, the time-lapse was running. Because they moved stuff around, I figured I’d make a movie. Nothing too exciting and it’s really short. You can see me working at the power pole, too.