A surprisingly wonderful midday out.
I’ve been debating what to do this winter. I don’t have much work here in the Wenatchee area other than writing, which I can do anywhere. I will likely be heading down to California in January anyway to record a new course for Lynda.com. I’ve been thinking about spending a month or two in Arizona — after all, I do still own a home there — and I have friends to visit and hike with. But local friends are encouraging me to stick around and even do something crazy (for me): take up downhill skiing.
So I have options.
Heli Skiing
A chat with a pilot friend yesterday morning got me thinking about heli skiing — where you use a helicopter as a ski lift to take you (very) quickly to the top of the slopes. And that got me thinking of my friend Don and Mission Ridge.
Don is an avid skier. He’s rejoicing over the early opening of the local ski resort, Mission Ridge, and is determined to be one of the first on line for the lift on Saturday.
Don’s been talking to me on and off about offering heli skiing at Mission Ridge. He says I can drop off skiers at the microwave towers at the top of the ridge. And then he offered to drive up there with me.
I didn’t realize we could drive up. But since there are towers up there, of course you can drive up. I didn’t know how to get there but offered to drive. I met him with my Jeep at his house at about 10:30 AM. The plan was to scout for a landing zone so I could propose a heli-skiing service to the folks at Mission Ridge.
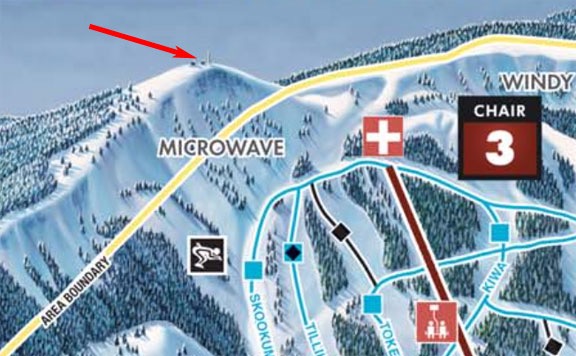
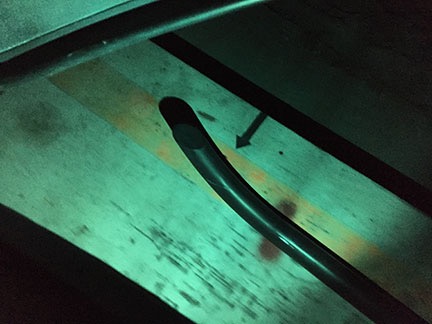
This ski trail map by the folks at Mission Ridge really exaggerates the mountains and distances. The arrow points to my proposed landing zone.
The Drive Up
We took two cars — my Jeep and Don’s truck — to the turnoff for Jumpoff Road off of Stemilt Loop Road. No sense in me driving all the way back to Don’s house when we were done, especially since the Jumpoff turn was closer to my place than his.
Jumpoff, by the way, is the name of the ridge behind my home. There’s a basalt cliff face to the south of me that soars at least 500 feet straight up. The top of that is called Jumpoff Ridge. There’s a road that winds up the side of the mountain near Stemilt Hill to the west of me. From there, another road turns off to follow power lines up the mountain. And then another road breaks off to the microwave towers overlooking the resort on Wenatchee Mountain, elevation 6742 feet.
It was not a short drive. It wasn’t smooth, either. Although the first road, Jumpoff Ridge Road, was relatively smooth and well-maintained, the next two roads weren’t maintained at all. The power line road was pretty straight in most places, but was filled with large rocks that forced me to drive slowly. Most of it was in clearings filled with bunch grass and sagebrush much like I have at my home. Whenever we left the power line, the road got windy and sometimes steep. That’s where it made its way through forests of tall pine trees.
Snow appeared on the road after the first seven or eight miles and was a few inches thick a bit farther up. I had to switch into four wheel drive at a particularly steep spot. My tire tracks were the first ones in the snow, which may have fallen overnight. Although we were on a ridge for much of the time, low clouds made it impossible to see very far in any direction. Indeed, by the time we reached the first antenna installation, a light freezing fog was blowing past. Beneath it, out to the south, we could see glimpses of where the valley dropped down toward Ellensburg.
If you’re curious about our exact route, you can find it here on Gaia GPS. I tracked it with their app on my phone.
After about an hour of driving, Don opened his backpack and pulled out a snack. He fed me cheese, crackers, and smoked turkey as I drove. That was a good thing since I’d forgotten to eat breakfast.
We made one stop along the way. There was a weird trail across the road and Don wanted to check it out. While he did that, I made a pit stop behind a tree. Then we were on our way again.
The drive to the end of the road took about 1-1/2 hours. We’d driven 15.7 miles and climbed more than 3000 feet in elevation.
At Wenatchee Mountain
At the end of the road was the Communication Facility at Wenatchee Mountain. It consists of two small buildings — both locked up tight — and a bunch of antennas. I shut off the Jeep and we all got out — Penny, too — to take a look. It was surprisingly windy up there — it wasn’t windy down below — and the wind chill must have brought it down to the teens. Exposed skin froze quickly, but the rest of me was pretty warm in heavy jeans and three layers (cotton shirt, fleece sweatshirt, and the junky polyester winter shell I’d bought at Costco for just $20). I was wearing a scarf (of course) which I soon used to cover my head and ears. (My hair, which is longer now than it’s been in about 30 years, does a good job keeping my ears warm, but not when it’s windy.)
I was thrilled to see a large, level spot that would be perfect for landing the helicopter — provided the snow wasn’t too deep there. There wasn’t much snow on the ground that day — the wind had blown the powder mostly away. I assumed the wind would almost always be coming from the south so I’d have to land into that direction. There was a clearing between trees to the north that would make that easy. And the departure off the top of the ridge to the south would be a piece of cake. A quick turn back to the north and then an autorotative descent to the starting point. I suspected I’d be able to turn a ride with two passengers on board in less than 10 minutes. With at least $50/person, I few hours each weekend morning could be lucrative enough to make me stay in Wenatchee all winter.
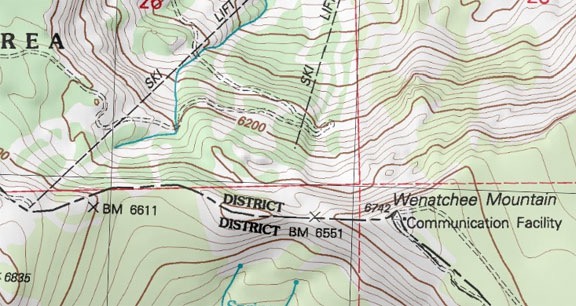
Here’s a topo map of the top of the mountain. The terrain drops off sharply to the north, south, and west.
We turned to the larger of the two buildings and the lookout point to its south. The view from Wenatchee Mountain was breathtaking in almost every direction. There were still clouds off to the southwest, trying to drift over the ridge but not quite making it. The entire ski resort lay spread out before us — we could see trails, lifts, and buildings along the way.
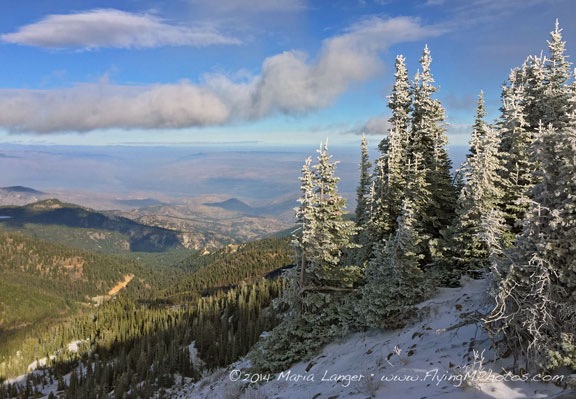
The small pine trees at the northwest edge of the mountaintop were still wearing the snow coats they’d acquired the night before. Wenatchee sits in the valley in the center left of this shot. I think this is a perfect Christmas Card photo, don’t you?
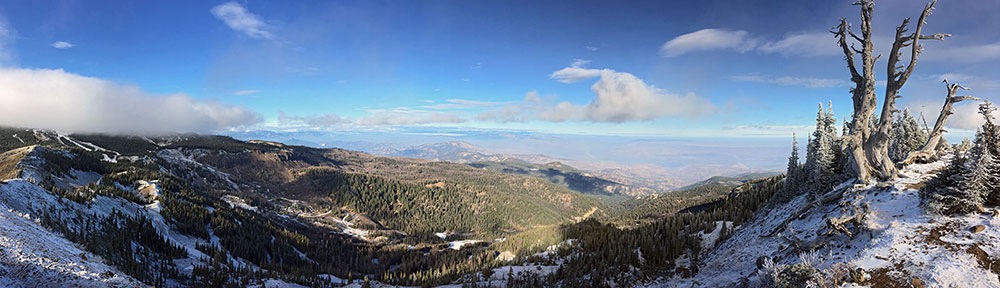
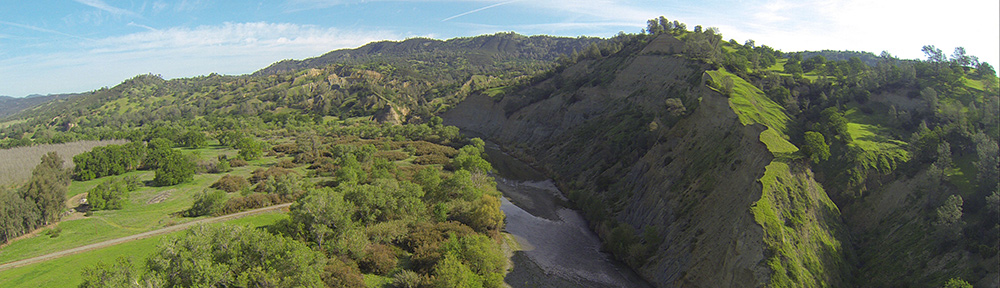
Did you say you wanted a panorama? Here you go. You should see it in full size. I think this will look great enlarged and hung over my stairs — I really didn’t want that Monument Valley canvas triptich anyway.
Don explained how skiers would get up to the spot where we stood: a ride up on Lift 2 followed by a trip along the boundary and a climb on foot to where we stood. He said the area where the Jeep was parked was a natural snow bowl surrounded by a windbreak. He was clearly excited about the prospect of getting up there by helicopter. Despite the wind, I was getting excited about the possibility of bringing him and others.
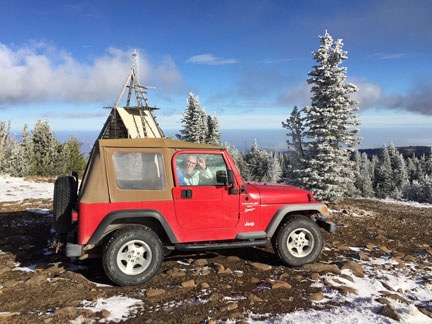
Don in the Jeep at the top of Wenatchee Mountain.
We hung out for a while and I took a bunch of photos while he shot off some bottle rockets to encourage snowfall. Before we started the drive back, I took a picture of Don in the Jeep, making a face at me.
Clear Lake
We took a slightly different route back that avoided much of the power line and wound down the side of the mountain toward Stemilt Hill, completely avoiding Jumpoff Ridge Road. Our path took us past an area where the mostly eaten carcass of an elk lay and an eagle sat stood up in a tree. I suspected that we’d interrupted his meal.
I stopped the Jeep but left it running and left Penny inside. Don and I each tried to approach the eagle to get a better photo. We spooked him, of course, and I got a decent shot of it taking off.
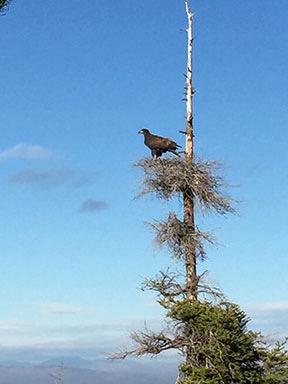
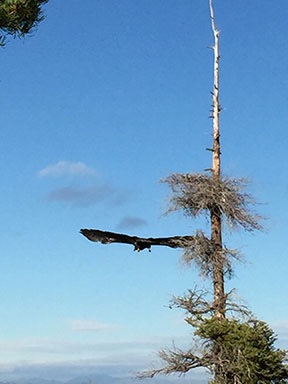
An eagle watched us from a perch in a tree, then took off when we got too close.
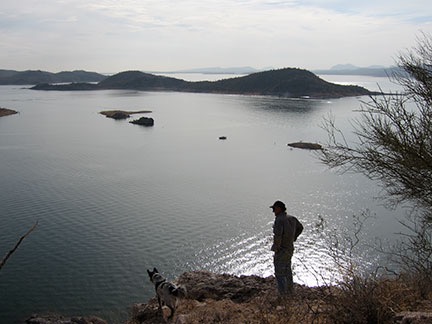
We continued down the mountain, snacking on chocolate chips and honey roasted nuts. The road wound into the forest and took us close to Clear Lake, where Don suggested we stop for a look.

On the shore of Clear Lake.
The lake is really just a small reservoir used to irrigate orchards on Stemilt Hill. Irrigation was turned off that time of year and the lake looked about half full. It was also frozen. Frozen enough to walk on. We figure the ice was anywhere from 3 to 6 inches thick.
Understand that our area of Washington was hit with a cold snap about a week ago that lasted a full week. We’re just coming out of it now. Low temperatures at my place have been in the teens for most of that time with highs below freezing. Today was the warmest day in a while, reaching about 35°F. I’m talking cold.
So it was no surprise to me that a lake at least 2,000 feet higher in elevation than where I live should be frozen. What was a surprise was (1) how thick that ice was and (2) how many rocks were sitting on the ice.
I shot this video of Don with my iPhone. Look at it in full screen with sound full up.
We walked around on the ice. Don slid around. We both agreed that if we had ice skates, we could be skating. He tossed large rocks across the ice so we could listen to the weird sounds they made. He fired a shot from his 22 pistol into the ice away from us. Later, we went to find the spot the bullet hit. A scratch was dug about an inch and a half into the ice and the bullet was nowhere to be seen.
I took a lot of artsy photos. At least I tried to. Later, I stuffed Penny into my jacket to keep her warm while we walked along the edge of the lake.
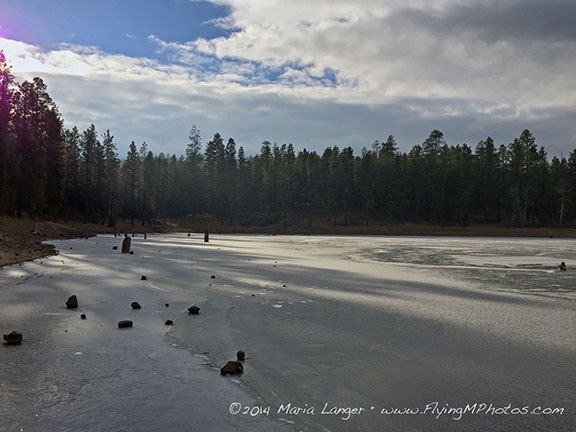
Clear Lake was frozen. Suitable for skating frozen.
Parting Company
We climbed back in the Jeep and followed the road the rest of the way down the mountain. It intersected with Stemilt Loop Road less than a half mile from where we’d left Don’s truck.
We talked briefly about trying to set up a meeting with the folks at Mission Ridge. I’m not sure if they’ll go for the heli-skiing idea, but it doesn’t really matter. I’d enjoyed our day out no matter what came of our “research.”
We said our goodbyes and went our separate ways. Fifteen minutes later, I was home. Not only did the four hour midday break leave me with a head full of good memories from an outing with a friend, but I had lots of ideas for places to camp and take my ATV and Jeep when spring and summer return. It never ceases to amaze me how many truly incredible spots are so close to where I live.