What’s Keeping Me Off My Blog

Someone special.

Well, it’s been nearly a month since my last blog post — the longest gap between blog posts since I started blogging back in 2003. Why the delay? Well, I’ve found something else to take up my time. Or perhaps I should say someone else.

Maria and Kirk
I danced barefoot with my new sweetie at the Ohme Gardens Wine Gala last week. My friend Kriss shot this photo of us.

Yes, it’s true. After three years of being single, with occasional time-wasting dates that really made me happy to be single, I began a serious relationship with someone I’ve known for about a year. His name is Kirk, he’s retired (early), and he lives on a 15-acre orchard/farm in nearby Peshastin. I ran into him at a Meetup event the Thursday before my birthday at the end of June, he invited me on a double date for dinner and dancing in Leavenworth the next evening, and things progressed rather quickly from there. He treated me to the best birthday I’ve had in more years than I like to admit — pardon me if I leave out the details. We now spend quite a bit of time together doing the kinds of things we both like to do: hiking, dancing, eating out, picking blueberries, cooking, flying, exploring swimming holes, you name it.

And yeah, that, too. I’ve done more of that in the past month than I had in the last three years of my marriage.

Kirk is smart, upbeat, and friendly. He’ll start a conversation with anyone and learn interesting things along the way. He’s confident and comfortable in his own skin. He knows how to make me feel good about myself and never belittles me or tries to embarrass me in front of friends. He obviously doesn’t feel threatened by either my intelligence or success. There doesn’t seem to be a mean bone in his body.

He doesn’t have any previous relationship baggage and isn’t a slave to a job or tied to high-maintenance offspring or parents. He says Yes far more often than No. He’s willing to try anything once and then do it again if he likes it. Better yet, he actually suggests fun things to do so I don’t have to.

He makes me happy. Very happy.

And he keeps me busy. So busy that I simply don’t have time to blog.

So if you don’t mind, I’ll need to cut things short here. He’s on his way for dinner tonight. I’ll grill up some chicken tenders and he’ll cook green beans from his garden. I’m hoping he’ll bring some rhubarb, too — I’m thinking of strawberry rhubarb topping on vanilla ice cream for dessert. Wine on the deck for sunset. Later, when it gets dark, we’ll take out the telescope and explore the heavens.

Still later, we’ll likely do some other things that I won’t detail here.

I’ll get back to blogging regularly one of these days. I hope you’ll keep checking in.

Beer Bread

More than just a good way to get rid of beer you don’t like.

There’s a restaurant in Wenatchee, near where I live, called McGlinn’s. It’s a casual dining place with a pretty big menu and lots of beer. Although it’s not one of my favorite places, it’s pretty popular with most of the locals and I’ll usually say yes if one of my friends suggest it.

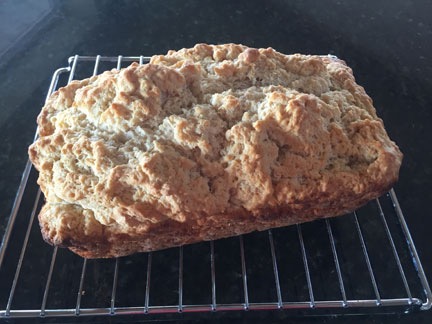
Beer Bread
A recent loaf of beer bread, cooling on a wire rack.

One of the things on their menu is beer bread. A fellow pilot from Utah was raving about it when I spoke to him and I’ve had it. But I told him what I thought: my beer bread was better.

I got a chance to prove it last week. He hosted a steak cookout at his cherry drying base for all the pilots working with me this summer. I promised to bring along a fresh loaf of my beer bread and didn’t disappoint. He agreed that it was great — but I can’t recall whether he admitted it was better than McGlinn’s.

Anyway, here’s the recipe:

Ingredients:

  • 3 cups self-rising flour
  • 1/4 cups sugar
  • 1 tsp caraway seeds (optional)
  • 1 12-oz bottle of beer or ale*
  • 1/4 cup melted butter or margarine

* A note about the beer. I usually use whatever I have around that I don’t like to drink — which is pretty much any beer. These days, with friends stopping by all the time, I have a lot of different beer around. I’ve been making this bread with Coors Light leftover from a party, which no one seems to like. I don’t really like it as much as when it’s made with a darker brew. Guinness is probably my favorite for this. I tried Pyramid IPA the other day and it wasn’t bad.

Instructions:

  1. Preheat oven to 350°F.
  2. Butter (or grease) a large loaf pan.
  3. In a large bowl, mix together all dry ingredients. I usually skip the caraway seeds because (1) I don’t like them and (2) I seldom have them around.
  4. While stirring, add the beer. The batter should be very thick.
  5. Spoon the batter into the prepared pan.
  6. Pour the melted butter over the batter.
  7. Bake until done, about 50 minutes. The crust should be golden brown and crispy.

I like to serve it hot. It also makes great french toast.

Amazon Reward Points Scam

Come on folks — don’t fall for this!

I’ve been getting so many of these in email lately that I figured everyone else must be, too. It’s a scam. Don’t click any of the links. Throw it away.

Amazon Reward Points Scam

If Amazon.com was writing to you, they would use your name, not your email address. There is no Amazon.com Loyalty Department. When you point to one of the links, it displays a URL that is not on Amazon.com.

If all that fails, look at it logically: are they promising “reward points” or a “$50 Amazon Gift Card”? A real promotion would be clear. Don’t let the placement of a few Amazon logos fool you.

Orange Yogurt Scones

Real scones, real easy to make.

Every once in a while I fall in love with a specific kind of food and want to eat various versions of it all the time. (As you might imagine, eventually I get sick of that kind of food and move on to something else.) For the last six or eight months or so, scones have been high on my list. I think it started with a few instances of really good scones bought at a coffee shop. From there, it became a sort of goal to try scones in various other places, looking for “the best” scone.

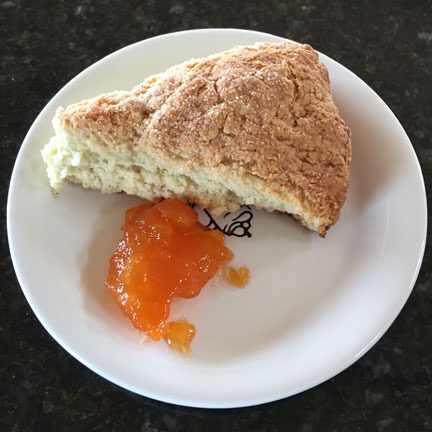
Plated Scone
Here’s one of the scones I made yesterday, served up with some apricot preserve. (Orange marmalade would have been better.)

When I unpacked most of my kitchen equipment and put it away in my new kitchen, I began baking again. And because my cookbooks were still packed, I relied on the Internet to find recipes — knowing the whole time that one of my cookbooks contained my very favorite scone recipe. After a few disappointing muffin-like concoctions, I finally dug out the cookbook with the scone recipe, Sunset Recipe Annual, 1997 Edition. This was a cookbook I got from my mother way back then. It has two recipes that I turned to over and over; this is one of them.

NutritionIngredients:

  • 2 cups flour
  • 1/3 cup plus 2 teaspoons sugar
  • 2 tablespoons baking powder
  • 1/4 teaspoon baking soda
  • 1/4 teaspoon salt
  • 3 tablespoons cold butter or margarine. I used butter.
  • 1 6-oz container of orange or lemon flavored yogurt (about 1/3 cup).
  • 2 teaspoons grated orange peel.
  • 1/4 cup orange juice

Instructions:

Here’s how I made it for a Sunday brunch at a friend’s house yesterday:

  1. Preheat oven to 375°F.
  2. Oil a 12 x 15 inch pan. I used spray oil, which I rubbed into a nonstick pizza pan.
  3. Combine flour, 1/3 cup sugar, baking powder, baking soda, and salt. I did this in my food processor.
  4. Cut in the butter until the mixture resembles crumbs. This is very easy (and quick) in a food processor. (Indeed, I think food processors were made for making scones and pie crust.)
  5. In a separate bowl, combine yogurt (I used pomegranate because I didn’t have any orange or lemon), orange peel (which I didn’t use), and orange juice.
  6. Add the yogurt mixture to the flour mixture and stir until evenly moistened. This is where the total amount of yogurt matters. The Chobani that I used comes in 5.3 oz containers — not 6 oz. So I added more orange juice to make sure I had enough moisture. And no, I didn’t do this in the food processor.
  7. Mound the dough on the prepared pan and then use your hands to pat it into a 9-inch round. The cookbook suggests flouring your hands, but I didn’t need to. I’m thinking my mix might not have been moist enough.
  8. Use a large knife to cut down through the dough to make eight wedges but don’t separate them. All you’re doing is scoring the dough so the scones break apart easily later.
  9. Sprinkle the remaining sugar on the dough.
  10. Bake about 25 minutes, until scones are golden brown.
  11. Cut or break into wedges and serve hot or warm.

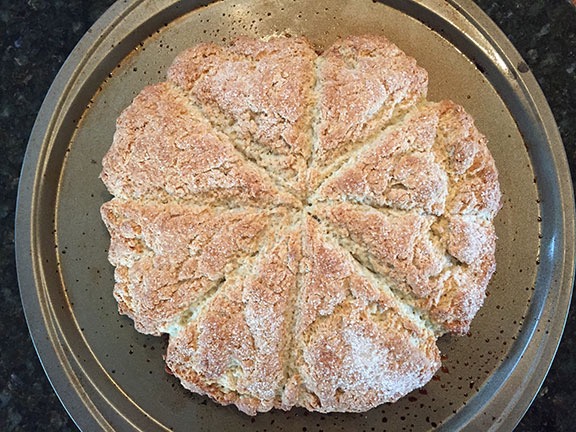
Baked Scones
Here’s what my scones looked like, right out of the oven.

I’m pretty sure that you can modify this in a variety of ways to make different flavors. Next time, I’ll get the orange yogurt and grated orange peel to make it the way I used to years ago.

Download and print this recipe.

Keeping Cherries Fresh

A few tips from years of experience.

One of the perks of my summer job as a cherry drying pilot is my friendship with more than a few orchard owners. As a result, I often find myself with an opportunity to pick cherries right off the trees for my own personal consumption.

Gleaning

I got an opportunity just yesterday. I was on a charter flight with two good clients who occasionally use a helicopter to visit multiple orchards during the growing season. Our first stop was a cherry orchard about forty miles south of my base in the Wenatchee area. Picking was in full swing, with lots of pickers working on trees just to the south of the clearing where I’d landed. I wandered off into the orchard in the other direction and found large, mature trees. I stepped into the shade and looked around me.

Most of the trees were Bing cherry trees. I could tell because I know that Bings don’t self-pollinate, which would explain the presence of Rainier cherry trees, which are sometimes used as pollinators. There was another type of cherry tree there too — likely another pollinator. The Bings had been picked; the Rainiers and other cherries had not.

I have a lot of respect for my client, which is why I didn’t pick any Rainiers. Instead, I went to the picked Bing cherry trees and began my hunt. I was gleaning.

According to Wikipedia:

Gleaning (formerly ‘leasing’) is the act of collecting leftover crops from farmers’ fields after they have been commercially harvested or on fields where it is not economically profitable to harvest.

(I was not familiar with this term until last year, when I described what I was doing and a friend told me it was called gleaning. I never stop learning and hope you don’t, either.)

I’m pretty good at gleaning, having had lots of experience over the past eight years. As strange as it may seem, when pickers go through an orchard, they often leave a lot of fruit behind. I’ve noticed that some trees have more leftover fruit than others, likely because some pickers are not quite as good as others. I’ll go for good sized, unblemished fruit that I can reach from the ground. (Being tall helps.) It doesn’t matter what I pick or how much — since the trees have already been harvested, if I didn’t pick the fruit it would likely rot there. One of my clients even told me that by gleaning the leftover cherries, I help prevent the spread of a certain pest that thrives on rotting fruit.

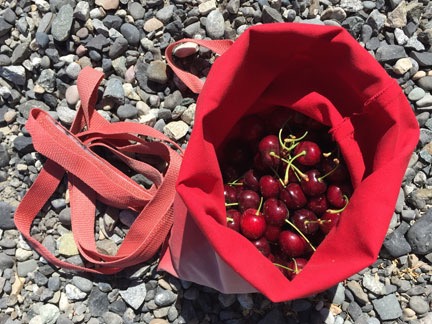
Bag of Cherries
Robinson R44 blade tie-downs make pretty decent little canvas bags. I could have put at least five pounds in this one.

I picked about two to three pounds of cherries. I put them in one of my helicopter’s blade tie-downs, which actually makes a good-sized canvas bag. (I can’t take credit for this idea; a pilot friend of mine used one of his tie-downs Thursday as a bag on a kayak trip.) I stowed it under my seat for the trip home, knowing how important it is to keep the cherries cool.

And that’s the trick: keeping the cherries as cool as possible.

Keep the Cherries Cool

Cherries begin to lose their freshness as soon as they are picked. Growers do everything they can to keep the fruit as cool as possible. They only pick early in the day and seldom after the outside air temperature reaches 80°F. If able, they run the bins of freshly picked fruit through a hydrocooler to drop the temperature of the fruit. They get the bins of fruit into refrigerated trucks as quickly as possible. Even at the packing house, the fruit is moved off the trucks and into huge refrigerated warehouses until they can get a place on the packing line.

I have my own hydrocooler of sorts: a kitchen sink or large bowl of cold water. As soon as I got yesterday’s cherries home, I rushed them into the kitchen, dumped them into a bowl, and filled the bowl with cold tap water. I whooshed them around in the water to wash off the orchard chemicals and dumped the water. Then I did it again. And again. Three washes — that’s my routine.

Next, I half-filled the bowl of cherries with water and topped it off with ice from my freezer. (Before I moved out of my RV and into a real home, I actually bought bags of ice that I stored in my RV freezer just for this task.) I whooshed the cherries around in the water, getting the water and the cherries icy cold.

The important thing to remember here is to not leave the cherries in water longer than necessary. Why? Because they will split. After all, that’s why I work as a cherry drying pilot — to get rainwater off cherries so they don’t split.

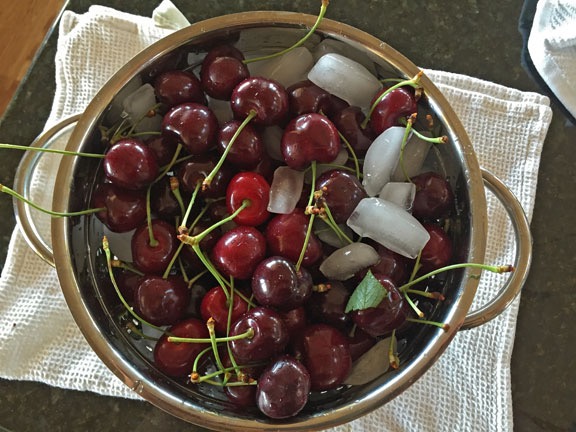
So my next step was to dump the cherries with the ice into a colander. That would allow the water to drain off while keeping the ice around the cherries to cool them just a little bit more.

Cherries on Ice
I keep the cherries on ice a while to keep cooling them down.

Then I ate some. Quite a few, in fact. Although some people seem to have digestive problems when they eat too many cherries, I don’t. I can eat a lot of cherries.

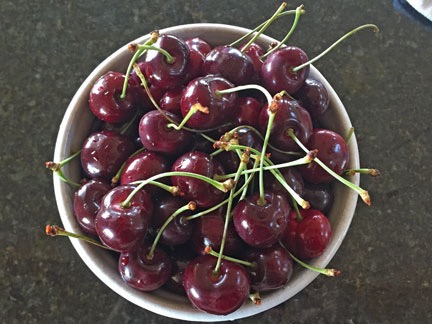
Cherries in a Bowl
My gleaned cherries, ready for the fridge.

Finally, I pulled the cherries out of the colander and put them in a ceramic bowl, leaving the ice behind. And I put the bowl in the fridge, where I could easily reach in for a handful of cherries any time I liked.

Sealing Out the Air

Every once in a while, I pick a lot of cherries — more than I can eat in a day or two — or one of my clients gives me an 18-pound box. 18 pounds is a lot of cherries.

Besides making cherry turnovers, cherry cobbler, and cherry chutney, eating cherries with yogurt and cereal, and sealing pitted cherries in jars with vodka and a bit of sugar to enjoy six months into the future, I want to store the cherries in a way that’ll keep them fresh for munching as long as possible.

To do this, I follow all the steps above and then add a final step: store them in a zip-lock bag with air sucked out of it. I suck the air out with a straw, just before sealing the bag. Then I put the bags in the coldest part of the fridge. I’ve managed to keep cherries edible for up to two weeks like this.

I Love Washington State Cherries

The only fresh cherries I eat are Washington state cherries, most of which are grown within 50 miles of my home.

Whenever possible, I pick them myself, after the pickers have gone through the orchard block. I’m picking up the crumbs, taking fruit that would just go to waste otherwise. I feel very fortunate to have the opportunity to do this. It’s not just a matter of getting free cherries. It’s also a great way to get closer to my food source, seeing how the fruit grows and fades, getting a better appreciation for what it takes to grow and harvest the food we take for granted.

Washington state cherry season will likely end early this year — possibly before the middle of August. There isn’t much time left to get this great fruit. If you find some in your local supermarket, buy it, bring it home quickly, and chill it back down. Then come back here and use the comments to tell us what you think.