Homemade Brie

And other new adventures in cheesemaking.

Way back in September 2013, when I was still living in my fifth wheel RV (the “Mobile Mansion”), I got interested in cheesemaking. I took a class at a local cheesemaking facility (which closed down the following year when they lost the land lease they needed to graze their sheep) and even tried making a few cheeses myself. Trouble was, my RV kitchen was tiny and if there’s one thing cheesemaking requires, it’s space. So I packed up the cheesemaking gear I’d invested in and set it aside until I had a real kitchen again.

200 Homemade Cheeses
I highly recommend this book, 200 Easy Homemade Cheeses, to anyone just getting started making cheese.
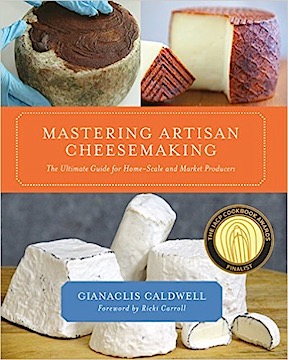
Artisan Cheese
I also bought this book, Mastering Artisan Cheesemaking, but it’s a bit more advanced than I’m ready for at this point.

In the meantime, I bought and read (or at least browsed through) two cheesemaking books and heard more than a few Splendid Table stories on NPR about making various cheeses.

I should mention here that I’ve been making my own yogurt for at least five or six years. Making yogurt is similar to making cheese, but I think it’s a lot easier.

I moved into my new home in May 2015 and the kitchen certainly was ready for cheesemaking then. But I wasn’t. I’m not sure what finally got me to try again — maybe it was walking past the plastic bin containing all of my cheesemaking equipment that was stored in my garage? — but I finally pulled out my favorite cheesemaking book, ordered the necessary cultures, unpacked the stainless steel pots, etc., and bought four gallons of milk to start making cheese again.

Brie

I decided to start by making brie. I like brie. I can eat brie every day of my life and not get tired of it. What would be better than making my own?

I had two recipes. One was from the Splendid Table website. The other was from my favorite cheesemaking book.I can’t remember why, but I decided to go with the one in the book. It may have been because it provided instructions for adding calcium chloride, which is pretty much required when making cheese from homogenized milk. I didn’t have an affordable source of raw milk — no, I won’t pay the local health food store $10 per gallon for it — so I knew I’d have to add calcium chloride and I wanted detailed instructions on how much to add and when to add it.

The trick with making cheese is to heat the milk to the exact right temperature — in this case, 88°F — and, if necessary, hold it there. Fortunately, brie doesn’t need a temperature hold. It does require the cheese to drain for about 24 hours at room temperature. What you’re draining off is the whey, which some people drink and I used to give to my chickens (as a good source of protein). Whey from hard cheeses can be further processed into ricotta, but not whey from brie making. Such a shame to let it go down the drain, especially since it accounts for at least half the volume of milk — in this case, a gallon of the two I started with.

After draining, the cheese is ready to ripen in a cheese cave. I don’t have a cheese cave. (I suspect you don’t either.) I originally thought that my dorm-style cube fridge, which I’d bought for my Wickenburg hangar at least 12 years ago and now had in my garage, could be used if set so it barely cooled. Unfortunately, the lowest (highest?) setting still put the temperature below 42°F; I needed a range of 50°F to 55°F. On a whim, I threw the thermometer into my wine fridge. Bingo: 50°F. The ripening containers went right in.
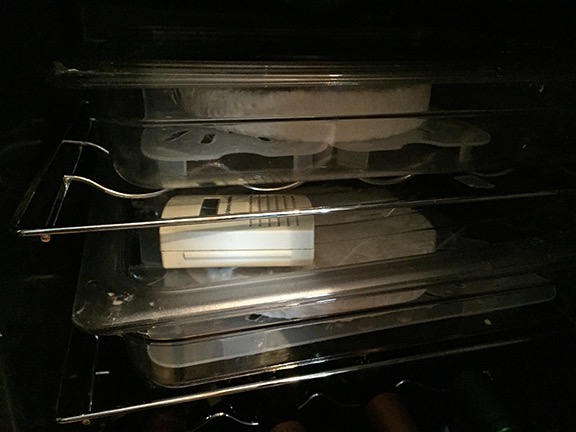
Ripening Brie in a Wine Fridge
Brie in ripening containers in my wine fridge. I was not happy about evicting the wine that was in there and am looking at a new wine fridge to accommodate both wine and cheese. (My sister and brother bought me this wine fridge for Christmas 2016 to support my cheesemaking habit.)

I should mention here that although I bought open-bottom cheesemaking molds and cheese mats from a Cheesemaking supplier — I use The Cheesemaker website — I went local for the ripening containers. Wenatchee has a restaurant supply shop and I bought hard plastic food storage containers that can be stacked to use as ripening containers. I have them in a variety of sizes so I can make just about any size cheese.
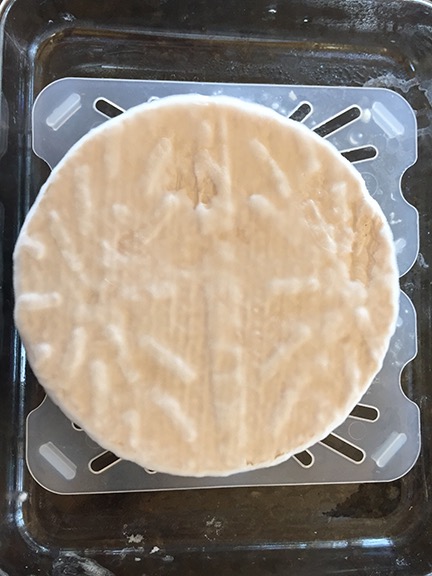
Mold on Brie
This photo shows the mold just starting to cover one of the two bries I made. (I used a food mat for this; I’ve since bought real cheese mats.)

What you might not realize is that the white “skin” on brie is actually mold that’s created by the Penicilum candidum added as part of the cheesemaking process. This begins to grow on the cheese after a few days. It kept growing as I flipped the cheeses daily. When the cheese is wrapped, the mold gets flattened down to form that skin. And yes, you can (and should) eat it.

The cheese stayed in the “cave” for a few weeks. Then I had some friends over for dinner and decided to make up a cheese platter for them that included two of my cheeses. The brie was one of them. It wasn’t bad, but it wasn’t quite ready, either. Not ripened enough. Still, we all enjoyed it and I’ve been eating it slowly since then. Had some on my eggs this morning. The other cheese — I made two 7-in rounds — just went from “cave” to fridge. I consider it a success and plan on making two more to take with me on my winter travels.
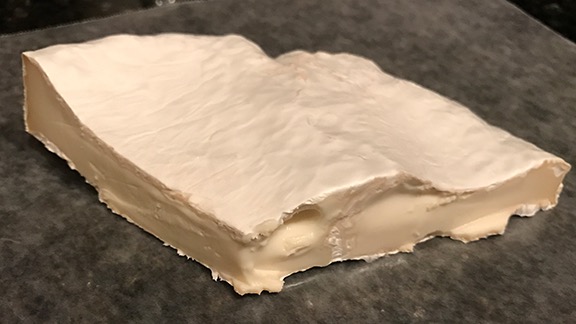
Homemade Brie
This is all that’s left of that first homemade brie. I’m going to use smaller molds next time so the cheese is taller.

Chaource

I used another two gallons of milk to make chaource, which looked like an easy enough recipe in my cheesemaking book. This is also a soft-ripened cheese, but it does not get gooey in the middle like brie does. Actually, I’m not sure how it gets because I’ve never had it and honestly don’t know if the ones I made are really like chaource cheese.

Th difficult part of making this cheese was getting it to 77°F and keeping it there for 12 hours. I rigged up a double-boiler on the warming burner of my stovetop, using a BBQ temperature probe to give me an accurate reading. When it got too warm, I’d turn off the burner. When it got too cool, I’d turn it back on. This was not fun, and if I had to go out that day, I would have ruined the cheese.
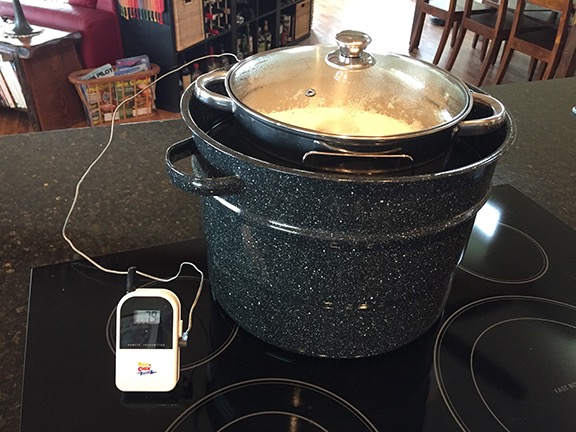
Double boiler
I rigged up a double boiler with my canning pot holding water for a stainless steel cheesemaking pot. This sat on the “warming center” burner of my stove, which kept it as close to 77° as possible.

This particular cheese had to drain for about two days at room temperature. (Now you see why you need counter space to make cheese; cheese needs real estate before it’s ready to ripen.) It never got quite as firm as I expected to — it stayed sort of crumbly throughout. I managed to fit it all in one ripening container, where it joined the brie. But although it started second, it was finished ripening first. I served it up on that cheese platter and it seemed to go over well enough.

Would I make it again? Not until I try store-bought chaource to see how close I came. If I blew it, I’ll likely take a pass — unless the “real thing” is so good that it’s worth another try.

Fromage Frais

Just to mix things up a bit, I bought another gallon of milk and whipped up a batch of fromage frais. This is a fresh cheese a lot like cream cheese. Like all fresh cheeses, it was extremely easy to make and yielded quite a bit of cheese.
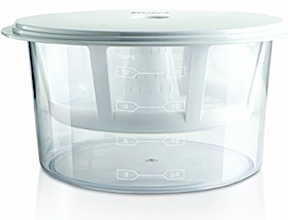
Greek Yogurt Strainer
A fine mesh strainer like this is a must-have when making greek yogurt or fresh cheese. I got this one on Amazon.

For fresh cheeses, you basically heat the milk and then add the cultures. Then you add the rennet to get curds. But instead of using a mold, you let the whey drain out in a cheese bag. I used my greek yogurt strainer. You then put it in a bowl, add a bit of salt, stir it up good, and refrigerate it.

The note on the recipe in the book said “This fresh, creamy cheese is so delicious, you’ll want to eat it on everything.” And they were right. I used it like cream cheese and like sour cream. I ate it on date nut bread and on butternut squash ravioli. I basically added it to anything I might add cream cheese or sour cream to. But after a while, even I’d had enough. If I do this one again — which I likely will — I’ll do a smaller batch.

More in the Future

As I mentioned earlier, I’m planning to make a few more bries before I leave; with luck, they’ll be ready to take with me on the road this winter. I might try a cheddar, too — it really depends on difficulty and whether I can leave it behind to age while I’m gone.

I do enjoy making cheese, but I won’t lie: it’s a lot of work. The only reward at this point — I’m definitely still a novice and not an “artisan” — is that feel-good feeling I get when I do something myself. Do I see myself making all my cheeses in the future? Hell, no. But I’m having fun with it now.

And who knows? Maybe I’ll come up with some sort of specialty cheese that only I make. Wouldn’t that be fun?
Life above the Clouds

One of those days when I’m so glad I made my home where I did.

Pictures just don’t do it justice. I know because I’ve been trying to take a good picture of what I’m seeing outside my window for the past hour and a half.

It started before dawn, when the early morning’s gray light revealed the thick cloud blanketing the Columbia River in the valley far below me. It just sat there for a while, apparently still, shrouding the homes and roads and orchards that normally fill my view. I went about my morning tasks — making coffee, writing in my journal, unloading the dishwasher — sneaking peaks outside to see if the view had changed. Every time I looked, it had. Then I begin to notice the movement of the clouds, rising and falling, drifting to the south west, drifting back to the north east. For the hundredth time in as many days, I regretted not setting up one of my GoPro cameras to capture a time lapse of the movement of the clouds.

I took pictures. Dozens of pictures. I used my phone and my good Nikon. I brought the pictures into my computer and fiddled with them, hoping I could get them to show off what I was seeing. For some reason, they always came up short.

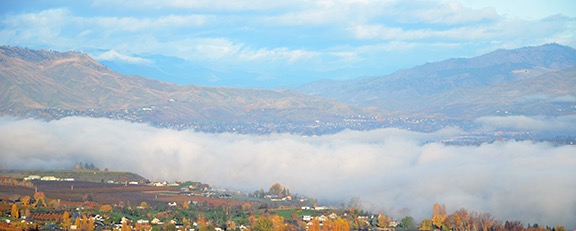
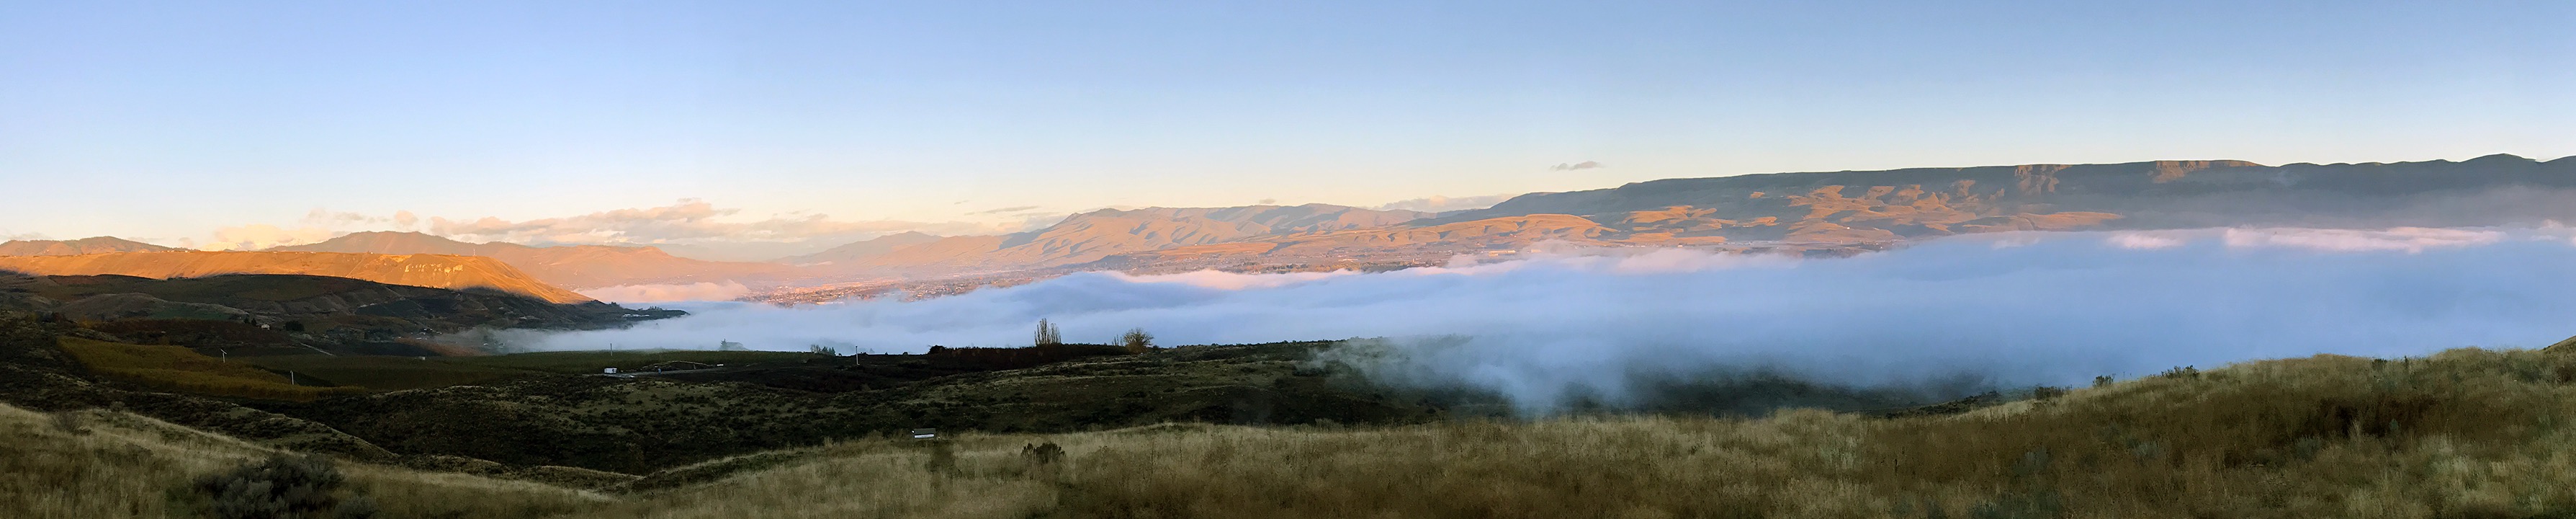
Cloud Pano
One of the first photos I shot was a panorama. Click this image to load and view the whole thing.

At one point, I watched the cloud grow and climb and drift right up my driveway to swallow my home. And then, just as quickly as it had come, it was gone.

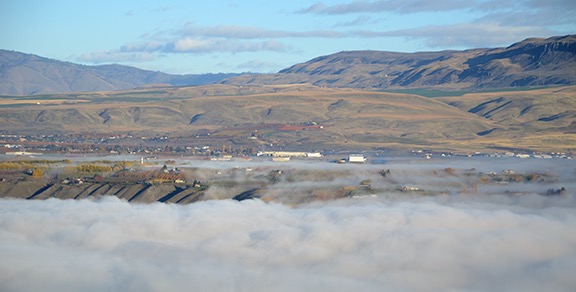
Airport Clouds
Directly across the river from my home, the local airport is in a bright fog. Like me, it’s quite a bit above the river level.

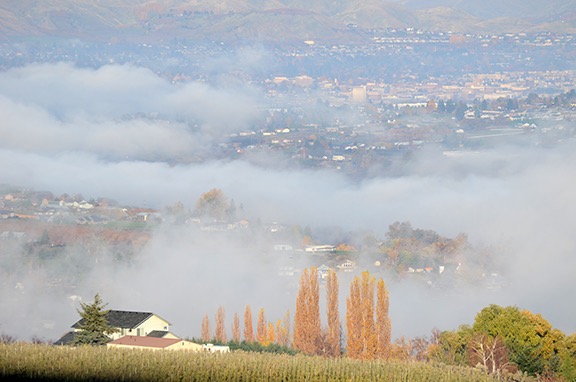
Autumn
This zoomed in shot looking toward Wenatchee really shows off the autumn colors.

Even as I write this, now two hours after dawn, the view keeps changing. The bright sunlight plays on the autumn colors in the orchards and reflects bright white off farmhouses and shop buildings. I keep waiting for the fog to burn off, but instead it keeps drifting and rising and falling. Below the cloud, its a gray day, but above it, here at the Aerie, it’s bright and beautiful — almost springlike.

Foggy Home
A 300mm lens really compresses the distance between a home about a quarter mile away and the city of Wenatchee five or six miles beyond it.

I’m a view person, as I’ve stated numerous times here and elsewhere. I bought this piece land because of the view and I designed my home to take advantage of it. I don’t need pictures on my walls; I have windows. It’s amazing to me how often the view out those windows varies — with changes of time or light or season or weather. It’s a new show every single day, and although some days are better than others — like this morning’s show — they’re almost always amazing.

The other day, a friend came by for dinner. As we were sitting at my breakfast bar, enjoying our meal, we couldn’t help but take in the view of the city as late afternoon turned to evening and then to night. My friend turned to me and said, “I’m so glad that you haven’t taken your view for granted.”

I immediately knew exactly what she meant. My last home, in Arizona, also had some nice views. In the beginning, when I first moved there, I used to like to watch the way the setting sun turned the mountains to the north an amazing shade of copper red. After a while, however, I noticed that I wasn’t looking quite as often, even though the view was spectacular most afternoons. I had begun to take the view for granted.

I hope that doesn’t happen here.

As I was finishing this up, I noticed that the fog was finally dissipating, being burned off by the warmth of the sun. I took a quick break to shoot video of what I saw — it’s zoomed in a little so the quality of the video isn’t very good. It does give you an idea of what I was seeing and just how beautiful can be here.


A quick video from the deck.

I’m very glad I decided to make my home here.

Found: Camera Equipment

I unpack a few more boxes and find some camera equipment I forgot I had.

Regular blog readers might know that I moved from the Arizona home I lived in for about 15 years to Washington state back in 2013. I packed my belongings over a nine-month period while waiting for my much delayed divorce to make its way through the court system. In the beginning, I packed the things that meant the most to me — heirloom items, mostly — but I also quickly packed my valuable possessions, including electronics and camera equipment. (Eventually, I packed or discarded things I didn’t really need or want, but that’s because I was bored and pissed off and I didn’t have anything else to do while I waited to get on with my life.)

The Migration of My “Stuff”

My new home wasn’t waiting for me when I moved out of my Arizona home. So the boxes went from my Wickenburg home to my Wickenburg hangar (September 2012 through September 2013) to my Wenatchee hangar (September 2013 to June 2014) to my Malaga garage (June 2014 to today). I started unpacking when my living space was nearing completion in April 2015. I’ve been unpacking ever since.

Seriously: I packed way too much stuff. Everyone who comes into my garage tells me I have too much stuff and I have to agree. I’ve given a lot away and I’ve sold a bunch, too. (Craig’s List works much better here than in Wickenburg.) The benefit, of course, is that I didn’t have to buy much when I moved into my new home. I already had almost everything I needed to make a home.

As my modest living space fills with stuff, I struggle to find places to store it all. That’s why I’ve still got about 20 boxes in the garage that need unpacking. One thing I learned is that the first step to keeping your home clutter-free is to have a specific place where everything you own belongs. If something can’t be put away, it should be thrown away.

Finding the Camera Equipment

These days, I’m organizing and arranging my garage’s shop area. Part of the job is to finish unpacking those damn boxes. So while my friend Bob was over, working on his boat, I began tackling boxes again. I had a mission: I wanted to find and unpack my games and camera equipment.

I found the games right away: Boggle, Scrabble, two (?) Monopoly games, Pente travel version, Uno, Skipbo, dominos, Parcheesi, and playing cards — including a few custom decks I’d had made not long after returning home to get divorced. I sorted it all out, with some games going upstairs to live on the bottom shelf of my coffee table and some going into my truck camper (the Turtleback) for my annual trip south. I got a lot of joy out of flattening that empty box and tossing it atop the others waiting for a trip to the recycling center.

The camera equipment was a bit more elusive. Although I had some of it in a plastic bin on a garage shelf, a lot of it was missing. I definitely remembered a light gray camera bag and two identical Nikon 35mm film camera bodies. There was a 10.5mm fisheye lens that I hadn’t seen in a while, too.

The equipment in the bin was what I’d had with me in the big fifth wheel (the Mobile Mansion) where I lived every summer since 2010 and then full-time while waiting for my home to be built. I knew there was more from my old house and I was pretty sure I’d packed it. But none of the boxes were marked “Camera Equipment” — I’d labeled every single box — and I was at a loss.

And then I remembered that I didn’t always label the boxes with the exact contents. The reason: a mild case of paranoia. If someone got into my Wickenburg hangar that last summer and started going through the boxes, I didn’t want him (or her) to find my valuables. The same thing applied to the movers; I didn’t want them knowing exactly which boxes they could find stuff worth stealing.

I looked at the labels on the remaining boxes. One was marked “Old Photos.” But I also had a plastic bin full of old photos. How many old photos did I have? I used my box cutter to open the box. And there was the gray camera bag, along with a bunch of lenses, filters, and other equipment I’d completely forgotten about.

It was like a great birthday or Christmas day: getting presents that you actually wanted.

The 35mm camera bodies — which are pretty much worthless these days — were in the box. But the camera bag was full of lenses. Not only was the missing 10.5mm lens there, but there were three others I’d completely forgotten I had. They’re all Nikon lenses and I suspect, based on their weight, that they’re of different qualities (metal and glass vs plastic). Not only do they fit the D7000 I currently use, but most of them will work with the old film cameras (if I ever start using them again).

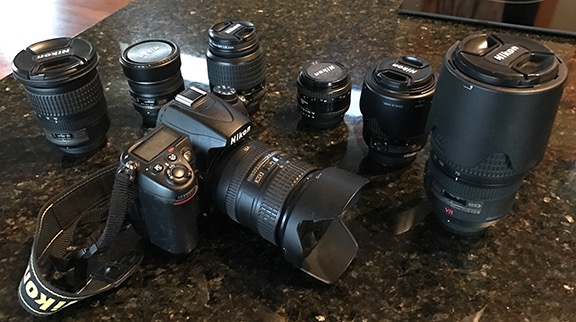
Camera Equipment
With the newly found lenses, I now have seven lenses to choose from: 10-24mm ƒ3.5-4.5 zoom, 10.5mm ƒ2.8 fisheye, 16-85mm ƒ3.5-5.6 zoom (on the camera here; my “everyday” lens), 18-55mm ƒ3.5-5.6 zoom, 50mm ƒ1.8, 55-200mm ƒ4.5-5.6 zoom, and 70-300mm ƒ4.5-5.6 zoom.

This is not “professional” camera equipment. Back when I was shopping for my first DSLR in 2007 — right before my first Alaska trip — I bought a Nikon D80 camera, mostly because it would work with lenses I already had. It had a crop sensor, not the full-frame sensor preferred by professionals. (Learn the difference between full-frame and crop sensors here.) By the time I bought my D7000 in 2011(?), I had a lot invested in lenses and didn’t want to have to start over; that’s why I went with another crop sensor model, albeit one that’s slightly more advanced than a general consumer model: the D7000 I still use today.

Of course, it wasn’t just lenses that I found. There were also about a dozen camera filters — the good, glass screw-on type — that included polarizers, skylight filters, and neutral density filters. There are also a few collapsible reflectors that could be used to either shade or reflect light back up to small subjects. I distinctly remember using those for flower photography in the desert near my Arizona home.

And then there’s my HD video camera and all of its accessories. And my old time-lapse setup. And my geotagger. And my lightweight tripod. And lens pouches. And bean bags.

Needless to say, I’m thrilled to have access to all of my camera equipment again. I’ll be bringing quite a bit of it with me when I head south — well, we’ll see what I can comfortably fit in the Turtleback, anyway. Maybe it’ll motivate me to get a little more creative on this trip. With so much equipment at my disposal, there’s really no excuse not to be able to capture the images I want.

The Floating Bodies

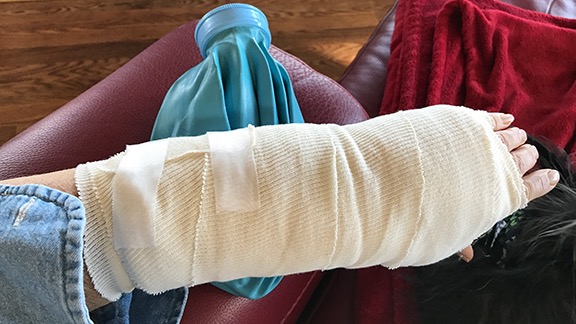
An explanation of why there’s a honking huge splint on the end of my left arm.

I’ll make this short, if I can. I’m using dictation because I can’t type very fast with one hand. It’ll probably take me longer to edit this than to actually dictate it.

It all started back in August 2013. I had closed on the purchase of the property where I’d build my new home and was spending most afternoons at the property tearing out koshia, a type of invasive weed here. I left for the day, hot and tired and sweaty, and did some grocery shopping. I put the groceries in the back of my truck, which I never do. When I got back to my trailer, I climbed into the back of the truck, gathered up the groceries, and then attempted to vault off the tailgate up as I had done many times before. On that particular day, however, one of my feet got hung up on the tailgate’s spray-in bed liner and I didn’t make a clean jump. I landed on my left side and seriously sprained my left foot. You can read the details of that little accident in another blog post.

Wrist Lump
Here’s the lump at its least swollen state as I waited for surgery. When it was inflamed, it would triple in size and be quite painful. The knob below the swelling is a bone that’s supposed to be there. I have very thin wrists.

What I didn’t realize at the time is that I had also injured my left wrist. The problem manifested itself sometime later with some swelling in that wrist that never seemed to go away. Occasionally, after a hard day working at the house or in the yard, the swelling would increase and the rest will become very painful. On those days I had to turn to Ibuprofen and a wrist brace to keep the pain under control. Those little painful spells would often last several days, but the swelling would usually go down by the time I got to see a doctor about it. I did, however, get several tests done over the years, including x-rays, an MRI, and a cat scan.

This year, a bunch of little medical expenses added up to fill my deductible and I decided that it was time to fix this problem once and for all. The CAT scan identified what the doctor and I had suspected: there were tiny bone fragments loose in my wrist. He called these “floating bodies.” Apparently, when I moved my wrist under strain – for example, lifting something very heavy or twisting my wrist while I was holding something heavy —it caused these bodies to move, which would set off around of swelling and pain. The solution was to remove the floating bodies.

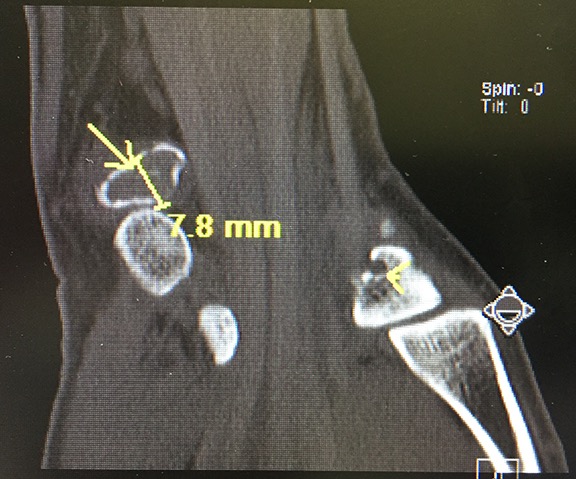
Cat Scan
Although the X-ray and MRI were inconclusive, the cat scan clearly showed the floating bodies in my wrist, including this big one.

I scheduled the surgery for a time after my helicopter had gone into overhaul so I wouldn’t need to fly. That surgery was scheduled for yesterday.

A neighbor drove me to the hospital at 7 AM and the surgery began promptly at 8 AM. I was under general anesthesia so I don’t remember anything from the moment I got into the operating room until I was in recovery. I was very surprised, however, to find my left arm in what looked like a cast from my elbow down to my hand. It turned out to be a clamshell type splint that would hold my wrist immobile. The whole thing was wrapped up in bandages that I would have to keep clean and dry for at least the next week.

Splint
I was not expecting this.

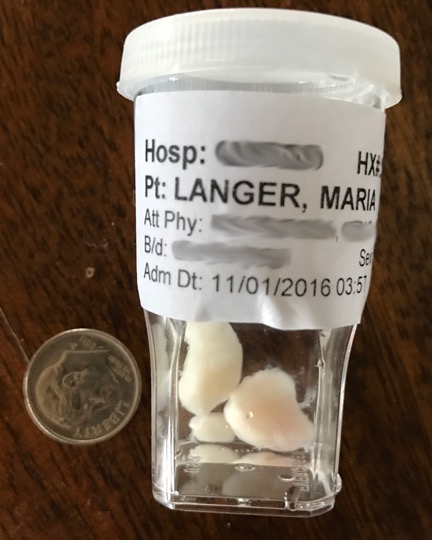
floating bodies
My souvenir.

The doctor came by and told me the surgery had gone well, taking about an hour and 45 minutes. I was shown (and then given) a tiny bottle containing the bone fragments, wrapped in cartilage, that he had removed. There was no need so end the lumps in for biopsy because we already knew what they were.

I’m one of the unlucky people who gets no pain relief from standard painkillers like oxycodone or Percocet or codeine. I know — I’ve tried them all several times as prescribed for various painful ailments. Fortunately, my doctor had another alternative, something called Dilaudid (generic called hydromorphone). They gave me some of this while I was in recovery and although it took about 30 minutes to kick in, it worked like a charm. I was assured that if the pain continued or got worse at home, I could combine this new medication with ibuprofen, which normally works like a charm for me.

A friend drove me home and, after letting Penny out and back in, I climbed the stairs and made myself some lunch. That was pretty easy — I just reheated the leftover pasta from the day before. I took my lunch and something to drink over to the sofa, sat down and got comfortable, and then turned on the TV. I was asleep before I even got a chance to touch my food or turn on Roku. I woke up about an hour later, reheated my lunch, took a painkiller (because it was time), and settled back on the sofa to have my lunch and watch some TV. And that’s how I spent the rest of my day — watching more television that I normally do in a week. The third time Netflix asked if I was still watching, I decided to go to bed. It was about 8:30 PM.

Fortunately, the pain never really came back. It was just a dull ache when I took three ibuprofen before going to bed. I had the stronger painkillers nearby in case I needed them but I slept straight through until about 3:30 AM. Even then, I had no serious pain. I wasted time on Twitter and Facebook and even worked on a crossword puzzle on my iPad. Then I put it all aside and fell back to sleep — until 8 AM!

This morning, I feel remarkably good. Not tired and not in much pain. In fact, as I write this now at 10 AM, I still have not had any painkillers. I’m pretty surprised about that but also very happy. I do not like to rely on painkillers — or any medicine — for comfort.

So life goes on with the addition of a clunky bandaged splint on the end of my left arm. I have full use of my fingers but feel pain anytime I try to grip something or twist my wrist. So I’ll just try to take it easy with that hand. I had no trouble making coffee or breakfast this morning. Using the dictation built into my Mac computer or my iPhone is making it a lot easier to communicate in writing. So I guess I can say that this really isn’t too much of a hardship. It’s more of an inconvenience.

My next doctor’s appointment is on Monday when they’ll remove the splint and bandages and take a look at the incision site. With luck, everything will be okay and they’ll replace the splint with the same old wrist brace that I’ve been using before. (Note to self: run brace through laundry.) It’ll be nice to not have that lump in my wrist and the occasional painful swelling that went with it.

I should mention that I got this done now, while I’m still relatively young, because I didn’t want it to become an issue as I aged. I refer to this as “body maintenance.” It’s a lot easier to maintain a young body than an old one — just like a car.

Slow-Cooker German Pork with Sauerkraut, Onions, and Apples

A twist on a family recipe…kind of.

My grandfather was German — born in Germany — and trained as a pastry chef. He owned a bakery in New Jersey and ran it with my grandmother until I was about 10 years old, when they retired to a life of leisure in their New Jersey home.

He was also an excellent cook who whipped up the real German dishes I grew up with. One of them was pork with sauerkraut. Years after my grandparents were gone, I got the recipe and whipped up a batch at home, which, if I recall, called for boneless country-style pork ribs. I’ve since lost the recipe and pretty much forgot all about it.

Until my friend Shirley shared a similar recipe on Facebook. That got me thinking about it. She linked to another recipe even more similar to the one I remembered. I decided to make it. I bought the pork. And then I got busy with other things (as usual) and forgot about making it (as usual). Fortunately, I’d put the pork in the freezer and when I was poking around in there thinking about what to make this weekend, I found it and remembered the recipe.

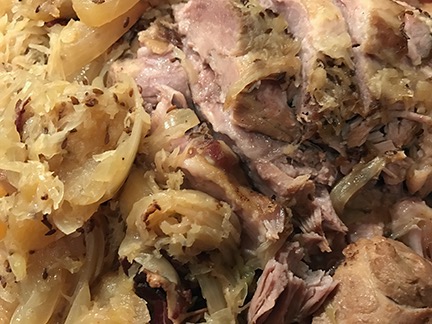
Pork w/Sauerkraut
Here’s a closeup of my version of the finished dish. (Do you really need to see more than one picture?)

Of course, by then I’d lost Shirley’s recipes. Rather than trying to find it on Facebook, I did a Google search, came up with a few recipes that were similar, and zoomed in on one of them. But since that wasn’t really what I wanted to make — I don’t remember potatoes being in the dish — I fine-tuned it to make it into something similar but different.

Following me after all that?

Anyway, here’s my version, which includes instructions specific to an Instant Pot. One of the things that sold me on Instant Pot was that it was a slow cooker, too; no need for multiple devices filling my pantry shelves.

Ingredients:

  • 1 2 to 4 pound boneless pork loin roast. This is not the same as a pork tenderloin. (I’ve said it before and I’ll say it again: do not waste a pork tenderloin in a slow-cooked or pressure-cooked recipe. It is naturally tender and is best grilled.) If there’s any visible fat on the roast, trim it off.
  • Salt and pepper to taste.
  • 2 strips uncooked bacon, chopped. I used buckboard bacon, since that’s what I had.
  • 1 tablespoon brown sugar. I bet you could substitute maple syrup or even honey.
  • 1 14 oz. can sauerkraut. Or whatever “standard” sized can or jar you find. You don’t want the big jar. Don’t drain it!
  • 1 large onion, cut into 1/4 inch wedges. That’s the way I cut them, anyway. I used regular yellow onions, but I suppose you can use any kind of onion you want.
  • 1 large apple, cut into 1/4-1/2 inch wedges. I used a Honeycrisp, because that’s all I had in the house. Silly me. I kept one segment for the cook. Quality control, you know.
  • 2 teaspoons caraway seeds. That’s the one part of the recipe that I definitely do remember, mostly because when I was a kid I hated caraway seeds and my baker grandfather would make me rye bread without it. (Talk about a spoiled kid.)

You know, if you’re really big on starches with your food, you could add potatoes. The original recipe called for 6 white ones, peeled and quartered.

Instructions:

  1. Season the pork with salt and pepper and set aside.
  2. Press Sauté on the Instant Pot and toss in the bacon. Cook it up to release its yummy aroma and fat. (Okay, so if you don’t have an instant pot, you’ll need to do this in a pot on stove.)
  3. Note about browning the meat:
    The recipe I based this (loosely) on instructed cooks to simply put the raw pork into the pot with the other ingredients and cook it. But my understanding is that browning meats helps increase flavor so that’s why I did it here — and nearly always do it in any slow cooker or pressure cooker recipe. I added the bacon merely as a source of tasty fat; you could, I suppose skip the bacon and use some sort of oil instead.

    Add the pork and brown on all sides. This could take a while. Be patient. Try to stir around the bacon so it doesn’t get all burned.

  4. Remove the pork and set it aside again.
  5. Deglaze the pan with about 2 cups of hot water. This means adding the hot water and using a wooden or silicone spoon to rub away the burned bits at the bottom of the pan. Along the way, the water will turn into bacon soup. (At this point, if you’re not using an Instant Pot, you might want to transfer everything in the pot to your slow cooker which you should then turn on high. And remember later, when you’re washing two pots, that Instant Pot users only washed one. Just saying.)
  6. Add the brown sugar and stir it in.
  7. Return the pork to the pan.
  8. If you’re including potatoes, I recommend putting them in the slow cooker around the pork right now.
  9. Add the sauerkraut (with all juices), onions, and apple. Just dump them in right on top of the roast.
  10. Sprinkle the caraway seeds on top.
  11. Cover and bring the mixture to a boil, then press Off. Then press Slow Cooker and adjust the temperature to Low and the Time to 6 hours. (If you’re using a regular slow cooker, you’ll probably need to cover it to get it up to temperature. Once it’s bubbling, turn the temperature down to low.)
  12. Slow cook 6 hours.
  13. Remove the meat from the pot, slice it as thin as you can (against the grain; good luck), and arrange it on a serving plate. Using a slotted spoon, scoop out the rest of the goodies and arrange them around the pork. You can put some of the juices in a milk pitcher or gravy boat for guests who might want to pour it over on their plates.
  14. Serve hot (duh), possibly with some crusty bread. Or rye bread, with or without seeds.

If you try this, please do let me know what you think.

—

—