Two very different summers.
Forgive me readers for I have sinned. It has been nearly three weeks since my last blog post.
All joking aside, I haven’t blogged for two reasons:
- I’ve been very busy. Let’s face it, I’m usually a pretty busy person. If there isn’t something I have to do, I make something to do. (This is a throwback to my crazy divorce days when I was eager to find things to take my mind off my future wasband’s hurtful insanity.) I’m never at a loss for projects to keep me busy.
- I haven’t been inspired. I need a reason to blog. An idea, a thought. Something I read online that I want to respond to. An interesting thing that happened to me. And this summer has been pretty dry in more ways than one.
So I guess you might consider this a blog post that, in part, explains why I haven’t been blogging. And it also fills you in on what I’ve been up to this dry, dry summer.
The Projects
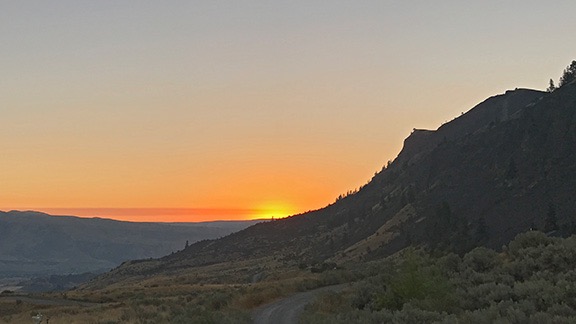
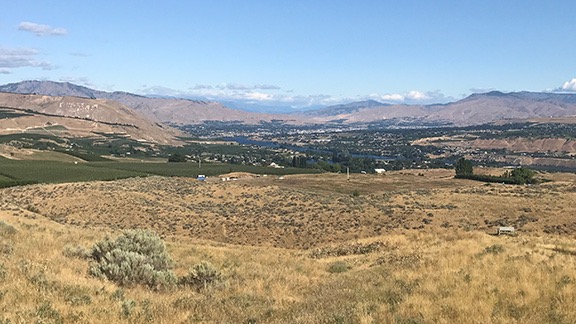
I live on 10 acres of land on a shelf overlooking the Columbia River Valley. I absolutely love it here. I’ve got everything I’ve ever wanted in a home: space, views, privacy, and plenty of land to do whatever I like with. I bought the land back in 2013, the day after my divorce papers came through, and immediately started developing it for my home. The building began in 2014 and I completed my living space — well, enough to move in, anyway — in spring 2015.

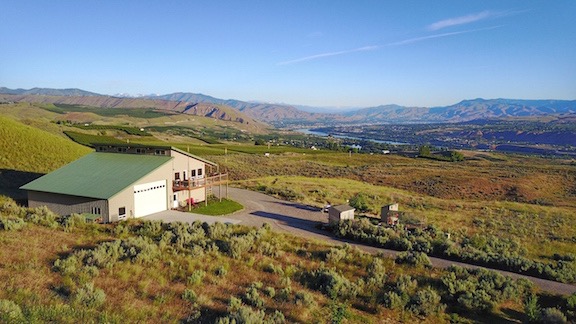
My home sits on a shelf overlooking the Columbia River Valley near Wenatchee, WA. (And yes, this is a drone photo.)
My home isn’t a typical stick-built house. It’s a “pole building” that’s primarily a 2800 square foot garage to store my vehicles and other stuff — which I admittedly have too much of — with a 1200 square foot finished living space on top. I was originally going to build a much smaller garage with a more modest living space and then build a house to go with it, but in the interest of saving time and money, I built just one big building and didn’t skimp on the amenities in my living space. It’s very comfortable for one or two people — although I admit I really do enjoy the utter freedom and flexibility of living alone so I’m unlikely to share my space anytime soon.

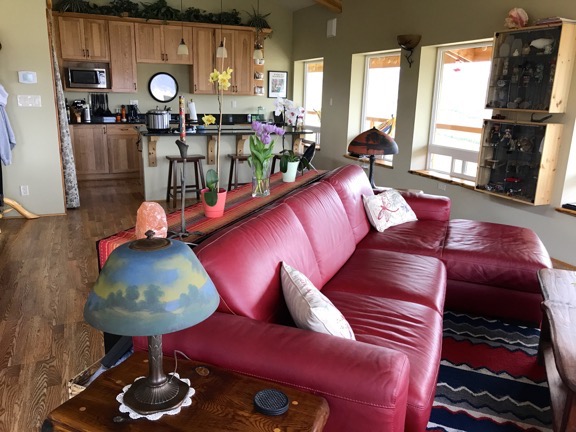
My great room, with windows overlooking that wonderful view.
I did much of the work on the living space myself and I haven’t quite finished. For example, I still have to finish the trim up on the loft and in my bedroom, I still have to finish some tile work around my shower stall, I still have to dress up the stairs a bit, and I really do want to tile the entrance hall. Recently, I decided that instead of using the loft as a guest bedroom, I wanted to move my desk up there and make it my office so I’ve got some furniture moving ahead of me. And yes, I’m still unpacking. I really did pack too much stuff from my old Arizona home.
Other than minor building-related projects, I have the usual chores related to owning a home: mowing the lawn, gardening, making repairs to things that break or just need attention. So far, everything I’ve needed fix has been something I can fix myself, so it’s just a matter of finding the problem, figuring out what needs to be done, and doing it. I have a lot of tools now — I actually have a whole workshop in my garage — so I seldom need to buy or borrow anything to get a job done.
Weed control is a serious concern here; the county requires us to control our noxious weeds. I’ve been at war with the kochia since my very first week as a landowner and I’m definitely winning. This year I’ve started working on the knapweed that seems to have begun appearing since the kochia has been killed off. I also identified and destroyed some tumbleweed, which I absolutely abhor since trying to deal with it at some northern Arizona vacation property years ago. The trick is to cut or pull out these weeds before they go to seed. This year, I also bought my third (and last) weed sprayer, a 15-gallon ATV-mounted tank with a DC pump. Yes, I use various chemicals to spray the weeds along my 1,000+ feet of road frontage and in my driveway. (Lecture me all you want about “natural” mixtures of salt and vinegar, but nothing works quite like Roundup or some of the specialized broadleaf killers they sell at the local farm supply store.)
The Big Projects
I do have two large self-inflicted projects, and they are related.
One is a platform for a 12 x 14 cabin tent that I’ll be setting up for “glamping.” I ordered the tent from the Colorado Yurt Company. Built to my specifications, it should arrive here on Wednesday. It’ll have canvas and screen sides so whoever is staying in it can configure it as they see fit — these days, I’d roll up the canvas on at least three sides and enjoy the views and airflow through the screen. It also has a 12 x 8 foot covered porch. Of course, all this has to be built on a custom platform, which I’ve constructed, with the assistance of two pilot friends, out near my lookout point bench. The whole thing is made from pressure-treated lumber with Trex decking. Assembled with screws, it can be disassembled and moved at any time. (This is actually a good thing since I’ve already decided I want to move it for next year.) It’ll be furnished with a queen bed, night tables, dresser, and table and chairs (on the deck). I can’t wait to sleep in it!

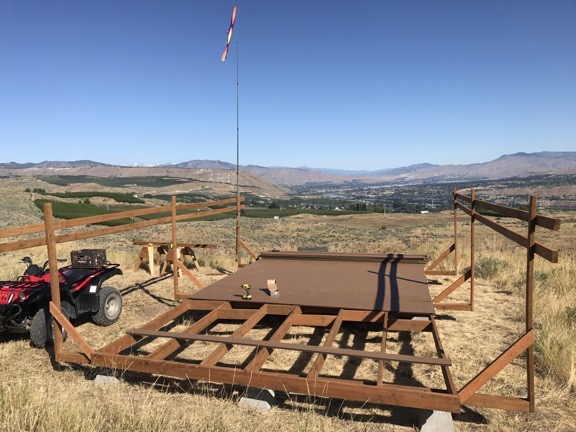
Here’s the platform as it looked last week. The only thing left to do is lay the rest of the Trex and then put up the vertical supports.

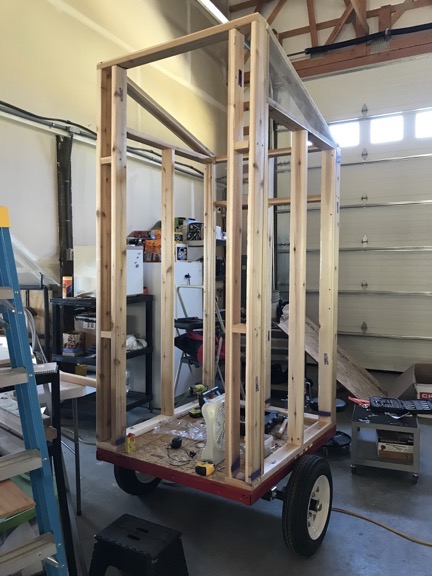
Here’s my portable potty, under construction in my garage. One of the benefits of having a huge garage is being able to do projects like this in relative comfort.
Of course, the one thing the tent doesn’t come with is a bathroom. One option was renting a portable toilet — you know, those blue buildings you see at outdoor events. I’d rented one while my home was under construction — mostly for the builders, since I had my own bathroom in the RV I was living in at the time — and learned that if they give you a newish one and maintain it weekly, it isn’t nasty at all. But it does cost $90/month and I’d have to look at it all summer. And it isn’t quite the experience I want my guests to have. So I cooked up the idea of building a portable bathroom with an RV toilet and holding tank. I got the trailer kit at Harbor Freight, framed out the building on it, and bought a holding tank and RV toilet. I’m about 75% done at this point; I’ll do the plumbing this week, test it, and then put on the walls, door, and roof. I can then put it in position anywhere on my property when needed and tow it back to one of my RV dump ports when I need to. Over the winter, I can drain it and store it in my garage. This is a complex project — mostly because of the plumbing work involved — but I’m enjoying the challenge of making something I cooked up in my head become reality. (Like my home.)
Other Activities
I do occasionally find time to socialize with friends.

Here’s my funny little boat, parked at the dock near Pybus Market in downtown Wenatchee. (Every time I use the boat, I’m reminded of my wasband’s second divorce lawyer, who tried desperately in court to get me to admit that it was worth more than the $1,500 I’d paid for it. He even claimed my wasband would pay me $1,000 for it — which I accepted — but my wasband backed down; he obviously didn’t want it. It’s just an example of the divorce court antics, likely fueled by my wasband’s old whore, that I witnessed back in 2013. I wound up getting the boat in the divorce — it was mine, after all — without having to pay him a penny.)
I’ve had the boat out twice this summer so far. I have to admit that I was surprised that it started so easily on our first outing; I’m terrible about maintaining things I don’t use regularly and the battery was completely dead when I put the charger on it in June. Neither of our outings were interesting; in both cases, I was taking friends out for a ride. We did the usual: motor at full throttle — for a whopping 32 miles per hour — up the river to the Rocky Reach Dam and then drift back for a while on the current. It isn’t much of a boat, but it does get me out on the water and I really do enjoy that. I might take it out to other stretches of the river when cherry season ends and I’m pretty sure I’ll be taking it with me to Arizona this winter; I already bought the hitch extender I need to hook it up behind my truck with the camper on top. I’m really looking forward to getting it on the Colorado River and some of the Salt River lakes near Phoenix.

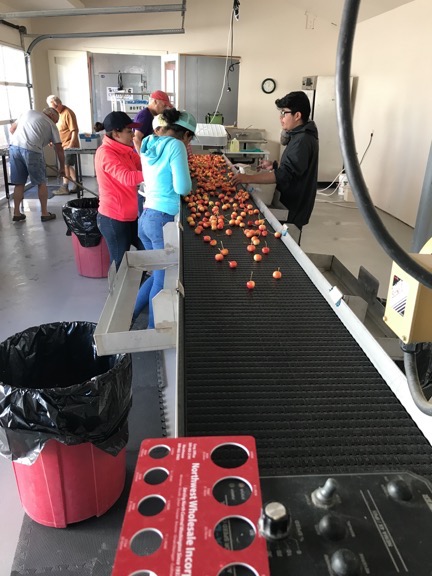
The cherry packing line at my friends’ orchard. It’s actually a lot of fun when you do it with friends and there’s some good music playing.
I also helped some friends pack rainier cherries earlier this month. They have two cherry orchards and have arranged to sell rainier cherries directly to a Seattle area supermarket chain. I worked with about a dozen people to sort and pack cherries over a two-day period. It was a paying job, but I took a 15-pound box of cherries instead of cash. I’ve got about a pound left.
Later that week, my cherry packing friends invited me to join them and and a big group of other friends to watch a production of The Sound of Music at Leavenworth Summer Theater. Not only was their future daughter-in-law playing the lead character, Maria, but it was her birthday. It was nice chatting with cast members after the show. And you really can’t beat a musical production nicely produced outdoors on a warm summer night.
I’ve also done a bit of entertaining, from having a few neighbors over for wine and homemade cheese on the deck to full-blown barbecues where I’ve made my famous smoked ribs. I really enjoy having people over to share my home with them.
The Animals
Of course, some of my time has been taken up with caring for my growing menagerie.
Penny turned 5 — can you believe it? — this year and has become quite the spoiled little mutt, going with me nearly every where I go. She loves to come with me in the helicopter but has learned that when I’m wearing my flight suit, it’s likely to be a very boring long ride over cherry trees so she stays clear when I put it on.
After losing my chickens twice to a neighborhood dog last year, I started a new flock of chickens in March with 18 chicks. I built them a big chicken coop and it has been working out very well. The chickens just started laying about two weeks ago; I’m now getting 6 eggs a day and expect that to go up to about 16. I’ll be selling off most of the hens as layers — there’s actually a decent market for that around here — and keep just 5 or 6. In the meantime, I bought eight more chicks to get them started before winter. My goal is to keep a young flock and keep selling off the layers before they’re a year old. I’ll always have fresh eggs and the money I get from hen sales will cover all my costs.

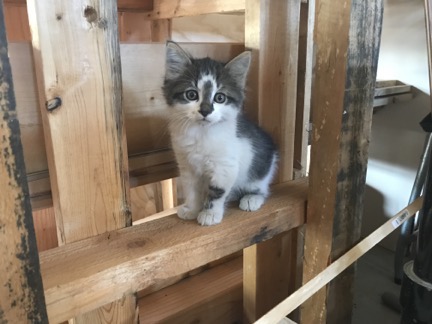
This is Solo, one of my three mousers-in-training.
I also added three kittens to my home. They are mousers-in-training and currently live in the garage. They’ll keep the mouse population down — it’s impossible to keep up in the garage and garden without resorting to poison — which, in turn, should keep the snake population down. (I had to kill a rattler the other day; my first kill since 2014.) I’ve had limited success with feral “barn cats” in the past, but Penny tends to annoy them to the point that they leave. I figured that raising kittens with Penny will prevent them from wanting to run off. It seems to be working so far; she plays with them quite often and one of them really seems to like it. But the youngest of the batch is probably going back to where I got her; she doesn’t seem to understand what the litter box is for and I’m tired of cleaning cat crap off the concrete floor.
And for the folks wondering about the winter when I’m away, the chickens and the cats will be fine. I have a good, reliable housesitter.
As for wildlife, with five hummingbird feeders hanging from my deck, I get lots of hummingbird activity. And the bighorn sheep, which came down from the cliffs daily late last summer, have just started appearing every few days. It’ll be interesting to see if they become a nuisance again.
The Weather
The weather this summer has been absolutely amazing. Day after day of blue skies and temperatures in the 80s and 90s. I don’t even think we topped 100°F this year. While that’s good for the folks who grow cherries and alfalfa or come to the area for vacation, it’s isn’t good for the helicopter pilots who live or travel here to dry cherries. And that would be me.

This is the upcoming forecast for Wenatchee per the National Weather Service. But it could be the forecast for nearly any week over the past month or so. No rain.
My main source of income these days is from my cherry drying work. (Don’t know what that is? Read this old blog post, which explains it. Or watch this video to see me in action.) My business has been growing steadily since around 2011. I now build a team of up to six pilots to cover the hundreds of acres of cherry orchards I have under contract.
This year, my season began on June 1 and will end on August 16. During that time, I’m pretty much stuck in this area, waiting for it to rain. The season got off to a promising start: my team, which consisted of just me and one other pilot in early June, flew a total of about 5 hours. But then the rest of the team began assembling and the skies dried up. None of us have flown in over a month.
Needless to say, my first-year pilots are pretty pissed off about that. But I warned them. When asked how many hours we could expect to fly, I told them the truth: 0 to 40. As I explained to them, if you can’t make it work financially with just the standby pay, you shouldn’t sign up. That might be all you get. And for two of the pilots who have come and gone so far, that’s exactly what they got: standby pay. And at this point, it looks like another two pilots will be in the same boat.
Fortunately for all of us, the standby pay isn’t too shabby. If you can keep your costs down, you can make good money. The smart folks who do this work with me treat their contracts as a sort of paid vacation. With perfect weather and no chance of rain, they can hike, go out on the water, fish, or do any number of local things while getting paid by the day to just hang around with a helicopter parked nearby. But when it rains, they’d better be at their helicopter with their phone handy and ready to fly.
What folks don’t seem to understand is that the weather here can change quickly. This is my tenth summer in the Wenatchee area and I’ve seen days like today where there isn’t any forecasted chance of rain, cloud up steadily. Soon there are isolated thunderstorms dumping rain on orchards. That’s why I can’t leave the area. Even with a forecast like the one shown above, I know that things can change. And I know that if I don’t have a helicopter over an orchard within 15 minutes of a call, I’m going to lose a client.
So yes, I take it very seriously.
I should mention that although this is my worst (so far) cherry drying season, last year was definitely my best. Although it didn’t rain much early in the season, by this time last year it was raining all day for several days in a row. We flew like crazy, sometimes drying the same orchard four or five times in a day. The growers were miserable and I could hear it in their voices when they called. We were doing our best with prompt responses and constant flying, but at a certain point even we couldn’t save the crop. A lot of cherries went unpicked.
But that’s the way it is in agriculture: you get good years and bad years. A good year in cherries is extremely profitable for growers — which is why they grow cherries. A bad year? Well that’s what insurance is for.

The Girl Scout motto is “Be Prepared” and I really do believe it’s a good idea.
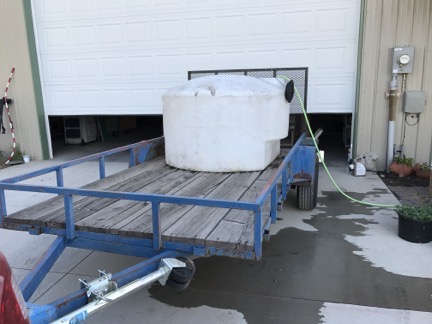
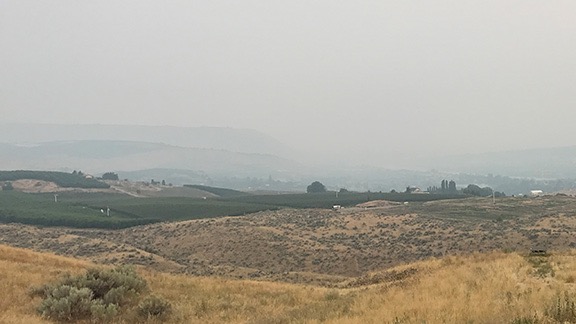
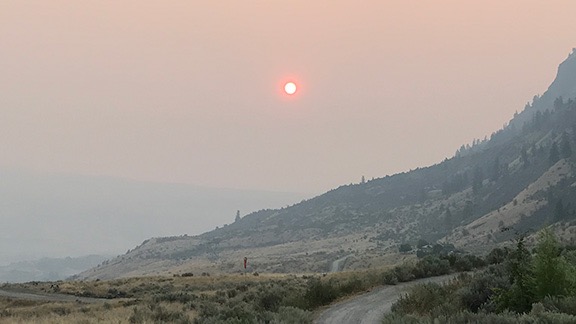
Meanwhile, the dry weather this year has turned the area into a tinderbox. Dry lightning started a fire in the hills beyond the cliffs behind my house back in late June. Although there was no evacuation notice for my road, I admit I got a bit uneasy watching a pair of single engine air tankers on floats scoop up water down on the Columbia River and climb up to drop it just out of sight behind my home. Things got even scarier when they were joined by a pair of Hueys with buckets that dipped in my neighbor’s irrigation pond and climbed up right over my home. Not only did I test my fire suppression system, but I put my 425-gallon portable water tank on a utility trailer I have, filled it with water, and prepared to connect it to a pump and generator as my own private fire department. Then the wind shifted and the fire went elsewhere, burning thousands of acres before they finally put it out. The tank of water is still on the trailer, just in case I need it. I’d be pretty pissed off if a fire took out my new tent platform.
Vacation Plans
Fortunately, my season will end right before the eclipse. Like last year, I’ll have my camper on my truck, all packed and ready to go when that last day rolls along. Then I’ll be off for my first vacation.
This year, I’m heading south to a remote area of Oregon where I hope to watch the eclipse from the shores of a small lake. Then I’ll make a leisurely drive back home, stopping in Walla Walla for some wine tasting and Palouse Falls for some night photography. I’ll be back in Wenatchee in time for a charter flight booked months ago.
Other trips planned:
- Five or so days with a friend at his place on Lopez Island. We’re still sitting on the fence on whether I should fly us out there in the helicopter or drive. (Guess which way I’m leaning?)
- A weekend-long mushroom foray with the Puget Sound Mycological Society near Mount Rainier. I’ll be taking my camper this year so I can camp out in the national forest before or after the event. Or both.
- A trip back east for the fall colors in Vermont, a visit with my brother in New Jersey, and a museum visit in Washington DC. This one is tentative; I’d really be cramming it in between charter flights and events and am not sure I want the stress of making such a long trip with so much on my plate at home.
Three Weeks Left
In the meantime, I’m stuck at home, keeping very busy, waiting for my season to end, praying for some rain. It doesn’t seem likely.
Anyone who thought I was nuts for leaving Arizona for “wet, wet Washington” should get an idea of the reality here: our summers can be even drier than Arizona’s.


 The
The 