How to Make Everyone Think You’re a Great Photographer

For most folks, it’s pretty easy.
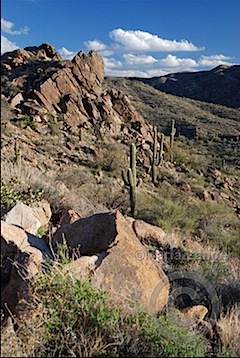
Off Constellation RoadI’m often told that I’m a great photographer. While I don’t usually correct the person handing out the complement — hey, everyone likes to have their ego stroked once in a while — I have to admit here that it’s simply not true.

The real truth is, I can occasionally make a great photograph.

What Makes a Great Photographer?

There’s a difference, at least in my mind. A great photographer can consistently make great photographs. He often goes out with his equipment with an idea in his mind of what he wants to achieve. He considers location, lighting, composition, and camera settings. He takes full advantage of his equipment, no matter what it is, to help him achieve great results. Consistently. His worst photos may be about the same quality as my best.

I, on the other hand, try to do all of these things. I don’t usually succeed. I’m limited by my experience, my capabilities, and my equipment. It’s experience that helps you know when the light is just right and how to set your camera for the shot. It’s capabilities that make it possible to use all the tools on the camera to make the shot as good as it can be. Its equipment that ultimately determines whether the shot is composed properly (think lens focal length) and in good focus (think lens quality).

I’m also limited by my willingness to sit in one place for hours, waiting for the light to get just right. Or my willingness to hike that extra two miles to get into the perfect position to frame the shot. Or my willingness to face the cold or heat or strong winds. Or my simple willingness to carry a tripod when the light seems “bright enough” or that extra lens I probably should have with me. (I’m working on getting over all of these personal limitations, but it ain’t easy.)

In the end, I get mixed results. Some of my shots are really good and make me really happy. Others are crap. The rest fall in between. The fact that there’s no consistency is what keeps me from being a great photographer.

And I’m okay with that. I’ll keep trying and, hopefully, get better. But I don’t think I’ll ever be great. I’m okay with that, too.

How to Make People Think You’re a Great Photographer

So why is it that so many people tell me I’m a great photographer? Here’s my trick: I only show off my best photos.

Yellow-headed BlackbirdToo many people share too many of their photos. You know the folks I’m talking about. They go out with their camera and take 50 shots at the zoo. They then dump all (or almost all) of them on Flickr or some other photo sharing site. You go through them and are overwhelmed by the mediocrity. The great head shot of the giraffe munching a leaf is lost in the shuffle of poorly framed images of zebras and ostriches. The interesting image of the rhino’s sleeping face is buried among out-of-focus or poorly exposed images of monkeys and lions. You get bored after the first ten shots and may not browse any further to see the buried gems.

Digital cameras turned everyone into photographers and services like Flickr make it too easy to put photos online. Too many people think they need to share all of their photos. As if every shutter snap is the creation of a great work of art.

It isn’t.

Don’t Share Your Crappy Photos

There’s a lot of crap out there. It’s easy to distinguish yourself from other photographers. Simply share only your best images.

Be honest with yourself. Put one photo against another and keep the best one. Then do the same repeatedly to pare down the 50 zoo shots to three or four.

If necessary, get feedback from others — and I don’t mean the bullshit “great shot!” comments from fellow Flickr users who are fishing for reciprocal comments and “friends.” I’m talking about feedback from people who know good photos when they see them and are not afraid to tell you.

Don’t believe me? Try it and see for yourself. Weed out the crap you’re sharing on Flickr (or other online photo sharing sites) so only your best remain. Then see what people say about you, as a photographer. I think you’ll be pleased.

Why I’m Watermarking All of My “Good” Photos

And why other serious photographers should, too.

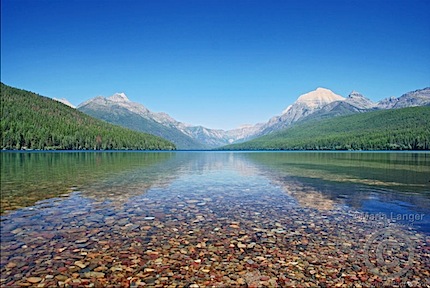
Bowman Lake
This photo of Bowman Lake at Glacier National Park appears in my photo gallery, Flying M Photos.

The watermark / copyright notice argument goes back and forth all the time.

On one side are the bloggers and readers of Web content who have created and seen more crap online than the rest of the human race combined. These people claim that copyright notices on photos are tacky and make the photos look ugly. They go on to say — and there is definitely some truth to this — that the average photo on the Web is so poor in quality that the photographer has no need to worry about it being stolen.

On the other side are the serious — or possibly professional — photographers who want to show off their work online but protect it from theft. These people are tired of seeing the results of their hard work and investment in costly equipment appearing on someone else’s Flickr account or in blog posts. Or, as in my case, in an e-mail postcard sent to me.

Why People Steal Photographs and other Web Content

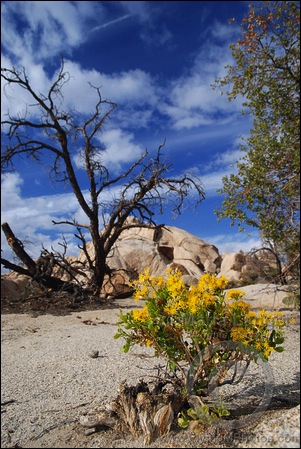
Joshua Tree Bouquet
I clearly recall lying on my stomach on cold rock to get the right angle for this shot. Photographed at Joshua Tree National Park.

There are two reasons why people steal photographs and other content they find on the Web:

  • They mistakenly believe that anything that appears on the Web is in the public domain. This is not true. Most Web content is protected by the same copyright law as the most recent Dan Brown masterpiece of fiction (yes, I’m being sarcastic) or Black Eyed Peas single (do they still call them that?) or Pixar animated feature film. When these people honestly don’t know any better, they’re making an honest mistake. But when they’re told they’re infringing someone’s copyright and they refuse to believe it, they’re being downright stupid and putting themselves in the next group of people.
  • They simply don’t care about the rights of content creators. These people know that what they’re doing is wrong but they simply don’t care. Perhaps they think they’ll get away with it. Or that since everyone does it, the content creator won’t bother trying to stop them. They’re wrong. Many bloggers, photographers, and other content creators actively pursue copyright infringers — and win in court.

I follow many photographers on Twitter and have seen more than one of them complain about their work being used elsewhere without their permission. In many cases, a bunch of us will “gang up” on a copyright infringer to attack him/her for his actions in blog or photo comments. This usually gets some kind of result. A properly prepared DMCA Takedown Notice usually does a better job.

Just Say No to Flickr

In one blatant case I recall on Flickr, a woman was stealing photos from photographers all over the Web and passing them off as her own. If she really had such a huge, diverse library of quality photos, she’d be famous. But all she had was a big, diverse collection of quality photos she’d stolen from other photographers, removing any copyright notices she found along the way. It was quite easy to convince the powers that be at Flickr that she was a thief. Flickr closed down her account. Has she learned her lesson? Who knows?

The worst thing about Flickr is that if someone steals a photo and puts it on his/her Flickr account under a Creative Comments Attribution License, anyone else is free to use the image if they give the Flickr user credit. That means that not only is he/she making a photographer’s work “legal” to reproduce, but he/she will get credit instead of the photographer!

As you can imagine, I don’t use Flickr. It simply makes content theft too easy.

Why I’m Watermarking

I’ll be the first to agree that watermarking photos — putting a visible copyright notice on the face of a photo — can be downright ugly. Depending on how it’s done, it can really detract from the aesthetics of the photograph as a whole. That’s why I’ve avoided them for so long.

But the other day, I got an e-mail from one of Flying M Air‘s aerial photography clients. He’d given me permission to include some of his images on Flying M Air’s Client Photos page (since removed). Flying M Air has an unusual photo format. Each photo is brought into Photoshop, given a yellow background, white border, and drop shadow. It’s then tilted 2° or 3° to give it the feel of a photo album. I purposely use small images, not only to offer more room for text but to make the photos less useful to a thief. Unfortunately, one of his photos had been stolen and it appeared in a Flickr photo stream. The photographer was certain it had come from my site. He said that he’d given me permission to reproduce them, but only if I watermarked them. (I honestly don’t remember the watermark requirement.) To avoid problems in the future, I simply removed his photos from my site. If he experiences any more theft, it won’t come from me.

But the whole thing got me thinking. Here was a professional photographer whose work was being lifted from a third party site and being displayed on yet another site. He’d relied on me to watermark his work. Wouldn’t it have been better if he simply watermarked it himself?

And wouldn’t it be better if I simply watermarked my best work myself?

You might be asking why: what’s the purpose?

The purpose is education. While a watermark probably won’t deter a content thief who simply doesn’t care that he’s stealing from me, it might educate the person who thinks all content on the Web is free to take and use as desired. Or it might protect my work from the person who thinks that only those photos with a copyright notice are protected.

My client issued a takedown notice to the person who stole his photo from my site. The photo was immediately removed. I like to think that the person who stole it simply didn’t know any better. Now he does.

Zenfolio

I should mention here that in addition to my photoblog, I also maintain a library of images at a custom Zenfolio site. Zenfolio is a photo sharing site that offers a number of features a service like Flickr doesn’t offer. For example:

  • I can have my own domain name (www.FlyingMPhotos.com).
  • I can sell photos using format I specify — and actually profit from a sale.
  • I can create custom watermarks that are automatically placed on each image for display.
  • I can limit the sizes of photos that can be displayed.
  • I can customize the appearance of my photo gallery pages.

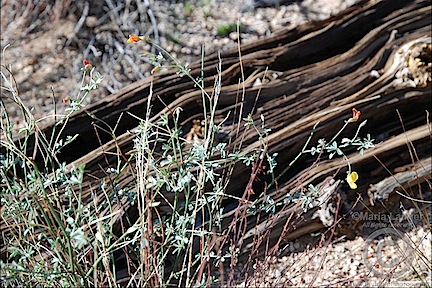
Wildflowers
I photographed these wildflowers near a mine site last February.

The list goes on and on.

Yes, I do pay an annual fee for this service. But I think it’s worth $100 a year to have control over how my photos are displayed and offered for sale. And I like the fact that my Zenfolio portfolio is completely separate from all others. On services like Flickr and Red Bubble (which I used to use), your photos are simply part of a much larger portfolio of diverse and often quality-challenged work. People who visit my portfolio aren’t exposed to that — unless they want to be.

I like the way Zenfolio places watermarks on images. They’re visible yet don’t need to jump out of the photo at you. I chose the same method for my photo blog; you can see it on all the images on this post. I used Photoshop to create the notice, applied an Emboss filter, saved it as a PNG with transparent background, and then applied it to photos with 20% to 50% opacity. Done.

What Do You Think?

I’d be very interested in hearing what other serious and professional photographers think about watermarking images. I’d also like to see examples of what photographers think are successfully applied watermarks. Use the comments link or form for this post to share your thoughts, horror stories, and links to one or two of your watermarked images.

I’m not interested in hearing from Internet trolls who want to criticize concerned photographers for wanting to protect their work. Or people who want to argue that Internet content is not copyrighted — get with the program already, folks.

Photoshop Sign Removal

I had to try it.

BEFORE

This photo of San Xavier Mission is somewhat marred by three signs. (The third is very small and hard to see in this size.)

While at Saturday’s San Xavier Mission shoot, I commented to the other photographers about how unsightly some of the signs on the outside of the building were. (Whenever possible, I’d actually moved portable signs before pressing the shutter release.) All of the photographers I was with at the time agreed, but one of them went on to complain that they were a pain in the neck to remove in Photoshop. When I asked whether he actually did that, he replied that he always used Photoshop to remove signs he didn’t want in his photos.

Of course, I knew this was possible and, in all honesty, I’ve done my share of Photoshop editing. Still, I was amazed that someone would go to all that trouble to remove elements photograph of a photograph in post processing.

You see, I’m a bit of a “purist.” I believe that a photograph should be created in the camera. The photographer should photograph what’s there, carefully framing the shot to create his image of what’s in front of him. Creativity comes with exposure, depth of field, composition, choice of lens, point of view. What the camera records on digital media — or film, for that matter — is the photograph. Editing beyond the removal of specks and scratches or minor adjustments to exposure or color balance is — to me at least — not photography. It’s image editing.

You could argue that a real “purist” wouldn’t edit at all. I’d have to agree with you. I didn’t say I was an absolute purist — although I’d love to be one. My photos, unfortunately, sometimes need a little help. Like most other photographers these days, I turn to Photoshop or another image editing application to get that help.

I think the difference is how much help I get from Photoshop. I draw a line before a lot of other people do. Maybe it shows — for good or bad — in my photos. I don’t know. But I’d rather get it “right” in the camera than “fix it” in Photoshop.

AFTER

After a little sign removal. The photo certainly looks cleaner, but is it a true representation of what I saw?

But after the shoot, when I went back to my camper to relax for the afternoon, I started wondering what kind of difference sign removal would make and how well I could pull it off. So starting with the photo you see above, I used the brush and clone tools to remove the three signs that were visible. You can see the end result here.

I’m not sure how this would hold up if printed as a large photo. I’m confident that the closest sign, which appeared on a stucco wall, was neatly removed. The far sign was too small to be noticeable in the first place. But that middle sign…well, who knows?

Would I do this all the time? No way. I’d rather find creative ways to keep the signs out of the shot in the first place.

What do you think? Use the Comments link or form to share your views.

Photo Shoot at San Xavier Mission

A nice excuse to visit Tucson.

This past weekend, Mike and I took the camper down to Tucson, parked it at Gilbert Ray Campground (highly recommended) on the west side of the city, and joined the members of Arizona West Shutterbugs for a photo outing at the San Xavier del Bac Mission just off I-19 south of Tucson.

I’ll likely blog about the rest of the trip another time; for now I wanted to share some information about the photo shoot, as well as a few photos.

We were scheduled to meet the group at 7:30 AM at the mission. We’d spent the night nearby, so we were less than a half hour away when we started down there. We arrived at about 7:10; less than 15 minutes before sunrise.

The place was almost deserted. A few members of our group had arrived and were parked off to one side. We parked in the back of the parking lot so as not to block anyone else’s long shot of the mission.

It’s not my purpose to tell you about the mission. You can learn about it on the San Xavier del Bac Mission Web site or Wikipedia. So please don’t criticize me for being short on facts here. I’m typing this in a camper and have to literally dial-up (via my cell phone and Bluetooth) to go online and check facts.

Candles at San Xavier MissionIt was cloudy to the east when we arrived, so sunrise was pretty much a non-event. Although I did take some photos of the front of the building in first sun (or what we had of it), I detoured to a small shrine-like building on the west side of the main church building. My friend, photographer Ann Torrence, had suggested this. I took a number of photos of the multitude of statues in candlelight before light started creeping in through the door behind me. The one here was shot with one of the 10mm lenses we rented from BorrowLenses.com.

Only a few minutes later, a pickup truck backed up to the front of the church gates. There was a blue coffin in the back. A man set up a coffin dolly and several others carried the coffin over to it. People started assembling in front of the church. Any photographer present stopped taking photos in respect for the family and friends of the deceased. A priest in traditional Catholic priest garb came out. He spoke with the family, then stood in the doorway of the church and began the service. The sound of his voice echoed in the building behind him and for a while, I thought it was a trick of the acoustics. I later discovered that he was wearing a wireless microphone. So much for construction design miracles.

The service lasted about an hour. During that time, the rest of the photographers arrived and we swarmed all around the outside of the church, snapping photos just about everywhere. There were about a dozen of us. Most of us had tripods and digital SLRs, but there were a few folks shooting without tripods or with less sophisticated camera equipment. I’d come fully prepared with a tripod, my Nikon D80, and four lenses: 10.5mm fisheye, 10-24mm, 16-85mm, and 70-300mm. I mostly used the 10-24mm rented lens and my usual 16-85mm lens.

Virgin Mary at San Xavier MissionWhen the funeral ended, we paused as the blue coffin was loaded into the back of a Cadillac Escalade hearse — which I didn’t even know existed. As the mourners departed, the photographers swarmed into the church.

The mission is beautiful in a weird old Spanish/Native American way. It’s amazingly colorful and ornate, with dozens of statues of saints and angels. Spotlights are strategically placed to bring certain statues to life. Don’t get me wrong: you’ll need a tripod (recommended) or flash (not recommended) to get good photos in there — it’s mostly pretty dark. But with the right exposure, you can get some stunning images.

Altar at San Xavier MissionThe main altar area, which is shown here, is a crazy ornate masterpiece of southwestern art. Having grown up Catholic, I can’t imagine sitting through a mass amid such decorations. Yet the church is active and has mass daily. (No photography allowed during church services.)
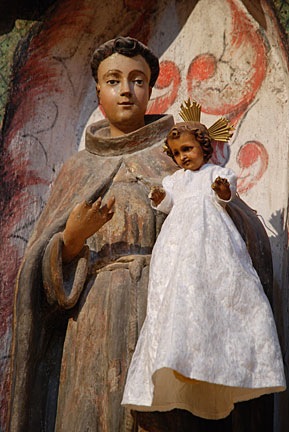
St. Anthony at San Xavier MissionThere are also candles all over the place. The sale of candles is probably the church’s biggest fund-raiser. They’re not expensive — only $3 each — and they’re quite beautiful when lined up in racks near statues. I bought one in memory of my grandmother. I’m not religious, but she was. She would have liked the place, so I bought a candle and put in in front of Saint Anthony (or “S. Antonio,” as the label at the bottom of the statue said). My grandmother used to have a Saint Anthony statue in the guest room — my mother has it now — so Saint Anthony statues remind me of her.

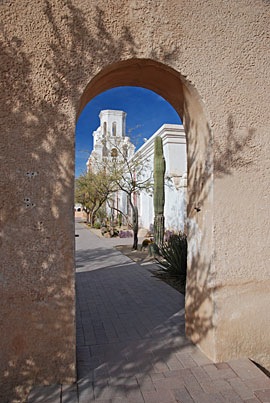
San Xavier MissionBy the time we were finished inside, the sun was out and the sky was nearly clear. I shot this photo of the front of the mission, after waiting about 10 minutes for various tourists to meander in and out of my composition. This was shot at f/16 with a polarizer to enhance the color of the sky. There’s definitely some distortion in this shot, but I rather like it. It’ll probably end up in my photo blog.

San Xavier Mission PewsI also got a little creative, working with various elements inside and outside the main building. These two photos are examples. The first is of the backs of the church pews. They’re simple carved wood with this unusual scalloped edge. It was sad to see that more than a few people had carved words into the backs of them.

San Xavier Mission Wall DetailThis shot is a closeup of a scroll design in the stucco finish of a wall outside. I like textures and try to experiment with them in my photography. Although not very interesting, this is a good example.

These are only a few of the 100 or so photos (not including bracketed exposures) I shot at the mission. I’d like to go back and try for a sunrise shoot again.

If you plan to go, here’s some advice:

  • Bring a tripod. You’ll need one if you plan to shoot indoors.
  • Leave your flash at home. All it will do is make ugly shadows behind the statues.
  • Don’t plan on photographing any kind of church service inside the mission. It felt good when the priest came into the church a half hour after the funeral was over and thanked us for respecting the privacy of the mourners and waiting until they were gone before shooting. And there are signs outside that warn against any kind of photography during mass.
  • Go early. The earlier you go, the fewer people will be there to wander through your shots. And with a good sunrise, the front of the mission building would likely glow in that early morning light.
  • Go everywhere you can. There are lots of public areas. Explore them.
  • Leave behind a donation — or buy a candle in memory of a loved one. Entrance to the mission is free, but it’s certainly worth your support.

A Quick Look through the 10-24mm Nikon Lens

So far, so good.

Yesterday, the two lenses I rented from BorrowLenses.com arrived. This morning, Mike, @AnnTorrence, and I headed out for an early morning photo shoot to get a feel for them.

Nikon 10-24mm lensIt might seem odd, but I rented two almost identical lenses: the Nikon 10-24mm f/3.5-4.5G AF-S DX ED (shown here) and the Sigma 10-20mm f/4-5.6 EX DC HSM for Nikon. Lately, I’ve been enjoying the challenge of wide angle photography and want the ability to get up close and personal with my subject matter while still fitting much of it in the frame. I like the oddness introduced by a wide angle lens — the way a wide angle photo makes you look closer to see what’s not quite right. I’ve had a lot of fun over the past two years with my 10.5mm f/2.8G ED AF DX Fisheye Nikkor Lens, but that introduces too much distortion. The photos I take with that lens look downright weird. I want a lens without that much distortion that still has the ability to frame big landscape backdrops to my foreground subjects.

This could be just a stage I’m going through, but I feel a need to explore it fully to see where it takes me as a photographer.

I want to buy the Nikon 10-24mm lens. I wanted to buy it before I rented it. It has the kind of range I’m looking for to complement the 16-85mm f/3.5-5.6G AF-S DX ED VR Nikkor lens I keep on my camera most of the time. But it’s a costly lens and it wasn’t readily available from my first choice supplier. With an upcoming photo shoot, I figured renting it was a good alternative. And since my husband would also be shooting with his Nikon, it made sense to rent the Sigma so we could compare that lower-cost alternative.

The photo shoot is in Tucson, at the San Xavier Mission. About 15 members of the Arizona West Shutterbugs “Meetup” Group will be gathering there on Saturday to shoot the mission and then head into Tucson for a museum with an Ansel Adams exhibit. I’m looking forward to trying the lenses at the mission, although I am a bit concerned that my up-front-and-personal approach might put me in front of the other shooter’s lenses. I hope not. If the group shoot turns out to be a bust but the location has potential, I’ll likely return on a weekday when there will be fewer people around.

This morning, we headed out before dawn to nearby Rancho de los Caballeros, a local guest ranch. At night, their horses — all 93 of them — are kept in a big fenced in area at the south end of the property. At about 7:30 AM, the wranglers herd them all into a smaller enclosure closer to the ranch’s main buildings. They return the horses to their nighttime enclosure at around 5 PM. This movement is referred to as the “running of the horses” (even though they don’t actually run the entire mile or so). I thought it would be interesting for Ann and she did seem to enjoy it, although I don’t think any of us got any good photos. (I’ll try again another morning, perhaps from a different vantage point.)

Vulture Peak Near Wickenburg, AZ

The east side of Vulture Peak, shot at 10mm with the Nikon 10-24mm lens.

Afterwards, I took us all by Jeep down a few of the more rugged Jeep roads on the east side of Vulture Peak. The light was still good, at least for a while. We all made lots of photos from the two or three places I stopped and we got out. Then the light got too harsh and we headed back to my house.

Mike and I each tried each of the 10-24mm lenses. Mike thinks the Nikon may be better, although we really don’t have a good test yet. He’s in love with the lens and it’s very likely that we’ll buy one. But not yet. We still have 6 days with these rentals and we plan to shoot a lot of photos.