
Jumping the gun a bit, but I deserve it.
Last night, I slept in my new bedroom in my new home.
It was a non-event. My home isn’t done yet — although it’s almost ready for final inspection. Other than my desk, file cabinet, dining room tables and chairs, and an Ikea easy chair by a window that I nicknamed “the throne,” none of my furniture has been moved up from its corner of my shop yet. I was going to have the furniture moved up, but I still have the trim to do in every room and it would just be in the way. And I think it might get in the inspector’s way, too.
Living in Two Spaces
When the kitchen neared completion late last week and I moved my coffee maker upstairs, I began thinking about how odd it was to roll out of bed in my RV and go upstairs to start my day. Why not just sleep upstairs? I could easily move the RV’s queen sized air mattress, which normally hides inside the sofa, up to my bedroom and inflate it. I had a second set of sheets and another comforter. So I could keep my bed in the RV — which, in all honesty, is very comfortable with its memory foam topper — all made up so I wouldn’t be actually living in my new space yet. I’d be a sort of guest up there.
I thought about it for a few days but didn’t act. My bed in the RV is very comfortable and, for some reason, after two years of calling the RV my “home,” I felt odd about abandoning it.
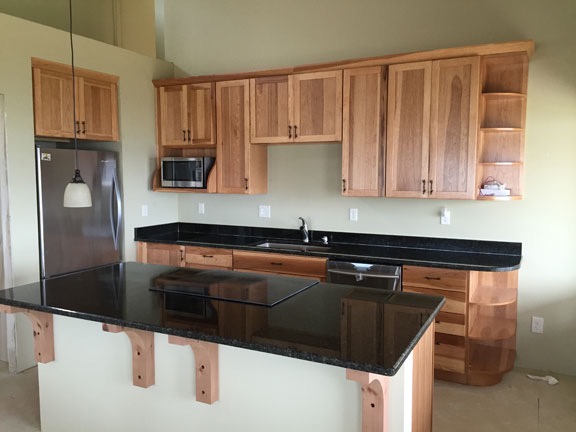
But yesterday was a big day here. That’s when the plumbers showed up to hook up the kitchen sink, dishwasher, shower head, and front yard hose spigot. They were here for just two hours and when they left, I had a working sink and dishwasher. Other than the floor and trim, my kitchen was done. I celebrated by washing the frying pan I’d used to make my breakfast earlier in the day.
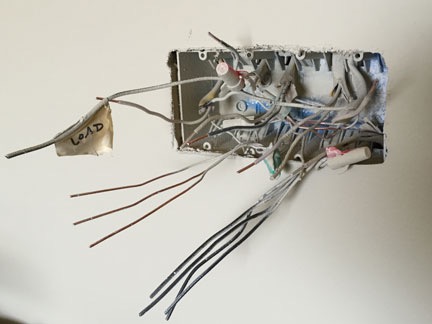
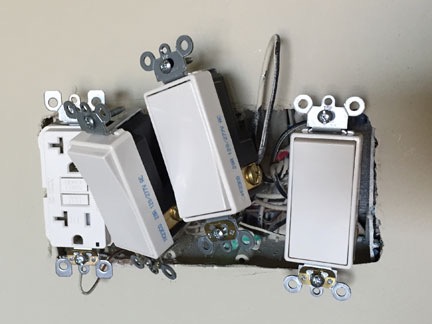
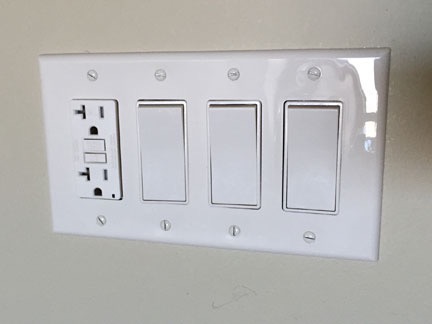
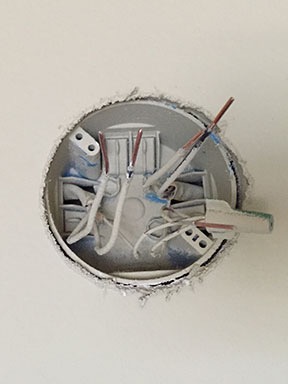
Later, my electrician friend Tom came by to help me with some electrical troubleshooting. I was having trouble with the GFCI-protected outlets in the bathroom and my entire bedroom circuit. And the three-way switches I’d wired exactly the way the electrical book showed me weren’t working exactly the way they should. The bathroom circuit problem was a loose wire, which Tom fixed. The bedroom circuit problem was a cross-wiring issue that I figured out on my own and we fixed together. The three-way switch problem — well, we’ll revisit that next week. Our afternoon beer break had turned into a Pendleton break and although we were enjoying ourselves, further cognitive efforts were unsuccessful. (Note to self: Buy more Pendleton.)
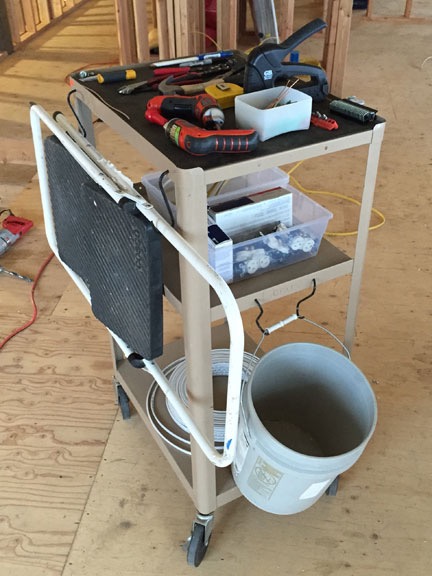
I saw Tom off, gathered together my electrical tools again, and worked on the blog post I’d been writing when he arrived. (It’ll appear tomorrow instead of today.) I had a bite to eat while I was working and found myself feeling sleepy — which is no surprise, given that Pendleton break a few hours before. I didn’t want to relax on the throne or in the RV. I wanted to stretch out upstairs somewhere, possibly with a book.
Sleeping On Air
I thought about that air mattress again and went down to fetch it. 30 minutes later, I was stretched out on top of a fully made air mattress on my bedroom floor, watching The Daily Show on my iPad. Penny was curled up in her bed on my bed.
I’d positioned the bed exactly where my real bed will go when it’s moved up so I’d get a real feel for how sleeping in my bedroom would be. Of course, I was about 8 inches off the floor; my bed would put me about 3 feet off the floor. So although I could see out the windows and door to the deck, I really couldn’t see down into the valley. That was okay. I could wait for that.

“Guest bed” accommodations in my new bedroom.
Outside, the wind howled. I fell asleep, as I often do when watching the Daily Show these days — what’s up with that? When I woke up, it was after 7 PM and the sun was setting. The room was cooling down — time to get the heat going.
I felt lazy. I have a ton of work to do — including putting up the rails around the edge of my loft and doing a few other tasks that are required before final inspection — but I just felt like taking it easy. It seems that I work in spurts these days, getting a ton done in a very short period of time and then sort of resting with a few odd jobs until the next spurt comes along. Yesterday, after the plumbers left, I’d installed my over-cabinet lighting in the kitchen and urethaned the trim for my pantry. Odd jobs. I need another spurt.
Anyway, by 9 PM I was back in the bedroom, in one of the oversized henley t-shirts I often wear to bed, reading. By 9:10 PM, I was asleep.
I slept well, waking only once for a trip to the bathroom. I learned that the heat makes a quiet whistling sound that’s probably got to do with the filter in the return air duct. (Adjustment needed.) I learned that my motion-sensitive lights in front of the garage doors are very sensitive and don’t stay on very long. (Adjustments needed.) I learned that the glow of the city’s lights keep my bedroom from getting completely dark — but it’s not nearly as bright as the ambient night light in Phoenix, which required blackout blinds in the condo. (No adjustment needed.)
And quiet. So very quiet.
Another First Night
When I woke in the early hours of the morning, I found myself thinking of first nights in other places I’d lived. I realized that I only remembered one of them: the first night in my New Jersey house.
It was January 1986 and my future wasband and I had fallen in love with an odd little house on a tree-lined street in Harrington Park. The house, which had been built in 1926, was made entirely of poured concrete: walls, floors, ceilings. It was on a narrow suburban lot that backed against a train track. We’d been assured that the train came by very seldom and rarely at night.
The two of us were sleeping on our old mattress on the floor in the bedroom — the new bedroom set my grandmother had bought us had not yet arrived — when a train came by in the middle of the night. With the house positioned between two crossings, the horn would always blast abeam us. I nearly jumped out of my skin. What the hell did we buy?
It couldn’t have been that bad, though. We lived there 11 years.
The only thing last night had in common with that night nearly 30 years ago is the mattress on the floor. My new home is comfortable and quiet. Although I can occasionally hear a passing train down in the valley two miles away, it’s never loud enough to wake me out of a sound sleep. And rather than a tiny yard and canopy of bare trees overhead, I have ten acres of land and a view of the valley, river, city, and mountains that stretches for miles.
I’ve come a long way.
Without a train screaming by in the middle of the night, will I remember last night? Well, thanks to this blog post, I will.
It Only Gets Better
As my construction project winds down, things in my new home only get better.
Yesterday, I loaded my new dishwasher with a mixture of dishes from my RV and my old home. (Have I mentioned how weird it is to have my old dishes, pots, pans, and kitchen linens in my new home? Weird but wonderful — I really like the stuff I had in Arizona and am so glad I packed it.) I cook meals on my new stove, oven, and microwave and store food in my new fridge. I soak in my wonderful new bathtub. I sit at my computer at my old desk to write blog posts or do my bills or shop or keep in touch with friends on Twitter and Facebook. Soon, I’ll be lounging on my old red leather sofa, watching my old flat screen TV, and sleeping on my old bed — all in my new space.
It’s been a lot of hard work and so worth the effort. Best of all, I’m almost done.


 When I couldn’t find a cheap replacement for the battery charger, I simply bought the same drill, which came with a new charger.