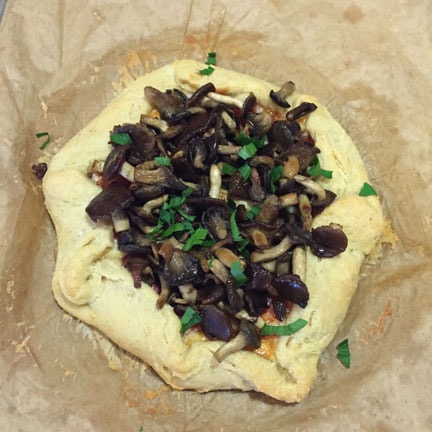
Beef Barley Soup

Skip the mushrooms!

Freezer full of meat
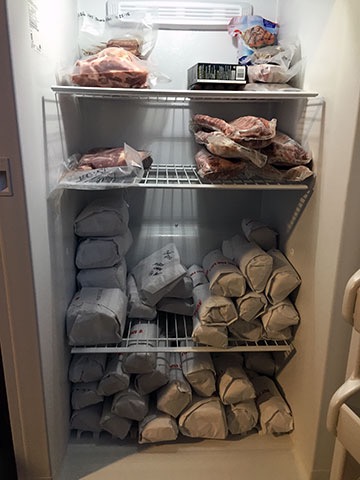
Here’s what 100 pounds of beef looks like in a mid-sized upright freezer. The other meat I’ve been storing is on upper shelves. The doors are filled with plastic containers of homemade heat-and-eat meals.

Yesterday, I took delivery of 100 pounds of grass fed, locally raised beef. This “1/4 cow” came butchered, wrapped, and frozen solid. Although I already had a chest freezer I’d brought with me from my Arizona home, I bought another freezer primarily to store this meat. It just about filled the bottom two shelves.

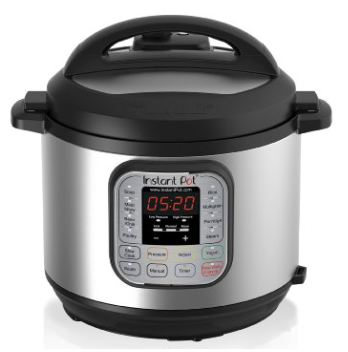
(I should mention here that our local supermarkets often put “expiring” meat on sale for 30% to 50% off. I can’t tell you how many amazing deals I’ve gotten on normally very pricey meats just because their last date of sale is that day or the next. One day I scooped up four racks of lamb for about $7 each and a large boneless leg of lamb — which was great in a Moroccan lamb dish — for about $10. Last week, Safeway had a sale on baby back ribs that were still frozen: $2.99/pound instead of the normal $4.99. I bought four racks for smoking on my Traeger. Having a big freezer makes it possible to take advantage of these deals as they come up. And when you consider how much I’ve been using my new Instant Pot lately, I don’t expect to have any trouble keeping that freezer full of meat or homemade heat-and-eat meals.)

I had some control over what I’d get in my beef package — basically a menu where I could choose a certain number of cuts in certain categories. In addition to a bunch of steaks cut from all over the place and a lot of ground beef, I also got short ribs, roasts, a very large brisket, and stew meat.

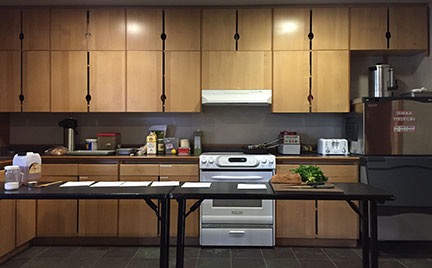
With a winter storm coming, I figured that some comfort food was in order. So when I went down into town to run errands and pick up the beef, I stopped at the supermarket for the few ingredients I needed to make beef barley soup.

I found the recipe on MyRecipes.com. I chose it over other recipes I found online primarily because it looked so hearty in the photo and wasn’t tomato-based. Although I made the recipe pretty much as it was written, I wasn’t satisfied with the results. The reason: mushrooms. In my opinion, mushrooms ruin the flavor of this soup.

So here’s my new take on this recipe.

Ingredients:

  • 1 tablespoon olive oil. The original recipe called for cooking spray. But why not use a little olive oil instead?
  • 1 to 1-1/2 pounds stew meat, trimmed and cut into 1/2- to 1-inch pieces. You can make it with less meat, but if you have more, use it. It’ll make a heartier soup. The beef I got was amazingly lean and didn’t need a bit of trimming.
  • 3-4 large carrots, sliced. Carrots are a must-have in any meat-based soup.
  • 2-3 stalks of celery, sliced. The original recipe called for 1-1/2 cups of celery. Seriously? That’s way too much.
  • 1 large onion, chopped. The third member of the aromatic trilogy, I put onions in most soups and stews. The original recipe called for 2/3 cup, but more is better.
  • 1 large parsnip, sliced. If you can’t find parsnips, add another carrot or two.
  • 1 medium turnip, cut into 1/2-inch cubes. This will really round out the root vegetable flavor.
  • 4 cups fat-free, low-sodium beef broth. I could not find real beef broth (vs. “beef flavored” broth) in my supermarket that was both fat free and low sodium. So I bought what I found.
  • 1 bay leaf.
  • 2/3 cup uncooked pearl barley. This was the first time I’d ever bought or cooked barley, despite the fact that I really like beef barley soup. Go figure, huh?
  • 1/2 teaspoon salt. You can probably omit the salt if you don’t use low-sodium beef broth. I did, but then again, I’m trying to keep my salt intake down. Remember you can always add salt; you can’t remove it.
  • 1/2 teaspoon black pepper. Pepper is always good with beef.

Instructions:

These instructions assume you’re making this on the stovetop. I’ll update this blog post when I have pressure cooker instructions. I need to experiment.

  1. Heat oil in a heavy-bottomed pot over medium-high heat.
  2. Add beef to pot; cook 4-6 minutes or until browned, stirring frequently.
  3. Remove beef from pot with a slotted spoon and set aside.
  4. Add vegetables to pot; cook 6-8 minutes or until liquid almost evaporates.
  5. Return beef to pot with beef broth and bay leaf; bring to a simmer over medium-high heat.
  6. Cover, reduce heat, and simmer 1 1/2 hours or until beef is tender, stirring occasionally.
  7. Stir in pearl barley; cover and simmer 45 minutes or until pearl barley is tender.
  8. Stir in salt and pepper.
  9. Discard bay leaf before serving.

Keep in mind that the longer you cook the pearl barley or let it sit in the hot soup, the more liquid it will absorb. The net result could be more of a stew than a soup. If you want a soupier soup, either reduce the amount of barley or increase the amount of broth.

This yields about six-eight servings, depending on serving size. I think it would be excellent with some crusty bread on a cold winter day.

Want a printable version of this recipe? Download it as a PDF.

Low-Fat, Low-Calorie Raisin Bran Muffins

A variation of a Martha Stewart recipe.

This summer, after cleaning out my RV for the last time, I found myself with an unopened box of raisin bran cereal. I like raisin bran, but there are other cereals I like better. So I searched for a way to use up the cereal and remembered how I used to occasionally make raisin bran muffins. So I went in search of a good recipe that called for the ingredients I had on hand. I found this one on MarthaStewart.com.

I made them with just one substitution: I didn’t have whole wheat flour so I used just unbleached flour. They came out amazing: moist and tender. I stored the leftover muffins in the fridge and reheated them one at a time with a 30-second zap in my microwave.

Of course, the big drawback to the recipe is also what makes it moist: it contains oil, which is high in fat (duh) and also high in calories. Although the folks at MarthaStewart.com seem to think this is a “low-fat” recipe, it could be better. I decided to try again with a substitution that could make it better: using unsweetened applesauce instead of oil.

This isn’t something I dreamed up. I’d read it in other places and figured this recipe would give me a good opportunity to try it. Here’s my version of the recipe — not only did it come out great, but it’s about 80 calories less per muffin than the Martha version. Like the other version, this makes 6 largish muffins.

Ingredients:

  • Nutritional Info
    Nutritional information with the ingredients here. As you might expect, it’s pretty high in fiber.

    1 1/2 cups raisin bran. I used Kellogs, but you can use any brand. If you can get it without sugar-coated raisins (ick), go for it.

  • 3/4 cup 2% milk. You could probably substitute fat-free milk for even less fat and a lower calorie count.
  • 1 cup unbleached all-purpose flour. If I had whole wheat flour — it’s on my shopping list now — I’d do 1/2 cup of each.
  • 2 teaspoons baking powder
  • 1/2 tbsp cinnamon
  • 1/4 tsp salt
  • 1 large egg
  • 1/4 cup packed brown sugar. You could probably reduce the amount of sugar if you wanted to since the unsweetened applesauce is still sweeter than oil. That would further reduce the calorie count.
  • 1/4 cup sauce unsweetened applesauce. If you use sweetened applesauce, you might be able to completely omit the brown sugar. I don’t know; I haven’t tried it. I don’t buy sweetened applesauce.

Directions:

  1. Preheat oven to 400°F. Lightly grease a 6-cup muffin tin.
  2. In medium bowl, combine cereal and milk. Let stand until softened, about 5 minutes.
  3. Stir applesauce, egg, and sugar into cereal mixture and mix well.
  4. In a small bowl, thoroughly combine remaining ingredients. Fold into cereal mixture.
  5. Raisin Bran Muffin
    One of the drawbacks of substituting applesauce for oil is that the muffin sticks to the paper liner. The next time I make this, I’ll put the batter in the individual lightly oiled tin cups.

    Divide batter into prepared muffin cups. Bake 20-25 minutes, until toothpick inserted in the center of a muffin comes out clean.

  6. Cool in pan 5 minutes, then move to a wire rack. Store in a sealed container in refrigerator.

If you do make this, let me know what you think. I’m also interested in any substitution ideas you might have.

Mushrooms in the North Cascades, Day 3: Cooking and Heading Home

Cooking with Kent.

The weather finally broke on Sunday morning. Although I love the sound of the rain more than the average person — a side-effect of being a desert dweller for so long — it was nice to not hear it that morning. I dressed, packed my bags, and made the hike down to the parking lot to stow them in my car.

Morning Sun Through Autumn TreesAfter nearly 40 hours of rain, it was a real pleasure to see the early morning sun shining through the trees, casting long shadows across the wooded trail.

As I walked to the Dining Hall for my morning coffee and a bit more time on that puzzle, low clouds lingered over the area. But by the time we’d finished breakfast, it had cleared considerably. I grabbed my camera and went for a walk on one of the short trails that wound through the woods alongside the lake right outside the Dining Hall. When the clouds parted over Pyramid Peak, I could see that there had been snow in the higher elevations — possibly the first snow of the season.

Pyramid Peak in Clouds
Although you can hardly see it in this shot, Pyramid Peak had a generous dusting of snow.

The Cooking Class

Culinary Setup
Kent’s cooking class setup.

Back in a small utility kitchen off the Dining Hall, Kent, the Learning Center chef, was preparing for the culinary part of the course. He’d set up a table and some chairs and gathered ingredients.

Mushroom Galette
Kent’s mushroom galette was not only delicious, but it had an incredibly flaky crust.

Chanterelle Mushrooms
Store-bought chanterelle mushrooms. Kent used them fresh, but also had some dried and powdered mushrooms for the sauce recipe.

Soon we were all gathered together again, watching, listening, and taking notes as he prepared several dishes featuring mushrooms: fresh mushroom pickles, a mushroom galette (pictured), mushroom sauce over pan fried pork tenderloin, mushroom risotto, and mushroom bruschetta. For most of these dishes, he used chanterelle mushrooms, although at least one recipe included a mix. While chanterelles can be found locally, the ones he used were store-bought because (1) it’s illegal to gather mushrooms in a national park (which is where we were) and (2) NCI rules require all ingredients to be obtained through suppliers to limit liability. (It would not have been nice if we were all poisoned because he picked the wrong mushrooms.) His presentation was a lot like watching a cooking show with the added bonuses of being able to ask questions and sample the food. By the time it was over, it was lunchtime but we were all too full to eat in the Dining Hall.

The Trip Home

Fall Color at the NCELC
I took one last shot from the parking lot as I left the Learning Center. It was a really beautiful day.

The course pretty much broke up after that. I’d already packed up my room and loaded my car so I said goodbye to Lee. The other two women in the course were going to try looking for mushrooms on the Rainy Lake trail on the way home and I was hoping to join them. But first I wanted to try photographing some of the reflections in Gorge Lake from the road farther west. So I took off that way, hoping to catch up with them on the road.

Unfortunately, the light wasn’t quite right for the shot I’d imagined. I turned around and headed east on the North Cascades Highway, making tracks. The road was pretty much dry and traffic was light and my Honda is no slug but despite my speed I was unable to catch up with them. And when I got to the Rainy Lake trailhead, it was absolutely packed, with cars stretched out the entrance road onto the main highway. (The longer and more popular Maple Pass Loop trail shares the parking lot.) I drove in optimistically and did find a parking spot, but I didn’t find my classmates. I was a bit disappointed, but not exactly shattered. I decided to do the hike to Rainy Lake again. Maybe I’d meet up with them along the way. Either way, I’d try to get the reflection shots I’d tried to get on Friday.

I didn’t meet up with them, although there were a few more people on the trail. The lake was glassy smooth but clouds had moved in. Still, I got a decent shot of the lake with reflections. Seems like I’ll have to keep trying to get it just right.

Rainy Lake Reflection
With the clouds gone, I could see the fresh snow atop the peaks around Rainy Lake. Can you see both waterfalls in this shot?

I only made one more stop on the way home: Washington Pass. The weather was turning cloudy again and the sky was gray. But there were quite a few people at the pass. I followed the short trail up to the overlook and gazed out at the rocky peaks covered with fresh snow. The yellow leaves or needles of aspen or larch (or both) trimmed the scenery like Bob Ross brushstrokes. Finding myself alone at the overlook for a few minutes, I composed an odd shot of a reflection in a puddle. (Seriously: I can’t get enough reflections in my photographs.)

Washington Pass At Washington Pass
Two shots from the Washington Pass overlook. It’s a shame it had turned into such a cloudy day.

Then it was back on the road, top down, headscarf on. I stopped for gas in Winthrop and kept going. The fall color was in full swing in the Methow Valley and it was a joy to drive through it.

After a stop to visit a friend in Chelan, I made my way home. I pulled into the driveway at about 8 PM. I had a lot of work to do around the house before catching the 5:40 AM flight to Seattle and Anchorage the next morning.

But that’s another story.

Summing Up

I thoroughly enjoyed my experience at the North Cascades Environmental Learning Center. It was was great to be in such a beautiful place, surrounded by interesting, intelligent, and thoughtful people who are in tune with the environment and actually care.

It was also great to be “off the grid” for a few days — I had no cell phone coverage and minimal Internet access. I got a chance to keep up my journal and start some “mindfulness” exercises to help me focus on what’s around me. I need more experiences like this. I really look forward to next season when I can attend base camp there — hopefully with better weather — and get more hiking in.

As for mushroom hunting — well, I already made two forays into the forrest with friends since then, one successful and one not. I’m planning another mushroom hunt later this week and will report here about how I do.

Pressure Cooker Carnitas

Another pressure cooker recipe.

I’m hooked on this damn pressure cooker. I still can’t believe how tender and juicy meat comes out after cooking for less than an hour.

After Tweeting about the first time I used it, one of my Twitter friends, Laura suggested carnitas. When I asked for a recipe — fully expecting a link — she gave me basic instructions. Very basic. Too basic for me.

So I Googled it and found a recipe on Allrecipes.com. I modified it for my own tastes and pressure cooker. Here’s how I made it. And yes, it came out amazingly good.

Ingredients:

  • 2-1/2 pounds boneless pork shoulder, cut into 1-1/2-inch cubes. I used the country style spareribs and trimmed much of the fat off.
  • 3 tablespoons canola oil. I used olive oil because that’s what I have in the pantry.
  • 2 poblano peppers, roughly chopped. I used 3.
  • 3 jalapeño peppers, roughly chopped. I used 1.
  • 1 serrano pepper, roughly chopped
  • 1 large onion, roughly chopped
  • 4 cloves garlic, roughly chopped. I used garlic from my garden, which was a real pain in the butt to peel.
  • 2 teaspoons ground coriander
  • 1 tablespoon ground cumin
  • 1 1/2 cups beef broth. I used about a cup, which I made with water and powered bouillion. Next time, I’ll use 1/2 cup.

Instructions:

  1. Heat oil and brown pork cubes on all sides.
  2. Stir in remaining ingredients.
  3. Lock down the pressure cooker and cook for 45 minutes. (The recipe stated 60 minutes on medium pressure, but my pressure cooker does low or high — not medium. So I took a wild guess and reduced the time. It worked fine.)
  4. At the end of the cooking period, vent the steam, open the cooker, and serve.

While it cooked, I made guacamole with onions and tomatoes from my garden. I served it with corn tortillas I happened to buy yesterday. It needed salt and pepper to taste. The finished product wasn’t very spicy; I probably could have used more jalapeño peppers. But the meat was, once again, fork tender. And so juicy!

Moroccan Lamb Tajine

I discover pressure cooking — and love the results.

Yesterday, experimented with a cooking technique that rocked my culinary world: pressure cooking.

The Instant Pot

For years, I thought the only way to get a nice, rich stew with fork-tender pieces of meat was to slow cook it for five or more hours, often in a crock pot. With cool autumn weather coming on, I started thinking about new recipes for hearty stews — comfort food after a long day outdoors hiking or doing yard work. Trouble was, I’d sacrificed my old crock pot — which had to be at least 25 years old — to beeswax processing duties and it was no longer fit to make a meal. I’d done this on purpose to force me to buy a new one with modern features and the time had arrived.

Of course, I’d also been thinking about something to make it easier for me to make yogurt. And I’d been told over and over by friends that I needed a rice cooker. I’d already gotten an ice cream maker. With my mixer, toaster, food processor, and similarly sized appliances, the pantry shelf I’d dedicated to countertop appliance storage was quickly filling up. The ice cream maker and bread machine were already stored in the garage because I didn’t expect to use them very often. I didn’t want any more appliances than I needed. (And, as usual, I use the word “need” very loosely here.)

Instant Pot
The Instant Pot IP-DUO60 7-in-1 Programmable Pressure Cooker.

So I was pretty interested in the Instant Pot I found on Amazon.com. This single device offered seven functions:

  • pressure cooker
  • slow cooker
  • rice cooker
  • sauté/browning
  • yogurt maker
  • steamer
  • warmer

My experience with the computer world taught me one thing: if any piece of software or device claims to do multiple, only slightly related things, it won’t do any of them well. Think about integrated software like Microsoft Works. Word processor, spreadsheet, database all in one package. But none of those pieces were powerful enough for a serious user.

I figured how good could this be? I kept looking.

But I kept coming back to the Instant Pot. With a 4+ rating from 3,960 customer reviews, it had to be good. I started reading reviews.

And I was sold. I bought one last week.

The Recipes

I won’t go into details about the Instant Pot — after all, this is not a product review. I’ll just say that it seems to be well designed and easy to use. I like the stainless steel pot. It’s a good size that fits nicely on my kitchen island when in use and on the shelf in my pantry when not in use.

The Instant Pot comes with two books: an instruction manual in multiple languages and a recipe book in English and what looks like Chinese. Why Chinese? Well, not only is this made in China (like the rest of the merchandise sold in this country), but many of the recipes have an Asian flair. Apparently, devices like this are popular in Asia.

I needed a recipe for its inaugural use, so it made sense to take a recipe from the recipe booklet. These were written specifically for this device and instructions tell you exactly which buttons to push. For example, you start by sautéing onions and browning meat using the sauté feature. Then you seal it up and switch to pressure cooking with that feature. The instructions tell you which buttons to push, thus giving you a use tutorial. It was great to be able to cook the entire meal in one dishwasher-safe pot.

Anyway, here’s the recipe without the Instant Pot-specific instructions; if you have a pressure cooker, you can probably make this at home in yours.

Ingredients:

  • 2-1/2 to 3 pounds of lamb shoulder, cut into pieces. Lamb is not a big seller here in Washington state and I was fortunate enough to be at the supermarket when several packages of lamb were marked 50% off for quick sale. I bought 3 racks of lamb and a boneless leg of lamb that day, saving about $30, and popped them all in my chest freezer. Yesterday, I pulled out that leg of lamb, defrosted it, and cut it into pieces for this recipe.
  • 1 tsp cinnamon powder
  • 1 tsp ginger powder
  • 1 tsp turmeric powder
  • 1 tsp cumin powder
  • 4 tbsp olive oil, divided
  • 2 garlic cloves, crushed. I got lazy and used about a teaspoon of garlic powder.
  • 2 onions, roughly sliced
  • 10 oz prunes, or a mix of dry apricots and raisins. I used the prunes. I actually like prunes.
  • 1 bay leaf
  • 1 cup vegetable stock. I used water plus 1-1/2 tablespoons of Better than Bouillion. (Next time, I’ll reduce this to 1/2 cup total liquid.)
  • 1 cinnamon stick
  • 3 tbsp honey. I used honey from my own bees, of course.
  • Salt and pepper, to taste
  • 3 1/2 oz almonds, toasted
  • sesame seeds

Instructions:

  1. Mix the cinnamon, turmeric, ginger, and garlic with 2 tablespoons of olive oil to make a paste. Spread the paste over the meat and set aside.
  2. Put the prunes in a bowl and add enough boiling water to cover. Cover and set aside.
  3. Heat a pan and add 2 tablespoons of olive oil and the onions. Cook until softened, about 3 minutes.
  4. Remove the onions and set aside.
  5. Add meat to pan and brown on all sides, about 10 minutes.
  6. Add the vegetable broth and deglaze the pan, scraping all browned bits into the sauce.
  7. Put the meat, broth, onions, bay leaf, and cinnamon stick into a pressure cooker. Seal and cook for 35 minutes.
  8. At the end of the cooking cycle, allow pressure to release on its own. That could take up to 20 minutes. Open the cooker when safe.
  9. Add drained, rinsed prunes and honey.
  10. Reduce the liquid by simmering, uncovered, for about 5 minutes.
  11. Sprinkle with toasted almonds and sesame seeds and serve.

The best part about the Instant Pot is that all of the cooking steps can be done in the same pot. No moving ingredients from one cooking vessel to another when switching from sauté to pressure cook to sauté. So at the end of all this, there’s just one pot to clean and the countertop stays remarkably neat.

The Big Surprise

I have to admit that I wasn’t expecting anything special. After all, I’d only cooked the meat for a total of 45 minutes. How tender could it possibly be?

The answer: very tender. The meat was moist but tender enough to break up with a fork. And it was absolutely delicious. I served it over a mixture of rice and quinoa.

So, as you can imagine, I’m thrilled with pressure cooking as an alternative to the all-day crock pot routine. Look at the facts: the pressure cooker enabled me to cook a good, hearty stew that was both tender and tasty, in less than an hour. Who wouldn’t be thrilled?

Got a pressure-cooker recipe to share? Leave a comment on this post so we can all see and try it.