Easy to make, too, if you have a thermostatically controlled smoker, like a Traeger.
This post has been on this site for more than three years now and it continues to be my top post every weekend. It deserves it. The recipe, which is adapted from the Amazing Ribs website, is easy to make and use. The instructions are absolutely foolproof. In fact, I made four racks of these ribs on Friday to feed 10 dinner guests and got nothing but rave reviews.
Follow these instructions exactly as written and you won’t be disappointed. Check the comments for a link to buy powdered rosemary (which I have since done; you can get it in bulk on Amazon) and suggestions about spraying with apple juice (which I still haven’t tried).
Enjoy!
I picked up my Traeger the other day. I’d stored it in a friend’s garage while I was in California for two months on a frost contract. I wanted to bring it with me, but I couldn’t figure out how to bring it along without either making a mess inside my RV or disassembling it to fit it into the RV basement.
I was back nearly two weeks before I picked it up. I was busy. But once I had it home, I wasted no time smoking up two racks of baby back ribs. Although I took them with me to a pot luck BBQ down on the river that night, I knew attendance would be low so I gave half a rack to the guy who was doing the earth moving at my place in preparation for building to begin. He’s a nice guy and I figured he and his wife could share them for an appetizer before dinner. The next day, he thanked me, said they were great, and told me his wife wanted to know where I got the ribs.
Fred Meyer, I told him, but they could have just as easily been from Safeway or Costco. The meat isn’t what makes them amazing. It’s the preparation.
If you’re interested in buying a Traeger, you can help support this site by starting with this link.
I’ve made ribs at least twenty times on the Traeger since I bought it for my birthday last summer. I thought I’d shared the recipe here, but I couldn’t seem to find an entry for it. I figured that today was as good a time as any to get the recipe out there. As you’ll see, it’s extremely easy to make if you have a decent smoker.
There are two parts to this recipe. In the first part, you prepare the ribs by removing the membrane on the back side and rub them with a good rib rub. Do yourself a favor and make your own. There are a lot of recipes out there and any of them that includes salt and brown sugar as main ingredients will do the job nicely. A list of ingredients for my preferred recipe is below, but I can’t take credit for it. It’s from the Amazing Ribs website, which I highly recommend, and is called Meathead’s Memphis Dust. You really ought to read the recipe on that page since it has a lot of interesting details and useful tips that I won’t repeat here.
(Note: I do want to mention that this is the original version of that recipe, which Meathead no longer shares. He now thinks it’s better to keep the salt out of the rub and to salt the meat in advance. I’ve tried it his new way and frankly, I don’t like it. The meat always ends up too salty. This rub makes rib preparation error-free. Try it and see for yourself.)
The second part of the recipe is where you smoke the ribs. On a smoker. For a long time.
If you insist on boiling your ribs first, stop reading here. You’ll be wasting your time and, frankly, you’re not worthy of the results you’ll get if you follow the instructions here. Ditto if you think the best way is to roast them in an oven, slathered with barbecue sauce and covered with aluminum foil until they’re a soupy mess. (#YouKnowWhoYouAre) Get your mommy to make you one of her Campbell’s soup casserole recipes and a Cool Whip no-bake pie. You won’t appreciate the results of this recipe.
Still with me? Good! Here’s the recipe and instructions.
Rib Rub
Mix together the following ingredients in a medium bowl:
- 3/4 cup firmly packed brown sugar. The recipe calls for dark brown sugar but because I don’t like the taste of molasses I usually have light brown sugar around and that’s what I use.
- 3/4 cup white sugar. The recipe calls for white sugar but I usually have evaporated cane sugar and that’s what I use.
- 1/2 cup paprika. If you make rubs often, buy the largest container of paprika you can find because you’ll go right through it.
- 1/4 cup kosher salt. Although the recipe specifies Morton’s Kosher salt and the amazing ribs website tells you why, I think you can use any coarsely ground salt.
- 1/4 cup garlic powder. But of course!
- 2 tablespoons ground black pepper
- 2 tablespoons ground ginger powder. The Amazing Ribs website warns you not to omit this ingredient. Personally, I would not omit any of these ingredients.
- 2 tablespoons onion powder
- 2 teaspoons rosemary powder. I was unable to find rosemary powder but I did find some sort of chopped rosemary leaves which I then tried to ground up a little bit to simulate a powder. What you want to avoid is full-sized pieces of rosemary leaves because I don’t think they’ll blend as well.
If you have any of this leftover after rubbing the ribs — and you should because it makes about 3 cups — put it in a jar with a tight lid and stow it with the rest of the spices in your pantry. It usually doesn’t last me more than a month or two before I use it all up. I really like these ribs.
Prepping the Ribs
You need to prep the ribs before you start the smoker. I don’t think it needs to be done the night before. I’ve done it as little as 30 minutes before placing them in the smoker and they always come out fine.
The kind of ribs you buy depends on your taste. I always buy either baby back or St. Louis style ribs. I used to like baby backs better, but I think St. Louis are usually meatier and juicier. They take a little longer to cook, too, so that might be a deciding factor.
- Remove the membrane on the back side of the ribs. This is a sort of skin that will prevent the rub from getting into the meat and possibly leave a stringy, chewy bit that really isn’t that good. The best way I’ve found to remove it is to use a butter knife to get the corner started, then grab it with a paper towel (which will give you a good grip with your fingers) and peel it off.
- Rinse and dry the rack of ribs.
- Sprinkle 1 to 3 tablespoons of rub evenly on each rack and rub it in. I use a lot because I really like it coated — almost to the point that the finished ribs are crusty. Do both sides and the ends and edges. The Amazing Ribs website recommends oiling the ribs first and then rubbing them, but I forgot the first time and they came out fine so I never do now. Why add fat, especially to the St. Louis ribs, which always seem to be fatty enough?
- Set the ribs aside until you’re ready to put them in the smoker. If that’s more than 20-30 minutes, put them in the fridge.
Smoking the Ribs
This is the easy part; your smoker does all the work.
- Follow the manufacturer’s instructions to get the smoker started and prepped. I always replace the aluminum foil from the drip pan, run the smoker up to a high temperature, and rub down the grill with a wire brush to clean it.
- Set the thermostat for around 225°F. You don’t want the temperature below 200°F or above 250°F.
- Lay the rack(s) of ribs on the grill surface, bone side down.
- Close the smoker cover.
- Go do something else. For at least 3 hours.
 That’s an exaggeration. You might want to check on the grill periodically to make sure the thermostat is keeping it at the right temperature. My Traeger is a Junior and has a small hopper so I usually have to add pellets after a few hours. Don’t let it go out!
And don’t try to rush it by upping the temperature. Ribs need to cook slowly.
As the ribs cook, they’ll form what the Amazing Ribs guys call a “bark.” Yum.
The ribs are done when they pass the “bend test.” That’s when you grasp one half of the ribs with a pair of tongs and use them to lift the other end. The ribs should bend. If the bark cracks, they’re done. Yes, cooking them longer will make the meat fall off the bone, but that isn’t necessarily better. It’s just drier.
Expect 3-4 hours for baby back ribs and 5-6 hours for St. Louis ribs.
This recipe is so good that even though I overcooked the baby backs the other day, every single person who had them said they were “the best ribs” they’d ever had. Everyone. And I screwed up!
The Last Step
If you like barbecue sauce, now is the time to brush it on. Raise the temperature of the smoker or, better yet, thrown them on a direct heat grill. (Yes, it’s true: I don’t currently have a home, but I have two grills. I guess that tells you a bit about my priorities.) Cook on both sides until sizzling, but be careful not to burn them.
And you’re done.
As far as the barbecue sauce goes, you can also make your own. If I get it out of a bottle, it’s usually Jack Daniels original. Otherwise, I really like the honey barbecue sauce I blogged about the other day.
What Do You Think?
If you try these, let me know how they came out. But I warn you now: I won’t listen to any nonsense about boiling before cooking. Seriously: don’t even go there with me.
And if you don’t have a smoker but love ribs, this recipe will give you plenty of reason to go out and buy a smoker. Really.
I do so love my Traeger.
How about doing something to show your appreciation? I’d love it if you’d add a comment at the end of this post to share your feedback with me and others. But I’d really love it if you’d visit my Support page and chip in a few dollars to help cover the cost of hosting this blog and motivate me to keep writing new, interesting content. It’ll only take a moment and I really would appreciate it!
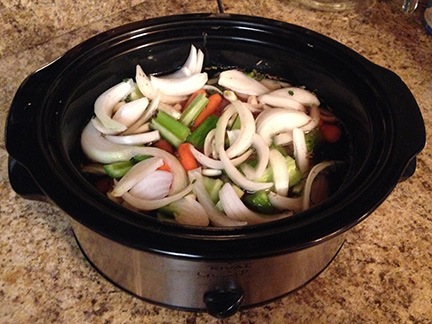 Pour enough water over slow-cooker contents to barely cover them. In the slow-cooker I’m using, that was just over 3 cups.
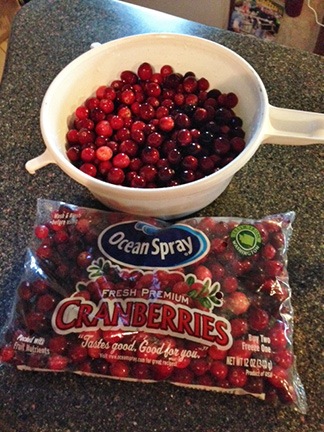
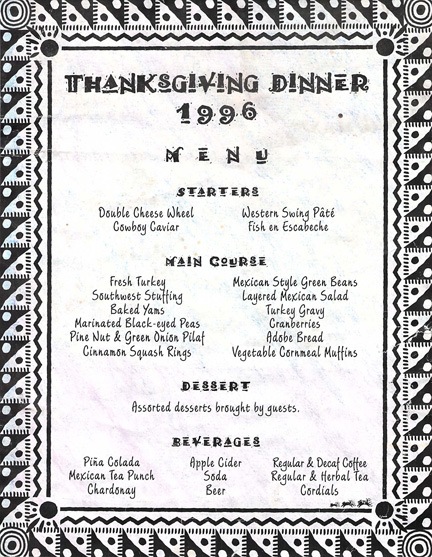 I first made Julia’s cranberry recipe for Thanksgiving dinner in 1996. This was an amazing meal served in my New Jersey home. Our Salvation Army-acquired dining table, expanded to its full length with the help of a homemade leaf fully five feet wide, made it possible for all 15 of us to sit together. Amazing timing with the help of a standard sized oven and the microwave I still own made it possible to serve the entire meal at the same time, fresh and hot. If there is such a thing as miracles, this was one of them. I’ll never be able to top that feat again.