Rescuing an Ugly Bench

Ugly, but functional — and now not even ugly anymore.

My Little Shed
Inside the shed was a silly little bench.

When I bought my storage shed back in November 2013, tucked inside it was an ugly bench. The shed had been used at a school and the bench appeared to have been a shop project later painted with school colors. Even the guy who sold me the shed didn’t know it was in there. And he had no interest in taking it away with him.

With the help of a friend, I moved it from my future building site to a point along the northwest side of my property, right before the land drops off into a little valley. It’s the place on my property with the absolute best views — 270° that take in everything from Mission Ridge to downtown Wenatchee to the East Wenatchee Bench to the mouth of Lower Moses Coulee. I’ve since christened that point “Lookout Point.” I go out there sometimes in the evening to sip wine and watch the light change over the valley.

Lookout Point
The ugly bench at Lookout Point.

I solved the bench ugliness problem the other day with a very simple solution: paint. I chose the same sage green I’ve been using for other projects around here — a color that’s calming and blends in with the terrain.

And then I dug one of the two lounge cushions I had in storage out and fastened it to the bench. It’s not exactly right, but it does work. (I think the pattern is pretty dull and lifeless. I’ve since put them up for sale on Craig’s List and will buy one that fits the bench better.)

Lookout Point Bench
The not quite as ugly bench at Lookout Point.

Again, reusing is better than recycling, especially when something has plenty of life left in it.

Construction, Day 7: Adding the High Roof Beams

Construction begins on the challenging roof.

On May 20, 2014, I began blogging about the construction of my new home in Malaga, WA. You can read all of these posts — and see the time-lapse movies that go with them — by clicking the new home construction tag.

As I’ve mentioned elsewhere, my future home has two roofs — or a split roof. One is higher than the other. While the roof over my RV garage could be constructed with trusses made off-site and shipped in, the roof over my living space had to be fully constructed on site. That’s because the space beneath it will have a vaulted ceiling; I didn’t want to look at trusses or beams.

The beams to support this roof are not only long — more than 24 feet each — but they’re thick. They’re laminated beams made by layering multiple pieces of lumber into one thick beam. And because their highest point is more than 30 feet off the ground, they needed to be hoisted into place with a crane.

The workers spent the morning prepping the tops of the poles that would soon support the beams. They installed specially made pieces of hardware atop each pole. Then the crane went to work and the workers guided each beam into place. They were about halfway done when I returned from some errands and stopped to take some photos.

Building Site
Here’s a slightly different angle on the building site. The building looks big from this angle, no?

Hoisting a Beam
This beam gave them a bit of trouble getting into position. Corey, the boss, said it’s because of the audience; none of the other beams were difficult to place.

While I was out, the windows were delivered. I was delighted with them, as I blogged about here.

Later, I took a walk out to visit my bees and looked back at the construction site. I’m really looking forward to getting the RV back under cover and a real roof over my head again.

Looking back from my Bees
Here’s a late afternoon look back from my bee yard to my construction site.

Here’s the time-lapse for Day 7:

Or if you want to see the first 7 days, edited with titles and music, try this:

The Pallet Planter

Reusing is better than recycling.

One of the things I wanted at my new home was a nice, neat garden. And there’s nothing that keeps a garden neater than raised beds for the plants.

But what to make them out of? A friend offered me railroad ties stacked up in his backyard, but they’re ugly and dirty and I was worried about tar or other nasty stuff they could have been treated with.

And then I thought of pallets.

I’ve got this thing about pallets. There’s something about a nice, clean, well-designed pallet that just makes me very happy. Come to think of it, it gives me almost the same feeling I get from unused paper. Is it the wood?

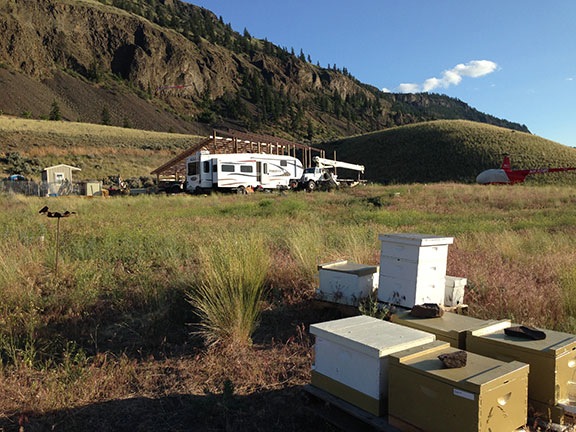
As I wrote the other day, my chicken coop was made, in part, with three pallets. My beehives are kept off the ground on pallets. And, in the past, I’ve made a “porch” for my RV with pallets and a deck for my poor man’s hot tub with pallets. To me, pallets are the ultimate free building material and I’m always on the lookout for good ones.

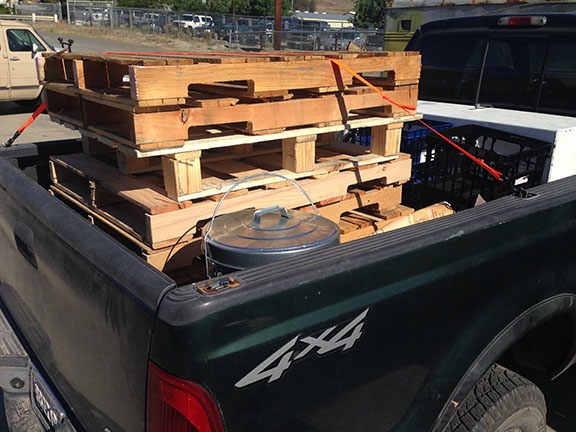
I hit the jackpot yesterday morning when I attended a “surplus sale” at the local school. Not only did I score two really nice media carts that’ll be perfect for my shop ($15 each), but I also bought a 4×10 foot magnetic white board in mint condition ($20) and a Sony boom box with AM/FM/CD/dual cassette ($5). And stacked outside were about 2 dozen of the nicest pallets I’d ever seen. I picked 7 of those and took them home for free.

Pallets in a Truck
I have a truck for a reason: I haul stuff.

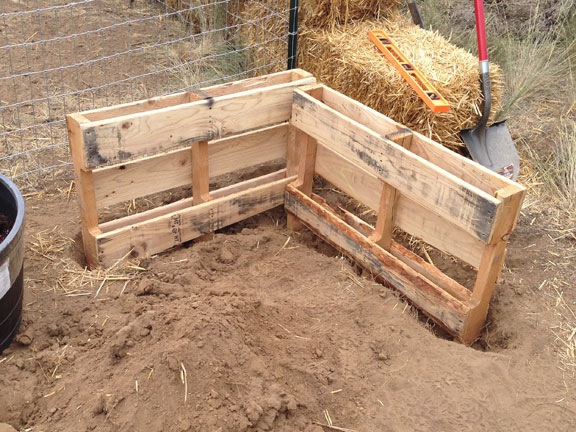
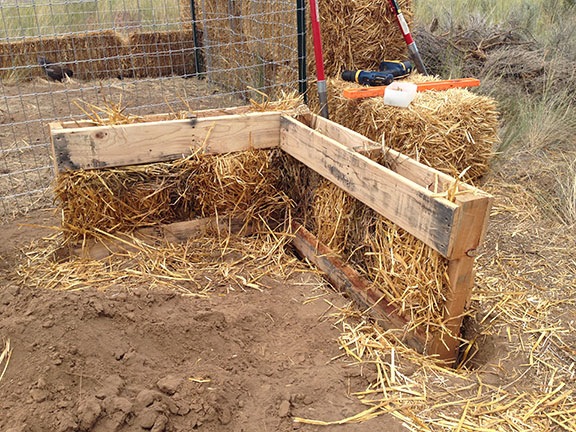
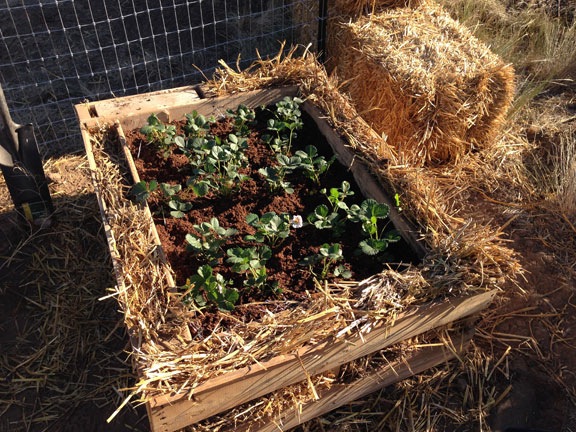
Figuring out how to use them to create raised garden beds was a bit of a challenge until I took the time to see how they were configured. Then it was just a matter of cutting them in half and standing the pieces up in a square, partially buried in my garden. These photos and captions pretty much tell the story.

Pallet Garden
I started by digging a trench just wide enough to stand up the pallet halves. I used a level to keep them relatively level on sloped ground.

Pallet Garden
I needed something to prevent the dirt from coming out through between the slats. Because I have no shortage of straw, it was the logical choice. I really packed it in.

Pallet Garden
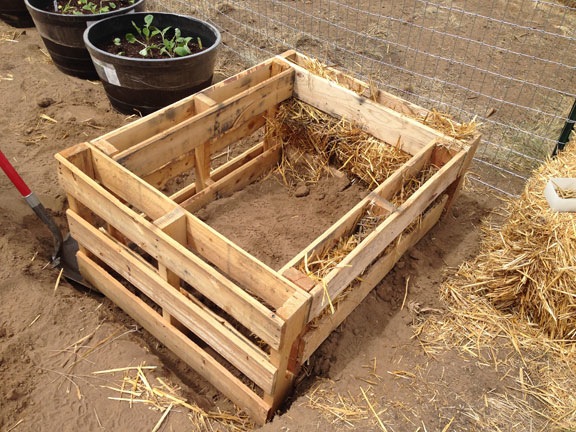
Because the dirt at the base (inside and out) would do most of the work holding the pallet halves together, I only needed four screws — one in each corner — at the top.

Pallet Garden
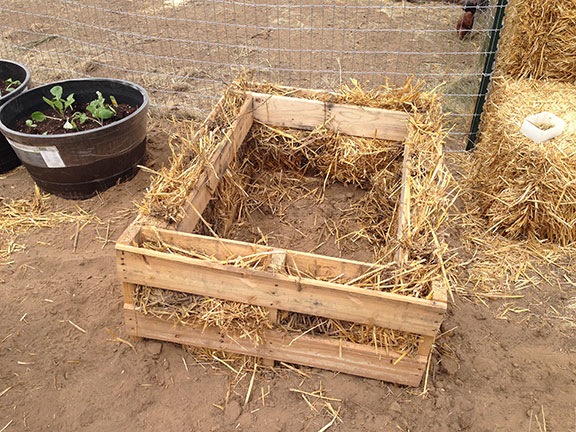
I filled in the straw all around.

Pallet Garden
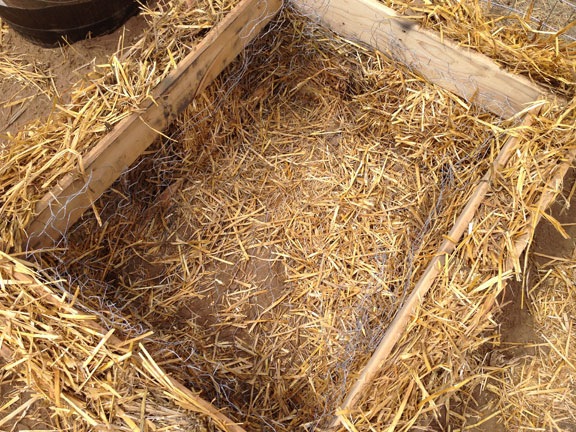
Then I lined the inside with chicken wire to “discourage” moles (or voles or gophers or whatever the hell keeps digging on my property) from coming up through the bottom.

Pallet Garden
I filled the inside with the dirt from the trenches, some leftover compost, some leftover topsoil, and a big bag of Miracle Gro potting soil. before planting 18 strawberry plants.

Pallet Garden
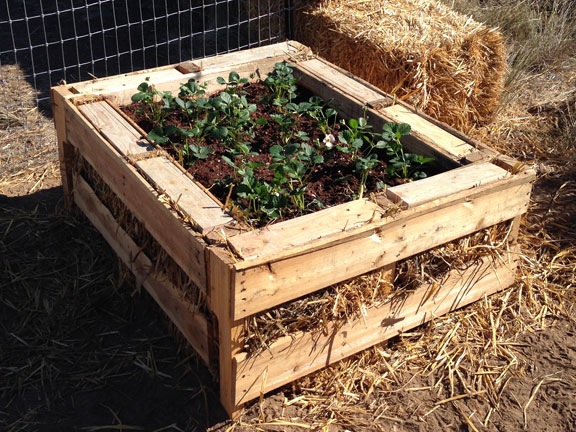
For a finishing touch, I cut some scrap 2×4 lengths and set them into the groove at the top of the planter, hiding most of that messy straw.

Someone mentioned rabbits — they’d have to be pretty tall to reach these planters. And they’d have to get past my faithful garden watchdog, Penny. I’m more worried about birds. I’ll be making a chicken wire cover to keep the birds out before the plants begin to show fruit.

I’m very happy with the way this turned out. It took about 2 hours to build. The hardest part was digging the trench — which was actually quite easy because there are few rocks in my garden. The most costly part was filling the planter with dirt; I probably put about $15 worth of store-bought materials in there.

I’ll be building more of these. My goal is to eventually have three rows of six of them in my garden area.

What do you think?

About the Windows

The best of both worlds.

On May 20, 2014, I began blogging about the construction of my new home in Malaga, WA. You can read all of these posts — and see the time-lapse movies that go with them — by clicking the new home construction tag.

The windows arrived at my building site this afternoon. They left them stacked in two groups against what will soon be my shop wall.

Even though I didn’t pick the windows out of a catalog, they’re perfect! I described what I wanted to the ever-patient Tanya at Western Ranch and she ordered them. It couldn’t be easier.

New Windows
My new windows are exactly what I wanted.

Three of the windows in my old house in Arizona were 4 x 8 sheets of glass that didn’t open. They let in lots of light and nice views to the northeast, but no air. And, sadly, because two of them weren’t shaded on the outside, they also let in a lot of heat from the brutal Arizona sun. Indeed, we had to keep blinds closed over them during the morning hours from the first day of spring to the first day of autumn. Such a shame.

These windows are 4 x 4 square, double-paned glass with 1 x 4 sliders at the bottom. I wanted to look through big windows at my big view. I didn’t want to look through a screen or a sash. But I wanted to be able to open every window to let fresh air in.

These windows give me everything I wanted. There are 11 of them for my living space, along with two glass doors. The seven windows and one door facing north will also be shaded by the roof of my deck, so even in the summer, when the sun creeps far to the north, I won’t have to worry about direct sunlight radiating heat into my living space.

I’ll be letting in lots of light and air and a nearly unobstructed look at my wonderful view.

The further along we move with this project, the more excited I am about what’s to come.

Construction, Day 6: RV Garage/Shop Girts

Half the building framed.

On May 20, 2014, I began blogging about the construction of my new home in Malaga, WA. You can read all of these posts — and see the time-lapse movies that go with them — by clicking the new home construction tag.

A “pole building” is built with post-frame construction. The entire building is hung on a series of vertical posts that, in my case, are set 3 feet down into 4-foot holes and anchored with concrete. The holes were dug and the posts were set last week. The roof over one half of the building is built with triangular trusses that are tied together with rafters. The construction and raising of the roof over the RV garage/shop side of the building kept the builders busy on Day 3, Day 4, and Day 5.

Installing Girts
The crew framed out half the building yesterday with horizontally placed girts.

Yesterday, the crew worked on the wall framing of the RV garage/shop. In a pole building, this is done with horizontally placed beams called girts. The girts are nailed right into the posts, evenly spaced. This is what the workers did yesterday, on the sixth day of construction. They also finished off the framing of the roof and the place where the roof meets the walls on that side of the building.

Although I’ve got 10 acres of land, the area around the building site is quite crowded. The workers need to clear some space to make room for the steel delivery, which will be on a Wednesday or a Friday. I’m hoping they clear space by continuing to use up the lumber scattered in neat piles around the base of the building and my RV. They may, however, start storing construction materials inside the base of the building. Doesn’t matter to me, as long as they keep up the good pace.

Day 6 Site Photo
I shot this photo of the building site on my way home from some errands mid-morning. I’d flown in my helicopter the previous afternoon.

I’m hoping that they begin work on the other roof for Day 7. I suspect that will be quite a challenge, given the height and the fact that they can’t use pre made trusses.

Until then, here’s the time-lapse for Day 6: