Construction Day 11: Framing Second Story Floor, Garage Doors

A huge amount of work done.

On May 20, 2014, I began blogging about the construction of my new home in Malaga, WA. You can read all of these posts — and see the time-lapse movies that go with them — by clicking the new home construction tag.

I was out for a good portion of the work day, with a hair appointment in the morning and a meeting with the concierge at Cave B Estate Winery at lunchtime. While I was gone, the three-man work crew buzzed through piles of lumber, fitting them like puzzle pieces into the frame of my future home.

In looking at the time-lapse (below), I could clearly see the order in which the work was accomplished. First, they laid in the remaining beams for the second story floor. Then two men added girts to the front and back of the building while the third finished framing out the floor. They took a break for lunch and then the two continued adding girts, this time to the garage side of the building while the third man framed out the garage doors.

Day 11 Work
The “well-oiled machine” was working in peak form on Wednesday, framing floors, garage doors, and exterior walls.

They were almost done for the day when Tanya drove up. She wanted to review the window placement with me and Angel, the lead worker. We talked about it first, then walked around the building with Angel, who made notes in pencil right on the girts. It wasn’t until then that I realized my building would have 20 windows — not including the ones in the garage doors.

The next step will be framing the windows and getting the plywood on the second story floor. Once the windows are framed, they can be installed. Once the floor is finished, the stairs can be built. After the windows comes the metal roof and skin of the building — the metal was scheduled to be delivered the next day. The additional windows for the shop area would arrive Friday. Somewhere along the way, they’d add the poles for my front deck and put in the concrete pad. The garage doors would be last.

That’s my understanding of how the job would finish up. At this point, I’d say they’re more than halfway finished.

In 11 days.

Here’s the time-lapse for the day. I think this is one of the most interesting ones in a while. So much going on that its difficult to keep track of it all!

Construction Day 10: Deck Roof Framing

The roof is now fully framed.

On May 20, 2014, I began blogging about the construction of my new home in Malaga, WA. You can read all of these posts — and see the time-lapse movies that go with them — by clicking the new home construction tag.

On this tenth day of construction the crew of three guys mostly worked on the framing for the roof over the north-facing deck which will be just six feet wide but run the entire depth of the building — 48 feet. The final building will have decks on two sides, but the east-facing deck, which will be 10 x 24, won’t have a roof over it.

Deck Roof Framing
They framed out the roof over the north-facing deck. At this point, their roof framing work should be done.

The day started out nice enough, but soon got windy as thunderstorms rolled by on a northwest to southeast path, never quite going over us. I did hear loud thunder once, but never really saw the storm that it was advertising — it was south of me, beyond the cliffs.

I was out for a while, running errands in town, and when I got back a big truck was partially backed into my driveway. He’d just dropped off a load of roof insulation for the RV garage/shop side of the building. (The living space will have more substantial insulation.) Since he blocked my way in, I parked on the road. I chatted with him for a while about how great it is to live in the country — he lives in Cle Elum — before he got a phone call and then headed out for his next delivery an hour away.

Glulam Beam
Here’s one of the two glulam sections left in the scrap pile. The bottle is for scale. While pine can’t be true butcher block because it simply isn’t hard enough, I should get several years use out of it as a food prep surface beside my BBQ grill.

One of the bonuses of this construction project is the scrap wood being left behind. The beams supporting the second floor, for example, are glulams (glued laminated timber), created by gluing together standard pieces of lumber. A few of them are made from 12 2x6s. The builder ordered them slightly longer than necessary and the workers trim them as they use them. When they trimmed for the second floor support, they left me with two nearly perfectly square blocks of wood suitable for making small “butcher block” tables. I’ve already researched ways to seal the wood to make it safe for use with food; I’ve got a woodworking friend who’ll put legs on them for me. This creative use of scrap wood has been a lot of fun for me; I’m really looking forward to setting up my tools in my shop to hone my skills and do projects like this on my own.

The builders made progress on the building, but it seems to be going more slowly now. I think it’s because the novelty of this construction project out my back window has worn off. Seeing the second story floor start to go in yesterday really energized me, but they did very little work on that today. I think it’s interesting to note that they moved their lunch area into the building’s footprint; I think it’s because they’re looking forward to the shade they’ll get when they put the floor in.

Building Front
The front of the building, shot from the southeast corner.

There’s a good possibility that metal for the roof and sides will be delivered this Wednesday or Friday. With the insulation handy, once the roof metal comes there’s no reason why they can’t put on the roof. Got my fingers crossed!

Here’s the time-lapse for Day 10:

Construction, Day 9: Placing Second Floor Beams

Interior is starting to come together.

On May 20, 2014, I began blogging about the construction of my new home in Malaga, WA. You can read all of these posts — and see the time-lapse movies that go with them — by clicking the new home construction tag.

My building will have a second floor over a four-car garage. This 24 x 48 foot space will be my home.

The builders who have been working on my place for the past two and a half weeks are providing a shell — an enclosed but otherwise empty space. The only things they’re doing for the upstairs living space are providing an unfinished (plywood) floor and stairs. They’ll also be installing the windows and doors, and providing the basic framing (but not the floor) for my deck space.

Once the floor is in place, I can begin getting bids from contractors to do the interior framing — in other words, build the interior structure of that living space. The framing needs to be done before I can move in and install the plumbing and electrical systems. So the completion of the second floor’s floor and stairs are a key milestone for moving forward with my living space.

Yesterday, they began work on the second story floor by installing two very thick laminated beams and then hanging the framing between them.

First beam Installed
The second floor will be supported by a series of laminated beams like this one.

First Beam Support
The beam sits atop a 4×6 post on either end.

The laminated beams come from the lumber supplier a bit too long for the job. The workers had to trim them to size. The scrap piece from one of them is a serious block of wood that, with a little work, would make a nice butcher-block table. I’m thinking of fixing it up for just that purpose, perhaps for the east deck where I plan to put my BBQ grills.

Second Floor in Progress
Here’s where they left off on Day 9.

Framing between the two big beams really gives the second floor some structure. I found myself getting really excited, knowing that before the end of the week, I’d be able to walk inside the upstairs space I’d soon be living in.

Angel, the lead worker, told me that Tanya from the office would be by on Tuesday or Wednesday to finalize the locations of each window. Throughout the planning process, windows have been a huge deal and I’m happy that they’re as serious as I am about getting them just right.

The crew also prepped some other beams with hangers, getting a head start on the work they’d do the next day.

Here’s the time-lapse video:

View to a [Chicken] Kill

Not quite as gross as I expected it to be.

One of the things about living in farm country is that there are a lot of farmers around. I’m not just talking about the folks who grow corn or soybeans or even the cherry trees that originally brought me here in 2008. I’m also talking about people who raise cows and chickens for milk and eggs and meat.

I ran into an acquaintance at the local Coastal Farm and Ranch store about a month ago. I was looking for a chicken fencing; he was buying a ton of feed for meat chickens. We chatted about our chickens, ending up with an offer to buy some freshly slaughtered birds the next time they killed. I ran into him and his spouse again a week later and placed my order for two birds — which is about all I can fit in my RV’s tiny freezer. I asked if I could come watch them slaughter the chickens and was told I could. I wasn’t sure how I felt about it, but I suspected it would be, at the least, very interesting to see.

I was invited to their next slaughter, but had to turn down the invitation because of a scheduling conflict. (I spent that day in Woodinville, wine tasting with a hard cider maker friend. I really need to blog about that excellent day.) But they slaughtered again on Saturday morning and I made it my business to attend.

First came a tour of the facilities. The birds live in a relatively spacious pen beneath a deck. All my non-farming friends talk about “free range” — this is about as free as these birds want to be. They basically do four things: eat, poop, sit, and sleep. They are not interested at all in wandering around, pecking at the ground and doing bird things.

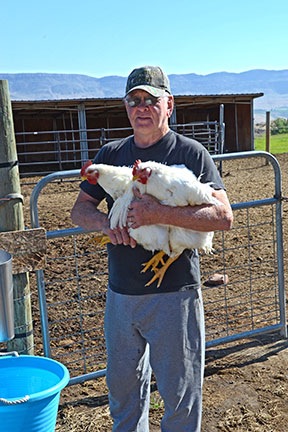
This could be because of selected breeding. Meat chickens are bred to grow quickly. The birds in the pen were 6 to 8 weeks old and ready to slaughter. They were huge — far bigger than my 7 week old laying chickens — and downright lazy. They just sat around in the shade and seemed perfectly happy about it. Melanie, who’d invited me that day, said that if they don’t slaughter them now, they’d likely die of heart attacks within the next few days. She’d already lost two of them that week. These chickens are not bred for longevity.

We talked about “free range” and she confirmed what someone else had told me: if given access to a large open area, these chickens would do the same thing they were doing right then: nothing. It would be a waste of space. They’d tried it and had seen for themselves.

I can actually confirm a bit of this. My 7 laying chickens have a 9 x 25 enclosure and they spend most of their time either in their coop or in the shade of some straw bales stacked up outside their yard.

Melanie gave me a quick rundown of the process. Rather than just narrate, why not look at the photos I took and read the captions?

Carrying the Chickens  Carrying the Chickens
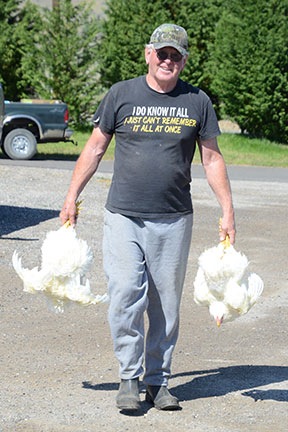
Al was in charge of fetching the chickens from the pen. He took one or two at a time. He said he talked softly to them as he caught and carried them, telling him that he was sorry but that they were going to taste good. And before anyone freaks out about him carrying them by their feet, that’s actually how it’s supposed to be done to calm them down.

Chicken in Cone Chicken in Cone
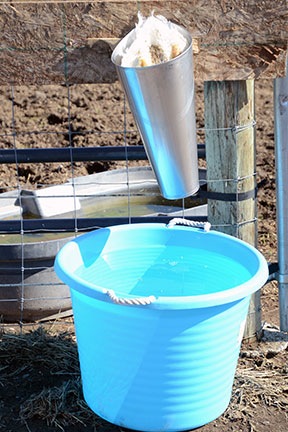
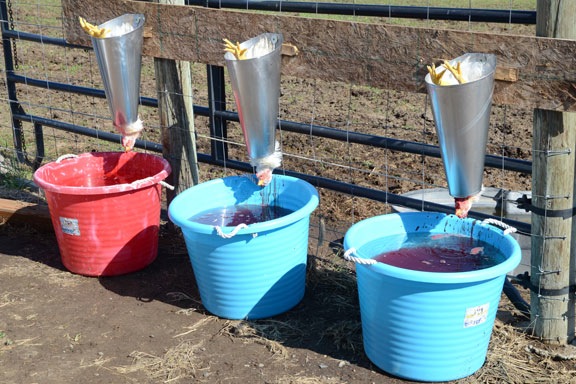
Al placed each chicken head down in what’s commonly known as a killing cone suspended over a large basin of water. After a few minutes, the chicken relaxes enough to let its head through the bottom of the cone.

Slit throat
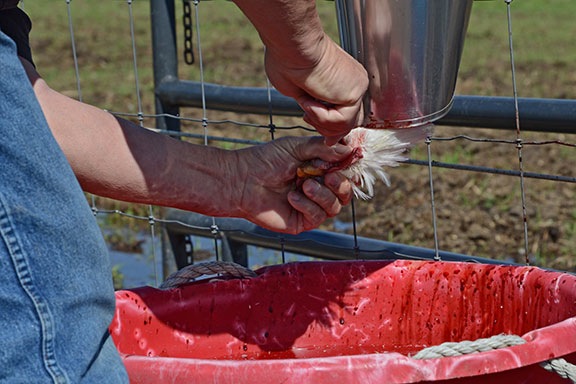
Next, Dennis stepped up with a very sharp knift, grabbed the chicken’s head, and slit its throat.

Draining Blood
The blood drained from the chickens into the bins of water. Although the chickens died very quickly — this is supposedly the most humane way to do this — they often had muscle spasms that made them jerk around inside the cones. That was probably the worst part of this whole thing — seeing those dead chickens move as the blood drained from them.

Dipping Chickens  Dipping Chickens
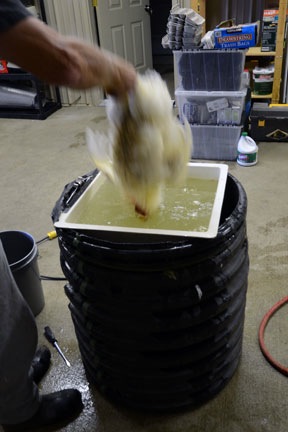
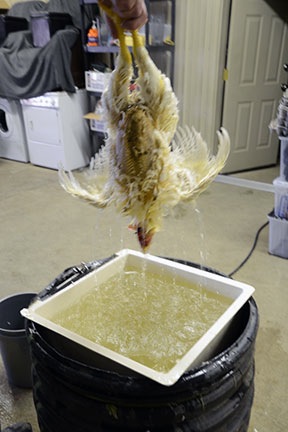
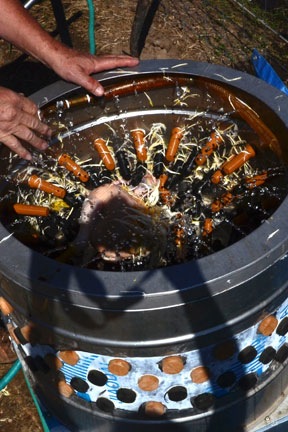
When the chickens stopped moving and the blood had sufficiently drained, Al took them, one at a time, to a vat of very hot water to loosen the bird’s feathers. The water had to be an exact temperature: too hot and the skin would split when the feathers were plucked; too cool and the feathers wouldn’t come off. He dunked each bird 3 times, swirling it around in the water before taking it back outside.

Off with their heads!
Back at the butchering table, Dennis used his sharp knife to cut off the chicken’s head.

Into the plucker  Plucking Chickens
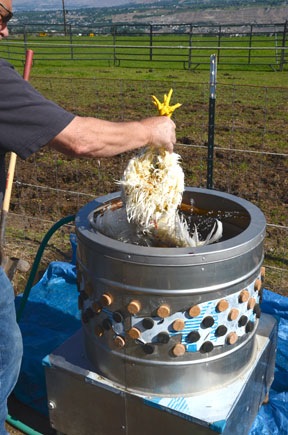
Then Dennis dropped the bird into the chicken plucker and turned it on. This machine has a bunch of rubber-covered fingers that pull the feathers off the bird as it bounces around inside. The process takes less than 10 seconds and splashes quite a bit, so I couldn’t get a decent photo of it.

Ready to Butcher
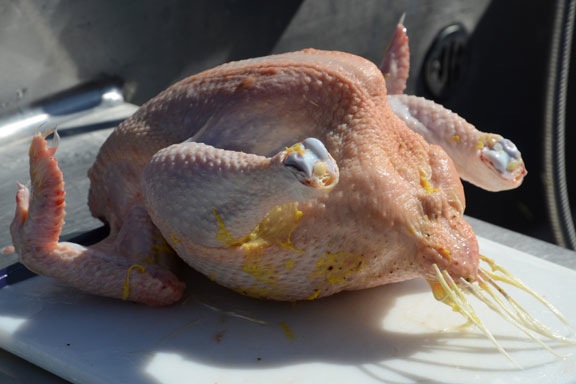
The chickens emerge with only a few feathers left, all ready to be butchered.

Ready to be butchered
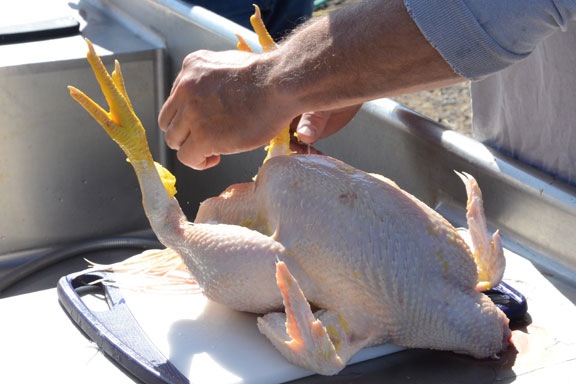
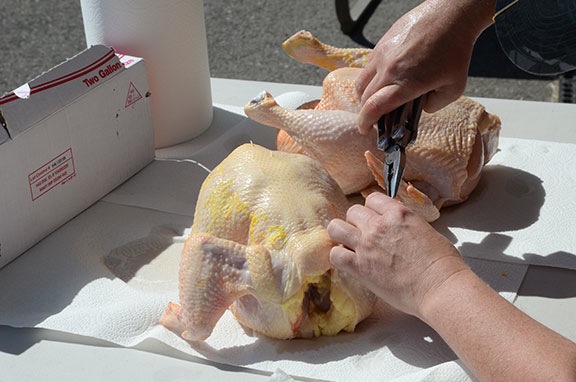
Jill and her husband did the butchering, using sharp knifes and cutting boards on a stainless steel restaurant sink. The feet are cut off first.

Getting out the Guts
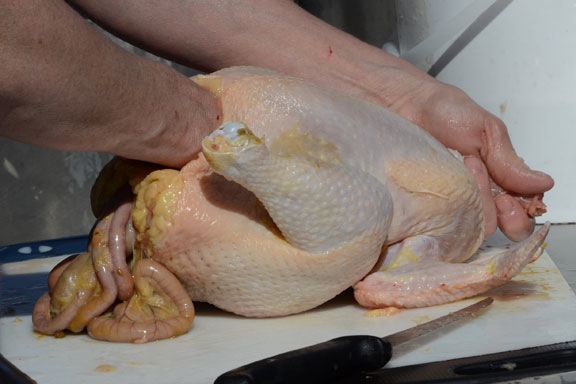
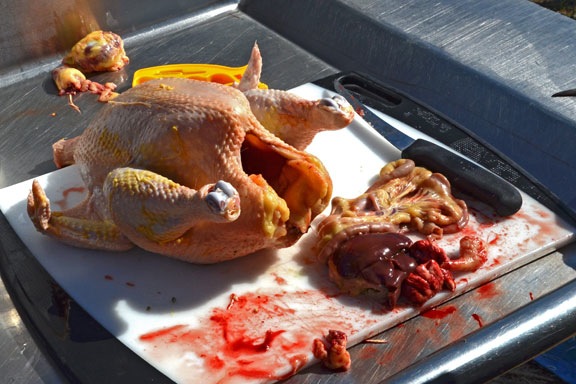
Next, they open up the chicken’s bottom end, reach inside, and scoop out the innards. (This part is pretty gross.)

Chicken Guts
They saved the hearts and gizzards — for the dogs, I think — but threw away the rest of the guts, including some really excellent livers that my mother-in-law would have killed for. (People outside of the NYC area don’t seem interested in chicken livers.)

Washing Chickens
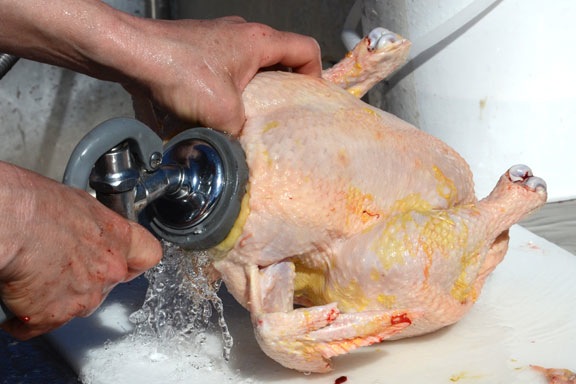
There was lots of washing with fresh, cold water. Afterwards, the chicken was put into a large plastic container filled with ice water. It stayed there for about 15 minutes before being transferred to another plastic bin of ice water.

Packaging
Melanie’s job was to pull off any remaining feathers and exterior fat, pat the chickens dry, and then vacuum seal it. From there, it went right into a freezer.

We started work at about 9:30 AM and, when I left at about noon, 25 birds had been slaughtered. Melanie was almost done packaging them. It was a lot of work.

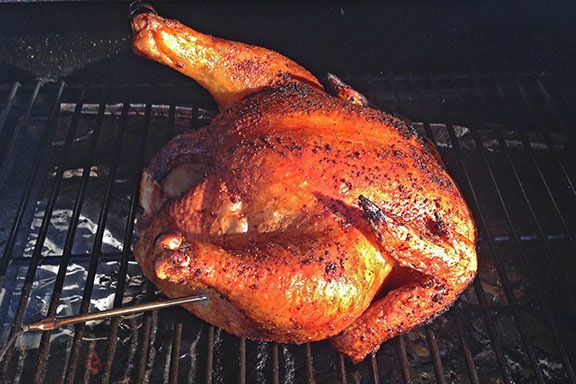
I got to take home one fresh bird and one frozen one from the last slaughter. I cooked up the fresh one on my Traeger grill and it was good — although I have to admit that it wasn’t quite as good as I expected.

Grilled Chicken
Looks yummy, no?

It tasted like chicken.

Would I do this again? I can’t see any reason to. And although I might buy chickens from Melanie and company in the future — mostly to support local farmers — I don’t think I’d stop buying store-bought chickens.

Construction, Day 8: Framing the High Roof

A lot of work high above the ground.

On May 20, 2014, I began blogging about the construction of my new home in Malaga, WA. You can read all of these posts — and see the time-lapse movies that go with them — by clicking the new home construction tag.

Week 2 of construction on my future home was mostly done high above the ground, framing out the roof over my garage and living space. They used up quite a bit more of the lumber that has been stacked in piles all over the place; my pile of scrap lumber is getting very large indeed.

I was out running errands all morning and, when I got back around noon, took the usual photo from the road that runs along the south boundary of my property.

Building Site
Another look down on my building site.

I also wandered around inside the building. I do that a lot lately. As its frame is filled in, there’s a real sense of enclosed space. It’s a big space, a space with lots of room to store lots of stuff. I know that my biggest challenge will be keeping it all neat and clean — I hate dust and cobwebs and spiders. I suspect that my wimpy ShopVac from my Wickenburg hangar will need to be replaced with something more substantial.

Another big challenge: not acquiring more stuff to fill the space. I have enough stuff.

I experimented with my iPhone’s panorama photo feature and captured this image from the southwest corner of the building, in what will soon be my “shop”:

Inside Panorama
The wide angle view of this panorama makes two perpendicular walls seem parallel to each other. Click this image to view a much larger version.

The shop, by the way, will be 12 x 48 feet. I’ll eventually have a workbench and a bigger toolbox — but even that won’t come close to filling that space. I realized on my last trip to California that I’d have ample space to install a recording booth for training videos, podcasts, and voiceover work and may do that next year if I can find an affordable solution. It sure is quiet enough here most of the time to do recording work.

I also realized that because there won’t be many interior walls on the ground floor level — at least not at first — I’ll be able to pull my little boat, Honda, and Jeep straight through one garage door into the back of the building, making it possible to rent winter storage space for vehicles in three of my four garage bays.

These are the kinds of things I’m thinking about as I wander through this space. I designed it to be flexible — to meet my needs now and in the future — and to make it attractive for a future buyer.

Here’s the Day 8 time-lapse. Unfortunately, because of the camera’s angle, you really can’t see much of what the workers did. Full-screen helps.