Something a little different for a different kind of home.
I’ve been living in my new home for about a year and a half now and although I’ve had my Certificate of Occupancy since this past spring, I’m still not quite done with the finishing touches. The windowsills were one of the projects I recently finished. I documented my work with video as I finished up.
The Backstory
Most people have their homes built by builders who are managed by a general contractors. At the end of the project, the general contractor hands over a set of keys to a finished home. For my home, I was the general contractor. Whatever I didn’t hire someone else to do, I had to do myself. While this saved me a bunch of money, what’s better is that it gave me an opportunity to add custom design elements that most general contractors couldn’t be bothered with. My windowsills are a very good example of this.
My building is a “pole building” built with post and beam construction. That means the building’s frame literally hangs on a series of thick, pressure-treated 6×8 or 8×8 posts. When the framers came to frame the inside of my living space, I had two options: frame just the inside walls and allow those wooden posts to appear on inside walls or frame the entire living space so the drywall would hide those posts. The posts weren’t very attractive, so I chose to hide them. This means that they had to frame a secondary wall inside the outer wall, creating a relatively wide space between the inner and outer walls. This was great for insulation purposes — I could fit much thicker insulation in that wall than was required by building codes. But it also left deep wells at each window.
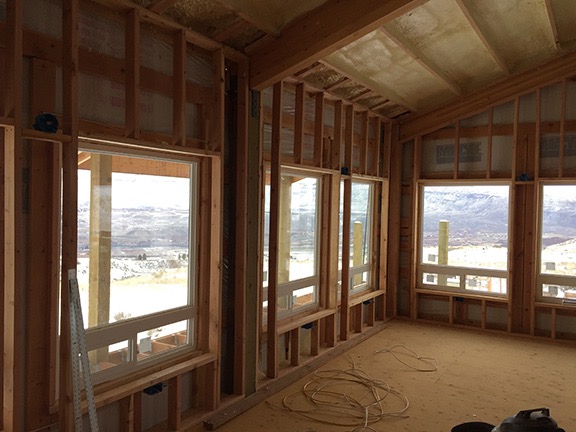
This photo was shot back on December 29, 2014 when I was working on interior wiring. It’s a pretty good illustration of how the framers framed my interior walls inside my building shell. This is my living room; my TV is currently in that corner.
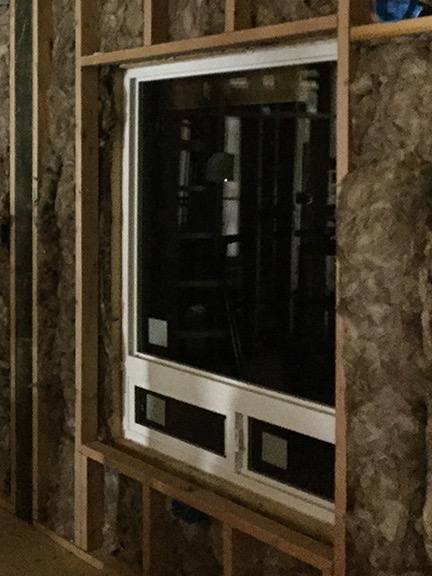
This is one of my living room windows after the insulation was put in place in mid January 2015.
When the drywall guys came, I had two choices. I could have them drywall the entire window well, including the bottom part, or I could leave the bottom part unframed and install wooden windowsills later on. I thought back to my old home, which used the first method for its relatively shallow window wells. When windows were left open in the rain or windows leaked — which was a problem with one window not long after we bought the home — the drywall windowsill was damaged and required a professional drywall guy to patch. I wanted to avoid that, so I went with installing wooden window sills later on. I should mention that my four clearstory windows, which are high on my south-facing walls, do have finished drywall window sills. But they’re rarely opened so I’m not worried about damage.
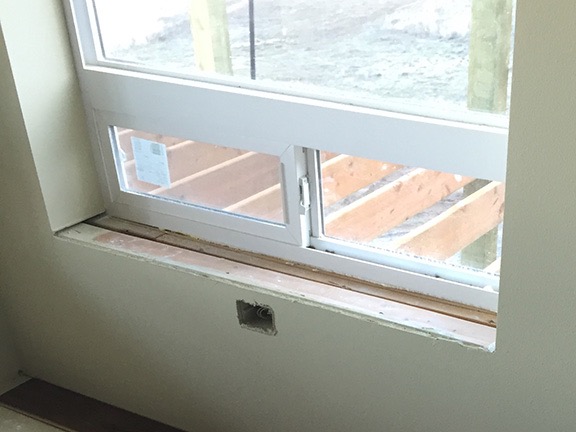
Here’s one of my living room windows on February 15, 2015, not long after being drywalled and painted. (If you’re interested in seeing what the drywall work looked like as it was being done, be sure to check out the walkthrough video in this blog post. And this blog post includes a video of my kitchen, after installation but before the windowsills were installed.)
So this was what I was left with. Ugly, huh?
The Solution
My first attempt at wooden windowsills used 1×10 and 1×12 lumber that I cut to fit. This turned out to be a difficult job, mostly because the framer (and the dry wall guy) hadn’t created uniformly sized or shaped window wells. Getting the wood to fit perfectly and look good was a nightmare and, as you might expect, I procrastinated about getting the job done. When I finally did it, it looked like crap — at least in my opinion. I started regretting the wooden windowsill decision.
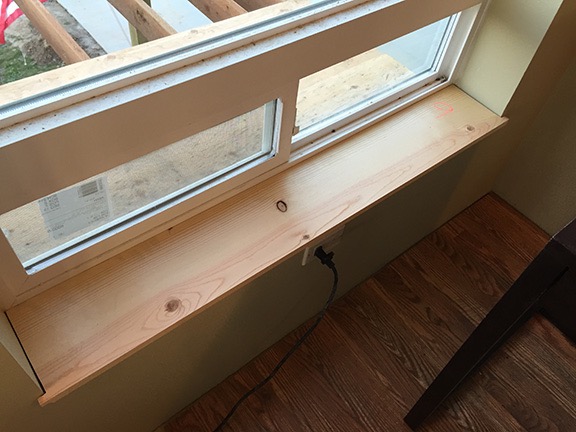
This is my first attempt at a windowsill back in March 2015 — it’s the original one in my office area. There were no right angles in the window wells, making cutting the wood to fit perfectly nearly impossible.
Time went on. I cut wooden planks to fit most of the window wells as best as I could. I didn’t like the way it looked, but it looked a lot better than nothing at all.
More time passed. Lots of time. My friend Don built a custom wood cap out of driftwood logs for my stairwell that got rave reviews from everyone who saw it. I asked him to build some furniture for my living room: end tables, a TV table, and a coffee table. He used reclaimed wood and left natural edges. He finished everything with tung oil. They looked great; you can see them in a video in this blog post. He told me about some logs he’d had planed into planks. I talked to him about my windowsills. He asked me how many planks I needed. I told him eight — one for each of my great room windows. He came by one day and delivered 8 raw planks of wood.That was sometime in the autumn of 2015; I don’t know the exact date because I don’t have a photo of the delivered stack of wood, which lay across a pair of sawhorses in my garage. For months.
The trouble was, I didn’t know what to do with the wood. So when Don asked me this past summer how the project was going, I told him I was waiting for his help. So he set a date in July and when that date rolled around, we got to work.
The Job
Don did the first two windowsills for me, start to finish, while I watched and learned.
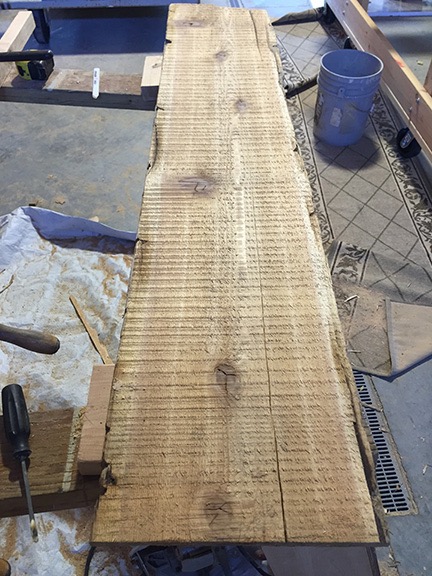
A typical wood plank. We began working it by closing up cracks, then cutting off a live edge for the back of the windowsill, trimming its length, and shaping its front edge.
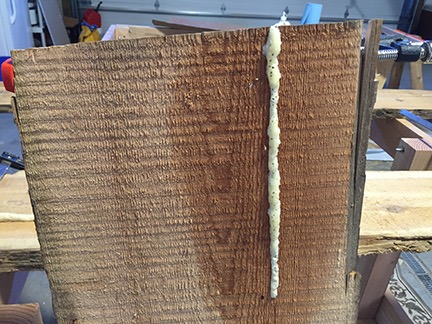
One of the cracks after gluing it. After scraping away the solid foam and sanding it, the crack disappeared.
The process began with repairing cracks in each piece of wood. The wood had arrived wet and had been stacked horizontally on sawhorses with each row of planks separated by some scrap lumber so they could dry. Cracks along the grain had formed in some of the logs. Don wasn’t concerned. He’d already developed a workable solution for this problem, which he encountered quite often. We wet down both sides of the crack, filled it with Gorilla Glue, and then used clamps to close up and hold the cracks together. Overnight, the glue would set, leaving orangish solidified foam on the outside, That would be scraped away and sanded down with the plank later in the process.
Then we needed to match a wood plank to a window. The planks were all longer than they needed to be, but they came in two basic widths. The wide ones needed to be used for the five north-facing windows while the narrower ones could be used for the east-facing windows, which weren’t quite as deep. We had to pick which side should be the top and which edge should be on the outside, facing the room.
Then Don made a template out of cardboard pieces for a specific window. This had the exact length, including the weird angles, and the depth, including the outer edge. We’d bring that downstairs and he’d lay it on the chosen plank, outline where he needed to cut. Then, using a circular saw, he’d cut off one live edge of the wood to form a straight back edge. He’d also trim the length of the plank and then, using the circular saw and a handsaw, cut the shape of the front with an overhang past the edge of the windowsill area.
Then we’d go back upstairs to see if it fit. And back downstairs to make some adjustments. And back upstairs to see if it fit. Repeat as necessary. When Don was satisfied, we came back downstairs to finish the live edge. That required using a special cutting tool to carve away the bark and shape the exposed edge of the wood. This is where it got artistic and Don did a fine job (as I expected). Finally, he used an orbital sander to sand the top and outer edges of the plank.
When it was just the way he wanted it, we brought it back upstairs, fit it into place one more time to be sure, and then removed it. Rather than use screws or pegs to affix it into place, he took out his trusty Gorilla Glue and spray bottle, moistened the wood, applied glue to both the unfinished windowsill area and the bottom side of the new windowsill, and slipped it back into place. We used a combinations of rags for padding and lengths of wood to hold the windowsills down until the glue could cure — at least 12 hours.
Don did two of these that first day. I paid close attention. He came back the next day and did the rough cuts for a few more, leaving all the finish work to me. A week later, he dd the last two. I paid him for the wood and his time. The rest was up to me.
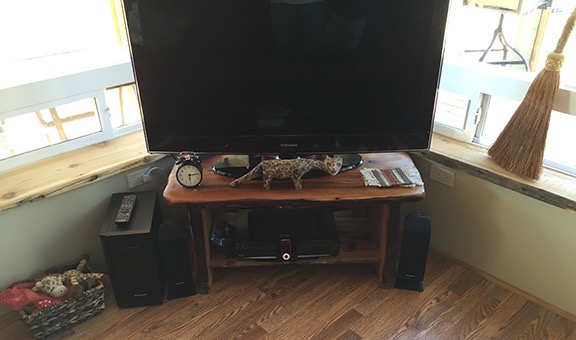
This photo shows two of my windowsills. The one on the left was completely finished and installed by Don. All it needed was to be oiled. The one on the right is cut to size but not finished. I had to carve out the live edge (removing the bark) and sand it down before gluing it into place.
With the window framing exposed again — we’d taken off my makeshift windowsills — I was motivated to finish up. So although I had a bunch of other stuff going on — including the end of cherry season and a vacation in my new truck camper — I went to work at it and eventually got it all finished up. Along the way, I shot some video clips of the work I had to do. I put them all together in this video, so folks could get an idea of what had to be done. It’s a little long, but it covers all the steps I took.
By the way, I’m finding that creating and saving these videos in my blog is a great way for me (and others) to look back on the progress I’ve made in building my home. As I wrote this blog post, I stopped to watch some of the videos I linked to here. It was not only great tp see things partially done again, but interesting to hear my narration of plans — some of which changed over time. What a great way to document the evolution of this challenging and lengthy project!
Discover more from An Eclectic Mind
Subscribe to get the latest posts sent to your email.

I ‘get’ what you are after here. A sort of ‘distressed authenticity’. The end product looks great and shows the working ‘history’ of that cedar pole.
You have much more patience than I can muster. I would have run that sawn plank through a planer and used a belt sander with two grades of grit. Your caulking is way neater than mine; respect.
Those knots and the ‘rude’ finish look superb. I did a similar job on a fireplace mantle. (I’ll send a photo).
Not sure about “distressed authenticity.” That makes it sound like I worked hard to make it look old. Kind of like beating furniture with a chain when refinishing to make it look antique.
In this case, we took something pretty darn close to natural and tried to make it more finished looking without losing some of the natural features. That was the idea, anyway. I really love natural wood and always have. That’s why the only thing painted inside my home is the drywall; all wood surfaces have natural finishes to let the wood grain shine through.
As for the caulking — well, I don’t enjoy doing it, but that blue tool I show in the video really does help finish things off. If you didn’t have the patience to watch the whole video — and I can’t blame you because it was LONG! — you can see a photo here: http://www.aok.org/images/calk-master.JPG I used this extensively in the bathroom shower stall, which is where I got enough practice to do the windows. The trick is laying down a bead that’s uniform and just the right amount of caulk.
One of these days, I’ll figure out a way to let commenters share photos…
Thanks for the link to the Calk-Master. I’ll try one of those. I usually try to do that task with my finger and invariably get the caulk stuck to all my digits, the cleaning rag and the work area.
I watched the whole video with interest. I realised that the timber was ‘distressed’ by its first use, not by you!
Putting recovered lumber through a powerful band saw is always exciting. I once saw a large elm tree trunk go through an industrial high-speed saw when the blade hit an iron gate hook which was buried deep in the timber. The teeth ripped off and the band broke out of the safety cage and bounced down the full (60 yard) length of the workshop. Amazingly, no one was hurt. One man dropped to his knees and offered up a prayer of thanks.
You have to wear gloves. That stuff is so difficult to get off your hands! I use disposable gloves that I get in the Home Depot paint department.
I’ve never seen a big band saw in action and, based on your story, I hope I never do!
Thanks for this! I’m being my own GC on a huge addition now, and am at the “indoor window sill” stage.
Your post gave me confidence. :)
How did you handle fitting wood sills into window cavities that expanded inward (imagine a trapezoid, where the length adjacent to the window was a little wider than the length at the drywall corners?)
I’m at a similar stage as you, and notice that the sheetrock crew put on metal corner guards and a 3-way wrap, but many of my window boxes have narrower front openings than back. Seems like no way to fit a snug wood sill in there.
We made individual templates for each windowsill. And yes, some of them were wider in the back (at the window) than in the front.We sometimes had about 1/16 inch or so gap on either side. We made it work somehow.