My new kitchen and laundry room appliances are delivered.
All the way back in December 2014 — a full three months ago — I decided to take advantage of an excellent Black Friday sale at Home Depot to buy all the appliances for my new home. I had planned my home and my kitchen to be simple, but comfortable. My appliances would be brand new and fully modern, incorporating the features I’d always wanted but never seemed able to get in my old life.
When I ordered the appliances, I wasn’t sure when I’d be able to take delivery of them. I was still sitting on the fence about whether I should go away for the winter or stay in Malaga and get my home done in time for a spring move-in date. As a result, I set the delivery date as far into the future as Home Depot allowed: three months. The date, which I didn’t even bother putting on my calendar, was February 28, 2015.
I subsequently went full steam ahead on construction and stuck around most of the winter to oversee subcontractors and get a lot of the other work done myself. Winter is my slow season for flying and I didn’t have any other things to hold me back, so I got a lot done. By the morning of Friday, February 27, my kitchen was starting to take shape with the cabinet installation mostly finished. I started wondering when the appliances would come — Home Depot had not called.
I was at Home Depot that morning and asked at the appliance desk. She punched my name into the computer and told me the appliances would arrive the next day.
“Saturday?” I asked. “They deliver on Saturday?”
“If that’s what you asked for,” she replied.
I left her desk in a mini panic. Was I ready to get my appliances the next day? I wasn’t — but I thought that maybe I could be. I had a lot of work to do.
Last Minute Preparations
The work that needed to be done fell into three categories:
- Electrical preparation. Although my home’s in-wall wiring had been run and hooked up to the circuit panel, I had not yet finished the outlets for the refrigerator, dishwasher, washer, or dryer. (The range was done.) I needed to get the right receptacle for the dryer — which used 10/3 wire — and then I needed to wire all the receptacles — especially those that would be behind heavy appliances that I didn’t want to have to move.
- Floor preparation. Although I’d laid the floor in my laundry room using adhesive vinyl planks, I had not prepped the floor under the kitchen appliances. I could not lay the Pergo I’d bought for the rest of my home — appliances should not be set on top of so-called “floating floors.” I needed to put flooring under these appliances that was the approximate thickness of the Pergo. That meant 1/4 inch plywood with some more of that adhesive vinyl on it. I needed pieces for under the refrigerator, range, and dishwasher.
- Laundry room molding. The space between the vinyl flooring and wall in the laundry room needed to be filled in with molding or trim. I’d planned to do the molding myself throughout the house using 1 x 4 planks that I’d stain. The laundry room would be a good place to experiment because it really didn’t matter how it looked. What was more important was that I got that molding in place before the washer and dryer were stacked there, since it was unlikely that I’d ever move them to lay the molding in later.
During the day, as the cabinet guys labored to get the over-the-fridge cabinet installed — heck, it was worth the installation cost just to get that one installed right — I worked on outlets in the kitchen and made a list of the things I needed at Home Depot. When they left, I was right behind them, list in hand, ready to exchange another bunch of money for more building materials: 4-prong 30 amp receptacles, plywood, 1 x 4 lumber, stain, 20 amp outlets, outlet covers, etc., etc. (I manage my lists with the 2Do app on my iOS devices and Mac so I always have them with me and can update them from anywhere. Yes, I’m a geek.) I had brought along the measurements for the flooring under the appliances, so I had the Home Depot guy cut the plywood to size for me. That would likely save me about an hour of time and, although they’re supposed to charge for cuts when there’s more than one per piece, they never seem to charge me a dime.
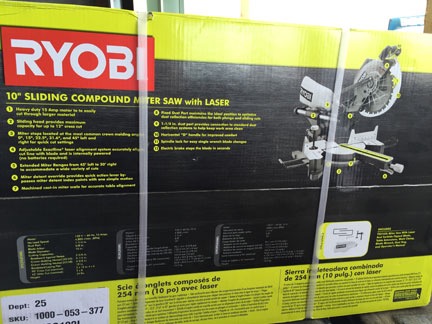
I bought this miter saw earlier in the month but hadn’t used it yet. Yes, I know it’s not the best quality or the most heavy duty, but I’m confident it will satisfy my limited needs.
I also bought a table saw. I already had a miter saw that I’d bought the previous week, but the cabinet guy had advised me to get a table saw to handle the rip cuts when I laid in that Pergo. I have to say that I absolutely love having all these power tools on hand. Although my 12 x 48 shop area is half full with my furniture and packed boxes, I’m really looking forward to setting up a permanent shop area once those things are moved into my home.
Of course, by the time I got home it was nearly 8 PM. I am not an evening person. I do my best work in the morning. By then, an annoying Home Depot delivery recording had warned me that delivery would be sometime between 8 AM and 11 AM. That meant I’d be up early on Saturday to get things done.
And I was. I was out of bed by 3:30 and dressed and coffeed up by 4 AM. I had to do things in the right order to make use of my limited time. That’s why I was rolling adhesive floor primer on three pieces of 1/4 inch plywood at 4:15 AM. It might need a few hours to dry and it was vital that it would be ready for the vinyl later that morning. I set it on the cabinet tops to dry.
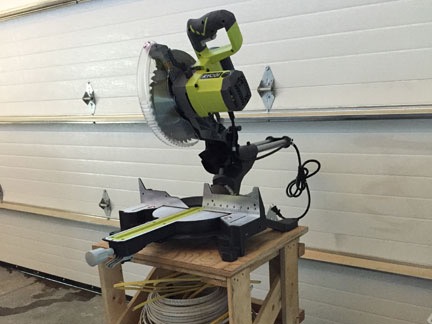
I’d set up my miter saw on one of my rolling tool carts. That makes it easy to move anywhere I need to work in my shop.
Next came the preparation for the laundry room molding. I’d never used a miter or “chop” saw before so I made a few test cuts in the wood before making the actual cuts I needed. It was a lot easier than I expected it to be. My main concern was getting the left side and back side walls done; I could do the rest later. Once the pieces were cut and tested — they fit! — I got out the stain and a rag, donned a pair of disposable gloves, and rubbed in the stain. It was a lot darker than I expected — probably not the color I’d want to use in the rest of my home. But this was the laundry room and I didn’t really care how it looked. That room was my “test bed” — more on that in a moment.
While that dried, I got to work on the few remaining outlets that needed to be done: refrigerator, dryer, washer. It went very smoothly. At this point, I’ve wired about three dozen outlets in my home, shop, and shed so I’m getting pretty good at it. I resisted the temptation to wire other outlets that didn’t need to be done — stay focused! — and went on to my next task.
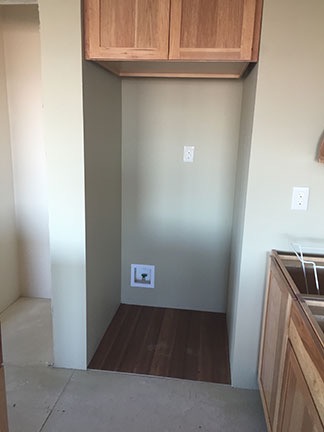
Here’s the space for the refrigerator, with the plywood and vinyl floor laid down in it. My Pergo is almost the same color.
The plywood pieces were dry and ready for vinyl. I had bought an entire box of the stuff with the thought that it might be suitable for my bathroom. But after putting it down in my laundry room, I decided it was too cheap looking for my bathroom. I wanted something nicer. I’d planned to return the remaining planks, but now I had a better use for them. I laid them out on the plywood pieces, using as many of the trim pieces from the laundry room that I could. For a scary moment, I didn’t think I’d have enough to do all three pieces. But by some miracle, I did — with just two 36-inch planks to spare!
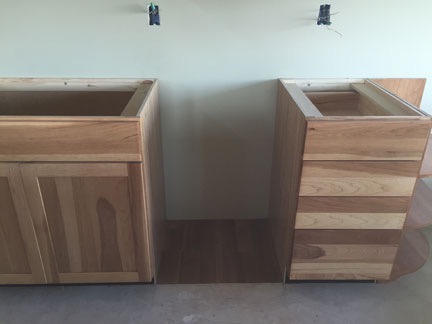
Here’s the space for my dishwasher. The outlet for the dishwasher is under the sink; a hole will be drilled in the cabinet side to bring the plumbing and power to this area.
The finished pieces actually looked pretty good. I had to trim one — either I’d measured wrong or the Home Depot guy had cut wrong — but my circular saw made short work of that, despite its dulling blade. (Note to self: get new blade for circular saw.) I laid each piece into position and fastened them down with the drywall screws I’d been picking up off the floor for the past two weeks.
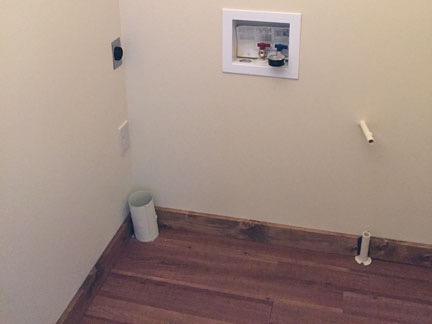
The finished washer/dryer corner of my laundry room floor. This was my first stab at doing molding and I’m rather pleased with the results.
By this time, it was about 8 AM. I still had one job to do: lay in that molding. I went down into the shop and was pleased to see that it had dried. I rubbed it with a clean rag. It looked okay, but really a lot darker than I wanted. Still, it would work for the laundry room. I brought it upstairs with some skinny nails and a hammer, laid the pieces in place, and banged them in. I admired the results. Not perfect, but certainly not bad.
The phone rang just after I took this photo. It was yet another Home Depot recording telling me that the appliances were just an hour away. Timing is everything. I went into my RV and made some breakfast. It was about 9 AM.
The Appliance Delivery
The delivery went very smoothly. The guys pulled into my driveway in a good-sized Mayflower moving truck. The driver got out and introduced himself and his partner. They were from Moses Lake, which is about 90 minutes from my home by car. I showed them where everything had to go, apologizing for the stairs. They didn’t seem to mind — I suspect they deal with stairs on a regular basis.
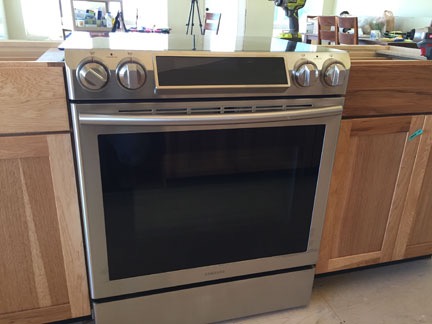
I absolutely love the look of my new stove. Can’t wait to start using it!
Twenty minutes later, they started bringing things up. The range was first. It’s a flat-topped electric range that fits into my kitchen island. It was a perfect fit. The countertop people will adjust its height so that it’s flush with the counters. They plugged it in and I ran downstairs to flip the circuit breaker. It worked. Not only did the burner shown turned on in the photo come to life, but when I touched the panel, it lit up with all kinds of digital buttons. (Understand that I didn’t choose this range from an in-store display so I had absolutely no idea what it would look like in real life. All I’d seen were a few photos.)

My new range even has a bread proofing feature!
The rest of the appliances came up one at a time. The dishwasher was pushed into place, but since the plumbing was not ready for installation, it was not fully installed. I’ll have the plumbers do that when they come, possibly next week.

Even stacked, my washer and dryer seem to fill my 6 x 5 laundry room. My water heater will go to the right of them and I should have enough space for a hamper just inside the door to the right.
The dryer was stacked on top of the washer — I couldn’t see any reason to put them side by side when they could be stacked to save room. Although my tiny laundry room looked extremely crowded with the two appliances stacked in there, both delivery guys assured me that it was the largest space they’d stacked a washer and dryer in the past week. They fully connected the washer and dryer to the water supply and vent rough ins. I flipped the circuit breaker for the dryer and we turned it on. It worked fine. I couldn’t try the washer because the plumbing isn’t done yet. But you better believe that if I have to go to the laundromat before the washer is hooked up, I’ll be bringing wet clothes home for my own dryer.
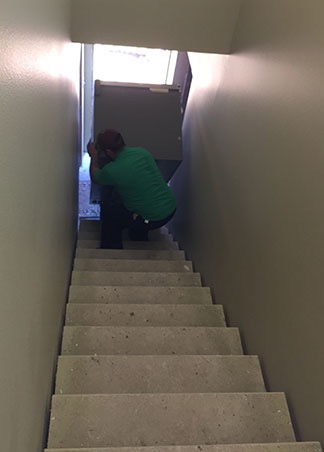
Here are the delivery guys, bringing my refrigerator up the stairs.
The refrigerator was the last thing to be brought up. They hadn’t been told to make the door hinge switch, so they did that when they got it upstairs. While they worked on that, I pulled out the shelf packing material. Soon they rolled it into place beneath the cabinet that had been installed so painstakingly just the day before. Later, when the cabinet guys returned to finish up, they’d put a spacer to close up the space between the fridge and the cabinet.
Between each delivery, the guys would remove all of the packing materials, including plastic, foam, cardboard, and tape. They took all that garbage — and the boxes the appliances had come in — away with them. (This was a huge relief to me, since I still had to dispose of a ton of foam packing material from my living room lights, ceiling fans, and power tool purchases. They were extremely careful about dinging the walls — indeed, I didn’t see a single scratch or handprint. They were friendly, polite, and completely understanding of my excitement. Because they were sweating from the hard work, I offered them Gatorade, bottled water, and Coke to keep them hydrated and even turned off the heat in my home so it wouldn’t be so hot for them. I tried to stay out of their way, wiring outlets in the kitchen and living room as they prepped each appliance for the trip up the stairs. It was a very positive experience.

It’s beginning to look a lot like a kitchen.
When it was done and they’d gone, I walked around my home, admiring my appliances. Only two were currently functional: the range and the dryer. But the refrigerator’s circuit could be flipped on as soon as I was sure all the outlets on that circuit were complete; I’d do that in the morning. Of course, the ice maker wouldn’t work until the plumbing was complete. Neither would the washer or dishwasher.
That made it pretty clear what my next big task would be: prepping the bathroom so the plumbing could be finished.
In the meantime, I started planning for my next big party: “Ladies’ Night, Kitchen Box Unpacking Edition.” I figure that after the countertops are installed at the end of March, I’d have a bunch of friends over to keep me company while I unpack all the kitchen boxes I packed that last winter in my Arizona home. I was bored out of my mind at the time, frustrated to no end by my future wasband’s unreasonable attitude and stupidity, so I’d filled the time by packing up more and more of what I’d bought for that home over the years. I know I packed more than I probably want to keep and figure that some of the excess might make nice door prizes for my friends. Any excuse for a party, eh?
Discover more from An Eclectic Mind
Subscribe to get the latest posts sent to your email.

You never realize how handy it is to have a table saw until you finally get one. While you certainly can’t rip lumber with a chopsaw, you CAN do crosscut work with a tablesaw if you must. Having both is the cats meow. ;)
I just assembled my table saw today. Haven’t tried it yet. I’m not happy about the way the blade guard sits and want to take a look at an assembled saw at Home Depot to make sure I got it right.
I do have plenty of wood to cut, though. With both saws set up side by side and my old baby-sized ShopVac between them to suck sawdust as I cut, it’s a pretty sweet setup. Later, when I move my things up into my home, I’ll be setting up a permanent wood shop area. Right now, the saws are set up in front of my big door — that won’t be very convenient when I start moving the helicopter in and out again.