Well, at least the first six of them.
If you’ve been following this blog, you might know that I decided to be “the electrician” for my new home. That means I’ve taken on the task of designing the electrical system, doing all the in-wall wiring, and ultimately hooking up all light fixtures, ceiling fans, and outlets.
These posts will give you an idea of what I’ve been up to with the electricity since buying my property in July 2013:
- The Little Dig, August 25, 2013
- Temporary Power: Cleaning the Box, August 26, 2013
- I’ve Got the Power!, September 4, 2013
- Construction: The Final Ground Work, September 13, 2014
- Construction: Setting Up the Power, September 14, 2014
- Construction: Wiring the Shed, September 15, 2014
- Construction: Wiring My Shop, October 7, 2014
- Construction: The Heat is On, December 18, 2014
- Construction: January 8 Walkthrough, January 8, 2015
- Difficult Decisions that Shouldn’t Be, January 10, 2015
- Construction: Wiring My Home, January 14, 2015
Wow. I didn’t think I’d written so much about electrical power, but there it is.
Electricity is an important part of our lives. We don’t think much about the electrical power in our homes. Flick a switch, a light goes on. Plug in a device and power flows through it. We only notice it when it goes out or we get our bills. We normally don’t think much about what’s going on behind the scenes, inside the walls. The planning that puts outlets and light switches and ceiling fans in the “right” spot. The wires, the connections. Amperage. Circuits. How does the power get from the transformer on your property to your microwave oven? Most people have no idea of what a “home run” — as it relates to power in their homes — really is.
I do. I have a vast, intimate knowledge of all the power in my home because I’m the one who designed the system and ran all the wires.
With a little help from friends, as I’ve mentioned elsewhere.
The Panel
After creating all the circuits you can read about in the last few entries listed above, I wound up with about 20 lengths of Romex wire dangling out of a cavity in the wall between my stairs and RV garage. Each length of wire represented one circuit, from the lights in my living room to the outlets, lights, and exhaust fan in my bathroom, to my water heater, to my stove/oven.
Romex is good stuff, mostly because each gauge — or thickness — is color coded. 14 gauge for 15 amp circuits is white, 12 for 20 is yellow, 10 for 30 is orange, and 6 for 50 is black. This would make it easy to match the wire to the correct circuit breaker amperage.
As I ran each home run, I used a Sharpie to write on the end of the wire, labeling it for its circuit. For example, KIT 1 and KIT 2 were my two kitchen circuits, BATH was for the bathroom, and LR TV was for the northeast side of the living room while LR OFFICE was for the northeast side. Although I never came up with a formal electrical plan for my place, I did keep track of each circuit on a sheet of paper. This helped me keep track of which circuits I had, what amperage it needed, and what my progress was on each one.

After running all the home runs, I was left with this mess at the circuit panel. (You should have seen it before I neatened it up.) The round thing is my Internet router, which I hung up there temporarily. I’m going to have the local cable company re-do the Internet wiring so the router can be in my office area upstairs.
Of course, what I had at the circuit panel end was a big mess. Everyone who looked at it — especially the county and electrical inspectors — wondered how I was going to get the wires into the circuit panel neatly, without the Romex being exposed below 8 feet. I wondered, too.
My friend Tom is a retired union electrician. He’d been giving me a bunch of advice for the past few months and had helped me with some of the more difficult tasks, such as getting conduit to my shed up to code, helping run the circuit panel and outlet ends of my RV garage’s 30 amp RV circuit, and installing fixture bases for my outside wiring. These are tasks that I could have done on my own, but it would have taken much longer and I likely would have gotten it wrong several times before it was right and to code. He knew all about the job that was ahead of me at the panel and he also knew that I’d be depending on him for help.
He said he thought a lot about it while I was on vacation. He said he worried about it.
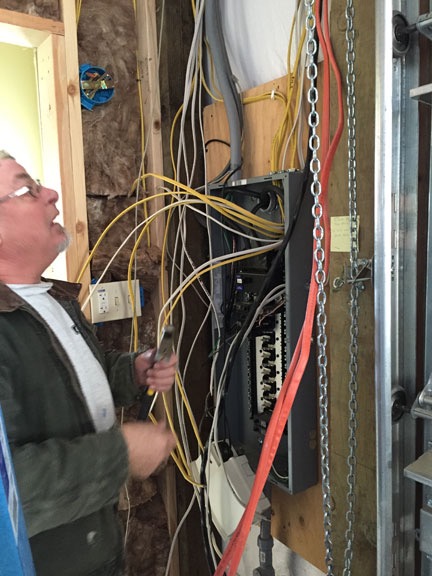
Here’s Tom contemplating the panel not long after we started feeding Romex into it.
But when he came by yesterday, it didn’t take long for him to figure out how to get the job done. I cut another piece of wood to complete the wire channel and we notched it so the wires could come out neatly in one big bunch, high above the panel. The drywall guys, who hadn’t done that area yet, would be able to work around the wires and then close up the space in the notch with fire tape.
The wires then came to the wall over the panel where they’d be secured before coming down the wall and into the panel. 8-foot lengths of 2×4 lumber, which I happened to have handy — doesn’t everyone keep lumber around their home? — would be secured to the posts on either side of the panel. The drywall guys would lay in one 8-foot long sheet of drywall, with a hole cut to the size of the electrical panel, and fasten it to the 2x4s. Result: a neat panel area with no Romex exposed below 8 feet.
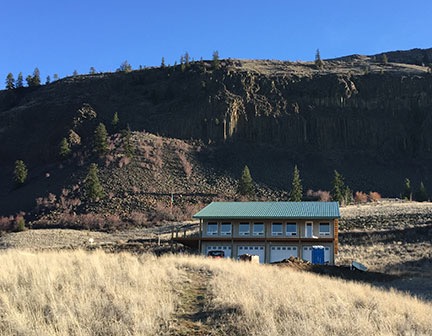
It was a beautiful day in the neighborhood. I shot this photo from my Lookout Point not long after Tom left.
And that’s the way things went. Tom and I worked on the panel for a few hours, stopping only for some grilled sausage sandwiches I cooked up for lunch and the occasional cigar break. The day was beautiful, with scattered high clouds, lots of sun, and temperatures in the high 50s. We had lunch outside in the sun. I opened the big garage door beside the panel about halfway to let in lots of fresh air. We worked as a team with Tom doing most of the connection work and me handing him circuits and marking the slot each circuit was connected to on my master list. Later, when the door was put on the panel, I’d label each slot on the sticker provided. At the end, we found that I’d failed to label three home run wires: by process of elimination, we figured out the 20 amp wire and know which two are the 15 amp wires — I’ll know exactly which is which when I finish wiring them and turn them on.
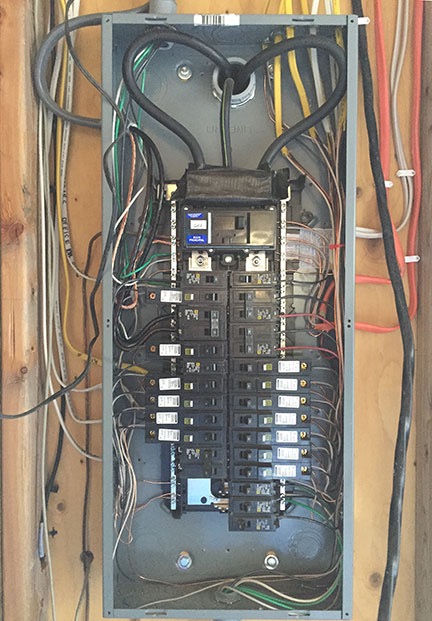
Here’s the finished panel. The long circuits with the white labels on them are arc fault protected, which are required for living space circuits in Washington as of July 1, 2014. The dangling black wire on the right is for my range.
We had them all done by around 3 PM. All except the 50 amp range circuit. That needed a 3/4 inch connector, which I did not have. (The others used 1/2 inch connectors and I had plenty of those.) I’d finish it up on my own before inspection. I’d also have to attach the wires to the wooden board behind the panel.
But at this point, I had all of my other home runs wired to the circuit panel. That meant I could begin wiring light fixtures, outlets, and other devices.
When Tom drove away, he stopped and said out his window, “We did pretty good. I didn’t think we’d finish in one day.”
He wasn’t the only one. The task had seemed overwhelming. But with his know-how and my help — not to mention being organized and having everything we needed on hand — we’d knocked it out in less than five hours.
Wiring the First Circuit
While I was away, the light fixtures I’d ordered for my living room about two months before finally arrived. The six boxes were stacked neatly by my drywall guys in my shop area.
The living room light circuit was one of the easiest to do. There were only the six fixtures on it. I’d run the circuit with 14/3 Romex with the idea of having two separate switches. I wasn’t sure if I wanted each switch to operate every other light or if I wanted one to do the north side of the room and the other to do the south. The benefit of using 14/3 wire (instead of 14/2) is that I could make just one run, from fixture to fixture, rather then two separate runs, each of which went directly to the lights I wanted connected to each switch. I could decide now which lights would be controlled by each switch but could easily change it later if I wanted to.
I decided to run the first three lights on one switch and the last three on the other. So the red wire brought power to the last three fixtures on the run and the black wire brought power to the first three fixtures on the run. I wish I had a decent drawing app to show how it was done. It’s actually quite interesting — if things like this interest you. (Which they might if you’ve read this far.)
It was getting dark, so I started by running an extension cord up the stairs and plugging in my portable shop lamp. I put it high up on my scaffold, which had been parked in my office area. I also brought up my radio and old iPod. I figured I’d be doing a lot of work upstairs in the coming weeks and some music of podcasts would be nice to listen to. Then I brought up all my electrical tools, the boxes of light fixtures, and a step stool. I put on some music and got to work.
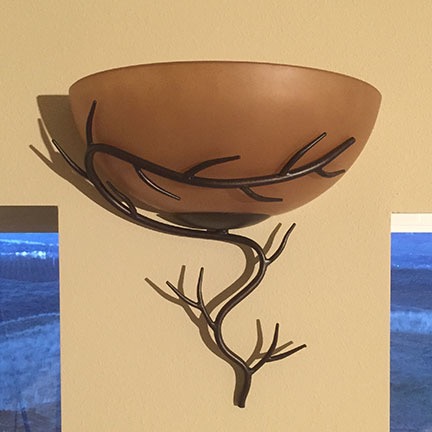
Here’s the first fixture I installed. Each fixture sits between and slightly above a window. The idea was to provide light high enough that it wouldn’t shine into your face when you looked out the window.
The light fixtures I bought were rather ornate. They’re sconces, each of which has a metal twig sculpture that holds a colored glass shade. Installing them was a remarkably easy multiple-step process:
- Use a yellow wire nut to fasten together the two unused power lines (in and out, red or black, depending on the fixture’s location) to allow power to continue down the circuit.
- Adjust the length of the central post in the metal base.
- Screw the metal base into the blue fixture box.
- Attach the ground wire from the fixture to the metal base.
- Use a provided wire nut to fasten together the grounding wires.
- Use a provided wire nut to fasten the fixture’s white wire to circuit’s white wires.
- Use a provided wire nut to fasten the fixture’s black wire to the circuit’s power wire (black or red, depending on the fixture’s location).
- Use the decorate nut to fasten the fixture to the metal base on the wall.
- Set the glass shade into place.
- Use a level to adjust the angle of the fixture and shade.
It went pretty smoothly. If I hadn’t stripped two screws for attaching the metal base to the blue box, I probably would have finished at least 30 minutes sooner. I took a break for dinner after the first two fixtures, still not sure whether I’d get it done that night.
In hindsight, I wish I’d taken some progress pictures. But I think I was too excited about getting it done that night. I was driven. I wanted to have the whole thing done at night so I could light them and see exactly how much light they cast so I worked as quickly as I could.
When the last fixture was installed, the only thing left to do was wire the switches. These switches would be at the top of the stairs in a box that held switches for three different circuits. I pulled out the mess of wires that, like the ones in the blue fixture boxes, were covered with paint overspray. I sorted out the ones I needed for my circuit and made the necessary pigtails for the black and white wires.

The two center light switches in this box will control the six living room lights.
Then my brain shut down. I knew how to do it, but they way I thought it needed to be done didn’t seem right. I didn’t want to bother Tom — especially after I’d texted him earlier, assuring him I knew how to wire the switches. So I grabbed my electrical how-to book, opened it to the page with the wiring diagram that applied, and studied it for a moment. Yes, I did know how to do it. I closed the book, went back upstairs, and finished wiring the switches.
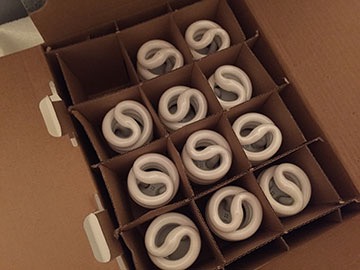
Amazingly, I had lightbulbs.
But did I have lightbulbs? I did! I think I’d picked up a box at Home Depot or Costco not long after ordering the fixtures. I found them in my shop, exactly where they belong. I wasted no time twisting them in.
Then I texted Tom:
I’m flicking the switch. If you don’t hear back from me in 2 minutes, I got it very wrong.
After all, if I electrocuted myself, it might be a good idea for someone to collect my smoldering remains before the drywall guys came in the morning.
I went downstairs, consulted my master sheet of circuits, and determined I’d wired circuit 15. I counted down the board three times to make sure I’d flick the right switch. Then I flicked it. No smoke, no fire. So far, so good.
I went back upstairs and flicked the first switch. The first three lights went on. I flicked the second switch. The other three lights went on. No explosions, no fire. It worked.
I texted a photo to Tom. He congratulated me and I responded that I couldn’t have done it without his help.
I turned off the shop light. The room was fully illuminated by the six lights. At first, I was a bit disappointed by the amount of light each fixture cast. But as the bulbs “warmed up,” the light brightened.

Here’s an iPhone pano shot of all six lights in my living room. There are two on each wall.
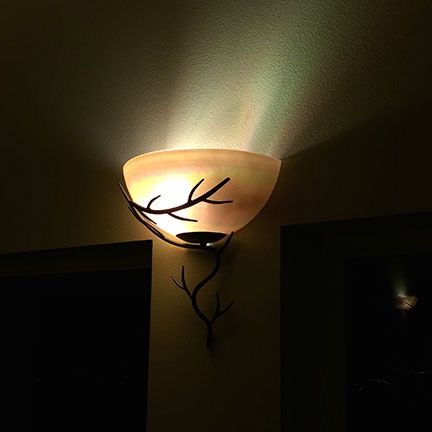
The lights even look good when they’re turned on. In this shot, you can also see the reflection in the window of another light on the other side of the room.
I’d used the equivalent of 60 watt bulbs. The fixtures can support up to 100 watts. But I like the gentle light they cast. Not only can you see the fixtures when you look right at them, but the light is mellow enough that you can still see the city lights out the window, even when sitting away from the window. The light doesn’t overpower the room and make everything outside look black. I like that.
Milestone Achieved
Once again, I can’t describe the amazing feeling of accomplishment I get every time I knock off a little part of my construction project. To me, this is yet another milestone — the first circuit in my living space completed. The ball is back in my court and it’s all coming together quickly now.
Later today, I’ll wire some of the outlets upstairs so I can get rid of the extension cord on the stairs. And, as the days go by, I’ll wire one circuit after another, flicking each one on to test it before the final electrical inspection. Before long, my electrical work will be behind me and I’ll be on to other tasks.
This evening, I’ll fill my freshly painted and lighted space with friends and the smell of smoked ribs and the sound of music and laughter. Another milestone achieved, another celebration with friends.
Discover more from An Eclectic Mind
Subscribe to get the latest posts sent to your email.

Great to hear that you’ve made progress. Here’s to keeping the smoke inside the wires and not letting it escape.
Thanks and I’m definitely with you on that!