Another do-it-yourself project for my home.
I had a lot of time to design my new home. A lot of time. And not only did I have time to think about the building and how I would use it, but I also thought a lot about the land.
The Plan — or at least the relevant part of it
I decided that I’d try to plant a small vineyard. The rolling hills on the east end of my property are well-suited for wine grapes and, after all, there is a winery less than a half mile down the road. If I did everything right and could produce some good grapes, I could sell them for supplemental income. I don’t expect to get rich and I certainly don’t want to become a winemaker, but it would be a nice way to join the agricultural community beyond my short season cherry drying work. Of course, all this is a bit in the future — 2 to 3 years, I think — but it got me thinking about features I could incorporate into my building to make it more attractive for someone who might want to buy a vineyard and start making wine.
And that’s what got me thinking about the floor drain. If there’s one thing you need when you’re making wine, it’s a place to rack the wine. Wine racking involves pumping wine out of the barrels where they’re aging, cleaning the lees (dregs) out of the barrels, sterilizing the barrels, and pumping the wine back in. The process is time consuming and labor intensive and since you’re dumping the lees and rinsing the barrels, the runoff has to go somewhere. Being able to do this indoors, in the shade, in a possibly temperature-controlled space would be a big plus for a future winemaker, making my property a bit more attractive than it otherwise might be.
As if the view and the privacy and the giant garage and the wrap-around deck weren’t enough.
Besides, I reasoned, I’d like a drain in the floor, too. It would make it possible for me to wash a car or my RV indoors or simply hose off the floor.
The Drain
I talked to the builder and we decided on a 24-foot long drain with a grate on top and pipe leading the water out the back of the building. I already had a drainage channel dug back there to take rainwater off the roof away from the building. We’d tap into that.
I went to Home Depot and bought the parts: 2 10-foot lengths and 1 4-foot length of drain channel, 12 2-foot lengths of snap-in grating, 2 10-foot lengths of plastic pipe, 3 drain channel fittings, and 1 drain channel end cap. I spent just over $500.
When the workers prepped the floor for the concrete pour at June month-end, they installed the channel and the cap. It sat above the gravel grade; the concrete would be poured around it. They covered the grate with duct tape to prevent concrete from getting in. And then they poured.
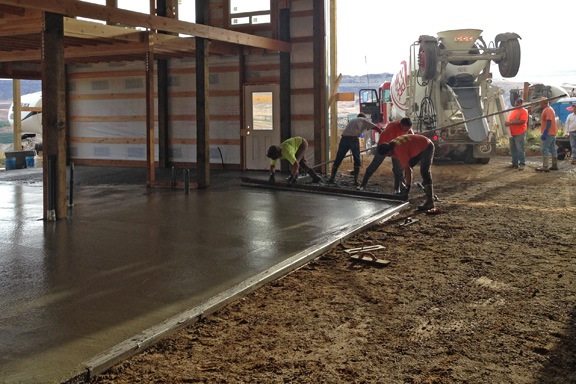
In this shot, the drain channel divides the poured concrete from the unpoured gravel floor. The concrete is basically as thick as the drain channel is high.
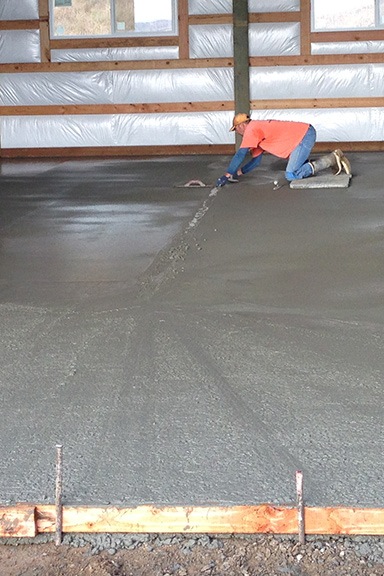
You can barely see the drain in this shot; they used silver duct tape that really blends in with the concrete color.
Finishing took effort. The drain runs down the center of a 24 x 48 foot space. The front, back, and sides needed to slope down gently to the drain so if water got into that space, it would eventually end up in the drain. I was told that the slope would not be steep and that was fine with me. I didn’t expect to use it very often anyway.
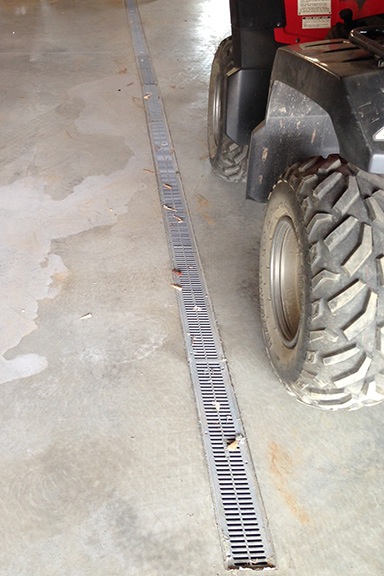
Here’s the drain looks like today, although it’s actually longer than what you see here. The white “stain” is from me hosing off my tile saw; some of the water came back into the building and went where it’s supposed to go: into the drain. That’ll wash away the next time I use the hose.
Later, when the concrete was dry, I peeled off the duct tape. I even took out a hose and hosed down the floor to watch the water flow into the drain. I walked around the back of the building and watched the water move away. Cool.
The Oil/Water Separator
There was a bit more to the drain than just the drain itself. Because the drain was in the floor of a garage space, it needed an oil/water separator. That’s a contraption (for lack of a better word) that prevents oil that might wash away from vehicles from getting into the ground. Instead, it’s trapped and, when enough has accumulated, can be cleaned out.
Before buying the drain parts, I did some research. I found a very simple oil/water separator that I thought I could make myself. It was basically a container with a water inlet from the drain and outlet to the drainage ditch. Inside the container were two baffles or dividers. One was short but went to the bottom of the container; sludge would gather between the inlet and that first baffle. The other was short but went nearly to the top of the container with space beneath it. The water would move through there but the oil, which floats, would stay at the top. The water would then go through the discharge outlet, clean.
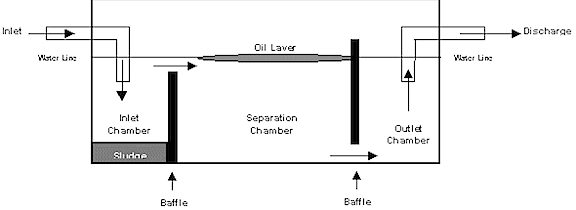
Here’s the design I found on the Web.
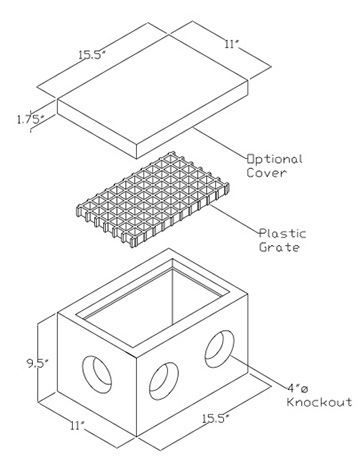
Here’s a diagram of the box. I didn’t buy the grate, mostly because I wanted it completely covered; I don’t want to be fishing dead rodents out of oily sludge.
I sent this image to the plans inspector to see what he thought. He agreed that it would do the job. I suggested making it out of a heavy-duty plastic toolbox. He said that wasn’t heavy-duty enough.
It took a while to figure out what I could use as the container. It was Tanya who suggested that I go to H2 Pre-Cast near Wenatchee Airport. I sat down with the sales guy and showed him my drawing. He showed me concrete boxes on his computer screen. I spent $70 for a small one with a concrete lid.
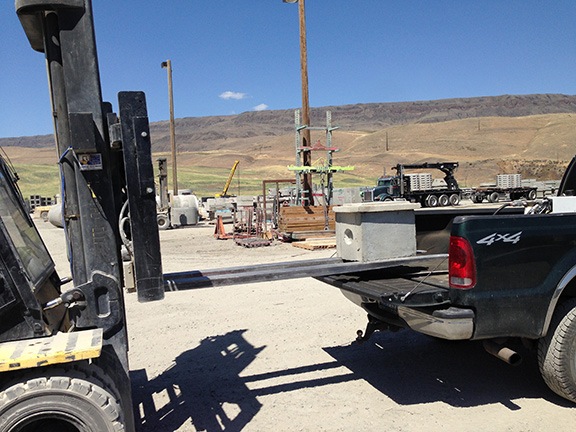
They used a forklift to load the box onto my truck for a reason — it’s very heavy.
When I realized I how heavy it was, I rushed home to get there before the crew working on my building went home for the day. I let them use their forklift to get it off my truck. They stowed it in the building. Later, when they’d gone for the day, I used the forklift to move it to the back of the building so it would be out of the way.
When the concrete was poured, the box was waiting for the rest of the installation: digging a hole for the box, moving it in, and putting in the baffles. That was my job — and I had no idea how I was going to do it.
The Concrete Solution
I thought about how I would do this for almost a month. I talked to friends. My friend Bob suggested using the concrete pavers I already had to build the dividers. He had a masonry saw he thought could do the job. Because the interior of the box was smaller on the bottom than the top, if we cut the pavers just the right size they should slip into place. We could then use a cement paste to sort of “glue” them in.
It sounded good to me.
In the meantime, I had to get the box into the ground. That meant digging a hole in compacted earth. Fortunately the earth there has very few rocks and I have a very heavy digging stick. I made short work of the job one morning before it got hot and the spot was still in the shade.
Of course, I still needed to get the box in the hole. And I couldn’t budge the box.
The solution came on a motorcycle: my friend Mike. Looking for an early morning destination with his dirt bike, he showed up at 6 AM on Tuesday. After giving him hot coffee and a bacon and egg breakfast, I led him around to the back of the building to the little moving problem I’d discussed with him on the phone. Together, we knocked out the holes on either side of the box — guess who I was thinking of as I banged away with a heavy hammer on one of the punch outs? — and lowered it into the hole. Then we connected a cut length of pipe to the pipe coming out of the building to make the inlet and used the rest of the pipe as an outlet.
Now I was ready for Bob and his masonry saw.
But it was Tuesday and Bob works 10-hour days during the week. The soonest he’d be able to come would be Friday — if he didn’t have something else on his plate for his only weekday off. And I’d been thinking about other solutions.
Like concrete.
I figured I could make 2 concrete forms for the inside of the box, mix up some concrete — I already had portland cement and sand — and pour the concrete into the forms.
And that’s exactly what I did on Wednesday. I cut some 1-1/2 inch foam insulation sheets I had lying around into 4 dividers. I positioned the dividers for the pour, being sure to place more foam under the dividers on the outlet side to leave a space under the baffle. I used scrap lumber to hold everything in place. It looked extremely makeshift.
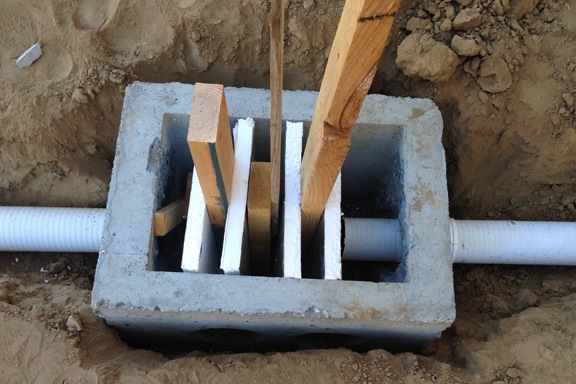
Foam dividers are held in place by pieces of scrap lumber.
Then I mixed up some concrete in a big paint bucket. I tried 4 parts portland cement + 4 parts sand + 4 parts water but the mixture — once I got it mixed up enough — seemed too thin. So I added 2 more parts of cement. The resulting blend looked like it might be thick enough to stay within the forms.
So I poured it.
Concrete immediately began leaking from the first form. But only for a moment; it seemed to sort of clot itself, like blood on a wound. So I kept pouring. I poured both forms, stopping the inset side form about 2/3 of the way up and bringing the outlet side form (with the foam beneath it) within a few inches of the top of the box. Then I got down on my hands and knees, scooped up the leaked concrete and slapped it against the walls where the pipes came in and out. I did the best I could to use all the concrete in the baffle forms and around the pipes. It looked awful when I was done. So did my hands.

Here’s the big picture after the pour. You can see the box lid standing up against the side of the building as well as one of the pavers Bob wanted to cut for baffles.
I cleaned up and resisted the temptation, for the rest of the day, to pull off the forms. Instead, I used a level and a shovel to make sure the outlet pipe sloped down. I put the paver on top of it and closed up its mouth with some hardware cloth to keep the rodents out. (Around here, you don’t wonder if the mice will get in. You assume they will and take preventative measures to keep them out.) Then I buried both pipes and brought the dirt around the outside of the box.
On Thursday, I could resist no longer. In all honesty, I didn’t think it would work. I couldn’t imagine why freshly poured concrete would adhere to the concrete walls of the box. But it did. As I pulled the forms out, cracking and cutting them as I worked, I revealed the smooth walls of my new concrete baffles. With a little cleaning up, it would be all ready for inspection.

Here’s my finished oil/water separator after cleaning it up a bit. The inlet from the drain in the building is on the right; the outlet is n the left. Although you can’t see it, there’s space beneath the left side baffle.
Inspection and Test
I was hoping I’d be around when the inspector stopped by so we could test it together, but I was on a charter flight at an orchard near Othello. He called me to get access to the building, which is secured by a keyless lock. He asked me to remind him what he was supposed to inspect.
“The oil/water separator and the framing,” I told him. “If you want to run the hose over to the drain in the building to test the oil/water separator, you can. Just don’t add oil unless you have to.”
“Oh, I already looked at that,” he told me. “It’s fine.”
And that’s that.
Of course, I wanted to test it. I wanted to make sure the water drained out properly.
Besides, who doesn’t like playing with flowing water?
So I ran a hose into my RV garage and laid it down by the drain. Then I turned on the water and ran around to the back of the building. I’d just managed to turn on my phone’s video camera when the water arrived.
Here’s the test. The water was only turned on partway — I have excellent water pressure. But the outlet drain kept up with the inflow of water and none of the water went over the top of the outlet side baffle.
Success!
What I like best about my solution for the oil/water separator is that other than the concrete box, I already had everything I needed to get the job done: foam for forms, scrap wood for supports, cement, sand, hardware cloth. So rather than spend over $1,000 for one of the many of the pre-made solutions out there, I got the job done for about $70. You gotta like that.
One More Thing
Of course, not everything could go perfectly smoothly.
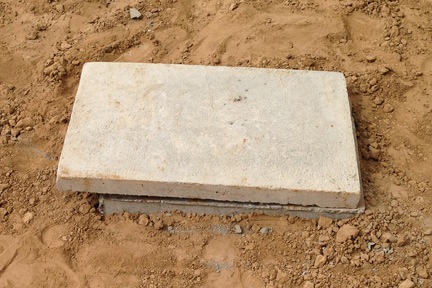
Duh-oh! These two pieces were sitting around here for two months and I never noticed I had the wrong size lid.
When I was cleaning up the area after the test, I put the lid on the box. That’s when I discovered that I had the wrong size lid.
Well, at least I can lift it to return it for the right one.
Discover more from An Eclectic Mind
Subscribe to get the latest posts sent to your email.

I am very very impressed.
Note to self: clean out the separator and the rat wire at the end of the outlet pipe, frequently.
Even I’m impressed. Can’t wait to show it to friends this evening. Hoping I don’t need to clean it at all.
I’m surprised that the concrete is sufficient to seal the inlet and outlet pipes. I thought you may need to seal them into the box first then use the concrete as a top covering over the seals.
I’m surprised, too. And, in all honesty, I didn’t even seal it as well as I wanted to. But (1) it passed inspection and (2) it won’t be used very often. In fact, at this point, I think I’m more likely to use it to show off how it works (as I did for friends yesterday) than to actually separate oil from water in my drain.
thank you rely help full
i will do same thing
but i think you have to go bay your shope square feet first 100 square feet 6 cubic for each additional 100 square feet 1 cubic foot
1 cubic = 7.481 gallons