100 Coffee Filters

Tracking house-sitting time with cups of coffee.

As I blogged a while back, I had every intention of spending the winter in my RV on my property in Malaga. The winterization worked well and I had no trouble with water, electric, or sewer hookups. I had enough heat to keep me warm night and day. And I had all the conveniences of home — the same home I’d been living in full-time since May and every summer since 2010.

The big drawback was the cramped space. Let’s face it, the mobile mansion might be big for a 5th wheel RV, but it’s not big for a full-time living space. And with winter weather outside — often at freezing temperatures — there was no outdoor living space to complement it.

Still, I’m not home very much — I have a pretty active work and social life — and I was prepared to deal with it. After all, the winter wasn’t that long.

I went to Seattle on a Sunday in mid-December. I had some chores to take care of — new battery for my phone, shopping for cross-country skis, hiking with a meetup group — and I’d already decided that I’d make at least one trip into Seattle every month, just to insert a dose of city amenities. When I got home that evening, there was a note on my door. It was from a man I’d never met — we’ll call him Joe to preserve his privacy — who happened to be friends with one of my neighbors. “Don says you’re going to freeze,” the note said, referring to my neighbor. It then ended with an invitation to spend the winter in his house since he was going away to (ironically) Arizona. He’d be gone until February month-end.

I thought about if for three days before calling him. Then I said that I appreciated the offer but thought I’d be okay. Still, maybe we could meet in case I needed a Plan B?

Before meeting, I talked to two people I thought might know him. They both had nice things to say about him. He’d lost his wife in March and was working his way though that. They both told me that he lived in a nice house.

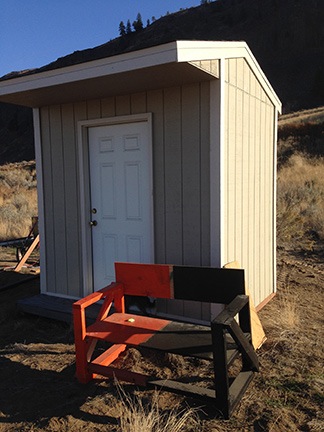
In the meantime, the weather forecast changed. It had been in the 40s every day and I’d been able to get work done outside on the path I was building and in my shed. For some reason, I thought it would stay like that. But no — it was going to get colder and those midday jaunts outside would soon end — at least until the snow came and I could take the skis or snowshoes out with friends.

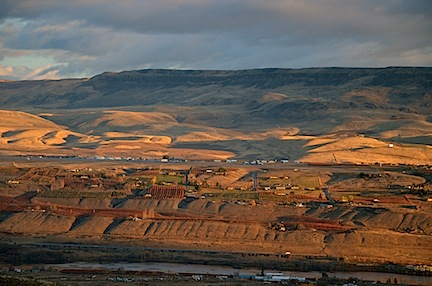
I met Joe and told him I’d reconsidered. If the offer was still open then yes, I’d love to take advantage of it. He showed me around his wonderful three-bedroom home just two and a half miles from my place. Situated on a shelf — just like my lot two levels up the mountain — it had a wrap-around porch and nearly the same view I had of the Wenatchee Valley. Furnished with antiques, it had a few modern conveniences I missed: a dishwasher, washer, dryer, and satellite television. There was plenty of room and plenty of privacy. There was even a garage and space in a covered carport to park my Jeep and truck.

It was more than I could possibly ask for. And all he wanted in return for letting me use the place was for me to pay the utility bills while I was there, keep the place clean, and keep an eye on things.

Joe, in the meantime, was heading south with his trailer and a friend. They planned to leave on December 2. I was welcome to move in any time, but I honestly felt a little weird moving in before he left. That would make me (and Penny) a house guest instead of a house sitter. So I held off, prepping for the move back in the mobile mansion.

At November month-end, the forecast warned about bad weather on December 1 and 2. Joe’s friend, who was coming down from Canada, came early. They packed up and pulled out on November 30.

I was supposed to do shuttle flights between two wineries — Martin Scott in East Wenatchee and Malaga Springs in Malaga — on November 30, which was a Saturday. But low visibility and some freezing fog made that a dumb idea. With my afternoon suddenly open, I decided to start my move that day.

I made a few trips in my truck, bringing along the bare necessities like clothes and food from my fridge and cabinets. I wasn’t sure what I’d need and, at first, I also brought along linens and towels and my electric blanket. I wound up bringing all these things back to my RV. I wanted to keep things simple so it would be easy to move out at the end of my stay.

I went out that evening with some friends and returned to my new (temporary) home around nine. I’d already picked one of the guest rooms. I put Penny’s bed on my bed, atop the comforter I’d brought along, and and climbed between the covers. I turned off the light and lay on my side, facing out one of the room’s two big windows, looking out at the lights of Malaga, Wenatchee, and East Wenatchee. My new home would have windows just as big. I felt as if I were getting a preview of what was to come.

Coffee
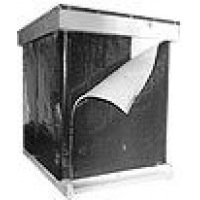
Coffee, coffee brewer, filters. What else do I need?

The next morning, I made coffee, just as I did every morning wherever I lived. I’d brought along my little one cup coffee brewer and a brand new pack of #2 cone coffee filters. I opened the pack of filters and brewed some coffee. I let Penny out and she did her business somewhere out in the yard, which she’d already explored the previous day. When she came back in, I fed her — I’d also brought along her placemat, dishes, and food. It was life as usual for the two of us — just in a different place.

But we’re used to that. For the past 18 months, we’ve been sort of gypsies. We lived in at least 20 different places, including various homes and hotel rooms. Even the RV had been parked in six different places in three different states. Penny and I adapted as necessary, settling into each of our temporary homes with ease. I loved the variety our gypsy lifestyle offered us and Penny didn’t seem to mind one bit. I think she’s come to expect it.

I spent much of Sunday morning prepping the RV for winter vacancy. That meant blowing out the water lines, putting antifreeze down the drains, and disconnecting the power for the heat tape on the water line. And packing up and moving a few more things. The weather was still iffy, with low clouds and mist. I had a gig flying Santa into Pybus Public Market later in the day and, for a while, wasn’t sure if I’d be able to do it. But by 12:30, I decided to give it a try and headed out to take care of it, leaving Penny behind for the first time, alone in Joe’s house.

After the flight, I met up with some friends at a wine tasting room and we wound up going to dinner. I didn’t get home until after 9. Penny was excited to see me. I checked the house out thoroughly to make sure she hadn’t had any “accidents” while I was gone. All was okay.

By Monday morning, life had already settled into a routine. I let Penny out, made coffee, let Penny in, and fed her. I caught up with email and Facebook while having breakfast at the kitchen table, watching the valley light up as the sun rose. (The view really is magnificent.) I showered and dressed. I already felt at home.

I ran out to do some errands that included dropping off my Jeep for service. It had been leaking from the transfer case for about a year and I needed to get it fixed. After all, it would eventually run out of whatever was leaking. But what really prompted me to get it taken care of was that I wanted to park it in Joe’s garage and I didn’t want it leaking in there.

I’d arranged for a neighbor to pick me up on her way home from errands in town and I had time to kill. After dropping off the Jeep, I had another breakfast in town — Sassy’s Dinner makes the best breakfast! — and then walked to Caffé Mela for a latte and to update the software on my iPad. On the way, I noticed that there was fresh snow on the hills north of town. Then I wandered to a used furniture store to browse for a dining table and chairs — the only thing I needed to furnish my new home when it will be built next year. My neighbor and her son picked me up and we drove up to where the mobile mansion and my truck were parked. I was surprised to see fresh snow on the ground — it had snowed during the three hours I was gone.

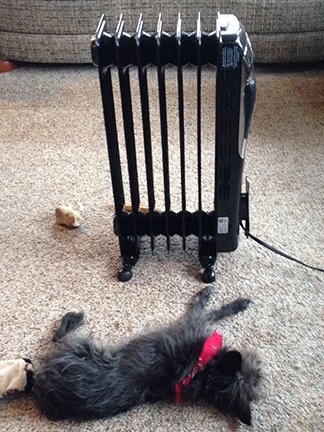
I decided that I didn’t trust my RV winterization. So I set up a heater in the basement and inside the RV. Power was cheap enough that the two heaters would be cost-effective insurance. I also had the added benefit of having the place kept warmer than freezing if I had to come back and fetch anything I’d left behind. I still had one more trip to make — to get my computer, printer, and camera gear — and then I’d close up the slides. That would make a smaller place for the inside heater to keep warm and minimize the amount of roof space exposed to the snow.

I should mention here that my hangar is large enough for me to park the RV in it, too. But it’s a pain in the ass to move and I did an excellent job parking it right where it is. I’ll admit it — I’m too lazy to move it and then move it back in February. (There’s also the very real possibility that snow on the ground would make it impossible to move in February.) And because of that, the mobile mansion will spend its very first winter outdoors.

Joe Miller Road
Joe’s place is truly wonderful.

When I got back to Joe’s place, I stopped at the end of the driveway to snap a photo with the dusting of snow all around and the valley off in the distance. It really is a beautiful place and I know I’m very fortunate to be here.

More errands yesterday afternoon, including a quick visit to where my helicopter is parked inside Pybus Market. Then home to Penny and dinner. I set up my Christmas tree for the first time in three years. We even watched a DVD.

This morning, I got right into my routine.

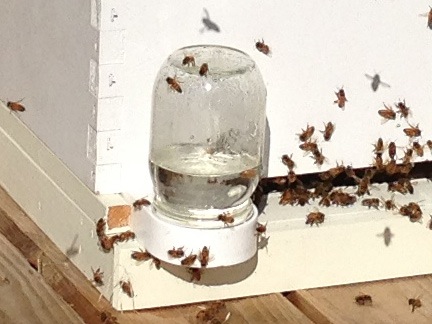
As I pulled a coffee filter out of the package, I consulted the label to see how many were in there. 100 coffee filters. I thought about my stay at Joe’s house. Three months. Pretty darn close to 100 days. I realized that I could see at a glance how much time was left of my stay just by looking at that package of coffee filters.

It’s still very full.

Prepping my RV for Winter Living

A lot of work with good results…so far.

September 2016 Update:

This post is very popular every autumn and this year is no different. I responded to some emailed questions with a new blog post that provides additional information on this topic. You can find it here: “Wintering in an RV.”

It was October when I realized that I’d likely need to stay in Washington for the winter. Although I didn’t expect to have much work to do, other business in-state required me to stay for various meetings throughout the winter months.

And then I started getting flying jobs, out of the blue, giving me enough work to make it worth sticking around. I started thinking about enjoying a winter season for the first time in 15 years, of cross-country skiing and snowshoeing with friends. Of really enjoying all four seasons of a year.

Not only was I going to stay, but I was going to make the best of the situation and enjoy my stay.

The No-So-Tough Decision

But where to stay?

I had a few options for winter lodging:

  • I could rent a furnished apartment. There are some available in the area, including some that are normally rented out to skiers coming to nearby Mission Ridge. The monthly cost would likely be somewhere between $500 and $1,500 — if I could find one that allowed dogs.
  • I could rent an unfurnished apartment. This would likely be cheaper, but it would also require me to move some of my stored furniture to make myself a home. I had to figure in the cost and bother of the move. And again, I needed to find a place that allowed dogs.
  • I could “camp out” in my hangar at the airport. The hangar has two offices with baseboard heaters, as well as a full bathroom. My furniture is already there, so it’s just a matter of reorganizing it to meet my needs for the few months I’d need to live there. Unfortunately, I didn’t think my landlord — the folks who manage the airport — would like those arrangements.
  • I could live in my RV, either in my hangar — there’s plenty of room — or on my property where it was already parked and hooked up. The trouble with that was that my RV, the “mobile mansion” is not designed for cold weather living. To make matters worse, I had parked it 66 feet from my onsite water source and I knew the hose running in a makeshift conduit under my driveway was very likely to freeze.

Morning View
Here’s what I saw out my window the other morning, not long after dawn. I look forward to seeing the changing seasons in my view.

In the end, the decision was made easy by the amazing views out my window every day. From my perch high above the Columbia River and Wenatchee Valley, I could enjoy the ever-changing scenery, which varied throughout the day with changes in light and weather. I could watch low-level clouds form and dissipate over the river. I could see the shadows move and lengthen with the shifting of the sun. I would watch the moonlight play upon the hillsides and cliffs. And I could marvel at the lights down in the city, sparkling with color. Would I see all that cooped up in a tiny rental apartment? Or closed up in a cavernous hangar with just three windows? No.

And what of the work I could do on nice days? I was working on a pathway from my RV parking area to my beehives. I’d been planting wildflower seeds and bulbs. And I still hoped to begin construction on my building at the beginning of the new year; I wanted to be around to supervise and document the work.

Besides, since I’d been living in the mobile mansion full-time since the beginning of June, it had become my home, my space. Bought to house two people, a mid-sized dog, and a parrot, it was amazingly comfortable for one person and a tiny dog. After dealing with seemingly countless delays, I’d finally moved it to the piece of land I’d been dreaming about for over a year. I was in my home, on my home. I was loath to give that up, even for a few months.

Of course, to stay in the mobile mansion meant a lot of prep work. I needed to “winterize” it and its water connection to ensure that my water pipes — inside and out — didn’t freeze and that I could keep warm inside. And with frost appearing outside my door on some mornings, I knew I didn’t have much time.

PEX, the Miracle Pipe

Heat Tape
Heat tape comes in rolls. I bought this at Home Depot.

The first thing on my list of things to do was replace the standard RV drinking water hose that ran from my city water source across my driveway (in a makeshift conduit I’d created) to the mobile mansion. I needed to run some kind of water line that I could run heat tape along. Heat tape (or trace heating) uses electricity to apply a small amount of heat to pipes to prevent freezing. I had some experience with it from my Howard Mesa cabin, where we’d used it on a very short length of hose between a water tank and the building. But rather than a 6-foot length of the stuff, I’d need 66 feet of it. That meant two 30-foot lengths plus one 6-foot length.

Regular hose, however, was not recommended by the heat tape manufacturer, which clearly specified metal or plastic water pipe. A hose was not a water pipe. Perhaps it wouldn’t work as well. Or perhaps it would degrade the hose and cause problems. I could imagine being poisoned by the breakdown of chemicals in my hose. (Seriously: I have a pretty good imagination sometimes.)

PEX
PEX comes in colors; blue is usually used for cold water and my water was going to be cold! I bought this at Home Depot.

Enter PEX. My friend Mike, who’d done most of the interior work on his home in Wenatchee Heights, had raved about it. I did some research. PEX was more costly than PVC but less costly than copper. It didn’t require any welding — or whatever it is that people do to copper pipes to join them — and it was flexible. There were two kinds of fittings. One kind required special (costly) crimping tools. The other kind, known as PTC, let you literally snap pieces together, with no special tools at all. All I needed was a PVC pipe cutter (which I already had) and a very inexpensive tool I could use to separate joined pieces if I made a mistake. The snap fittings were a bit more costly than the crimp type, but I only needed a few. I bought a 100-foot roll of blue 3/4 inch PEX.

PTC Fitting
A typical PTC to female pipe fitting.

I also bought PTC fittings. I needed one to join the PEX to a male hose connection and another to join the PEX to a female hose connection. I had a tiny bit of trouble with that — PEX connections normally work with pipe threading, not hose threading. (The fact that the two threadings are different is something I learned back when I set up the irrigation system at my Wickenburg house years ago.) The Home Depot pipe guy helped me get what I needed.

Pipe Insulation
This rubber pipe insulation has adhesive on one side, making it easy to wrap pipe. I bought this at Home Depot.

But there was one more thing I needed: pipe insulation. I wanted to wrap the pipe with the heat tape on it to help keep it warm. I checked out my options and decided on an adhesive wrap. Although it came in 15-foot lengths, I wound up needing 7 rolls of it because it had to go around the pipe. (This, by the way, is also when I learned that when you buy stuff for a home project at a place like Home Depot, always buy more than you think you need. It really sucks to run out of something in the middle of a project and you can always return unused items later. Home Depot has an excellent return policy.)

I went back and got to work. The biggest chore was attaching the heat tape to the pipe and insulating it. The big challenge there was straightening the PEX. It does straighten, but it straightens easier when it’s warm and it does require muscle. (Needless to say, I was sore the next day.) I cut off about 70 feet of the stuff and ran it across my driveway from the water source to my RV’s water connection area. Then, with the sun shining full on me the next morning, I brought out a clean damp rag (to clean away dust on the PEX as I worked), set up a chair, and got to work.

You see, because the PEX was so long and relatively inflexible, I had to move along the length of the PEX to get the job done. I couldn’t stay in one place and move the PEX. Adding the heat tape and insulation also made the PEX heavier, so moving it later would not be a good option. That was okay.

I was very pleased with my choice of insulation. Normally, I’d have to tape the heat tape to the PEX every six inches with a piece of electric tape. (Heat tape is not adhesive, despite its name.) But the insulation tape was adhesive so I just used it to stick the heat tape to the PEX, wrapping it as I went along.

It took a long time. Three days of about four hours a day with a few breaks for phone calls, snacks, and to track down a tiny dog who thinks she can chase bighorn sheep up on the cliffs. But finally, I was done. One end had two cords (one for the 30-foot length and one for the 6-foot length) and the other end had one cord (for the other 30-foot length).

I attached the fitting on the RV end of the PEX. I could not believe how easily it snapped into place. Working with this stuff on my new home was going to be a breeze. I trimmed the water source end and attached the fittings there. So far, so good.

Finishing Up the Water Pipe

Of course, I couldn’t have the wrapped tape stretched out in the elements across my driveway, especially when the snow started falling. So I got out my shovel and I dug another trench just deep enough to lay a conduit that I could seal the wrapped PEX into to keep it dry and enable me to drive over it.

For the conduit, I used brown vinyl downspout pipe. That’s the stuff people usually use to go from the gutter on the edge of the roof to the ground. I bought six 12-foot lengths of the stuff and six connectors. I also bought a pair of matching flex elbows to use at either end. I ran the PEX in this pipe, making connections as I went along. Then I laid it in the trench, put the flex pipes on both ends, and connected the ends of the PEX to the water source and RV. When I was finished, the PEX was completely enclosed in the pipe.

I crossed my fingers as I turned on the water. This was the moment of truth. If any of my connections leaked, I’d have a bunch of disassembling to do to find and fix the problem.

Imagine my pleasant surprise when not a single drop of water leaked from either end of the PEX! I love this stuff!

I had a few more things to do:

  • I needed to insulate the water source pipe and any portion of the pipe that wasn’t covered with heat tape or adhesive insulation. I used regular foam pipe insulation for that.
  • I needed to cover the water source area with waterproof material to prevent water from getting into the flex elbows. I used a heavy duty plastic garbage bag with bungee balls to keep it in place.
  • I needed to cover the trench across my driveway. I shoveled the dirt back in and placed construction cones at either end where the pipe emerged from the ground.
  • I needed to plug in the heat tape. I plugged two of the three cords in at my power pole and ran an extension cord across the driveway for the third plug. (I didn’t want the heat tape using the same circuit as the RV for various reasons.)

Then I was done.

Testing the Water Setup

Just in time!

The next morning was cold. I turned on the faucet and nothing came out.

I turned on the RV’s water pump. My internal tanks were full and functioned fine. But I had to troubleshoot the problem with the new pipe.

It turned out to be pretty simple: the heat tape was plugged into a socket that had tripped its GFCI. I reset the GFCI and tested the outlet. It worked.

Of course, it didn’t get cold again for quite a while. Three weeks, in fact. This morning, the temperatures dropped down in to the 20s. I turned on the water and it flowed.

All that work — and the approximately $150 I’d spent on parts — had paid off.

Basement Pipes

The mobile mansion has what I call a basement. It’s a huge storage area in the front under the bathroom and part of the bedroom. Most of the pipes that supply water to the bathroom fixtures run exposed in the basement ceiling.

The basement is not heated. When temperatures in the basement dropped down to freezing, the pipes could freeze, too.

My first thought was to insulate them with regular foam pipe insulation. I even got started doing that. But then I realized that a better solution would be to simply put a space heater in the basement and make sure it ran when it was cold out.

The trouble was, the basement was full of stuff. I’d have to move all the stuff out. I couldn’t fit all the stuff inside the mobile mansion. That meant having to store it in my hangar with the rest of my things.

I was bummed. There was some stuff there that I wanted to keep handy. Still, protecting the pipes was more important than convenience so I resigned myself to moving it all out.

Radiator Dog
Every morning, Penny lounges by the radiator in the living room.

That’s when I happened upon a gently used 6 x 8 shed for sale at an amazing price. I moved almost everything in the basement into the shed. Storage problem solved. The basement was now empty enough to put in a heater and not have to worry about things catching on fire.

Inside the RV, I had been using one of those oil-filled radiator style electric heaters for years. I kept it in the living room. In the bedroom, I had a small tabletop electric heater with a fan to push the warm air. Trouble was, I don’t like listening to a fan while I sleep so I never used it at night.

The radiator heaters are silent. I bought a second one, which had a fancy thermostat, and put the original in the bedroom. That freed up the little tabletop heater for basement duty and ensured a warm, quiet sleeping environment.

I placed it in the middle of the basement floor. Then I connected it to a temperature-sensitive outlet called a Thermocube at the end of the extension cord I was already using for the heat tape. The Thermocube supplies power to its outlets when temperatures dip to 35°F and turns off power when temperatures rise to 45°F. I turned the heater on to the lower of its two settings, figuring that would be enough to keep the area from freezing.

Basement Insulation
In this shot you can see the basement insulation panel as well as the connection for the water into the RV. The orange wire is for the heat tape; the red is the extension cord. Both are run into the basement where the heater is also plugged in. The blue coiled hose is the RV’s “outdoor shower” which I can’t seem to disconnect so I left it there.

Of course, like the rest of the RV, the basement isn’t very well insulated, either. Fortunately, I had four foam insulation panels I’d bought for another purpose. I did some trimming and made two insulation panels for just inside each basement door. Although it wasn’t a perfect solution for insulating the space, it was better than nothing.

Over the next few weeks, I’d open the basement doors to check the temperature in there. Although I never saw the heater on, it was always considerably warmer in that space than outside. I assumed the heater was getting the job done.

The Straw Skirt

The reason I had the foam insulation panels in the first place was because I had a crazy idea about possibly using them to build a skirt around the base of the RV. Many people had advised closing this space off to help keep the RV warm. But the mobile mansion is about 35 feet long. Foam was neither practical nor cost-effective.

I consulted with several friends. My friend Bob sketched out a frame that I could build with 2x4s and plywood. It would take a lot of wood and a lot of work. He gave me some wood for the frame to get me started.

But then my friend Tom, who lives in Vermont, suggest straw bales. I felt like slapping myself on the side of the head. Like duh. Not only were they good for insulation, but I’d be able to use them in the spring in my garden.

Straw in Truck
My first load of straw bales in the back of my truck.

So I went to get straw bales. I started with six. They loaded them in the back of my truck. It reminded me of the old days, when I’d get hay for my horses. I even bought a hay hook to make it easier to move them around.

I backed the truck up near the mobile mansion. The guy who loaded them told me they weighed around 80 pounds each. I don’t think they were that heavy. After all, I was able to get them into position easily by myself. They made a nice thick skirt against the sides of the RV.

Straw Skirt
The first six bales of straw in position around the mobile mansion. It took 22 bales to get the job done.

But six wasn’t nearly enough. I went back later in the day and bought another eight. This time, the loader put a palette in the back of the truck. It just fit. I strapped the straw down to prevent it from tipping off and brought them home. When I finished moving them around, I realized that another eight bales should do the job.

I got them two days later and put them in place. Although it wasn’t perfect, it was better than nothing. I’d fiddle with them and with spare pieces of wood and cardboard throughout the coming weeks.

Total cost of the straw skirt: around $200. Time and effort: minimal.

About the Physical Activity

I want to take a moment to comment about the physical activity needed to get all this work done.

First was dealing with the coiled PEX. I really needed to put some muscle into it to straighten it out. And that needed to be done about 3 feet at a time.

Next was digging the trench across my driveway. Although I’m fortunate that there are very few rocks in my primary building site — which also made the septic system guy pretty happy — the driveway did have a layer of gravel over it. I had to dig through that gravel and into the softer dirt beneath it. Later, I had to shovel all that gravel back. Hard work!

Finally, I had to deal with moving 22 straw bales from the back of my pickup into position all around the RV. I don’t really know what they weighed, but they were pretty heavy. I did a lot of dragging, mostly because I couldn’t do much lifting.

The days after doing each of these things, I really felt it in my muscles: shoulders, arms, abdomen, etc. But the soreness felt good. I can’t really explain what I mean by that. I think it has something to do with finally being back in shape after so many years of living in limbo. I’d let myself go physically (and mentally) while my future was delayed, waiting for a partner to fulfill promises he never meant to keep. Losing weight last year, getting back into outdoor activities, feeling good about myself again — that’s only part of my reward. The other part is the ability to do hard work again, to get a job done without waiting for someone to do it for me. (Not to mention the ability to make decisions without having to debate them with someone who seems to prefer arguing over getting things done.) The aches and pains were a reminder of how good independence really is and how great it feels to be physically fit and healthy. I love it!

The End Result

Last night, the temperatures dipped into the 20s. I know because I bought a thermometer with three wireless sensors — the one I fastened at my water source read 22°F this morning. In the basement, the temperature stayed in the high 30s. When I turned on my taps, the water flowed.

Inside, the RV is cool but not cold. Both radiators are on, although the one in the bedroom is set to low. I have an electric blanket on my bed so I’m never cold at night. The RV’s gas heater with its loud fan supplements the heat in the living room in the morning. I know I could keep it warmer if I’d just close the blinds, but I’d rather put on a sweater than miss out on the views outside my windows.

It’s unseasonably cold this week so I’ll have a good chance to test my setup. I’m not too concerned. The other day, one of my neighbors, who is going away for the winter, kindly offered me his home. I’ll talk to him later today; that might make a Plan B for nights that are just too cold to stick around. But it shouldn’t get much colder than it is this week, so there’s a good chance I’ll be living in my own space all winter long.

We’ll see. I’ve done my part; let’s see what Mother Nature challenges me with.

Bees: Winterizing my Hives

I tuck my bees in for the winter.

I started my beekeeping hobby in June 2013 and have been blogging about it periodically. If you’re interested in reading the other posts in this series, follow the Adventures in Beekeeping tag. Keep in mind that the most recent posts always appear first on this blog.

I moved to my new place in Malaga about six weeks ago and fetched my bees soon afterward. During the month they’ve been living in their new home, they’ve pretty much settled in. Although there aren’t any food sources right now — we’re well into the autumn season — they get out and about on warm days, which we had plenty of until very recently. I’d been supplementing their honey stores with sugar water in outside feeders that I filled every two days. Now those feeders were starting to freeze and leak. With temperatures dipping into the low 30s at night, it was time to prep my hives for the winter.

Because of my beekeeping goals, it’s vital for me to ensure that all of my hives survive the winter. With an average winter hive loss in this area of about 50%, statistically I stood to lose one or two of my three hives. I wanted to beat the odds and keep all three. That was my challenge.

Bees in Winter

Although bees don’t hibernate in winter, they do slow down their activities to a near hibernation state. They bunch together for warmth in the middle of the hive. The queen stops laying eggs — or lays very few –because the workers, who don’t really do any work outside the hive in winter, live a lot longer. The drones are generally kicked out; they serve no purpose at all in the winter and can eat precious food stores.

The food, by the way, is the honey and pollen they’ve been storing all summer. Beekeepers “steal” this honey, although a smart beekeeper will leave enough behind for the bees to eat during the winter. I harvested honey very early in the season with hopes that my bees would make enough to take them through the winter. For various reasons — hive strength, availability of food, etc. — I don’t think they made enough. That means I’ll have to feed them. More on that in a moment.

The bees will go out on warmish days, mostly to stretch their wings (so to speak) and poop. But because there’s nothing flowering, there’s no work to do and they don’t stay outside long.

Mite Control

Mite infestations weaken bees, making it more difficult for them to survive the winter. My friend Don is convinced that he lost his bees last year because of mites. I’m not going to make the same mistake.

I blogged about mites back in August; you can read more about varroa mites in that post.

This year, I used three techniques to control mites:

  • Drone frames – These are special frames with cell sizes that encourage the hive to produce drone eggs. Since mites prefer drone larvae, you can simply remove a full drone frame and freeze it to destroy the mites and the drones. This works, as I detailed here. It’s a great spring/summer solution because it requires no chemicals so you don’t have to worry about contaminating any honey that might be destined for human consumption.
  • Screened bottom boards – When mites move around the hive and when bees clean themselves, mites fall to the bottom of the hive. If there’s a flat bottom board, the mites can climb back up into the hive or hitch a ride on a bee entering the hive. But if there’s a screen bottom, the mites fall through while the bees can come and go by walking on the screen. This is a great year-round solution — no chemicals and no extra effort on the beekeeper’s part (although you could add a sticky board if you were interested in capturing and counting mites). I’d installed screened bottom boards on all three of my hives when I moved them in early October.
  • Apiguard – Recommended by another beekeeping friend of mine, Apiguard is a thymol based miticide that’s used after honey season but before it gets cold; it requires temperatures of at least 60°F to work. I treated all three of my hives when I moved them in early October.

I should mention here that when I checked my hives for mites in late August, I learned that my original hive and the split from that hive had serious mite issues while the captured swarm had hardly any mites at all. In addition, that swarm capture hive is the strongest of the three. Interesting, no?

Some Notes about Feeders

Entrance feeder
Here’s an entrance feeder on one of my hives.

I’d been using entrance feeders on all my hives since mid summer, although I didn’t always keep them full. When I moved them to my home in Malaga, I was able to tend to the feeders regularly and make sure they were never empty.

Entrance feeders utilize a jar with a perforated cap that sits on a plastic tray. One end of the tray slides into the corner of a hive entrance; bees can enter beneath the jar lid and feed through the perforations. I like entrance feeders because I can always see how much feed is left. They’re also easy enough to refill — just pull off the jar, brush off any bees on the lid, open the lid, fill it up, close the lid, and replace the jar on the plastic tray. I don’t even have to suit up to get the job done.

Entrance feeders were not practical for the winter. I’d discovered that with temperature fluctuations — low 30s at night vs. 70+ in direct sun during the day — the feeders would leak. In addition, once the temperatures dropped below freezing, the contents would freeze. Not only that, but I planned to put entrance reducers in the hive and I could not do so with an entrance feeder blocking part of the entrance.

Two more alternatives include frame feeders and top feeders.

Frame Feeder
Frame feeder as illustrated in the Mann Lake catalog.

A frame feeder is shaped like a standard hive frame and is designed to slide into the place of one or two frames. Bees enter through the top where there are holes with “ladders” the bees can use to access the contents of the frame. Frame feeders can typically hold one to two gallons of feed. As a new beekeeper, I bought a frame feeder like the one shown here, thinking it would be the best solution for my hives when it came time to feed them.

I subsequently rethought that idea. The trouble with a frame feeder is that you have to open the hive and expose the bees to cold air to refill it. It’s also difficult to see how full it is. And because I initially thought I’d be spending the winter away this year, I realized it simply wouldn’t hold enough feed to keep the bees fed all winter long.

Top Feeder
Top feeder as illustrated in the Mann Lake catalog.

As my collection of hives expanded from one to three and I began seriously thinking about my winter strategy, I invested in two top feeders. A top feeder sits inside a hive box at the top of the hive, just under the inner cover. Bees enter from the bottom, through holes between two center wells. A screen enables them to crawl down to the level of the feed. Although a top feeder works with a shallow hive body, it can also work with a medium or deep hive body; I already had plenty of medium bodies.

There are three main benefits to top feeders. First, they sit on top of the hive so you don’t need to expose the bees to cold air when refilling them. Second, they hold a lot of feed — four gallons. There was a pretty good chance I could fill them each once and not have to worry about them for the entire winter. And that brings up the third benefit: it’s very easy to check the level of remaining feed because the feed is clearly visible in the wells. Oh, and how’s this for a fourth benefit: You can fill just one well with liquid feed and use the other well to provide pollen patties or some other supplement. A little bend in the screen on one side will give the bees access.

So as I got ready to prep my hives for the winter, I had three feeders for my three hives.

Prepping the Hives

On Thursday, the weather was warm enough to open the hives and prep them for the winter. I began with my weakest hive (a late summer split) and worked up to my strongest hive (a swam capture).

Before I could do any of that, however, I needed to open up the back of my bee shelter. I’d built it using good quality wood screws so I could easily disassemble and reassemble it when I needed to. Since the bees were coming and going out the front, I figured I’d access the hives from the back. (This is something my beekeeping friend Jim taught me early on.) So I used my handy battery drill to remove the six screws holding the back on and laid the plywood panel aside.

Then I suited up. I debated lighting my smoker and then decided against it. First of all, there weren’t that many bees flying around. Second, when you smoke bees, their instinct is to go into the hive and gorge themselves on honey. Although they’d eventually put that honey back — don’t ask me how; I just know that they somehow do — I didn’t think it was a good idea to encourage them to eat when they had a limited amount of available food. Besides, the suit would protect me and I really didn’t mind dealing with angry bees when I was suited up.

I got all the equipment I needed and laid it out nearby. Then, hive tool in hand, I got to work.

Split Hive

This hive has only one deep box with nine frames in it. I learned during the hive move in October that it had very little honey stored. If any colony was going to die over the winter, it would be this one. My goal was to make sure they had as much food as possible. To that end, I’d retrieved a full frame of capped honey that I’d pulled out of another hive that summer when I extracted honey. It was the seventh frame and I simply didn’t have time to extract it when I did the others. (The extractor holds three frames at a time.) I figured that I’d pull out an empty frame and replace it with this full one.

That turned out to be pretty easy to do. I found three empty frames — out of nine total frames! — in the hive. These poor bees would definitely starve if I didn’t feed them. I pulled out one empty frame on the left side of the hive box and slid the full frame into its place. Then I pulled out the two empty frames on the right side of the hive box and slid a frame feeder into their place. I had prepared a quart of sugar water and I poured that in, too. It wasn’t enough for the winter, but it was enough to get the bees started.

Before closing the hive back up, I removed the Apiguard tray, which was almost empty, and repositioned the remaining grease patty. I had at least six more of those patties in the freezer; I’d add another one when I topped off the feeder on the next nice day.

Original Hive

My original hive came from a nuc I bought back in June. It was an extremely healthy nuc that took to its new hive very quickly and produced 2-1/2 gallons of honey in a month. I consider myself very lucky to get my start with such a great colony of bees.

After extracting the honey in July and splitting off half the brood frames to a new hive, however, the health of the hive seemed to suffer. Honey production dipped and although I’d hoped the bees would produce enough honey for winter, it soon became clear that they would not. I think mites were part of that problem; when I did a mite count in August, it clearly showed a serious infestation. I can only hope my October treatment helped resolve that issue.

This hive had two boxes: a deep brood box on the bottom and a medium honey super on top. There was drawn-out comb in most of the 10 frames in the honey super, but there was no honey. I removed the entire box. Beneath that was a spacer that I no longer needed; I removed that, too. In the deep hive box, all the frames seemed full with either honey or brood cells. I didn’t want to pull any out to check more closely; there was no reason to expose the bees to the cold air more than necessary.

I removed the Apiguard tray and adjusted the remaining grease patty. Then I pulled the frames out of the medium hive box and positioned the empty box on top of the deep box. I laid in one of my top feeders and fiddled with the screen to ensure that the bees would have access to both wells. Then I took a break to make about 3 quarts of sugar water back in my RV. I brought it back to the hives, poured it into one of the wells, and closed up the hive. I’ll top off the levels on the next warm day.

Swarm Hive

At the end of June, I captured my first swarm. This became my second hive but it is now the strongest of the three. As mentioned earlier, it has very few mites.

The setup of this hive is almost identical to my original hive: two boxes with a spacer between them. I followed the same process to winterize them. There were two differences, though.

First, the honey super’s frames were nearly all built out with comb and there was some honey in several frames. None of the frames, however, had been capped. I suspect the bees were eating this honey. There was not enough honey in the frames to leave them in.

Second, when I pulled the frames out of the honey super, bees were clinging to the bottoms of several frames. I suspect this is because this hive has a much larger population that the other hive, which had no bees in the upper box at all. I used my brush to brush them down into the deep bottom box.

After removing the medium frames, spacer, and Apiguard and adjusting the grease patty, I laid the top feeder in place. Then another break to make another 3 quarts of sugar water. (I was now out of sugar; I’ll need at least another 20 pounds to top off all the feeders.) I poured the feed into one well of the feeder and closed up the hive.

Reducing Entrances

Entrance Reducer
Entrance reducer image from Wikipedia.

Each of my hive bottoms came with an entrance reducer. This is a piece of notched wood designed to fit into the entrance of a hive. You rotate it to allow a tiny opening or a larger opening.

At the bee chat I attended the other night, I got into a discussion with another beekeeper about how to set the entrance reducer. His concern was dead bees blocking the entrance to the hive, so he planned to use the smallest setting and rotate it so that the hole was slightly elevated. This would (theoretically) prevent dead bees from blocking the entrance. I thought long and hard about this strategy. I was counting on my bees to keep the hive clean by dragging out their dead. (This is what bees normally do.) Setting the entrance reducer the way he described would make it very difficult for the bees to do this.

After some internal debate, I decided to set my entrance reducers with the wider entrance in the normal position. Not only would this make it easier for the bees to drag out their dead, but it would make it possible for me to reach in with a tool and scrape dead bees out for them. The drawback: a bigger opening that could let in more cool air.

The decision made, I implemented it. First, I removed the entrance feeders. Then, using my hive tool as a lever when necessary, I slid the entrance reducers into place. Because two of my hive bottoms had non-standard width entrances, I had to use a saw to shorten two of my entrance reducers. Not a big deal.

Finishing Up

Semi-Winterized Hives
My three hives, almost ready for winter.

Finished with most of the winter prep work, I closed up the back of the hive shelter again, replacing some of the (too) long screws with shorter ones that would be easier to work with in the future. Then I gathered together all of the frames I’d removed from the hives — a total of 19 medium frames and 3 deep frames! — and packed them up in my truck. Later in the day, I’d drive them out to my hangar for winter storage with the rest of my beehive components.

I also made a list of things to do to finish up winterization:

  • Top off feeders. There was no reason why I shouldn’t fill them up to the brim on the next warm day to minimize the number of times I needed to open the hives. For now, they had enough food to keep them for at least a few weeks.
  • Wedge tops open. One of the issues other area beekeepers have had is with condensation in the winter causing mold to form inside hives. This can be remedied by inserting a stick under the hive’s top cover to allow a small amount of ventilation.
  • Consider burlap blanket for weak hive. One of my beekeeping friends, who lives in the mountains where the conditions are considerably harsher in the winter time, used a medium box filled with burlap on top of each hive for additional insulation. I didn’t think I needed that since my hives had a roof over them and two of them had top feeders which would form an additional barrier to cold air. My weak hive, however, didn’t have this top barrier. I had everything I needed except the burlap. I needed to think about this and get my hands on some burlap.
  • Colony Quilt
    Colony Quilt as illustrated on the B & B Honey Farm website.

    Cover hives with “colony quilt” blanket. I’d ordered the insulating covers from B & B Honey Farm earlier in the week but they hadn’t arrived yet. I liked the idea of the cover because I knew the dark color, when exposed to the sun, would help warm the hives. The insulating quality would help keep the warm when the sun wasn’t on them. I can’t comment on these beyond that yet; will blog about them once I’ve had a chance to check them out.

  • Place insulation under screen bottom boards. Right now, two of my three hives have nothing beneath the screen bottom boards except the palette on which the hives sit. I need to slide in some foam insulation to prevent drafts from coming up from below.

With luck, I’ll be able to finish up all these tasks this week. Only then will I feel as if I’ve done everything in my power to keep my bees alive for the winter.

My Little Storage Solution

I obtain a shed.

As some folks know, I’m renting a hangar at Wenatchee Airport for winter storage of my helicopter, cargo trailer, car, and the furniture and other possessions I took away from my old life in Arizona. The hangar is huge — I’m only using half of its floorspace and even the half I’m using has plenty of room for other things. In fact, my original plan was to store my RV in there for the winter while I migrated to a warmer climate for a few months. I could get everything I own under that one roof and still have room to spare.

For various reasons, however, I decided to stick around in Wenatchee. I got a lot of encouragement from my friends to spend the winter here and join them in outdoor sports such as cross-country skiing, snowshoeing, and snowmobiling. I also have some personal business in state that requires me to be available for meetings. And I’ve even managed to keep flying, with two regular clients keeping me busy once or twice a week. Winters here are about the same as winters back in the New York metro area where I grew up. It had been a long time since I’d experienced a real winter.

Of course, to stick around meant to winterize my RV — a topic I hope to cover in another blog post. Part of winterizing my RV meant clearing items out of the “basement” storage space so I could put a heater in there. I’d also accumulated quite a few tools for property maintenance — weed whacker, rake, shovel, tarps, etc. All of these things had to be stored — most likely in that cavernous hangar 30-40 minutes away by car.

While a storage shed would be nice — and I’d actually been looking at my options on and off for the past few months — the idea of building one this time of year did not appeal to me. And the cost of buying a small one was simply not justifiable considering I’d have a big storage building of my own onsite within 6 months. So I’d pretty much resigned myself to storing in the hangar and simply not having the stored things around.

The Little Shed

That was the idea until I saw a fully-built 6 x 8 foot shed with metal door and window sitting on a trailer on the side of the road with a For Sale sign on it.

I drove by but immediately stopped and made a U-turn. I parked beside it and read the sign. $600.

That couldn’t be right. It looked brand new.

I called the phone number. The man who answered confirmed that it was still available and priced at $600.

“Would you deliver it?” I asked. I went on quickly: “I live on Cathedral Rock Road. It’s about 15 minutes from where the shed is parked now.”

“I’d have to charge extra for delivery.”

“How much?”

“A couple of hundred dollars, I guess. I’ll need a crew to help me.”

I could see this little shed slipping away. I had to acquire the shed at a price that made it not just a good deal but a great deal. “I can’t see paying a couple of hundred dollars to deliver a $600 shed,” I told him, slipping into New Yorker make-a-deal mode. “I’ll give you $700 total, including tax and delivery. Cash.”

“Let me think about it,” he said.

I was back home when he called an hour later. “I’ll take that offer,” he said. “Can I bring it by on Monday?”

Later, I looked up similar sheds on the website for the local company that had likely built it. They didn’t list sheds that small; the smallest listed on the site was 8 x 8. That was priced at $2,970.

Taking Delivery

We made arrangements for him to come sometime on Monday. On Monday he called with a two hour window in the middle of the day. He showed up right near the end of that window. Didn’t matter to me; I was working around the yard all day anyway, finishing up work on my new water line.

Shed Arrival
My new shed arrived on a flatbed trailer.

He arrived with the shed on a trailer and drove it right down my driveway. His companion and I guided him while he backed up into my preferred off-loading area. This was right beside my temporary power pole, not far from my water line. I didn’t want the darn thing blocking my view.

While we waited for the rest of his crew to come with a forklift, I asked him about the shed. What was the story? It looked like I was getting a good deal.

“You’re getting a great deal,” he told me. Apparently, the shed had been bought by a local school for some sort of project. It sat on the school grounds for a while. Then the school called him and asked him to take it away. His business, after all, was delivery. Although he didn’t say, I suspected that the school had given him the shed for free in exchange for the removal service. The only cost he likely had in it was the labor of moving it. That would explain why it was so cheap.

Then he told me that he owned a vacation house at Lake Chelan and was going to put the shed there if he didn’t sell it. I told him that it was just what I needed for the winter and that it fell within my very limited budget for a shed. I told him that although I don’t usually believe that things happen for a reason, finding this shed at this price was changing my beliefs.

Forklift with Shed
They used a forklift to move the shed off the trailer. They estimated that it weighs about 3,000 pounds.

As we talked, a long flatbed came down the road, pulled by a tractor truck. They rolled past my place and turned around farther down the road where it gets wider. A while later, the 3-wheeled forklift that had been on the trailer came chugging down my driveway with one man behind the wheel and another standing on a fork. Soon they were using the tie-downs they’d brought along to fasten the shed to the forklift and lift it off the trailer. Then it was on the ground.

They positioned it on an angle I didn’t like. I asked the forklift driver if he could straighten it somehow. The team put a wooden chock beside the skid on the front and the forklift operator used one of the forks to shift the front end over a foot and a half. It was lined up perfectly.

I put a level on the little porch. It was even relatively level.

I paid the boss with money from my rainy day cash fund and he handed over the keys to the locks. Then they all left.

Enough Space…and a Bonus

My Little Shed
Inside the shed was a silly little bench.

Inside, I found an odd homemade bench that was likely painted in the school colors. I dragged it out. Although it needs a little work to be usable, I think it would be perfect for what I’ve begun calling “lookout point” — a part of my land that sits in the northwest corner, with completely unobstructed views of the Wenatchee Valley and Columbia River before my land drops off steeply to the valley below. I’ll move it over there the next time a friend drops in and paint it the next time the weather forecast includes several consecutive clear days. Or, more likely, I’ll just leave it where it is with a tarp over it and wait until spring to fix it up and put it in place, probably with a nice cushion. (I’m pretty sure I took the cushions that were on the teak recliners back in Wickenburg. Side-by-side, they’d be perfect.)

I spent the rest of the afternoon stowing my yard tools and basement items neatly inside the shed. It’s a shame the door was mounted opening in; that really cuts down on usable space. But I have some shelves from Ikea (also taken from my Wickenburg home) that I can assemble in there to increase the amount of storage space. And a few hooks on the walls would likely make it even more usable. The man I bought it from suggested a loft — the ceiling is 10 feet at the peak — but I don’t think it’s worth the effort. We’ll see.

Overall, it was exactly what I needed for convenient, cost-effective storage of pesky basement and yard items. It’s great to get all of that stuff out of the elements without having to take them to my hangar.

Bees: More about Mites

My own observations prove another beekeeper’s theory true.

I started my beekeeping hobby in June 2013 and have been blogging about it periodically. If you’re interested in reading the other posts in this series, follow the Adventures in Beekeeping tag. Keep in mind that the most recent posts always appear first on this blog.

As I mentioned in a previous post, I’m concerned about varroa mites in my beehives. Mites can weaken a colony to the point that winter survival is impossible. Since I’d like all my hives to survive the winter, I’m starting a war on mites now, before it’s too late.

My Setup, as it Relates to Mites

There’s a few points I want to make here without spending a lot of time on a long narrative.

  • My three hives come from two sources:
    • My original hive was a nuc I purchased from a beekeeper in Peshastin. That hive grew and thrived very quickly, producing 2-1/2 gallons of honey in about a month. When a hive inspection showed signs of swarm cells, I split it off to form my third hive.
    • My second hive was a swarm capture. The swarm came from a colony living in the wall of a friend’s shop building. These are as close to “wild bees” as you can get.
  • My hives aren’t all set up exactly the same way. As I experiment with different hive components, I use them on different hives. For example, my first and second hives have standard wood bottoms while my third hive has a bottom with a varroa trap screen drawer. When setting up this third hive, I placed a sticky board in the drawer and left it there for about a month (which is really too long.)
  • My first and second hive have drone frames installed. As I discovered earlier this month, the drone frames work — once they’re adopted by the bees — and my first hive was confirmed to have mites.

Mite Count

On Wednesday, after a normal hive inspection, I placed sticky boards (with screens) in my first and second hives. Remember, I’d already learned that my first hive had mites; the idea behind the sticky board was to see how bad the mite problem was in each hive. Because I’d left the sticky board in the third hive so long, I couldn’t really gauge the mite problem. So I got serious for this test and left the boards in for just two days. If I had a third board, I would have tested that third hive again, too.

Mites on a Sticky Board
I’d say this hive has a mite problem, no?

When I pulled them out yesterday morning, I was surprised to find that the sticky board from Hive #1 was full of mites. Here’s a magnified image of just one square inch of the board. The dark ovals are dead mites — you can even see the legs on a few of them. The light ovals are also mites, but I don’t know if they’re some sort of shedded skin or exoskeleton or the actual mite itself after being dead for a day. The other dots on the image are mostly litter from the hive as well as some propolis that the bees laid down between the holes on the screen. Keep in mind that this sticky board has 176 square inches and although not all of them are as full of mites as this one, some are a bit worse.

All this was gathered in less than 48 hours.

But what was even more surprising to me — at first, anyway — was that the sticky board for Hive #2 had very few mites on it. In fact, because I pulled it out first, I thought that I’d pulled it out too soon. It wasn’t until I pulled out the other sticky board that I realized that the boards had done their job; I just had far more mites in one hive than the other.

Why the Difference?

Last night, I was at a BBQ gathering of helicopter pilots and mechanics who are based in the area for fire season. One crew — pilot, mechanic, and fuel truck driver — are based in a really nice house in a farm just down the road from where I’m currently living. They had a fire going in the fire pit and grilled up some steaks and brats and corn. It was a really nice night out.

I got to talking to one of the pilots, a guy who flies the Cessna Skymaster “push-pull” used for observation and direction to fire crews. He lives in the Snohomish area of Washington and keeps bees at home. We got to talking about mites and he asked me where I’d gotten my bees. When I explained their source, he told me that commercial bees always had mites.

I thought about what he said. It completely jived with what I had observed. The hive from the nuc had a bad mite problem. The hive from the swarm had very few mites at all.

He said that because so many hives were moved around for pollination, the mite problem spreads. He keeps mites out of his hives by keeping them away from commercially available bees.

Certainly something to think about.

Three Means of Attacking Mites

Because I’m serious about eliminating — or at least greatly reducing — the mite population in my hives, I’m currently using a two-prong attack:

  • The drone frames, as I discussed in another post, can help concentrate most of the mite reproduction on one frame, where they can be easily removed. Unfortunately, the queen is far less likely to lay drone eggs as the summer season comes to a close. In addition, only one hive (so far) has adopted the use of the drone frame.
  • I’ve purchased a miticide and dosed each of my hives with it. Although it can’t be used when the bees are producing honey for human consumption, using it now, before winter, should help reduce the number of mites and make a stronger hive.

The third method, which I hope to be able to institute soon, is to have sticky boards beneath screens on the bottom board of each of my hives. While it would be great to do this via a varroa trap with drawer for each hive, the $27 price tag makes that a bit more than I want to spend. So I’ll likely cook up my own solution using some “hardware fabric” I already have on hand to make the screen. I’ll talk to a beekeeper friend to see what we can rig up.

In this area, bee colonies have a 50% overwinter survival rate. I have three hives. I want to have all three colonies survive the winter. That’s going to take some work — and I’m willing to do it.