They say we make our own luck, but how could I in this case?
I’m up in Central Washington State on a number of cherry drying contracts. My only means of transportation — unless you want to count my bicycle — is my husband’s 2001 Chevy Duramax Diesel pickup. It’s a great truck, well cared for and very reliable.
The other day, I started noticing that it was having trouble starting. It would start, but it needed more cranking than usual. I attributed that to my bad habit of listening to the stereo with the engine off while working on the helicopter. I figured that if I stopped doing that, the problem would go away after my next long, battery-charging drive to Wenatchee or Ephrata to fill the transfer tank with 100LL.
Yesterday was my big errands day. The weather was supposed to be good. I planned to do my laundry at 7:30 AM, then head up to Wenatchee to get some fuel, a new mattress for the RV, and some groceries. And maybe some sushi for lunch.
These grand plans came to a grinding halt when I turned the key in the truck. I waited, like a good girl, until the glow plug indicator (a diesel thing) had gone out, turned the key, and got the sound of an almost dead battery trying in vain to crank a diesel truck engine. Not enough juice.
Of course, I tried it a few more times. It just got worse.
I dialed my husband in Arizona. I figured I’d ask him if he’d ever experienced this kind of problem before and whether he had any tips on how I should start troubleshooting. But he wasn’t answering his phone.
And that’s when my next door neighbor here at the campground appeared, standing at the front of his travel trailer, wiping the sleep from his eyes. “Having trouble?”
He’d heard the dismal cranking sound and had come out to see if he could help. I produced a pair of jumper cables — the Girl Scout motto is “Be Prepared,” after all — and opened the hood. But instead of him pulling his pickup over to mine, he walked over with what looked like a brand new car battery. He put it on the ground beside the truck. Then he went back to his truck and came back with a battery tester. He tested both batteries in my truck. (Yes, it has two.) “They’re both a little low, but they should be okay. Sometimes it’s the connections. A loose wire or a gunked up terminal. Then the battery doesn’t charge right. You have terminals on the sides, but the ones on the top are better because they’re easier to keep clean.” He went on in the same vein, telling me more about car batteries than I ever wanted to know.
It was then that I remembered what this man did for a living: he traveled around the northwest, collecting and recycling car and truck batteries. In other words, he was a car battery expert.
How could I be so lucky?
We jump-started the truck from the battery he’d brought over and let it run for a while. That confirmed that the problem was not the starter. He pointed out where the connections could be a problem. I shut off the truck, then turned the key and restarted it. I asked him where I should go to get it fixed. He told me that if I took it to a car place, they’d probably try to sell me another battery, which I didn’t need. He was pretty sure I just needed my terminals cleaned. He said he could do it.
 Ten minutes later, he was pulling off the terminal connectors and cleaning them with his wire brush. (For the record, I also had a wire brush in my toolbox.) One connector had quite a bit of corrosion — it might have been the culprit all along — and needed to be replaced; he pulled a new one out of his truck and did the job. (Do you know anyone who keeps new terminal bolts for side battery connections handy? Can you say Maria is lucky?)
We chatted while he worked. We talked about the geology of the area. He collected petrified wood and knew all about the Missoula Floods that had carved coulees through the volcanic rock of the area. “You should see them from the air,” I said.
“Yeah, that must be great.”
“When you’re done, I’ll take you and your wife.”
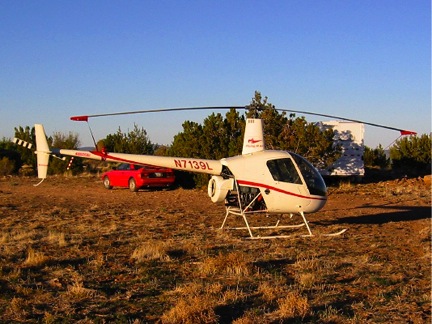
 So when he was finished and I had everything put away, he followed me to the ag strip where the helicopter is parked. I had to do some interior reconfiguration — remove my helmet and the oil bottles under the front seat that I’m using for ballast, add headsets — and then we all climbed in. I took him and his wife for a 20-minute flight around the area that included downtown Quincy, Crescent Bar on the Columbia River, Quincy Lakes, the Gorge Amphitheater, and Frenchman’s Coulee. Along the way, I learned that he and I had the same birthday (different years) and that he’d won a helicopter ride when he was a kid in the late 1950s. He took pictures and said he’ll send me copies.
I really appreciated the way he stepped up and offered to help me with my truck problems. It’s nice to see that there are still people who are willing to come to a stranger’s assistance when they can. Most people couldn’t be bothered. Or they’d worry about liability.
He really appreciated the helicopter ride. He wouldn’t take any money for the parts or his hour or so of time in making the repair. This morning, before he and his wife headed out to their next campground, he stopped by to thank me yet again.
But it was me who needed to thank him again. Not only had he fixed my truck for free, but he’d given me a good excuse to go flying on a nice day — for a change.


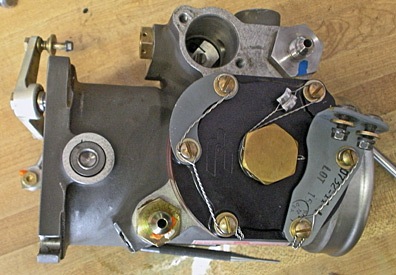
 Turns out, the reason the mixture cable became fractured is because the mixture control arm (lavender in this image) on the fuel control was too stiff. When I pushed or pulled the mixture control in the cockpit it was buckling and fraying. Pushing it in may not have resulted in full rich fuel, which could result in the engine running hot and lead to even more problems.
 Ed, Wickenburg’s very best airplane mechanic, followed up by pulling the fuel control and fixing it, following instructions of the device’s manufacturer in Wichita, KS. Here’s what it looked like sitting on his workbench with the offending arm removed for repair. This is a lot more of my helicopter’s innards than I usually like to see. But it was interesting to see the piece I’d found an illustration of for this blog (see above) in a place where it was clearly recognizable.
 The other day,
  Well, things are never as easy as they should be. Ed got the cable and went to work installing it. He soon ran into problems. The cable wouldn’t move smoothly. It wouldn’t go in all the way. He’s pretty sure we’ll have to order the entire cable assembly today. (This image, taken from Robinson SB-55, shows where the mixture cable attaches to the fuel mixture control. I highlighted the cable and its sheath in red. We ordered just the cable and it is apparently having trouble moving in the original sheath.)