Quick tips for making yogurt at home.
I’ve been making my own yogurt for nearly five years now. I began in October 2012 using a recipe posted by my friend Tammy on her blog. Since those first few times, I’ve come up with a method that’s quicker and easier.
I’m a multi-tasker. That means I really can’t tolerate standing at the stove to stir a pot of milk while it heats to a certain temperature. So I heat the milk without a stove: in the microwave.
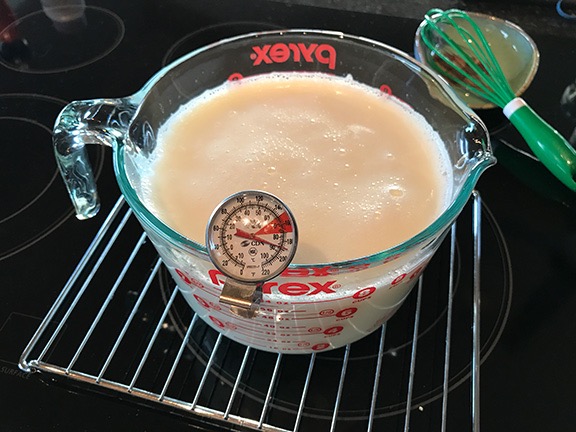
I make a half gallon of yogurt at a time. I have an 8 cup Pyrex measuring cup — which I believe every serious cook should have — and I fill that with the milk. Then I pop it in the microwave, set the timer, and start it up.
Every microwave is different — I can’t stress that enough. I set mine for 14 minutes on high and when I pull the milk out, the temperature is right around 190°F. I didn’t come up with this time by happy accident. It was a lot of incremental zapping and temperature measuring that got me there. If you want to use this technique, you’ll have to do the same thing so you know the magic number for your microwave.
Unless you have a microwave-safe thermometer, do not leave the thermometer in the milk while it’s in the microwave. (But you knew that.)
Of course, the time will vary depending on the quantity of milk. That’s one reason I almost always do a half gallon at a time.
Once the milk has heated to the right temperature, I leave the measuring cup on the countertop, normally on a rack so air can circulate around it. I leave the thermometer in it so I can check the temperature periodically. I stir it once in a while when I remember to. Room temperature will determine how quickly the milk cools.
Heating milk in the microwave for yogurt-making is quick and easy.
When it gets to about 120°F, I whisk in about 2-3 tablespoons of unflavored yogurt. I don’t buy yogurt starter, although I do occasionally buy plain yogurt to use as starter. This ensures success, although using my own yogurt for a starter could work, too. (I honestly can’t understand why people will spend several dollars on starter for a batch of yogurt when existing yogurt works fine.) I usually mix up the yogurt with some of the milk before combining everything and whisking to ensure there’s no lumps.

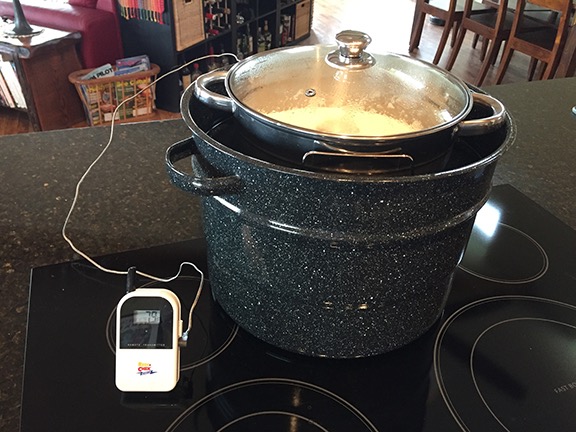
I love my Instant Pot.
Once that’s done, I pour the milk into four pint-sized canning jars and cap them with plastic caps. I use pint jars because that’s what fits into my Instant Pot, which I use to finish processing the yogurt. If you don’t have an Instant Pot or other yogurt maker, you should consult Tammy’s recipe to see how she uses a regular picnic cooler. That’s the way I used to do it, with quart sized jars, and it works very well. Nowadays, it’s easier to just load it in the Instant Pot than to haul up a cooler, fill it with hot water, and have it sit around for 6-8 hours.
For timing, I’ve discovered that 6 hours is just right, at least in the Instant Pot. If I let it go longer, it gets a sort of slimy consistency that I really don’t like.
Once the yogurt is done, I usually put the jars in the fridge to chill them. That gives me yogurt ready for smoothies.
The Euro Cuisine Greek Yogurt Maker is another handy gadget for yogurt or cheese makers.
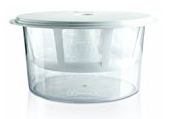
But if I want Greek yogurt, I go one step further and put it into a yogurt strainer. I love the one I have, the Euro Cuisine GY50, which I also use for making certain fresh cheeses. (It’s reusable so it’s a a lot cheaper and neater than dealing with cheesecloth. Mine’s plastic, but a stainless steel version is also available.) I can fit a quart of yogurt in it and let it drain in the fridge for as long as I like. The whey collects in the bowl at the bottom. After straining out the whey, you’re left with about half the amount of yogurt you started with. So a quart of regular yogurt yields about a pint of Greek yogurt.
Lately, I’ve been straining all the yogurt I make and saving some of the whey in the fridge. Then I can use the Greek yogurt in my smoothies but add back whey to thin out the mix without adding juice or milk. If I have a lot of whey I put the excess in my chickens’ water, supplementing their diet with calcium and protein to help them make stronger eggshells.
In the past, people have asked me when I add the flavor. What flavor? I like my yogurt plain. But if you want flavor, mix in some jam or preserve when you’re ready to eat it. I like mine with granola for a good crunch.
Those are my homemade yogurt tips. If you use any of them or have your own to share, please do use the comments to let us know.