Easy Cherry Cobbler for One

When you have a limitless supply of cherries, you get creative.

Fresh-picked CherriesA few days ago, I asked my client if I could go into his orchard and pick some cherries. I’d finished off the 15+ pounds of Rainiers I’d picked in Quincy two weeks before and was fresh out of fruit. Across the street from my RV were 86 acres of ripening cherries. My client gave me the green light and I’ve had fresh-picked cherries in my fridge ever since.

If you have some kind of comment about the affect of cherries on my digestive system, save them. I seem to be immune to the usual effects. Indeed, I easily put away a pound of cherries a day with no significant side effects.

But I am bored with simply popping fresh cherries from a plastic container. Back in June, I began experimenting with cobbler. The results were so-so. I wanted an easier recipe so I turned to Bisquick.

Bisquick, in case you’re not familiar with it, is a Betty Crocker/General Mills product known primarily as a pancake batter mix. But what a lot of folks don’t realize is that it’s a good quickbread batter mix that you can also use to make biscuits and “shortcake.” (Shortcake is in quotes because it doesn’t make real shortcake.)

The trick is to mix Bisquick with milk and a small amount of sugar to make a batter. Then bake it for a little sweet breadlike cake. Add fruit to the batter and you have an easy cobbler.

Here’s my current recipe. It makes just one (because I’m by myself here) but I don’t see why you couldn’t multiply the recipe to make more. You might try making individual ones in large muffin tins.

Ingredients:

  • 1/4 cup Bisquick
  • 2 tablespoons milk
  • 1 teaspoon sugar
  • 7 cherries, pitted and split in half

Instructions:

  1. Preheat oven to 350°F.
  2. Grease an ovensafe custard cup or other suitable baking vessel.
  3. In a small bowl, mix the first three ingredients until blended.
  4. Fold in the cherries.
  5. Place batter in custard cup.
  6. Bake 20 minutes or until batter is done.

This would probably be excellent with fresh whipped cream or vanilla ice cream. I have neither so I do without. It isn’t bad.

If you give this a try — with or without your own modifications — please do use the comments for this post to let us know what you think.

Get 20 Pounds of Apples for Christmas?

Make pie!

20 Pounds of Apples

Got apples?

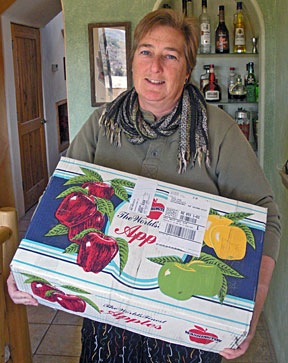
The box arrived yesterday via UPS. The labeling all over the box said, “Washington State Apples,” but I couldn’t believe it. Surely this big box couldn’t be full of apples! But when I checked the return address to see the sender, I knew it was: they’d been sent by one of my cherry drying clients from this past summer. Like most cherry growers, he probably has apple trees, too.

Fuji apples, to be exact.

The last time I had this many apples in my home was years and years ago, when I still lived in New Jersey. In those days, we’d go apple picking in New York State, just over the border. We’d make a day of it and pick too many apples to eat. I remember making apple pie, apple sauce, and apple butter. I remember being sick of apples. The year that we let a bag of apples go bad in the basement was the last year we went apple picking.

My husband’s comment when he realized that we’d just received 20 pounds of apples: “What are we going to do with them all?”

Make pie, of course.

Making apple pie isn’t difficult — if you cheat. Cheating means buying prepared pie crusts. Making pie dough, rolling it out, and lining the pie pan is 75% of the work in making fresh apple pie. If you get someone else to do it for you — like Mr. Pillsbury or Marie Callender — all you have to do is peel and cut up the apples, mix them with sugar and spice, pour them into the pie pans, and cover them up with another piece of prepared pie crust.

And if you’re like me, you probably can’t make a decent tasting pie crust anyway. It’s better to let the experts do it.

Here’s my recipe for the filling:

Ingredients:

  • 3/4 cup sugar
  • 1/2 teaspoon salt
  • 1 teaspoon cinnamon
  • 1/2 teaspoon nutmeg
  • 1-1/2 tablespoons flour
  • 5-6 large, firm apples (they’re supposed to be “tart” but I always use whatever I have handy, especially when I have 20 pounds to use up)
  • 2 tablespoons butter

Pie under constructionInstructions:

  1. Preheat the oven to 425°F.
  2. Line a 9-inch pie pan with pastry dough.
  3. Mix the dry ingredients together in a large bowl.
  4. Peel, core, and slice the apples.
  5. Toss the apples in the sugar mixture until well coated.
  6. Pile the apples in the pie pan.
  7. Dot with butter.
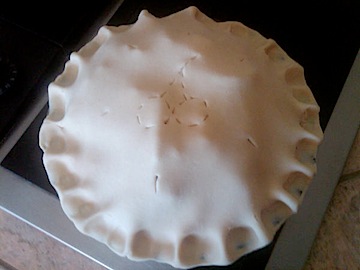
  8. Cover the pieCover the pie with another sheet of pastry dough. Crimp the edges and cut vents in the top. (I usually cut in a pattern or design; I did cherries this time in honor of the apple sender.)
  9. Bake 10 minutes, then lower the temperature to 350°F and bake about 30-40 minutes longer or until the apples are tender when pierced with a skewer and the crust is browned.

If you’re using a “deep dish” pie crust/pan, you’ll probably need more apples.

Apple Pie

It smells way better than it looks.

Here’s what the finished product looks like. I’m not sure about this Pillsbury pie crust — it almost looks as if it melted over the apples. I’ll try Marie Callender next. And maybe some phyllo dough after that for a more strudel-like result.

After all, there are a lot of apples in my fridge and garage. I figured I’d just make apple pie every time we ran out it, until we ran out of apples.

Helicopter Sugar Cookies

Bake your own fleet. They’re good to eat.

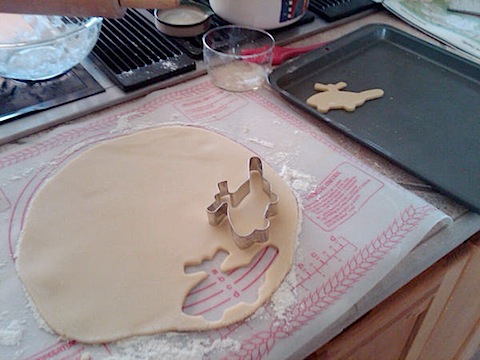
Helicopter CookiesToday, I made sugar cookies in the shape of helicopters for my cherry drying clients. It was a lot of work, but worth it. The cookies came out great and I think my clients will get a chuckle when they see them.
The recipe is my grandfather’s recipe for sugar cookies. He owned a bakery in New Jersey when I was growing up. My mother got the recipe from him and passed it on to me years ago. You can make the cookies in any shape you like.

Here’s the recipe. It may be doubled.

Ingredients:

  • 1/4 lb (1 stick) butter or margarine
  • 3/4 cup sugar
  • 1 egg
  • 1/2 tsp vanilla
  • 1 tbsp milk
  • 1-1/2 cups flour
  • 1/8 tsp salt
  • 1/4 tsp baking powder
  • white of 1 egg, beaten (optional)

Instructions:

  1. Preheat oven to 350°F.
  2. Cream butter and sugar in mixer.
  3. Add egg, vanilla, and milk. Beat well.
  4. Sift together dry ingredients and add gradually to butter mixture.
  5. Knead in extra flour if necessary to produce a firm batter.
  6. Roll out the DoughRoll batter out to 1/4 inch thickness on floured board.
  7. Cut with cookie cutters and place on cookie sheet.
  8. If desired, brush tops with egg white.
  9. Bake until golden brown (not more than 10 minutes).
  10. Cool on wire rack.

Yields 2 dozen cookies or fewer (depending on shape and size of cutter).

I added sprinkles before baking. My helicopter is red and I wanted to make the connection.