Yet another way to use up cherries.
On Friday, when I was just getting down to the last 5 pounds of yellow (but amazingly delicious) Rainier cherries in my fridge, another client dropped off 18 pounds of what I think were sweethearts — a type of red cherry. I could barely fit them in my fridge and was very happy to give about 1/3 of them to my neighbor (the one who let me park my helicopter on his driveway).
That left me with at least 15 pounds of cherries.
I like cherries even more than the next person and, unlike lots of people, don’t have digestive problems when I eat “too many.” In fact, until I got this big box, I didn’t know how many were “too many.” Now I do.
I did a helicopter winery tour on Saturday that brought me to Malaga Springs Winery in Malaga, WA. While I was there, I chatted with Al, the winemaker, and mentioned the cherries. I told him I was running out of things to do with them.
That’s when he suggested that I make cherry liquor. The directions are very easy:
Ingredients:
- Fresh cherries, pitted and cut. I quartered them.
- Sugar, to taste. This is optional. The cherries I had were so sweet — especially those darn Rainiers — that I didn’t use sugar.
- Vodka. Although I suppose any vodka would do the trick, I don’t drink junk liquor so I used Absolut.
Instructions:
- Wash, pit, and cut the cherries.
- If you’re adding sugar, mix the sugar in with the cherries.
 Pack a clean, dry canning jar with as many cherry pieces as you can. Because I had all those Rainiers that were starting to get a little old, I layered them in the middle of the jar (Al’s idea) which made each jar a little more interesting looking than if it had been packed with just red or yellow cherries.
- Slowly top off the jar with as much vodka as will fit in the jar. You might want to tap the jar on the countertop once or twice to release air bubbles and then top it off again.
- Seal the jar snugly.
- Store for at least six to eight months.
According to Al, using a canning process or refrigeration is not necessary. (If I suddenly stop blogging about six to eight months from now, throw out your cherries.)
I made six 1-pint jars, using wide-mouth canning jars so I could easily scoop out the cherries when they’re ready to eat. Al says the cherry/vodka mix is great on ice cream and that the cherry-infused vodka is good as a sweet drink. I’m thinking it’ll make a great cherry martini.
When I open the first jar early next year, I’ll be sure to blog about it and let you know how it goes. In the meantime, if you give this a try or have ideas for other ways it can be done, please share your ideas in the comments for this post.

 Pack a clean, dry canning jar with as many cherry pieces as you can. Because I had all those Rainiers that were starting to get a little old, I layered them in the middle of the jar (Al’s idea) which made each jar a little more interesting looking than if it had been packed with just red or yellow cherries.
 Pie crust dough, phyllo dough, or puff pastry sheets. A purist would make pie crust from scratch. I’m living in an RV with limited kitchen facilities, so that’s not really an option for me. Besides, I make really crappy pie crust from scratch. Someone with slightly less ambition might use frozen
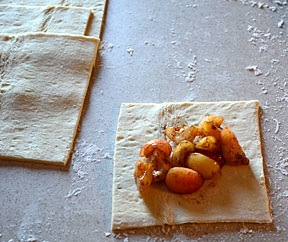
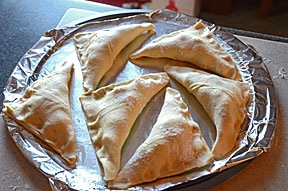
  Spoon about 1/4 cup cherries into the middle of a pastry square. Then fold diagonally and seal by pinching two open sides. It’s important to get a good seal if you want the cherries and their juices to stay inside the turnover. Repeat for remaining squares and cherries.
 Place turnovers on a lightly greased cookie sheet. (Again, with my limited kitchen facilities, all I had was a pizza pan, which would not fit all eight, so I had to make them in batches.)
 Yields: 8 turnovers.
 Here are a few additional notes: