Construction: The Heat is On

My heat pump/electric furnace are installed in a unique location, fired up, and sending out heat.

On May 20, 2014, I began blogging about the construction of my new home in Malaga, WA. You can read all of these posts — and see the time-lapse movies that go with many them — by clicking the new home construction tag.

When I decided late last month to forego my winter trip south and concentrate instead on finishing up my home to make a spring move-in date, getting the HVAC installed was a top priority. The main reason was because I wasn’t sure where the ductwork would go and I needed to know before the plumbing went in.

The Options

I’d gotten bids on the job in the fall from four different contractors. Two bid just “ductless” or “mini-split” systems, one bid just a ducted system, and the fourth bid both.

I was leaning toward a ductless system, with a unit in the living room and another in the bedroom. I thought it would be easier and cheaper. But I soon learned of a problem inherent in those systems: when the temperature drops below 20°F — as it sometimes does here in the winter — the ductless systems simply can’t produce heat.

The ducted system, which combined a 2-ton heat pump with a 10KW electric furnace, solved that problem. When it got very cold, the electric furnace would automatically kick in.

Considering that the two systems cost pretty much the same thing, it was a no-brainer to go with the ducted heat pump plus furnace system. That said, I decided to work with Dick’s Heating and Air Conditioning, which came highly recommended by several people, including the folks who built my building.

Installation Location

The next challenge was deciding where to put the darn thing. In addition to a compressor, which would go outside, I needed a sizable air handler/furnace system. I also needed ductwork — ducts to deliver conditioned air to four locations within my living space and another duct for return air. Ken from Dick’s came by to look at the place and come up with some ideas. Two required sacrificing one of my two hall closets, another required sacrificing some floor space in my storage loft. All of the options required having a possibly noisy air handler in my living space and ugly ductwork hidden behind drywall boxes — mostly because I absolutely refused to put them in the floor. Very discouraging.

Of course, all this was back in October. I was still sitting on the fence about getting the HVAC started before winter. I put it on hold to think about it.

Then a friend suggested hanging the unit in the garage or shop area.

When I decided to move forward, I called Ken over again. He came with the two guys who would be doing the work. We discussed different options for hanging the air handler. We finally decided to hang it right below the ceiling in the RV garage portion of my building, just outside the wall to the loft. The ductwork would run outside the living space and patch into the wall with flexible ducts in five places. Special fire-safe registers would meet county fire codes for separation between living and garage space. The only special thing I’d have to do was build a catwalk up in the rafters so the HVAC guys could easily access the unit without bringing in a man-lift in the rare cases they needed to access it.

Heater Location
Future location of my heater. I was standing on my RV roof when I shot this photo. The RV had to be moved for them to get to work. The plastic on the right, which was left behind (at my request) by the guys who put the spray insulation in the ceiling of my living space, will form a barrier between my garage and living space to keep some of the heat in until the drywall is done.

There was some concern over whether the trusses on that side of the building could support the 100 or so pounds of furnace plus catwalk plus worker. Ken and I each contacted the builder independently. I sent photos. Ken met with her. She talked to the truss manufacturer and the county inspector. It was a go.

Installation and Wiring

Installed Furnace
The fully installed air handler/furnace up in the rafters of my RV garage. The plastic-covered wall separates my living space from the garage and will eventually be insulated and drywalled.

Air handler/furnace installation took less than two days. They came last Monday, worked about half a day, and then finished up on Wednesday. They used a man-lift to get to the installation location 20+ feet off the floor of my garage. They told me that since they didn’t need the man-lift for any upcoming jobs, they’d leave it behind so I could use it to run wire, etc.

Running wire was exactly what I had to do. The installation didn’t include electrical wiring to a 60 amp circuit. I had to get 4 gauge Romex style wire from the circuit panel to the furnace and I’d definitely need the man lift to get up there. My scaffolding is only 12 feet tall.

I bought the wire on Monday. I figured I needed about 50 feet but wanted to make sure I had enough so I bought 70 feet. (I learned my wire lesson back when I ran wire out to my shed.) I had to go to three suppliers before I found it. The 70 feet of wire cost nearly $200 and weighed a ton. I was advised to keep it in a warm place until I was ready to run it. I put it in my RV living room.

On Wednesday, my friend Barbara came by to help me run the wire. It was definitely a two person job. But we’d barely started when I realized that I didn’t have any clamps strong enough to hold it in place. So we just brought it up near where it needed to go and used plastic wire ties to fasten it to the second floor girts. I sent the far end of the wire up to the air handler with one of the installers and told him to just drape it over one of the rafters up there. When we were done, it was roughly in position. I could do the actual fastening myself, without help.

The rest of the week was pretty busy for me, with kitchen design appointments at Home Depot, Lowes, and Bagdon’s, a wine tasting with friends, dinner and dancing with another group of friends, and helicopter repositioning after nearly a week on display in Pybus Public Market. It wasn’t until Friday afternoon that I got around to using rubber-lined clamps to fix the wire to the building frame. The man-lift came in handy; I just ran it alongside the wall between the shop and my living space and raised it into a comfortable position to screw in the clamps. Then I drove it along the wall, fastening wire along the way. The clamps will need to be removed and replaced when the drywall goes up, but the current setup should breeze through inspection.

I used the man-lift to climb all the way into the rafters — which took some carefully positioning of the lift before ascending and fine-tuning once up there to avoid the horizontal members of the trusses. I brought the wire right up to the furnace box and stopped.

I didn’t know where the wire had to go.

I pulled off the panel that looked like it led to the electrical components. Lots of circuitry in there. I saw a partially covered punch-out that might work for getting the wire in. I saw two other places that also might work. But once I got the wire in, I had no idea what to do with it. I’d gone as far as I could with wiring.

I did know that I had about 20 feet too much wire hanging from the rafters. I guessed about how much wire could be needed up there, took my big bolt cutters, and cut about $45 worth of wire off. Then I descended back to the ground, climbed off the man-lift, and called it a day.

Electrical Hookup

My friend Tom is a retired electrician. He’s been providing advice and guidance, along with some complex conduit and wiring work, when I need it. I’m trying hard to do everything myself and I’m doing surprisingly well — considering I’d never wired a thing in my life before this past summer — but I simply can’t do it all.

I knew I couldn’t do the furnace. But I was also unsure whether Tom could do it. He’d had some back surgery earlier in the month and had told me he might not be able to help me again until February. Although I wanted him to help — I really like working with him — if he couldn’t, I needed to find someone who could.

I waited until Sunday. I’d been running wires in my bedroom and had finished the wiring in the wall between the bedroom and bathroom. It looked so neat that I wanted to share it with him. I took a photo and texted it to him. He told me that he was out getting a manicure with his wife and that an electrician couldn’t do better than what I’d done.

On Monday, I texted him again with a question about the maximum number of devices I could have on a 15 amp circuit. (He advised no more than eight.) I had some other questions that couldn’t be handled by phone or text. I asked if I could stop by for a consultation. He told me to come over.

On the way, Ken from Dick’s called. He was sending a guy out on Wednesday to finish up. I needed to have the wiring done if I wanted heat. I definitely wanted heat. I needed to ask Tom if he could help, but I wanted to see his condition first.

His condition was perfect. Hard to believe he’d had surgery on his spine just two weeks before. He was animated, walking around without any restrictions in his motion. He said he was already off the pain killers and felt great.

We did our consultation, which required me to draw a lot of pictures of a circuit I was planning for my hallway, laundry room, and bedroom closet (long story). A three-way switch was involved, along with outlets and two other light fixtures with switches. He set me straight on how to proceed; told me about the amperages I’d need for my range, dryer, water heater, and washer; and gave me some good advice on how to wire the six wall sconces I planned for my great room.

Then I filled him in on the progress of my HVAC setup. I asked if he could help me wire my furnace or recommend someone else to do it.

He said he’d come the next day.

Tom Does the Wiring
Tom wired the furnace while I looked on and handed him tools.

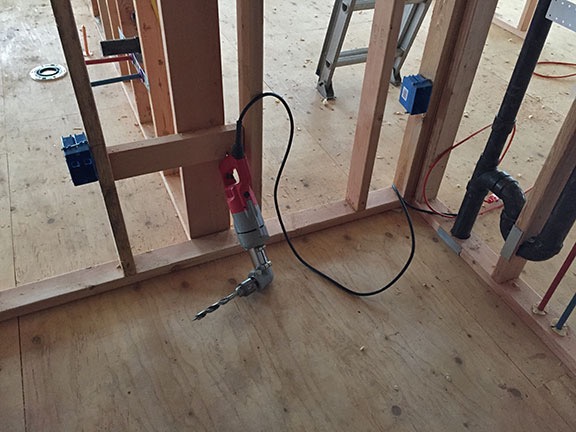
He came right on schedule with a small bag of tools. Together, we rode up in the man-lift, raising it as high as we could without hitting any of the trusses. I asked him to admire the way I’d run the thick wires and he complied. He used my drill to make a hole in the furnace cover in one of the spots I’d noticed, attached a connector I’d been given by one of the HVAC workers, and ran the wire in. He told me I’d cut the wire the perfect length, which amazed me. It was not an easy job. 4 gauge wire is about as thick as a pencil and not very pliant at 40°F. Even if I knew what to do, I doubt my girly fingers could have gotten the job done.

The Furnace Wiring is Done
The finished wiring. The red box indicates where the wires went.

Of course, I only had one connector and I needed two. That meant a trip down to Stan’s in Wenatchee, the closest hardware store. It was a 20-minute drive (each way). I bought a ladder while I was down there. I’d gotten tired of lugging my 8-foot aluminum ladder — bought for preflighting my helicopter and hauled up to Washington from my hangar in Arizona — when I needed to climb higher than my step stool allowed and bought a far more practical 6-foot Fiberglas one. I also bought some tamales for lunch.

I was working on hallway wiring again when Tom returned. Another struggle to get that thick wire into place in the circuit panel. I already had the 60 amp circuit waiting for him. He was done in less than 20 minutes.

Before leaving, he told me he’d be back on Monday to check up on me. I told him I hoped to have heat by then.

Turning on the Heat

An inspector from Dick’s showed up Tuesday, too. He was inspecting the ductwork. He left behind a document for the county inspector and told me they’d wire the thermostat and run up the heater for me if I was ready.

I was ready when they arrived Wednesday morning. There was snow on the ground and Ken had come along with his crew of two different guys. He was ribbing them because he’d had to drive the 2WD van for them while they followed in his 4WD truck.

Ken complemented me on my shop’s holiday decorations — small tree, chili pepper lights — before getting down to business. We reviewed the location of the compressor, which would be installed outside before the “trim” stage of my construction project. We also talked about where various wires and pipes had to go. Then Ken left in the truck, after ribbing his guys some more about driving back in the van without his help.

The guys got right to work. I went upstairs to work on the wiring for the wall sconces in my main room. The wiring was easy — because of my double exterior wall framing, I didn’t need to drill a single hole.

My friend Bob showed up around noon with his dog Skip and burritos from his favorite Mexican food place. By that time, I’d reassembled my big dining table upstairs. We had lunch there — the first meal at that table in my future home.

The guys finished up the work they had to do and we fired up the heater. I could not believe how quiet it was. Yes, you could hear air moving through the ducts, but it was hardly noticeable — certainly a lot more quiet than the HVAC system had been in my Wickenburg home. I was incredibly relieved. If there’s one thing I hate, it’s white noise.

The Heat Is On

On Wednesday evening, as I left to attend a dinner party in town, the heater was pumping warm air into my partially insulated living space. It had been at it for a few hours and I didn’t notice much of a difference. I suspect it’s because the ducts didn’t have any registers on them so the air was not forced out in any specific direction. Heat rises and I have very high ceilings. The heat was going straight up. Would there be enough of it to warm a partially insulated space that size? All I wanted was for the temperature to be over 50°F so I could finish the wiring without being all bundled up every day.

When I returned around 10 PM, I checked the temporary thermostat. It registered 55°F. I set the temperature to 60° and went to bed.

Inside my RV (inside the RV garage) the sound of the furnace overhead was a quiet, steady hum that I had to listen hard to hear.

In the morning, after my coffee, I went upstairs to check the situation. The temperature still registered 55°F. I suspect that’s as warm as it will get until the outside temperature increases or the insulation is put in.

Good enough for me. And now I’m even more motivated to get the wiring done.

Planning My New Kitchen

It’s small but functional, with lots of counter space and plenty of light.

On May 20, 2014, I began blogging about the construction of my new home in Malaga, WA. You can read all of these posts — and see the time-lapse movies that go with them — by clicking the new home construction tag.

I had two main points of consideration when designing my new home:

  • The total living space needed to be less than 1,200 square feet. That’s because I’m not building a primary residence here. Instead, I’m building the secondary living space allowed by Chelan County on a lot zoned like my 10 acres. The idea is to leave the primary building location — the one that can take better advantage of the views — available for either me or a future property owner to build a house on. That house can be any size as long as this space is 1200 square feet or less.
  • I needed to include lots of windows. What sold me on the lot is that it has amazing views, especially out toward the Wenatchee Valley. Big windows would not only let me take in those views from any room in my home, but they’d also let in lots of light. So I have lots of big windows. The entire building has 21 windows, not including those on each of my five garage doors or three man doors. Sixteen of those windows are in my living space.

Got Windows?
Got windows? I do! My living space is above my garage. I designed it to have regularly spaced, large windows so I could take in the view from indoors.

These two factors combined determined my floor plan. The walls had to be placed between the regularly spaced windows. This made special challenges in the bathroom and kitchen — you can’t put fixtures or cabinets right up against a window that starts 18 inches off the floor and stretches five feet above that.

Although I played around with several designs for my kitchen, I finally came up with a design that utilized a “galley” style with an island/breakfast bar. The key was setting the refrigerator into a wall and putting the stove on the island. That gave me more than 47 square feet of counter space in a room roughly 9 x 13 in size, even though I can’t take the counter all the way to the window. And because my ceilings are so high, I was able to use tall wall cabinets and for extra storage space.

Floor Plan
Here’s the latest version of my floorplan, with my appliances and some of my furniture included. Measurements are rough and don’t account for the thickness of drywall (1/2 inch). The gray shaded area is a storage loft above the hall and utility area.

Understand that although my kitchen in Arizona was large, it was not ideal. The textured tile countertops made it impossible to do something as simple as roll out a pie crust or cookies — and let’s not even talk about the chore of keeping the grout clean in a household where only one person knows how to use a dishrag to clean up spills. The appliances, although supposedly high quality, left a lot to be desired, as I discussed here. Food storage was in the cabinets rather than in a dedicated pantry; small appliances lined the countertop because there was no other practical place to store them. And while it might be difficult to believe, the abundance of countertop space made cooking a chore by allowing multiple work surfaces to leave bowls, measuring spoons, and ingredients — and to clean up.

While I certainly didn’t have the same amount of space in my new home, I could design a better kitchen to meet my needs.

Help from Home Depot

Getting an idea of the kitchen layout was the first part of the process. Getting actual cabinet configurations was another. For that, I turned to the local Home Depot.

Kitchen Drawing
Here’s Home Depot’s first stab at my kitchen. In this original version, I’d planned to mount the microwave in the cabinet below the stove in the island. The island’s breakfast bar was also designed higher in the back. We forgot about cabinets over the refrigerator.

I visited Home Depot back in July to get the process started. This helped me see how cabinets might work in my kitchen. With their kitchen planning software, they selected and placed cabinets to my specifications, then provided me, on request, with a printout of the configuration and a conceptual drawing. This made the room more real to me and gave me some time to think about it and how it might work. It also spit out an estimate of cost, although I wasn’t really thinking much about that yet.

Time passed. I got my living space framed to fit the kitchen we’d designed. I got other things done, like the ceiling/roof insulation and, more recently, the HVAC air handler and ductwork. Although I’d toyed with the idea of going south for the winter, I decided to stick around and finish construction work on my home this winter so I could dedicate early spring to settling in and late spring to putting in the massive garden I was planning.

I’d also had some other thoughts about the kitchen layout. After visiting a new friend’s place in Friday Harbor, I realized that putting the microwave down low would not be a good idea — especially when I considered how much I used my microwave. And although I’d hoped to use the microwave I’d brought from Arizona — the one my parents had given me as a housewarming present for my New Jersey home back in 1986 (!), I decided I deserved a new one. I’d get a large shelf model and put it on a shelf beneath the cabinets. I also decided to keep the island all one level — I saw that at the Friday Harbor home, too, and really liked it. More homey and lots of contiguous counter space for baking and cheesemaking projects.

My goal was to fit a dream kitchen into a small space and I was pretty sure that the changes I had in mind would help me achieve that goal.

Getting Serious

With those changes in mind, it was time to get solid price quotes from at least two sources: Home Depot and Lowe’s. I visited both yesterday.

Lowe's Kitchen
Home Depot's Kitchen
The kitchen drawing as prepared by Lowe’s (top) and Home Depot (bottom). I like the way Home Depot does a cutaway of the fridge.

At Lowe’s, we created the kitchen design on their computer system — which is virtually identical to Home Depot’s — making sure to get every detail. It took a long time and, since my appointment was delayed due to the previous customers taking longer than expected, I ran out of time before we could get into the countertops. Still, she designed the kitchen as I wanted it and gave me a printout of the primary wall’s layout, along with a detailed price quote.

Then I went to Home Depot. Fortunately, my design was still in their computer. We modified it to match what Lowe’s had drawn for me so I could compare apples with apples. I got a printout of the main, refrigerator, and island parts, along with a price quote. We also had time for me to pick out a granite countertop, select options, and get a quote for that. (That’s how I know I have 47 square feet of countertop.)

At this point, I’m leaning toward Home Depot. Their kitchen came in about $1,000 cheaper than Lowe’s for the same quality product — and that’s after manufacturer and retailer incentives. To get the incentives, I have to order at Lowe’s by December 15 or Home Depot by December 21. Both offer an additional 5% savings for using their credit card — which is one reason I have one for each company. Both will charge about $1,500 – $2,000 for installation, which I’ll likely get so I’m sure it’s done right.

As for the countertop, I need to get more estimates. Although the $54/square foot installed price sounds pretty good to me — and the few other folks I’ve asked — I might be able to get a better deal elsewhere. I will definitely check in at Lowe’s.

Keeping It Simple

One more thing… a lot of people have told me not to use Home Depot or Lowe’s for my kitchen. They say there are better options: Ikea, a local kitchen place called Bagdon’s (which I am visiting later today), and various local cabinet makers. But these people need to understand that my decision to use these big box companies is being driven by three factors:

  • Cost. I don’t have an unlimited budget. This is a small living space and I can’t pour a lot of money into it that I might never get back. (Although everyone seems to agree that I’ll have no trouble selling this place for far more than I put into it.)
  • Time. I can’t wait for various contractors to come and measure and plan. I want this done already. I’ve waited long enough.
  • Ease. I’m not interested in buying cabinets at Ikea and cabinet fronts at some local cabinet maker and finding some contractor to put it all together. I want to pick something out in one place, know it will work, and pay one organization to put it in my home. I have way better things to do with my time than play around with vendors and contractors.

While I’d love to spend my money locally with small organizations to get the perfect custom solution, I also need to do what’s right for me. And what’s right now is keeping it simple.

Ladies! Don’t Be Afraid!

There’s no reason you shouldn’t do what you want to do.

The tweet that prompted this post.

Yesterday, one of my Twitter friends shared a tweet that contained a list of the “Top 10 things British women would love to do but are too scared.” The heading at the top of the list asked if readers had done any of them.

I looked at the list and realized I’d done seven of them.

Which ones? Let’s go down the list:

  • Ask for a pay raise. Although I haven’t had an “employer” for more than 20 years, I have asked clients for increases in the rates they pay me — most recently just last week. I honestly can’t remember if I asked my last employers for a raise; in most cases the raises and promotions came automatically and I didn’t need to ask.
  • Travel or holiday alone. I do this all the time — and have been doing it since I began driving in the late 1970s. Hell, I remember taking a train to Canada by myself with just $20 in my pocket when I was 20. One of my Top 10 vacations, in fact, was the “midlife crisis road trip” I took in 2005. I spent 19 days cruising around Arizona, California, Nevada, Utah, Oregon, Washington, Montana, and Idaho in my little convertible with no destination or reservations. I had a blast!
  • Get a tattoo. I have two of them on my right ankle. I got them in the 1990s, before everyone and their kid was getting them.
  • Have a bikini wax. Check. ‘Nuff said.
  • Short Hair
    My hair was actually growing out in this photo from 2012.

    Get your hair cut very short. The first time was in the early 1980s when I got a perm cut out down in Greenwich Village in New York City. That was quite a shock to most folks. After that, I wore my hair short much of the time, getting a few super short haircuts in summer months. My hair is shoulder length now for the first time in more than 30 years. I still haven’t decided if I like it this way.

  • Ask someone out on a date. Still doing that once in a while. Sometimes I’m disappointed, sometimes I’m not.
  • Quit your job. Not only did I quit my job way back in 1990, but I quit it to start a freelance career. That takes courage. But sometimes you need to cut ties to move forward — a tip for any kind of relationship, including employment.

What about the other three? Let’s take a look:

  • Sing in public/karaoke. I’ve never actually seen live karaoke and haven’t had the opportunity to do it. Not sure if I would, though. Is it cowardice? Probably some version of it. No one likes to look like a fool in public.
  • Do a naked photo shoot. It isn’t fear that stops me from doing this. It’s common sense. Women who have naked photos of themselves — or near-naked photos of themselves — out there are just asking for trouble. Do you really want photos of you like that circulating around? My advice, ladies, is to keep your clothes on when a camera is present. Those pictures can and will come back to haunt you. (Ask my wasband’s girlfriend about the ones she sent him that I got my hands on. I’m still wondering whether the playing cards were a hit with his poker friends. My friends sure got a kick out of them.)
  • Have cosmetic surgery. Again, it isn’t fear that holds me back from this one. For years it was the simple fact that I didn’t think I needed any. But as I age and gravity begins to take hold, I’m reconsidering it. It’s on my list but at a low priority. Need to get settled into my home first.

Now I’m not sure if British women — the group supposedly polled for the list — are more cowardly (for lack of a better term) than American women. I suspect they might be. I’m also not sure about the age of the women polled and would have to think that very old and very young women would be more cowardly than those of young enough to be “modern” and old enough to have conquered most of our fears.

But now it’s your turn. How many of these things have you done? What’s memorable about any of them?

And if you haven’t done something you really want to do, why not? Tell us what it is so we can talk you into it. Never let your gender hold you back!

The Appliance Order

I order appliances for my new home to take advantage of Black Friday deals.

On May 20, 2014, I began blogging about the construction of my new home in Malaga, WA. You can read all of these posts — and see the time-lapse movies that go with them — by clicking the new home construction tag.

I went to Home Depot yesterday to order appliances for my new home. Although I’m not ready to take delivery of those appliances yet, I wanted to get my order in so I could take advantage of Home Depot’s Black Friday deals. I’d been told months ago by a Home Depot employee, during another appliance sale at Home Depot, that Black Friday was their best deal time and that if I didn’t need the appliances back then, I should wait for Black Friday. I waited.

Home Depot Appliance Sale
From Home Depot’s website; there were lots of good deals.

Refrigerator
Dishwasher
Range
Washer
Dryer
My appliances (not to scale).

The deals were — actually are — the sale doesn’t end until tomorrow — great. Not only were most appliances 25% or more off their retail prices — and yes, I know only idiots pay retail — but there were also additional savings when buying multiple items. For example, since I was buying 5 appliances — refrigerator, washer, dryer, range, and dishwasher — I could save an additional $300. And if I put the purchase on my Home Depot credit card, I could save another 5%.

I’d stopped in last week to take a look at what was available and get an idea of what it would cost me. I wound up going with Samsung products all the way: French door refrigerator, dishwasher with “Storm Wash technology,” and slide-in range with self-cleaning dual convection oven, and front loading washer and drier that could be stacked. I chose a stainless steel finish on kitchen appliances and white finish on laundry appliances. The only thing I didn’t buy was a microwave because I still have the one my parents bought me as a housewarming gift for my first home years ago and I really like it.

In every case, the appliance I bought was a huge upgrade from the Jenn-Air crap I had back in Arizona. Yes, I know that Jenn-Air is supposed to be good stuff, but I think it’s seriously overrated. The dishwasher was loud and didn’t do a very good job washing dishes. The oven had a loud fan that kicked in at temperatures over 325°F. The refrigerator was loud, too — I could hear it run, I could hear the ice maker refilling. And the idiotic electric grill on the range was better for filling the house with smoke than cooking anything other than grilled vegetables. (I made the mistake of grilling salmon on it just once.) Of course, I didn’t pick my old house’s original appliances. I lived in what had been a spec house and the builder had included what was considered “high end” appliances. I’m sure the next owner will be suitably impressed — until she has to live with it.

Samsung products are generally highly rated. The only thing I worry a little about is the dishwasher. Although Consumer Reports gave the one I chose a pretty good rating, reliability seems to be an issue with Samsung dishwashers in general. But I liked the styling, the feature set, and the spacious interior, which fit my rather large dinner plates and bowls without any problems. Since I plan to do a lot of entertaining when my home (and its deck) are complete, having a large capacity dishwasher was vital. This one fits the bill. Let’s hope I don’t have to test the warranty.

Yesterday, I went in to finalize the order and give them my credit card. With all the discounts applied, my appliance purchase, with free delivery and installation, was remarkably affordable. I’d originally budgeted about $8,000 for appliances, but wound up spending far less. Timing is everything, I guess.

And speaking of timing, I have about 3 months to get the place ready to receive all those appliances. This winter might be busier than I expected at the Flying M Aerie.

Planting Trees

I make plans to add some serious foliage to my property.

I bought 10 acres of view property in Malaga, WA at the end of July, 2013 — the day after my divorce decree was issued. Although financial uncertainty delayed the start of construction of my new home, I finally got the builders out here in May, 2014, and building commenced. Although the shell of the building is done and all of my possessions are tucked safely indoors, the living space still has a way to go. While I wait for that to be done, I’ve gotten back to work on developing the land around my new home: cleaning up my vegetable garden, planting bulbs, sewing wildflower seeds, etc.

My lot is beautiful. It sits on the north side of the road — the side facing the Wenatchee Valley. On clear days — which is most of the time here on the dry side of Washington — the view goes on forever and ever. I see the Columbia River, countless orchards, the cities of Wenatchee and East Wenatchee, the valley walls, and snow-covered mountains nearly year-round. This time of year, the fall color is amazing as individual trees and full orchards change into reds, yellows, and oranges. I built my home to take advantage of these views, with a total of 21 windows, most of which look out to the north, northwest, and northeast where the best views are.

Autumn View
I shot this photo on Monday morning from my Lookout Point bench, after the sunlight had filled the valley. The snow is back on the mountains I can see to the west. Click this image to see a larger version where more detail is visible.

The best thing about this view: it’ll never be blocked. The land drops down sharply near my property line into a deep ravine owned by the county as a wildlife corridor. Beyond it, where the land climbs a bit again, is a very large orchard owned by a local fruit grower. I picked this lot because of this situation — one thing I learned in the past (the hard way) was that if land in front of your view can be bought/changed by someone else, it will be. Even if the PUD did sell that low-lying land to a developer (or something worse), whatever’s down there will never obstruct my view.

The view on the other side of the road isn’t too shabby, either. Basalt cliffs, hundreds of feet tall, filled with bighorn sheep that sometimes wander down to graze on the bunchgrass that dominates the hills below them. The cliffs illuminate with a golden light at sunrise or sunset, especially during the summer months. Really breathtaking sometimes.

Cliff View
This shot gives you a good idea what’s behind my home, on the other side of the road. (Before I completed the RV garage space and driveway apron, my helicopter was parked outside.)

But although there are trees up in the cliffs and trees down in the valley, there aren’t many trees on the properties on my side of the road. My 10 acres doesn’t have a single tree over 10 feet tall. Instead, it’s mostly gently rolling hills with bunch grass and sage brush.

That’s good, to a certain extent. The views wouldn’t be perfect if there were trees in the way. But I would like some trees for shade, privacy from the road, and autumn color. Trees that are drought tolerant once established, trees that grow naturally in the area and will do well here without a lot of watering or maintenance.

Enter the annual Cascadia Conservation District Native Plant Sale. This program makes native plants available at affordable prices to homeowners in the area. It includes tall trees such as ponderosa pines, quaking aspen, rocky mountain Maple, and blue elderberry, as well as shorter shrubs such as red osier dogwood, serviceberry, mock orange, and woods rose. The brochure clearly indicates how large each plant will get, when it flowers, and whether it has edible fruit and/or attracts wildlife. This makes it easy to decide which plants to buy.

Actually, it doesn’t. I want to buy some of everything.

I plan on planting in a few areas. First, alongside the road behind my building. My building is set down in a sort of bowl below the road with no trees or bushes to block it from the road. It’s sort of a fishbowl effect with minimum privacy. Fortunately, my building faces away from the road so I don’t have to worry at all about privacy when I’m inside. But I’d like to get some when I’m outdoors, working in the garden, etc. And a row of bushy trees will not only give me that privacy, but cut down on the dust kicked up by the occasional passing car. (I should mention that there are only three driveways past mine on the road, so it isn’t as if there’s any real “traffic” up here.)

Quaking Aspen
Some of my neighbor’s aspen trees.

What to put up there? I was thinking of a mix of willow (which I’ve already got rooting from a friend in the area), quaking aspen, and red osier dogwood. (A neighbor already offered me some of their aspens — I need to go over and dig them up; after all the rain we’ve been having lately, it shouldn’t be too difficult.) This will give me the privacy/dust screen I want while providing early forage for my bees and vibrant fall colors later in the year. Although all of these do best with some irrigation, I’ve already got irrigation lines on that side of the driveway so it won’t be much of a chore to run another line up to the roadside. All of these varieties grow quickly and self-propagate.

I wasn’t going to plant anything beyond my driveway, but recent events have convinced me to extend that row of trees past the driveway, possibly all the way to the fence line that marks the end of my property. Unlike my neighbors on the other side of the road, my property stretches east along the road. Their lots stretch south up into the cliffs — in fact, they each own not only the cliff face behind their homes, but a bit of land near the top, which is impossible to reach by car or truck. (Not sure the value of that — unless you have a helicopter, of course.) My 10-acre lot actually stretches in front of three of their 20-acre lots.

Rather than have to see my neighbor’s rather unattractive roofline and bright, reflective chimney, I thought I’d plant some trees along the road to block my view. Some tall trees like ponderosa pines would fit in with the vegetation on the cliff side of the road and give me the screen I want. Maybe some blue elderberry and serviceberry so I can harvest some edible fruit at season’s end. I have irrigation set up on that side of my driveway, too, and can run the line quite far — I have excellent water pressure here — so getting all of these plants started and thriving should be pretty easy to do.

Since I plan to move my bee yard out toward the east end of my property next spring, trees out there will give the bees a nice screen from the wind and possibly a bit of shade. I’ll plant all kinds of flowering bushes around the bee yard so there’s foraging opportunities for them nearby. Maybe some snowberry, woods rose, and mock orange?

Not sure what I’ll plant on the view side of my home yet. I think I might wait until spring 2016, when I’m really settled in, to develop in that direction. Next year, I’ll be expanding my garden beyond the small area near my shed to include various locations in the immediate vicinity of my building. After all, if I’m going to plant around the building, why not plant things I can eat?

Beyond that, I suspect I’ll keep things close to the ground — that’s one direction that I don’t want a screen of tall trees. A wildflower field, kept vibrant through irrigation if necessary, might be just what I need. I’ve already got the seeds started.