2016 Honey Harvest — So Far

Twelve frames of honey — so far.

I spent about two hours this morning in one of my beehives. I’ve got nine of them these days and need to open each one before September month-end to harvest excess honey and begin pre-winter care. In all honesty, the sooner I get the honey out, the better off I’ll be; I know how hard it is to extract honey once temperatures drop.

This Morning’s Bee Encounter

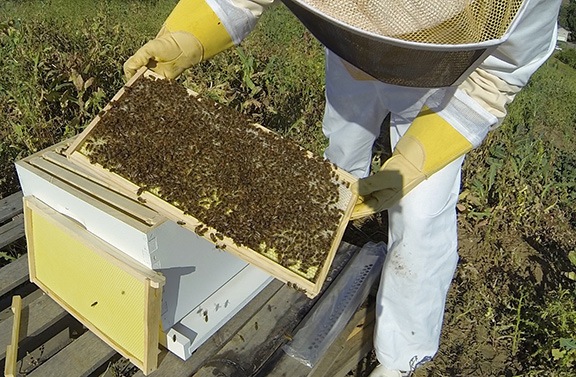
The hive I did this morning has two supers: one deep and one medium. It’s extremely crowded; the bees don’t seem to fit inside — many of them are clustered on the front of the hive at night and during the day. I thought it might be because they were preparing to swarm, but when I opened the hive, I didn’t see any queen cells. What I did see, however, was that the medium super on top was filled with ten fully-capped honey frames. Wow!

Capped Honey Frame
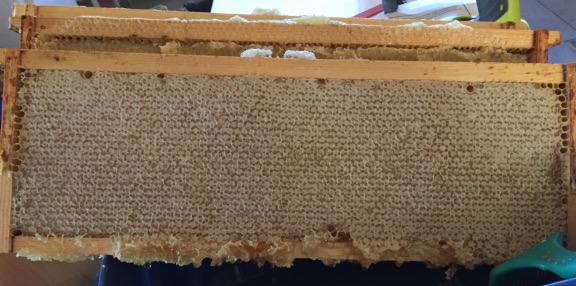
Capped honey frame. This is what honey looks like when it’s ready for harvest. It’s capped with wax that needs to be scraped away before extraction.

I took six of them. I was only going to take three, but as I worked with the bees, they got really pissed off and, in turn, got me really pissed off. I had to go back to the house to put on boots after getting stung on the ankle through my thick socks. While I was there, I fetched three more empty medium frames and swapped them for full ones.

Part of the reason they got so angry is my fault — I’m a hands off kind of beekeeper so there’s lots of burr comb to scrape off when I finally get into a hive. And in preparation for winter, I’m dusting them with sugar. That means taking every single frame out and sprinkling home-made powdered sugar on each side. Dusting the bees with powdered sugar is a chemical-free way to help reduce varroa mites; as the bees clean the sugar off, they also dislodge mites which fall through the screened bottom board and can’t get back up into the hive. I can’t use off the shelf powdered sugar because of additives; instead, I grind regular sugar to a powder in a blender.

I debated adding another super to the hive, but with six new empty frames, it didn’t seem to make sense. Besides, the only equipment I have left is a deep super with frames and I hate to put deep supers on top of mediums, especially this late in the season.

This Year’s Harvest So Far

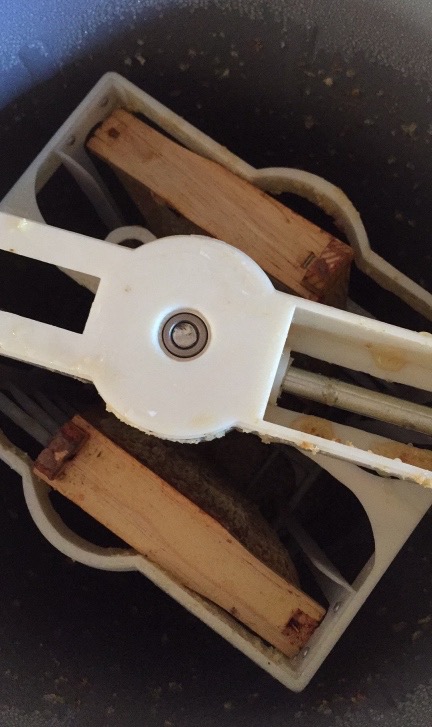
Extractor
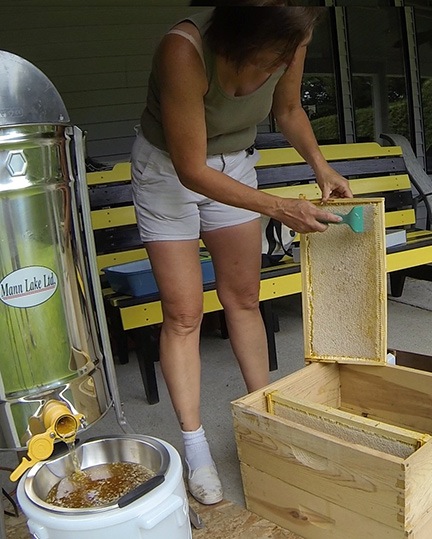
A view looking down into my extractor with two medium frames in place. The frames spin to extract honey by centrifugal force. The extracted honey runs down the inside of the extractor and accumulates at the bottom. A valve allows the honey to be poured out.

The six medium frames I pulled out today are only part of my harvest so far. I also pulled two medium frames and four deep frames from hives back in July. Together, that could come out to 5-6 gallons of honey.

Because it was warm and because I have a new extractor I was dying to try, I decided to start extracting honey today, too. The extractor is a budget model with a hand crank that holds two frames at a time. But, as you might imagine, I wasted no time automating it. I bought an adapter for my drill and use it instead of the crank handle to spin the frames. When the frames are well balanced, it works very well and I can get some good speed going. But when they’re not, there’s a good amount of wobble at high speeds. This is something I’ve learned to deal with over the years.

When the level of honey in the extractor reaches the bottom of the frames, it needs to be poured out before I can extract any more. I managed to get the six frames I pulled today extracted and start on two more.

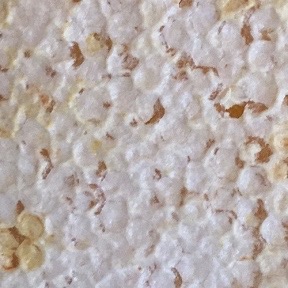
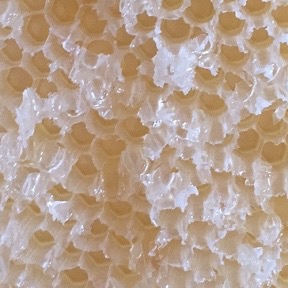
Capped Cells Uncapped Cells
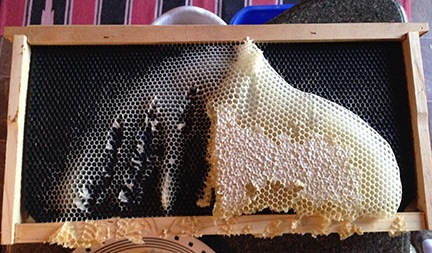
A closeup look at full/capped (left) and uncapped/extracted (right) cells on a honey frame.

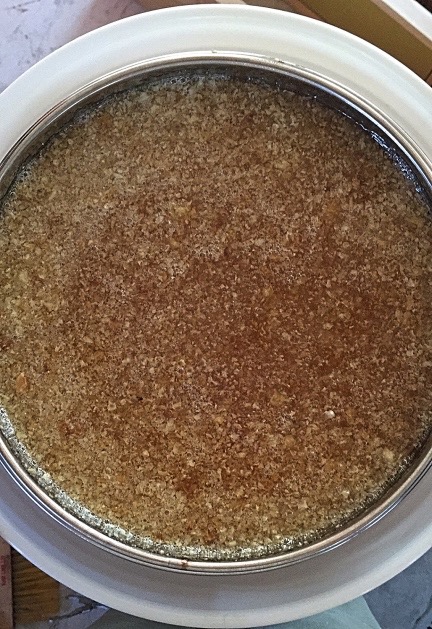
Straining Honey
From the extractor, the honey goes into a series of two stainers that strain away the wax cappings, which is what you see here.

Because I use an uncapping fork instead of a hot knife, there’s lots of wax in my extracted honey. Right now, I’m waiting for it to get through the two layers of strainers and into my storage bucket. I hope to extract the rest tomorrow. I’m hiking in the morning, but should be able to do it in the afternoon.

And yes, I’ve seen Hive Flow. But no, I don’t think it’s a good idea for serious beekeepers. Too complex, too costly, and too likely to fail. I would definitely love to chat with someone who has been using one for at least a year, though.

More Bee Stuff to Come

This is just the start of harvest for me.

Although I have two trips scheduled over the next week or so — when cherry season ends, I don’t spend much time home — I hope to get into the other eight hives early in the mornings when I get back. I really hate sweating my brains out in a bee suit on a hot summer day, so I go in when it’s cool, even though that’s when most bees are “home.” My comfort trumps their rest. They should be glad I don’t open them weekly or biweekly like so many backyard beekeepers do.

The last time I open the hives for the winter will be in October. That’s when I’ll check food stores, add more honey frames if necessary, and give the bees some medication for varroa and nosema. I don’t insulate my hives, but I do make sure they have good ventilation for the winter months. Last year four out of six hives survived the winter and one of the ones that didn’t make it entered winter pretty weak anyway so the loss was no surprise. If 50% of my hives survive each winter, I’ll be in good shape each spring.

Buy My Honey!

I sell my honey in jars suitable for gift giving. Buying my honey is a great way to support this site and my beekeeping activities. You can learn more at Maria’s Malaga Honey.

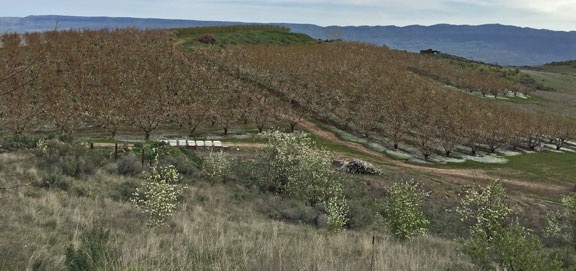
I’d like to expand my beekeeping activities — especially after this very good year. But I’ve learned that I can only support 3 to 5 hives on my property, due to dry summers with little forage. This summer was unusual because it rained a lot though July and there were more wildflowers for a longer period than usual. I think my garden helped, too — the sunflowers were seriously out of control here. So I have five hives at home and four on a trailer up Squilchuck Canyon, not far from a cherry orchard where there’s lots of water and wildflowers/flowering weeds. If I expand much more, I’ll need another trailer and another place to put my bees for the summer.

Something to think about.

Taking “Home Made” to New Levels

I realize that I can take home-cooking to extremes.

French Toast Breakfast
My home-made/grown bread, eggs, and honey went into this.

This morning, I made French toast for breakfast. For most people, that’s not a big deal — French toast is easy enough to make. But I realized that my French toast went beyond what most people would consider a home-cooked meal for a few reasons:

  • I baked the bread.
  • The eggs came from my chickens.
  • The honey I put on top came from my bees.

The only thing related to my plate that I didn’t make or grow was the cooking spray I used in the pan and the fresh strawberries. In two months, the strawberries will come from my garden.

While anyone with an oven (or bread machine) and a tiny bit of skill (or ability to follow directions for a bread mix) can make their own bread — and I highly recommend it! — I agree that raising chickens or keeping bees is not for the average person. So no, I’m not trying to tell you to follow my lead here. I’m just pointing out that it’s possible to have better control over what you eat.

And the results can be delicious.

On Keeping a Neat Desk

And conquering clutter.

I am — or, hopefully, was — the Queen of Clutter. And I’ve always hated it.

The Clutter

The clutter seems to come into my home with me. Sometimes it arrives by mail or UPS or FedEx in the form of junk mail, bills, account statements, and items ordered. Other times it arrives in my car or Jeep or truck in the form of items bought at a store or given to me by a friend or family member. Other times, I have no idea where it comes from. It just seems to appear.

My procrastinating nature — and yes, I am a confessed procrastinator — causes the clutter to pile up on any horizontal surface readily available. That included my dresser, night table, kitchen table, and desk. I would go through the piles periodically, pull items out — for example, a bill or a letter — to deal with them, and then keep piling. When the piles needed to be hidden to neaten up a room, they’d be shifted to a pile elsewhere, sometimes in an empty box that would be piled with other previously empty boxes. The situation was completely intolerable and embarrassing, to say the least. And I know I’m not the only one who was bothered by it.

My desk and office seemed to be the ending point for most of the shifted clutter. In my Arizona home, I had a huge L-shaped desk where I often had several computers and monitors and printers set up. Back in those days, my primary source of income was writing books about how to use computers and I wrote several a year. The huge desk gave me plenty of space to work and accumulate clutter. The rest of the room, including the floor, was for overflow. It was so awful that after a while, I preferred working with a laptop at the kitchen table than in my own office.

Fast Forward to Today

It’s been more than three years since the last days I worked in my home office.

These days, I’m putting the finishing touches on a new home in a new place. My living space is considerably smaller — half the size, in fact — but I don’t have to share it with another person. And it has a simple floor plan with just two rooms, a bathroom, and a loft. Rather than having an office in its own room, I’ve given myself a small corner of the great room, just under 4 x 7 feet, for my office space.

I had a second desk when I lived in Arizona. I’d bought it on sale at Pottery Barn in Phoenix and set it up in the bedroom of the Phoenix condo I lived in for a short time. When I moved, I brought it and its matching file cabinet to Washington with me. It has since become my primary desk while my big, old L-shaped desk became a workbench in my shop downstairs. It fits remarkably well in the small space and looks rather nice there, too.

I became determined not to let it become the resting place for the same kind of clutter I had in Arizona, and, so far, have done very well.

Lessons from my Sister

My sister was a corporate banker with Citigroup for a bunch of years. I remember visiting her a few times at her office on Wall Street in Manhattan. The one thing that always amazed me was how neat and clean her desk was. There was never anything on it that she wasn’t working on at that moment. And, at the end of the day, it was always completely cleared off.

I was jealous of her ability to do that and, for a long time, thought it was beyond my own capabilities.

I’ve since realized that it isn’t that tough. The trick is to never let anything accumulate on the desktop. And the best way to do that is to make sure that at the end of each day, the desktop is completely cleared off.

Getting Things Done

Getting Things Done
This is the latest edition of Allen’s book. I wonder if this edition takes advantage of more computer-based organization tools.

For Christmas back in 2006 — I know this because I searched my blog posts for the first time I wrote about it and it was nearly eight and a half years ago — I got a copy of David Allen’s book, Getting Things Done. This book was written to help people conquer clutter, fight procrastination, and get more done. In other words, it was written for people like me.

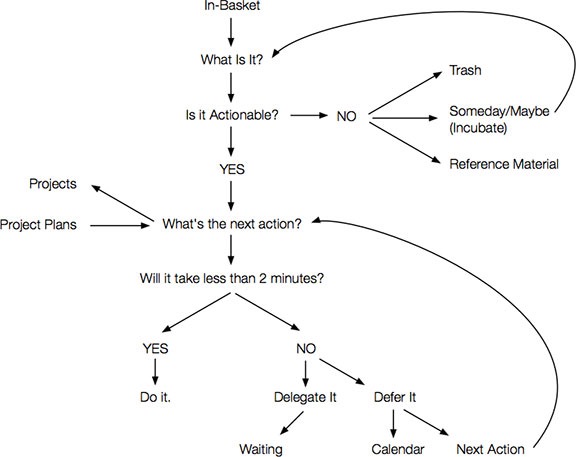
I read about halfway through it. It proposed an organizational strategy that used lots of paper and folders and labels to organize the clutter into manageable tasks. I admit that I wasn’t too keen on that part of the book — in my mind, it just created more clutter by adding to the piles of paper. But it also provided a good strategy for dealing with incoming paper — the stuff of future clutter. There was a flow chart and I found it so useful that I made my own version of it in a drawing program, printed it out, and hung it on the wall over my desk in my RV.

Getting Things Done Flowchart
Here’s my version of the GTD flowchart.

Of course, this cannot completely solve my clutter problem. “Incubate” is what causes clutter on my desktop. “Reference material” is another source of clutter — that paper has to be stored somewhere. I have a file cabinet with just two drawers and will likely use one to store stationery items like letterhead and envelopes. And I know from experience that any reference material I think is worth keeping is seldom referred to in the future. In reality, it’s “deferred trash.” I can’t delegate anything, either. I don’t have employees or a partner — which is a good thing, believe me — so I have to handle everything.

So, as you can imagine, this is of limited use to me.

The Joy of Scanning

I’ve discovered that the absolute best way to keep clutter at bay is to scan the documents you think you need and store them on a backed-up computer hard disk as PDF files. And that’s what I do now.

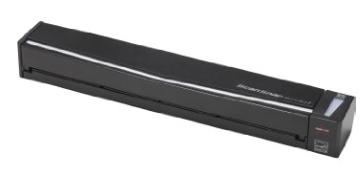
ScanSnap Scanner
My ScanSnap scanner is portable and efficient for the volume of scanning I do.

I’ve got a little ScanSnap portable scanner that can take as many sheets of paper as I need it to. I’ve created a date-based filing system on my computer with consistent naming conventions. It works like a charm — when I take the time to scan. The key, it seems is to scan something as soon as it hits my desk and then destroy the original paper and throw it into the recycle bin. No piles.

I try to avoid having to scan anything. This is easy these days with electronic bank statements and the like. Periodically, I go online and download statements, filing them into my existing system. I have a To Do list that reminds me to download for each account every three months. I tick it off when it’s done and I’m reminded three months later to do it again. The reminder stays active until it’s done; the three-month clock starts when I tick it off.

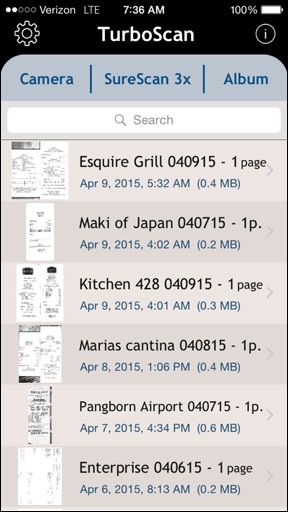
TurboScan
Some of this week’s receipts in TurboScan in my iPhone before moving them to my computer.

Receipts from traveling were a huge source of clutter in the past. But I’ve recently even resolved this with a $3 app on my iPhone: TurboScan. This app uses my phone’s camera to take photos of my receipts and then stores them. When I get home, I export them as PDFs to iTunes, copy them to my hard disk, and file them away in the appropriate folders. Not a single piece of paper comes home with me. Can’t make clutter if you don’t bring it in the house. Best $3 I’ve spent in a long time.

Back to My Desk

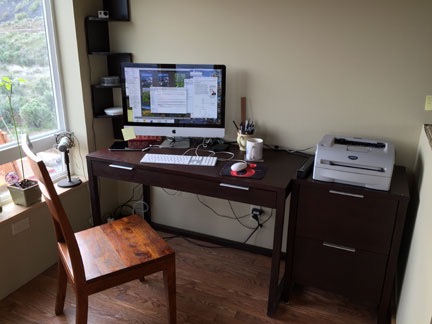
These days, I allow only the following items to live on my desktop:

  • My computer. It’s a 27-inch iMac that’s still going strong as it comes up on its fourth birthday. I have a 24-inch monitor I can use with it and there’s a slight chance I might bring it up — especially if I start writing computer books again. For now, the computer sits alone in the back corner of my desk.
  • My keyboard and mouse. I need these. Although my desk has a drawer that could be used as keyboard drawer, I prefer to use the drawer for small office supplies like clips and a stapler and the three-hole punch that was in the desk when I unwrapped it after the move. (A parting gift from my wasband? I doubt it.)
  • A mouse pad. The desk surface is a nice wood and I don’t want to ruin it by scratching a mouse all over it.
  • Backup hard disk. I use Time Machine to back up my computer automatically.
  • A pencil cup. It’s an oversized mug with pens, pencils, scissors, ruler, and other similar items in it.
  • Coaster. For my coffee cup or other beverages. Again, I don’t want to ruin that nice desk top.
  • Charging cables for my iPad and iPhone. I tend to keep them plugged in at my desk when I’m not using them so they’re handy when I need them.
  • USB Hub. I need the ports.
  • Tissue box. I always keep tissues nearby; I’ve had sinus issues my whole life, although they’ve been very minor since moving out west from the New York metro area.

My Office
This photo of my office was shot just moments after finishing this blog post. The only extra items you see are my coffee cup (on the coaster) and iPad (on a charger). And yes, the chair is temporary; haven’t brought my office chair up yet.

Two items live on top of my file cabinet, which abuts the desk:

  • A printer. Right now, I’m using the Brother laser printer I bought cheap a bunch of years ago. It’s wicked fast and does a decent job printing. I have two other printers — a LaserJet network printer and a Color LaserJet USB printer. But how many printers does a person need? I suspect I’ll replace the Brother with the Color LaserJet when I move into my new home and get rid of the other two printers. Or maybe get rid of the LaserJet — which prints great but very slowly — and keep the Brother as a spare. I don’t print very often, but it would be nice to have the option of printing in color.
  • A portable scanner. It’s a ScanSnap and it feeds a sheet at a time. A great little scanner if you don’t need to scan often. What I like about it is that I can set it aside next to my printer when I’m not using it and, because my desk is always clean, pull it out when I need it.

There are a few other things I keep out in my office area, either on the hanging corner shelves or my oversized windowsill:

  • Router. The internet comes into the room behind my desk; the router needs to be nearby. Added bonus: I can plug my computer right into it rather than use WiFi.
  • Podcaster microphone. I occasionally appear on podcasts and video podcasts and have been thinking of starting a new podcast this summer. The microphone also works well for voice recognition, which I hope to start using more frequently. It’s easy enough to reach for the mic and put it on my desk when I need it.
  • UPS. I’ve always had my computer plugged into an uninterrupted power supply. Not only does this filter the power to make it cleaner, but it prevents sudden shutdowns in the event of a power failure. I keep it on the floor and have just about all of my equipment plugged into either the battery + surge suppression or surge suppression side.

At the end of the day, before I go to bed, my desk cleanup job is simple: just make sure the above-listed items are the only items on horizontal surfaces in my office area. Anything else must be dealt with and/or put away before I go to bed. Because nothing ever accumulates, its remarkably easy to do.

Oddly enough, when I mentioned this strategy to a friend yesterday, his response was, “How you do penalize yourself if you don’t achieve that goal?” My response was: “I always achieve it so no penalty is necessary.”

And so far, I have.

Stress-free Living

The biggest benefit of getting clutter under control and keeping a neat workspace and home is that it eliminates one source of stress.

For me, having those clutter piles around were a constant source of stress. Each pile represented a huge stack of stuff I needed to deal with that I’d already put off many times for many reasons. What made things worse is that when the clutter problem got very bad on my desk, I had difficulty finding things I needed to work on and lacked the space to spread out and work.

Getting rid of clutter is the first step to increased productivity and a stress-free lifestyle. Don’t believe me? Try it for yourself.

New Bees, a New Bee Yard

I reboot my beekeeping efforts with two nucs in a new location.

I started beekeeping back in the spring of 2013. I’ve had mixed results.

Some History

I started beekeeping in June 2013 and have been blogging about it periodically. If you’re interested in reading the other posts in this series, follow the Adventures in Beekeeping tag. Keep in mind that posts appear in reverse chronological order, with the most recent first.

I started with one colony in 2013, caught a swarm, and then split a hive to end the season with three colonies. That first colony yielded about 2-1/2 gallons of honey with an early harvest. I was very encouraged. Late in the season, I moved my hives from their temporary homes in Wenatchee and Wenatchee Heights to my new home in Malaga. I set up an apiary or bee yard for them not far from where I was living in my RV and would build my home.

I lost two of the three colonies over the winter of 2013/2014 but the surviving hive, which I took with me to California for two months, was strong and I split it early. When I returned home, I added four packages in April and caught a swarm, ending the season with seven hives.

Unfortunately, I neglected my beekeeping duties that summer — mostly because I was kept so busy with the construction of my new home — harvested another 2-1/2 gallons of honey very late, and failed to treat for mites. My neglect did not go unpunished: despite moving six of the hives to East Wenatchee for the winter to avoid the Shadow Time at home, all seven of my hives died.

Cleaning Up

I retrieved the hives from East Wenatchee on their trailer, opened the boxes, and took a look. All of the boxes were full of dead bees and a lot of mold. (Yes, I know: I should have ventilated the tops of the boxes. I did mention my general neglect, didn’t I?) I thought it was the mold that killed them, but later decided it was probably a general weakening due to mites, which I hadn’t treated for prior to winter. (Lesson learned.)

I started pulling out frames and scraping them clean, keeping the comb to melt down wax. Some of the frames I’d bought locally at Coastal Farm and Ranch had been improperly brushed with wax, resulting in irregular comb that was a real bitch to extract honey from. I was determined to rewax all of the frames bought from Coastal before reusing them and needed the wax stores to do the job. But with so many dead bees and so much mold, most of it wasn’t worth saving.

I surfed the net to find some info on cleaning mold out of hives. Several sources said to simply reuse the moldy frames — the bees would clean it up. One source even had a video showing a moldy frame put into a hive and that same frame, a week later, cleaned up and being used by the bees.

Many sources suggested freezing frames to kill any pests that might be on them. That’s easy enough to do — I have a chest freezer that’s big enough to hold a few dozen frames at a time — but since my hives were out in freezing weather after the bees died, I don’t think it’s necessary.

Meanwhile, on warm days — and we had a few of them last week — the neighborhood bees, most of which are likely pollinators brought to the area for cherry pollination, came by and cleaned out the remaining honey. For a few days, the area around that bee trailer was buzzing with thousands of “robber” bees. It took them about a week to clean up.

Pollinators
The pollinators are back! This orchard just off my street has blooming cherry trees and pollinator bees brought in just for the season.

I ordered four packages of bees from the supplier used by the beekeeping club I belong to: the North Central Washington Beekeepers Association. Unfortunately, they would not arrive until mid April.

I set up a hive box, base, and lid on the hive stand near my garden. That’ll be for my garden hive. And then I started to rethink where to put my new hives once I got them.

A New Bee Yard

I have ten acres of land here in Malaga. While about 30% of it is too hilly to accommodate bee hives and I’m using about 10% of it for my home, I still have several acres I’m not using. It seemed silly to put the bees so close to my home, in my view, when I could move them farther east on some land I wasn’t likely to use for anything else.

Lay of the Land
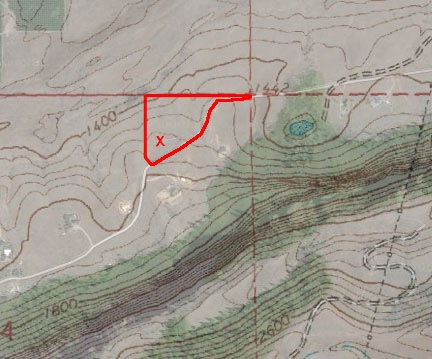
I threw together this hybrid topo/satellite map to show the lay of the land. The odd shaped red box is my 10 acre parcel; the south property line follows the road — hence the odd shape. The X is my homesite.

Understand that my lot has an odd shape. While its west and north boundaries run pretty much north/south and east/west respectively, its south boundary follows the road. Since the road winds northeast past my home, the farther you get on the east side of my property, the narrower the property is. At the very far east end, which is over a ridge and out of sight from my home, it’s only about 20 feet wide.

Before that point, however, right where the lot starts to get narrow, is a small ridge where my lot is about 100 feet wide. I know exactly where my property line is there because I had surveyors place a stake on the ridge back in 2013 before I bought the property. This is the easternmost part of my land that I can see from my home; I have to stand on that ridge to see beyond it. It’s also the part of my land that receives direct sunlight the longest.

I’d been considering that location as a site for my bee yard for a while and I drove out there a few times to take a closer look. The ground wasn’t exactly level and there were some sagebrush bushes, along with the bunch grass and wildflowers native to the area. But there were a few areas that were relatively clear and level and would be easy enough to get to with my ATV or Jeep or even the bee trailer. It would be a shame to carve in a two-track road with my tires, but it wasn’t as if the road would be long or I’d see it from my home. The ground was soft enough that I could probably even drive in a few T-posts, which I already had, and fence in the area to keep out large critters.

I let the information stew in my brain while I went on with my life.

Two Nucs from Wapato

I am not a patient person. The warm weather and abundance of wildflowers and orchard flowers were driving me nuts. If I had bees, they’d be out and about, visiting flowers, bringing home pollen and nectar, growing their hives. I could not only do a hive split in late May or early June, but I could probably even harvest some honey then — which was a good thing because I had less than a quart left.

Beekeeping 101: Nuc vs. Package

A nuc is a nucleus hive. It’s a cardboard box with an established queen and five drawn-out frames of honey and brood. It’s basically a small colony. You get it home, put the frames in a standard hive box with five empty frames, and the colony simply carries on, expanding into those frames you provided. This is the easiest way to get started.

A package is a box of bees with a queen in a cage. You dump the bees into a hive box filled with empty frames, put the queen’s cage between two frames with the cork replaced by a piece of candy or marshmallow, and cover up the box. The bees eat through the candy to release the queen and she starts laying eggs.

The main benefit of a nuc is that with capped brood already available, new bees will emerge from cells immediately; although a queen in a package should start laying eggs immediately, it’ll take three weeks for the new bees to start emerging.

So I started poking around, looking for bees. And I discovered that the Sunrise Honey Farm was selling nucs, with a pickup date down in Wapato on April 4.

To be fair, some people from my club had ordered nucs from Sunrise and they were delivered to Wenatchee the previous weekend. Somehow I thought the bees I ordered would arrive the same day so I ordered the packages, which were considerably less expensive. If I’d known that the nucs would arrive three weeks earlier, I would have gone with the nucs.

I did not want to drive to Wapato. It’s more than two hours away, south of Yakima. But I wanted an earlier start. So I called Sunrise and left a message. A few days later, they called back to say that they had a cancellation and there were two nucs available. I told them I’d take them. They told me to be in Wapato between 7 AM and 10 AM on Saturday.

I left home at 7 AM in my little Honda S2000 to make the drive. Along the way, I stopped down at Crescent Bar, where one of the cherry orchards I’m on contract to dry was in full bloom with bees on. I could not have timed it any better. When I arrived, the beekeepers were just pulling the last pallet of hives out of the orchard. I pulled over, rolled down the window, and chatted with the beekeeper, Eric, for about 10 minutes.

Wow. What an education! He told me that the cause of death in my hives was most likely nosema, although varroa, as I suspected, had probably weakened them, too. He recommended a product to apply at the end of honey harvest, before winter. He also suggested that I feed pollen late in the season when food sources were scarce. He said that doing these things should keep the bees strong enough to get through the winter.

I drove the rest of the way along a scenic route that took me along the Columbia River and then through rolling hills studded with farms and orchards. After a quick bathroom stop at a gas station five miles short of my destination, I pulled into a farmhouse driveway where I flatbed truck waited. It was just after 10 AM and there were just two nuc boxes on the truck’s bed.

I apologized for being late and they told me I was right on time. I gave them money and we loaded the two boxes into my car’s trunk. They didn’t fit, of course — my trunk needed to be about two inches deeper. So we used Penny’s dog leash to tie the trunk lid down. (Note to self: put bungee cord in Honda trunk.) We said goodbye and I headed home to Malaga; they headed back to their home in Spokane.

Hiving My Nucs

At home, I took the nucs out of the trunk and put them in the shade. One of them was buzzing loudly; the other was more subdued. I put the car away.

I was very pleased to see that the new nuc boxes were solid. In the past, I’d gotten boxes that the bees could escape from; it didn’t seem as if any were escaping from these.

It was only about 1 PM so I had plenty of time to get the bee yard set up and put the bees in their hives. Or at least I thought I did. The weather made me doubt that.

I used my ATV with its farm trailer attached to move a pallet, and several blocks of scrap wood posts, a level, and the beehive bottoms and tops out to where I planned to put the bees. As I suspected, I could drive the ATV right up to the yard area. I set up the pallet on the blocks, raising it about 8 inches off the ground. I was able to get it surprisingly level. I set up the hive bottoms and checked the level again. One rocked a bit; the pallet wasn’t perfectly flat. Some Pergo scraps under a corner would fix that. I positioned them on half the pallet, leaving room for two more hives. I’d have at least six by month-end.

On the second trip, I brought out the hive bodies with five relatively clean honey and brood frames in each.

By that time, the wind was blowing cold and hard. There was a storm moving in from the south toward Wenatchee. It might even be snowing up on Mission Ridge. Although it looked as if the storm might miss my place, who knew? I didn’t want to be out there with open beehives in a cold wind or rain. So I took a break and went inside for a while.

A friend called. He was in the area and asked if he could drop by. Of course!

We chatted, drank hard cider, assembled two of my three new bar stools, and tried them out. The storm never came. The sun came out and the wind died down. I kept thinking about my bees, eager to get them put away before nightfall. But I was enjoying my friend’s company. Still, when he said he had things to do at home, I didn’t stop him from leaving.

By that time, it was 5 and the sun was getting low. The wind had kicked up again, but not as bad. I loaded the bees, my smoker, and my hive tool into my Jeep. I suited up in my bee suit. Then I drove out to my new bee yard, backed the Jeep into the yard, and got to work.

I did one nuc box at a time. They were both filled with old, propolis-stained brood frames, with many capped brood cells. I didn’t waste time examining each frame or looking for the queen. In both cases, however, I did notice a queen cage fastened to a frame; I’ll need to make sure there’s no queen in each cage before removing them.

New Bee Yard
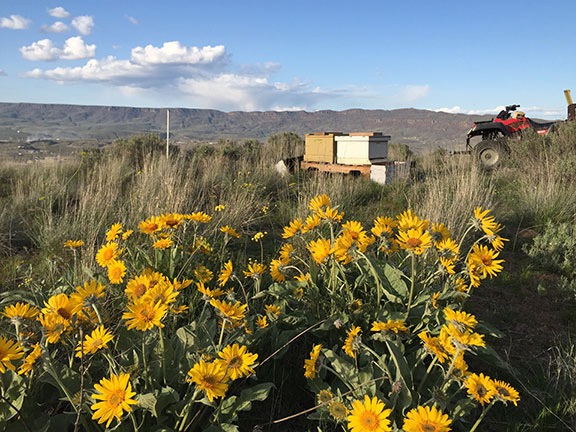
I used my ATV with its attached farm trailer to bring the hive components out to the new bee yard. There’s a lot of balsamroot in the area.

I have to admit that I’m a bit disappointed. Apparently, these nucs were created by taking brood frames with bees on them from the pollination hives and adding a caged queen. This is like a mix of a nuc and a package — the only thing that makes it better than the package is the inclusion of capped brood. The queen isn’t really “established;” she may not even be laying eggs yet. I need to examine the frames more closely on a warm day to see what’s going on.

Of course, some of the bees were left behind in the nuc boxes. That’s common. I left the boxes in front of the hives with rocks in the bottoms so they wouldn’t blow away if the wind kicked up hard again; the straggling bees might find their way into the hives. Or they might not and simply die overnight in the cold.

I realized belatedly that I should have fed them but I didn’t have any feed ready; I prepped some later when I got back in and put feeders at each hive this morning, before it warmed up. I also picked up the nuc boxes and put them away; they’ll come in handy if I have to capture any swarms over the next few months or if I want to do a hive split.

My Bee Yard
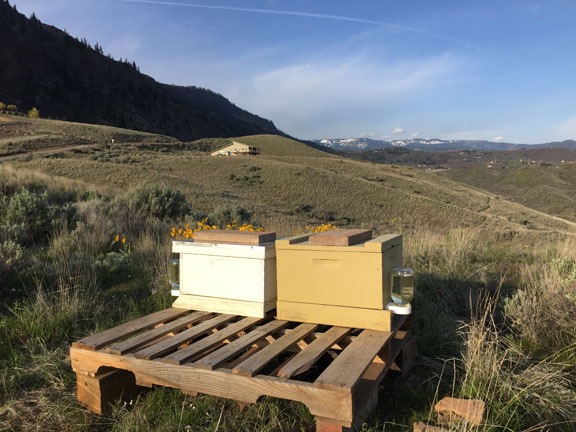
My bees are within sight of my home — and Mission Ridge, which is still snow-covered.

This Year’s Plan

I’ve decided to be a good and dedicated beekeeper this season. That means doing a hive inspection every 10 to 14 days, keeping copious notes about hive conditions, using integrated pest management, and making sure my bees are well fed and healthy before winter. I can’t use hot weather as an excuse to avoid a trip to the bee yard — I bought a vented bee suit at Mann Lake when I was there last month. I’ll also harvest honey on a more timely basis — as I learned last season, a late harvest is not fun.

I’m also working on some plans to put my bees in other locations, including a resort about 40 miles from here. If I get the resort contract, I’ll do some beekeeping seminars for resort guests when I do hive inspections there, thus earning some additional revenue to support this “hobby.” And that’ll open up a whole new market for honey sales.

I’ve already decided that if I have another total loss winter, I’ll give up as a beekeeper. But I think that if I do what I need to do to keep my bees healthy, I’ll have enough colonies next spring to continue without another bee purchase.

Wish me luck!
Getting the Facts Straight on Honey

A beekeeper ought to know, right?

I started keeping bees in June 2013. So, yes, it hasn’t been that long and no, I’m not an “expert” (yet). But I do know some things about bees and beekeeping and honey.

Maria the Beekeeper
This is me last year, examining a honey frame in one of my hives. Can’t believe how clean my gloves still were!

I posted a status update on Facebook yesterday that mentioned snacking on a piece of honeycomb from my beehives. The comments I got from my friends made me realize that there are some misconceptions — or simply knowledge gaps — out there about honey. I thought I’d take a few moments to clear things up.

Nature’s Perfect Food

I like to think of honey as nature’s perfect food. It’s created by nature, requires no refrigeration to preserve, and it doesn’t go bad. Smithsonian’s “The Science Behind Honey’s Eternal Shelf Life” elaborates on this. It mentions that the bees “regurgitate the nectar from their mouths into the combs combs to make honey.” But no, honey is not bee vomit.

Beeswax

Extracting Honey
In this shot, I’m scraping the wax caps off a honey frame before putting it into the extractor to the left.

Bees store honey in wax honeycomb they create. Most beekeepers use Langstroth hives that provide their bees with frames specially designed for them to create nice, neat honeycombs. This makes it easy to extract the honey using centrifugal force in a honey extractor.

Some beekeepers prefer more natural hives, such as top-bar hives, which allow the bees to create comb as they might in the wild. (I don’t know how they extract honey from natural comb. Maybe they just sell the honey in the comb.)

Bad Comb
This photo shows some natural comb made on a Langstroth frame. This is not normal. I think it was a result of the frame’s plastic surface not being properly coated with beeswax by the manufacturer. I won’t be buying my frames there anymore.

Beeswax is edible. If you buy comb honey, you can eat the entire thing. I occasionally have comb honey that I get from removing unwanted natural comb from my Langstroth hives. I eat it with a spoon, chewing it gently until the honey is gone from the wax. The wax does not stick to my teeth. It ends up as a little wax ball that I spit out (like gum). Swallowing it would not hurt me, but I don’t think there’s any reason to.

Buying Honey

The absolute best place to buy honey is at a farmer’s market. A real farmer’s market. Chances are, you’ll be buying the honey from the beekeeper.

And if you don’t think there’s a difference between store-bought honey and fresh honey from a beekeeper, think again. The first time I tasted my own honey, I threw away all the store-bought crap I had in my cabinets. Then I gave away too much of my honey and had to ration the last jar so it would last a whole year. (It didn’t.)

Raw honey is best. Don’t buy the flavored crap. Who knows what they added?

Creamed honey is honey that has been processed to control crystallization. Nothing is added. It’s just been stirred or whipped at a specific temperature.

Spending a lot of money for honey does not mean you’ll get better honey. It just means that someone’s marketing scheme worked on you.

Honey sold in glass jars is not necessarily any better than honey sold in plastic jars. In fact, many beekeepers package their honey in plastic containers — even the bear squeeze containers! — for sale because they’re cost effective, they’re lightweight, and they don’t break. Do you think it’s a good idea to shlep heavy cases of glass jars around from one farmer’s market to the next?

Storing Honey

Store honey in the container you got it in. I generally put my honey comb in plastic containers so that’s what I store it in. When I extract honey, I usually put it in quart-sized glass mason jars so that’s what I store it in.

If you’re refrigerating your honey, take it out of the refrigerator now. It doesn’t belong there. Refrigerating it can hasten crystallization. While crystallization doesn’t make the honey taste bad, it does ruin its nice, smooth texture.

If your honey gets crystalized, you can heat it to dissolve the crystals. You can do this in the microwave if you like or by putting the honey container in a bath of warm water. They crystals will come back when the honey cools.

Beekeeping Costs

The main cost of producing honey is buying the equipment: hive boxes, frames, bottoms and tops, beekeeper suit, etc. My initial investment was about $500. I’ve since spent about $1,000 more — I really do know how to throw money at a hobby — but now have what I need for six hives. You can save money by building your own bee boxes and frames.

All of the equipment is reusable, so once you’ve made the investment, the only thing you’ll spend to keep bees and make honey is your time. This year, I was neglectful — my new home under construction kept me very busy — but my bees didn’t seem to care. They did their thing — including keeping my vegetable garden pollinated — and I pulled another 6 frames of honey out of my hives. That’ll probably yield about 2-1/2 gallons.

And yes, I do hope to sell some of it. In glass jars with fancy packaging. In roadside fruit stands that cater to tourists from Seattle.

Heck, if a fancy jar and high price tag makes people think they’re getting something extra special, why not play the game?