Getting started with a new batch of chickens.

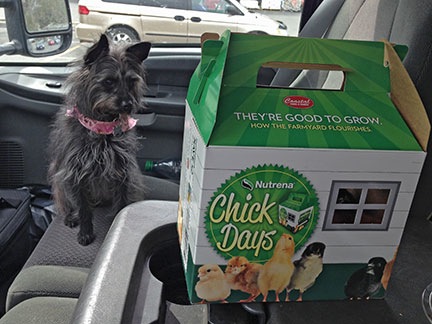
Penny suspected trouble when I got into the truck with this little box.
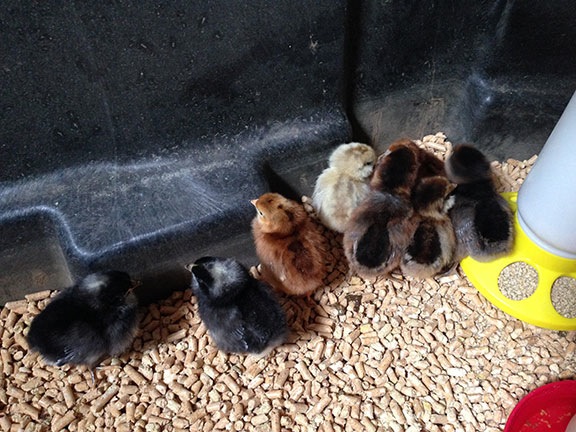
A few weeks ago — just a few days after returning from my 2-month California trip, in fact — I bought 8 chicks. I set them up in my shed, in the stock tank I’d bought last year for my poor man’s hot tub.

My little chickies, huddled together in their nursery.
I’d had chickens before, in Arizona. They’re a lot of fun and you really can’t beat fresh eggs. Because I knew I’d have chickens again, when I moved to Washington, I took along most of my chicken-rearing equipment: feeders, waterers, and heat lamp. That saved me a bunch of money when it came time to get these started. And the stock tank in the shed really beats the cardboard boxes I used to use in my garage to get the chicks started.
The Chicken Yard
Of course, they couldn’t stay in the shed. Eventually, they’d need a chicken coop and a fenced-in yard. Like Wickenburg, this area has coyotes and I’d have to protect the chickens from them. It also has large hawks, eagles — including Bald Eagles — and owls, so a net across the top would be vital. I wanted the chicken yard to be large enough to accommodate all the chickens and, with the real possibility of free-range egg sales, even more chickens in the future. And although I only wanted to build it once, I didn’t want it to be permanent. (I’ve come to realize that I don’t want anything in my life to be permanent because nothing really is. But that’s a philosophical discussion best saved for another blog post.)
I explored many options. “Hog panels” looked good, but the only ones available in the area were very large and very costly. Someone suggested a dog kennel and even sent me to Costco in search of one that seemed like a good deal. But they were out of stock and I was running out of time. I needed the chickens out of the shed before I headed south for a few days on personal business.

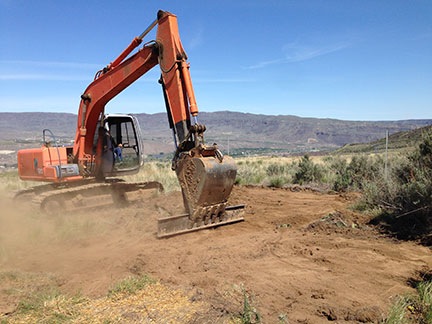
Jeff cleared a space for my shed and garden and left a pile of bunchgrass and weeds in the area just north of the garden patch.

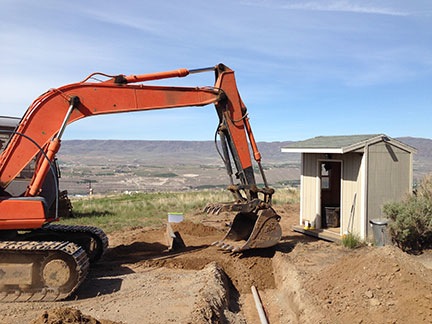
After he moved my shed and dug a trench, I ran conduit for my temporary electric and water lines to keep them off the driveway and he covered it back up.
Meanwhile, Jeff, the earth-moving guy, was preparing the pad for my future home. He had a honking huge backhoe and an i-beam that he used to scrape the ground. I wanted a garden and I wanted my shed moved to the other side of the driveway. (Originally, I figured I’d sell the shed when my building was done, but I realized it would make a great place to store garden tools so I decided to keep it.) I realized that Jeff could give me a good head start on my garden prep with that i-beam and I set him to work on a small area near where I wanted the shed. He dug out the few sagebrush there and scraped the ground clear of bunchgrass, leaving it piled up in an area north of the garden. He even dragged my shed to its new position — it was built on skids — and got it level for me. And dug a trench so I could run power and water for my RV and shed under the driveway so the cords and hose would not be run over by construction vehicles this summer.
When he left, I looked at my future garden location and the spread-out, uprooted bunchgrass beside it. The chickens wouldn’t mind all that grass. And it would be nice to have them next to the garden so I could let them in to eat bugs. Without even intending to, Jeff had chosen the spot for my chicken yard.
I wound up buying 150 feet of 5-foot tall “horse fence” at the nearby Coastal Farm and Ranch store. I wanted 6-foot fencing so I’d have plenty of room to walk around under the net, but this was on sale for a good price and it’s not as if I’ll be hanging out in there with the chickens. I also bought a few 6-foot T-posts. I already had a T-post driver and a bunch more T-posts that a friend had given me.
But I began realizing that I’d have a problem when I got the roll of fence home. It was too heavy for me to lift. I couldn’t even push it out of the truck bed. Clearly, I’d need help.
Assembling the Fence
Help came in the form of my friend, Mike. He’d come up from California with his helicopter towed behind his motorhome. After dropping off the helicopter at the airport, he rolled down my driveway and greeted me with a big hug.

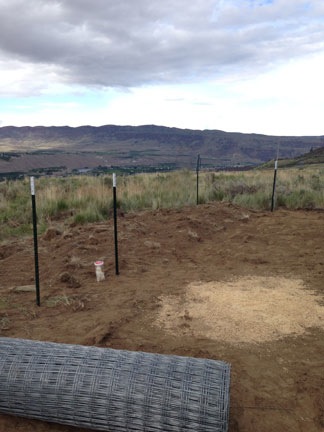
Some of the T-posts in the ground around the future chicken yard; the roll of fencing was very heavy.
After getting a tour of the place — building pad, “lookout point,” apiary, chicks in shed — we talked about the things I needed to do. I mentioned the chicken yard and the fence, never even thinking about asking him for help. That’s when he offered to help me.
I’m not an idiot. When someone offers to help me with a difficult task, I say yes! We got to work right then and there.
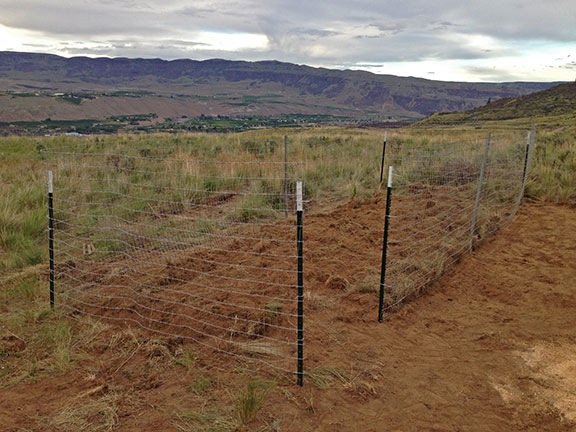
The work went surprisingly well. Within about 2 hours, we had completely fenced in a 9 x 25 foot area beside my future garden, leaving only a 4-foot wide doorway for a gate. Although it wasn’t perfect, it was a lot better than I expected it to look.

The nearly finished chicken yard.
Finishing Up. Almost.
The next day, I bought some bird netting at Coastal. Although it was supposedly 14 x 45 feet in size, the 14 foot width could not span the 9 foot width of the chicken yard. (What was that all about?) But with a little creative cutting and attaching, I was able to fit three pieces across to protect the chickens from aerial predators.
The next morning was warm and sunny with hardly any wind. I decided to try out the chickens in their new yard — I really needed to get them settled in before I went on my trip. I dragged the stock tank out of the shed and into the chicken yard. I closed the makeshift gate I’d made behind me. And then I tilted the stock tank so it was laying on its side, thus freeing the chicks.
They were not happy. And Penny, of course, went nuts. She couldn’t get into the chicken yard and she wanted a piece of those chickens. The chickens ran around and Penny ran around the yard. And that’s when the chickens started squeezing through the fence.
What followed was a comedy routine that involved me and Penny chasing 3-week old chicks. Penny was good at catching them and, for some reason, she didn’t kill them. I managed to get them all back in the stock tank. After putting food and water in there, I went back into the RV, hot, sweaty, and dusty.
The chicks would not be much bigger before I headed out on my trip. That meant that if I wanted them in the yard, I’d have to put something around the bottom edge of the fence to prevent them from squeezing through. What? I had some chicken wire, but I’d bought 4-foot width and that was overkill. It looked as if I’d have to head back to Coastal for some more chicken wire.
Reuse, Recycle
I was back out in the yard, contemplating the situation, when my eyes fell upon the 22 bales of straw I had in two piles in my yard. I’d bought the straw the previous autumn to stack around the base of the RV to winterize it. When I moved the RV out for my California trip in February, I’d stacked the straw neatly to get it out of the way.
If I laid the straw around the base of the chicken yard, right up against the fence, would that prevent the chickens from getting out? It certainly seemed as if it would.

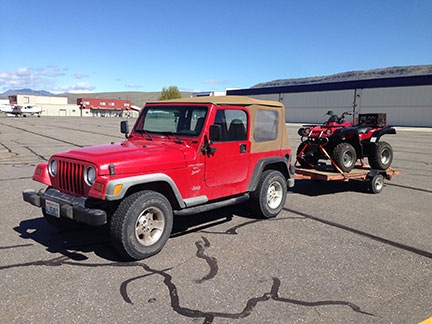
Although I bought this little flatbed trailer — a Craig’s List deal — primarily to move my bees around in the future, its size and low bed make it perfect for moving my ATV and straw bales.
So I got to work. I’d brought my ATV home, along with the little cargo trailer I’d bought years ago for yard work up at our vacation property in northern Arizona. The cargo trailer’s tires had been replaced and it was all ready for use. But last week I’d also bought a very small flatbed trailer that was larger than the ATV’s yard trailer. With a ball on the front of my ATV for towing the helicopter, I could tow the little flatbed trailer. It would be perfect for moving all that straw.
A formerly wise man used to say that any job is easy if you have the right tools. How true. I had the straw moved and positioned in less than an hour.
I was thrilled. My solution solved more than just the chicken escape problem. It also temporarily solved the problem of what I was going to do with all that straw.
A while later, I tried again to let the chickens out into the yard. This time, they didn’t escape.

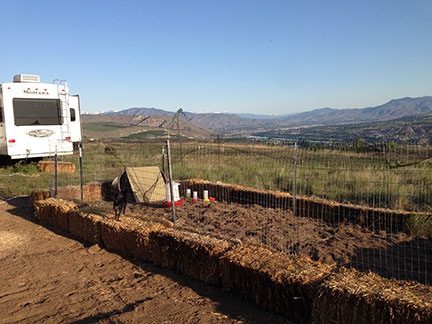
The chicken yard this morning. I haven’t done a headcount, but I’m pretty sure all eight of my little girls are in there.

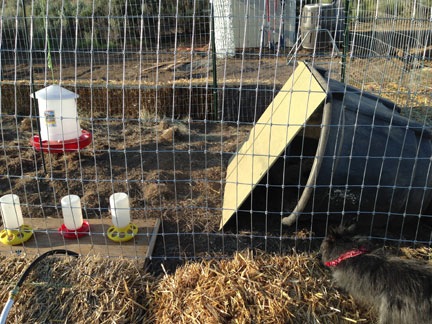
The temporary chicken coop is nothing more than a stock tank on its side with a piece of scrap plywood as a lean-to wall.
I set up an automatic waterer that I think might be a bit too big for them. Then I set up their chick feeders and waterer. I left the stock tank on its side against the side of the fence as a makeshift shelter for them; later, I leaned a piece of scrap plywood against it to enclose most of it. My list of things to do includes building a chicken coop, but I’m not sure I’ll get to that before my trip. The chicks are still small and should be okay in the stock tank, at least for a few more weeks.
The sun has just risen as I’m tying this. Seeing movement out the window, I took a closer look. The chicks are out in their little yard, scratching around in the early morning light. They’re exploring their big automatic waterer and, with luck, will soon be using their hanging feeder, too.
It looks like I’m on the road to chicken success. More later, after I’ve built their coop.
Like this:
Like Loading...
