And other new adventures in cheesemaking.
Way back in September 2013, when I was still living in my fifth wheel RV (the “Mobile Mansion”), I got interested in cheesemaking. I took a class at a local cheesemaking facility (which closed down the following year when they lost the land lease they needed to graze their sheep) and even tried making a few cheeses myself. Trouble was, my RV kitchen was tiny and if there’s one thing cheesemaking requires, it’s space. So I packed up the cheesemaking gear I’d invested in and set it aside until I had a real kitchen again.
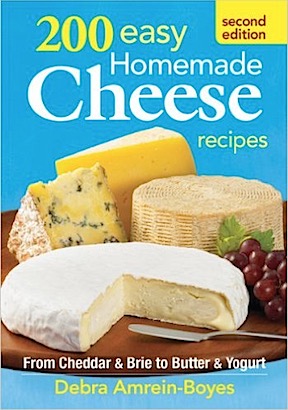
I highly recommend this book, 200 Easy Homemade Cheeses, to anyone just getting started making cheese.
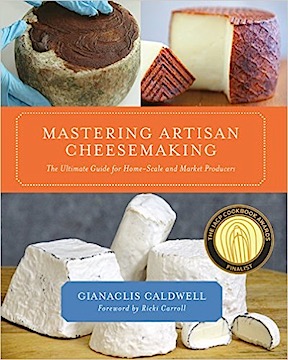
I also bought this book, Mastering Artisan Cheesemaking, but it’s a bit more advanced than I’m ready for at this point.
In the meantime, I bought and read (or at least browsed through) two cheesemaking books and heard more than a few Splendid Table stories on NPR about making various cheeses.
I should mention here that I’ve been making my own yogurt for at least five or six years. Making yogurt is similar to making cheese, but I think it’s a lot easier.
I moved into my new home in May 2015 and the kitchen certainly was ready for cheesemaking then. But I wasn’t. I’m not sure what finally got me to try again — maybe it was walking past the plastic bin containing all of my cheesemaking equipment that was stored in my garage? — but I finally pulled out my favorite cheesemaking book, ordered the necessary cultures, unpacked the stainless steel pots, etc., and bought four gallons of milk to start making cheese again.
Brie
I decided to start by making brie. I like brie. I can eat brie every day of my life and not get tired of it. What would be better than making my own?
I had two recipes. One was from the Splendid Table website. The other was from my favorite cheesemaking book.I can’t remember why, but I decided to go with the one in the book. It may have been because it provided instructions for adding calcium chloride, which is pretty much required when making cheese from homogenized milk. I didn’t have an affordable source of raw milk — no, I won’t pay the local health food store $10 per gallon for it — so I knew I’d have to add calcium chloride and I wanted detailed instructions on how much to add and when to add it.
The trick with making cheese is to heat the milk to the exact right temperature — in this case, 88°F — and, if necessary, hold it there. Fortunately, brie doesn’t need a temperature hold. It does require the cheese to drain for about 24 hours at room temperature. What you’re draining off is the whey, which some people drink and I used to give to my chickens (as a good source of protein). Whey from hard cheeses can be further processed into ricotta, but not whey from brie making. Such a shame to let it go down the drain, especially since it accounts for at least half the volume of milk — in this case, a gallon of the two I started with.
After draining, the cheese is ready to ripen in a cheese cave. I don’t have a cheese cave. (I suspect you don’t either.) I originally thought that my dorm-style cube fridge, which I’d bought for my Wickenburg hangar at least 12 years ago and now had in my garage, could be used if set so it barely cooled. Unfortunately, the lowest (highest?) setting still put the temperature below 42°F; I needed a range of 50°F to 55°F. On a whim, I threw the thermometer into my wine fridge. Bingo: 50°F. The ripening containers went right in.
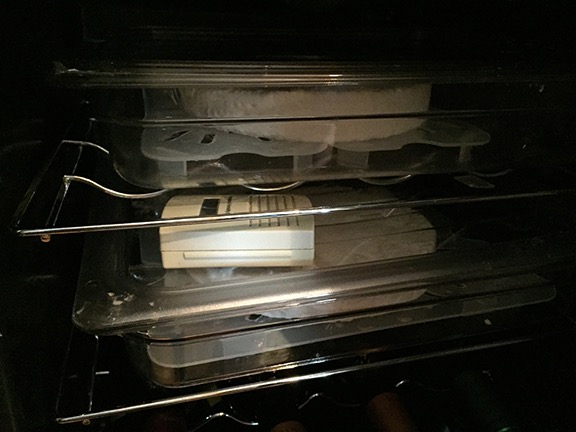
Brie in ripening containers in my wine fridge. I was not happy about evicting the wine that was in there and am looking at a new wine fridge to accommodate both wine and cheese. (My sister and brother bought me this wine fridge for Christmas 2016 to support my cheesemaking habit.)
I should mention here that although I bought open-bottom cheesemaking molds and cheese mats from a Cheesemaking supplier — I use The Cheesemaker website — I went local for the ripening containers. Wenatchee has a restaurant supply shop and I bought hard plastic food storage containers that can be stacked to use as ripening containers. I have them in a variety of sizes so I can make just about any size cheese.
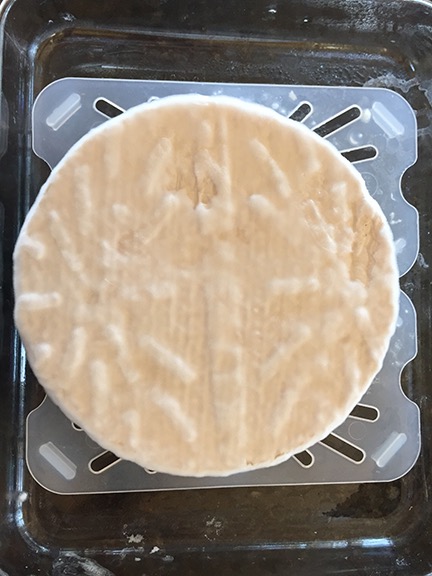
This photo shows the mold just starting to cover one of the two bries I made. (I used a food mat for this; I’ve since bought real cheese mats.)
What you might not realize is that the white “skin” on brie is actually mold that’s created by the Penicilum candidum added as part of the cheesemaking process. This begins to grow on the cheese after a few days. It kept growing as I flipped the cheeses daily. When the cheese is wrapped, the mold gets flattened down to form that skin. And yes, you can (and should) eat it.
The cheese stayed in the “cave” for a few weeks. Then I had some friends over for dinner and decided to make up a cheese platter for them that included two of my cheeses. The brie was one of them. It wasn’t bad, but it wasn’t quite ready, either. Not ripened enough. Still, we all enjoyed it and I’ve been eating it slowly since then. Had some on my eggs this morning. The other cheese — I made two 7-in rounds — just went from “cave” to fridge. I consider it a success and plan on making two more to take with me on my winter travels.
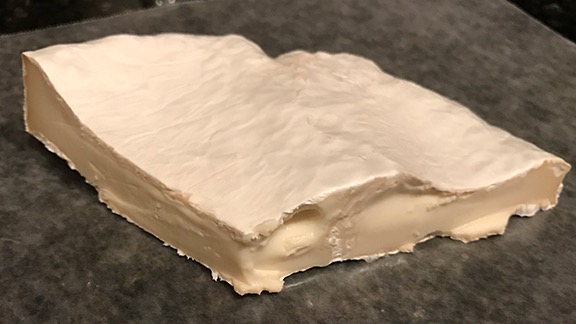
This is all that’s left of that first homemade brie. I’m going to use smaller molds next time so the cheese is taller.
Chaource
I used another two gallons of milk to make chaource, which looked like an easy enough recipe in my cheesemaking book. This is also a soft-ripened cheese, but it does not get gooey in the middle like brie does. Actually, I’m not sure how it gets because I’ve never had it and honestly don’t know if the ones I made are really like chaource cheese.
Th difficult part of making this cheese was getting it to 77°F and keeping it there for 12 hours. I rigged up a double-boiler on the warming burner of my stovetop, using a BBQ temperature probe to give me an accurate reading. When it got too warm, I’d turn off the burner. When it got too cool, I’d turn it back on. This was not fun, and if I had to go out that day, I would have ruined the cheese.
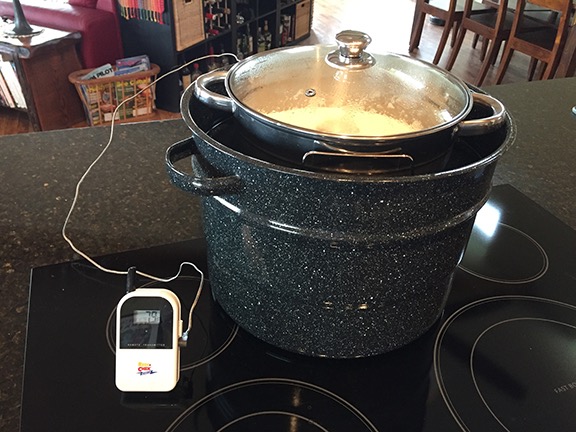
I rigged up a double boiler with my canning pot holding water for a stainless steel cheesemaking pot. This sat on the “warming center” burner of my stove, which kept it as close to 77° as possible.
This particular cheese had to drain for about two days at room temperature. (Now you see why you need counter space to make cheese; cheese needs real estate before it’s ready to ripen.) It never got quite as firm as I expected to — it stayed sort of crumbly throughout. I managed to fit it all in one ripening container, where it joined the brie. But although it started second, it was finished ripening first. I served it up on that cheese platter and it seemed to go over well enough.
Would I make it again? Not until I try store-bought chaource to see how close I came. If I blew it, I’ll likely take a pass — unless the “real thing” is so good that it’s worth another try.
Fromage Frais
Just to mix things up a bit, I bought another gallon of milk and whipped up a batch of fromage frais. This is a fresh cheese a lot like cream cheese. Like all fresh cheeses, it was extremely easy to make and yielded quite a bit of cheese.

A fine mesh strainer like this is a must-have when making greek yogurt or fresh cheese. I got this one on Amazon.
For fresh cheeses, you basically heat the milk and then add the cultures. Then you add the rennet to get curds. But instead of using a mold, you let the whey drain out in a cheese bag. I used my greek yogurt strainer. You then put it in a bowl, add a bit of salt, stir it up good, and refrigerate it.
The note on the recipe in the book said “This fresh, creamy cheese is so delicious, you’ll want to eat it on everything.” And they were right. I used it like cream cheese and like sour cream. I ate it on date nut bread and on butternut squash ravioli. I basically added it to anything I might add cream cheese or sour cream to. But after a while, even I’d had enough. If I do this one again — which I likely will — I’ll do a smaller batch.
More in the Future
As I mentioned earlier, I’m planning to make a few more bries before I leave; with luck, they’ll be ready to take with me on the road this winter. I might try a cheddar, too — it really depends on difficulty and whether I can leave it behind to age while I’m gone.
I do enjoy making cheese, but I won’t lie: it’s a lot of work. The only reward at this point — I’m definitely still a novice and not an “artisan” — is that feel-good feeling I get when I do something myself. Do I see myself making all my cheeses in the future? Hell, no. But I’m having fun with it now.
And who knows? Maybe I’ll come up with some sort of specialty cheese that only I make. Wouldn’t that be fun?