A Personal Tune-Up

Two new routines in my life.

I turned 56 at the end of June. (Unlike other women, I don’t lie about my age.) And although I’m a lot more active than my mother (for example) was at my age, I’m not quite as active and fit as I’d like to be. To make matters worse, I’ve discovered that Mother Nature plays nasty little tricks on a person’s body as he or she ages.

While most people would take the attitude that it’s all part of aging and there’s nothing they can do about it, I’d rather not. So I’ve set August as the beginning of a personal tune-up period and have added two new routines to my life.

Feeling Better through Weight Loss

If you’ve been reading this blog for a while, you’ll know that back in 2012 I lost 45 pounds or approximately 23% of my body weight. (I’ll let you do the math; and you never thought you’d use high school algebra, huh?) This huge weight loss coincided with the beginning of my crazy divorce and lots of folks assumed that stress from the divorce caused the weight loss. It didn’t — although I suspect it did help. I lost all that weight by getting on and sticking to Medifast, a diet plan that two friends had used to lose 80 and 70 pounds respectively. A friend who started at the same weight as me lost just as much as I did in about the same amount of time. Truth is, by the time I got home from my summer job to face the crazy that awaited me, I’d already dropped most that weight and I managed to keep most of it off for two years.

But as you might expect from going off a strict, unsustainable diet plan — I had no desire to eat that “food” for the rest of my life — the weight crept back on. Not all of it, thank heaven. But enough to make me feel the sluggishness and lack of motivation that I felt back in the final days of my ill-advised marriage. So I decided to do something about it.

The question was what to do? Sure — I could get back on Medifast and drop all that weight in another four months. But then I’d secure my seat on a dieting seesaw I never wanted to be on. I needed a more sustainable plan, something that would allow me to eat the food I wanted without counting calories or getting overly concerned about portions.

Enter Whole30

Long story short: six different friends raved to me about Whole30. It’s apparently been around for a while. It’s a version of a Paleo diet. Food is broken down into broad yes/no categories:

YesNo
Meats, fish, and eggsDairy, including cheese (!)
FruitAdded sugar or sugar substitute
Vegetables (with some exceptions)Legumes
Nuts (with some exceptions)Grains, including whole grains and pasta
Natural fatsAlcohol, including wine (!)

This isn’t everything you need to know, of course. But it is about 90% of what the plan entails.

It’s about your health, stupid.

I have no patience for overweight people who claim that they don’t care what other people think of them or that fat can be beautiful or that society places too strong an emphasis on perfect bodies and they don’t care. These people are missing the point.

I’m not saying we should all look like runway models. I’m saying that we should maintain healthy body weight. So many ailments can be avoided or even cured by weight loss. This isn’t bullshit hearsay — it’s the truth. Not only will you look better and feel better when you get down to a healthy weight, but you’ll be healthier and have a much better feeling of self-esteem. Take it from me: I’ve been there. Stop making excuses and start taking care of your health.

The idea is to stick to this plan exactly as written for 30 days (yes, it’s the 30 Day Challenge). The authors of the plan and the book that goes with it make all kinds of claims about how good you’ll feel at the end of that month. Some of them are admittedly outrageous — like claims to “cure” literally dozens of ailments related to “silent inflammation.” I don’t believe all that crap, although I do believe that symptoms of some ailments can be greatly reduced with a good diet and healthy weight. For example, I have had high blood pressure for years; it runs in my family. When I was very heavy, it took three meds to control it. When I lost all that weight, I got it under control with just one med — and that’s where I am today.

(I might also mention here that one of the reasons I was determined to lose all that weight back in 2012 is because my doctor told me I needed to start watching my sugar numbers. Type 2 diabetes also runs in my family and I didn’t want any part of that. My weight loss took the possibility of that off the table — no pun intended.)

Whole30 BookThe Whole30 book itself is pretty funny if you read it with a mind as cynical as mine. It’s all “rah-rah” and “you’ll hate us for this but” and other such nonsense meant to encourage weak people. The way I see it, if you want to see results, you have to stick to a plan that’ll work. No amount of coaxing is going to work on someone with no willpower.

The gimmick with the Whole30 Challenge is that for the 30 days you’re following the plan, you can’t cheat. Not even a tiny bit. If you have anything to eat that isn’t allowed, you have to start over. So yes, the 1/3 teaspoon (I measured it) of sugar and half ounce (estimated) of milk that I put into my 18 ounce cup of coffee (allowed) this morning is cheating and I’d have to start over tomorrow. That ain’t gonna happen. I was warned by my Medifast diet coach that coffee, milk, and sugar weren’t allowed on Medifast and I wouldn’t get results if I had them every morning. But I did and I still lost a shit-ton of weight.

And sure, you can throw my words about willpower above back in my face, but my morning coffee is something I’m not willing to give up for a week, let alone a month. I want to find a plan I can live with, not suffer through.

Not a Weight Loss Plan?

I should point out here that the Whole30 book claims it isn’t a weight loss diet plan. I honestly think they say that so you’re not disappointed when you don’t lose weight. But in the book, they say that you will lose weight as a side effect of getting all the bad food out of your system. And although they don’t have you counting calories, they do talk about portion sizes and having just three meals a day — or at least keeping three hours between smaller meals. And that sounds a lot like Medifast.

I guess it’s all the same no matter how different it is.

You Have to Like to Cook

One of the interesting aspects of Whole30 is that because you have no idea what they put in restaurant food, you can’t really eat in a restaurant. And because you’ll likely die of boredom eating plain salad and grilled meat all the time, they have lots of recipes in the book. (There are also a ton online. Want to make a pork dish? Google Whole30 pork recipe.) So you’ll theoretically do a lot of cooking at home. I like to cook so that’s okay with me.

The other day I made their Classic Chili recipe using some of the ground beef I already had in my freezer (from the 1/4 cow I bought last year) and vegetables right out of my garden. It was surprisingly delicious. It also made enough for me to freeze two portions so the next time I don’t feel like cooking, I can grab one out of the freezer, pop it in the microwave, and enjoy.

The book also has a ton of recipes for various sauces to spice up plainly prepared foods. I made an almond- and tomato-based “romesco sauce” yesterday to top garlic shrimp with zucchini noodles. The recipe made enough for several meals, so I used some this morning on an omelet I made with eggs from my chickens and onions, tomatoes, and peppers from my garden. It really did make breakfast more interesting.

Home Made Lara Bars
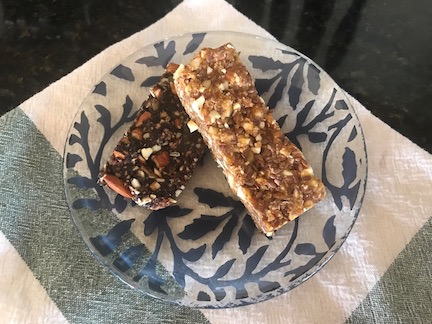
With no added sugar and simple, wholesome ingredients, you don’t need to be on a special diet plan to like these energy bars.

I also found a recipe online the other day for Whole30-compliant energy bars similar to the Larabars you might find in your supermarket or health food store. I made two versions: one with dates, coconut, dried cherries, almonds, and pepitas and the other with dates, coconut, dried apricots, almonds, and flax seeds. I put half in the fridge and used my vacuum sealer to seal and freeze the other half in individual bars. I’ve been eating them for dessert and will likely take them on hiking or day trips. They’re actually quite tasty.

So I guess that as long as I can continue to make interesting foods, I’ll have no trouble sticking with it. My 30 days started yesterday and I’ll go until month-end. I’ll likely blog some interesting things I discover along the way.

But I don’t actually expect Whole30 to be the reason I lose weight over the next few months. I’ll leave that to Invisalign.

Stopping Shifting Teeth

Here’s something I never knew about aging: your teeth shift.

I’ve always had very healthy teeth — only three cavities in my life so far. They were not, however, perfectly straight. When I was a kid, my parents actually debated me getting braces for an overbite and eventually decided that it wasn’t severe enough. (They were right about that.) My bottom teeth, however, have always been a bit crooked, with one of the front ones sitting at a 30° angle to the others. Fortunately, no one sees that when I smile since my front teeth steal the show. So although I was never happy about those bottom teeth, I never saw a need to fix them.

One of the happy side effects of my divorce is that I smile a lot more now. (It’s true! I’m a much happier person!) And about a year or two ago, I started to notice that in photos of me smiling, one of my front teeth seemed to be in the shadows. I realized, with a bit of horror, that it was starting to shift backwards in my mouth and it was affecting my smile.

Now I’m not raving beauty and I came to terms with that years and years ago. But I do look best when I’m smiling so I do it a lot. I found the thought of my smile getting ugly very hard to swallow.

Enter Invisalign

Invisalign is a program with dental “appliances” to straighten teeth. It’s extremely effective in cases where not much straightening is required — like in my mouth — and it’s popular with adults because it’s basically invisible to others. The patient starts with a set of clear plastic appliances that fit over his or her teeth and gently tug them toward the desired end position. Every 7 to 10 days, the appliance is replaced with a new one that continues the positioning. At the end of the program, the teeth should be in the desired end position.

My dentist showed me an animation of my teeth moving into the proper position over time. It was very cool. I’ll see if I can track down a sharable copy.

In my case, I’ll be using 20 sets of appliances. They started me yesterday with my first one. The worst part is the placement by the dentist of small upraised points on several teeth to hold the plastic braces in place. Then they snap in snugly and go to work. I can feel them pulling, but although I thought they’d keep me up, I slept like a log last night — nine full hours!

And yes, I do have to wear them night and day. You must wear them 20 to 22 hours a day for them to work.

I’ll wear these for 10 days, then switch. Then 10 days of that and a switch. Then I visit my dentist so he can see how things are going and get the next batch. I’m hoping that they’re going well enough to do a switch every 7 days instead of 10 to speed up the program.

The net results: I should have all my teeth — even the bottom ones I’d already decided I could live with crooked — straightened within about six months.

Of course, since my teeth will want to continue to shift as I continue to age, I’ll have to wear a retainer at night, likely for the rest of my life. Let’s hope I can live with that.

Invisalign and Weight Loss

Of course, I talked to a bunch of people about their Invisalign experience before plunking down a bunch of money to give it a try. (It ain’t cheap.) And one of the things that came up is the fact that you lose weight when you’re on Invisalign.

What?

Well, it actually makes perfect sense. You have to wear these things at least 20 hours a day and you can’t eat or drink anything other than water while you’re wearing them. Sure, they’re easy enough to take out, but if you take them out to eat, you need to brush your teeth and clean the plastic appliances before putting them back in. This is a huge pain in the ass. So, as a result, people wearing Invisalign appliances don’t do much snacking between meals. That means they lose weight.

So combine Whole30 with Invisalign and it would be a miracle if I didn’t lose weight.

Invisalign and White Teeth

I also expect that my teeth will be cleaner and whiter than they’ve ever been before.

Let’s face it: I hate brushing my teeth. I hate the flavor of toothpaste. (Peppermint has been known to make me nauseous.) When I eat a meal, I want the flavor of the meal to linger on my palate 20 or 30 minutes later, not the minty flavor of toothpaste. So I normally brush my teeth just once a day, and that’s usually right after showering. I do everything in my power to avoid brushing right before or after my morning coffee, which really is sacred to me.

But now I have to brush after every meal or snack. I brushed my teeth four times yesterday. I expect to brush at least five times today as I begin considering my mid-morning snack.

I use a whitening toothpaste. Brushing 4-5 times a day would have to result in whiter teeth, no?

So in six months, I can expect to have the straightest, whitest teeth I’ve ever had.

Is It Time for Your Tune Up?

Getting old sucks. (And don’t give me the tired old saw about it beating the alternative; there will come a point for many of us when the alternative is better.) But you don’t have to take things lying down. You can do what’s within your power or budget to make your life better as you age.

That’s what I’m doing. If you’re not, why not?

Getting a Closer Connection to My Food

Gardening, foraging, gleaning, making things from scratch.

Frittata
This morning’s breakast: a frittata with home grown onions and broccoli, homemade cheese, and eggs from my neighbor’s chickens.

This morning, for breakfast, I had a frittata I made with onions and broccoli from my garden, eggs from my neighbor’s chickens, and Chaource cheese I made myself three weeks ago. (The only reason the eggs came from neighbors is because my 17 chickens aren’t laying yet.) I could have added chanterelle or gypsy mushrooms I foraged for and froze last autumn or morel mushrooms I forged for on Friday. (That would have been a waste of the morels.) Or I could have made blueberry muffins from scratch, using blueberries I picked and froze last summer and sweetened with honey from my bees. Or a smoothie made with those same blueberries, two strawberries from my garden (only two are ready right now), and yogurt I made myself.

It’s only recently that I’ve realized how much of my food comes from my own sources or resources. Last night, I made a batch of pickled broccoli stems with more of that garden broccoli and dill from my garden. The tomato sauce and pickled green beans I canned last winter are still forming the basis of pasta meals or snacks and hors d’oeuvres for dinner guests. The cherries I gleaned last summer are still in the fridge in the form of cherry chutney that goes very well with roast or grilled pork, turkey, or chicken. I’ve got five kinds of homemade cheese in various stages of ripening in my wine-fridge-turned-cheese-cave or refrigerator. I’ve got mead made from honey from my bees fermenting in my pantry closet. In my garden, the broccoli and onions are ready for harvest and I pick them right before I eat them. Soon I’ll also have tomatoes, peppers, green beans, brussels sprouts, cucumbers, corn, melons, zucchini, and potatoes, not to mention marion berries, ligon berries, and black-capped raspberries. And it I get back into the forest for a hike at just the right time, I can pick thimbleberries right off the bushes.

Chickens Eat Weeds
My chickens love to eat weeds. They’ll be making eggs in about 2-3 months.

I’ve discovered that I can turn weeds into eggs by feeding them to chickens and coffee filters into vegetables by composting them into a rich garden soil.

I spent literally hours traipsing through forest floors tangled with the debris of fires a year or more ago, looking for the morel mushrooms only found this time of year. Although I found a few — enough for a small side dish or pizza topping — I was competing with people who had a lot more experience than me and consider myself lucky to find ones they obviously missed.

It also takes a long time and makes a big kitchen mess to make cheese from scratch.

And gleaning cherries after harvest? Do you know how frustrating it is to see a perfect one just out of reach up in a tree and not be able to close your fingers around its stem?

Which is why people ask me why I bother. Why not just go to the supermarket and buy whatever’s there?

The only thing I can come up with is the feeling of satisfaction I get from knowing where my food comes from or what’s in it, and having a very active role in obtaining it, putting it on the table, and serving it to my guests.

Foraging for mushrooms, which I hope to blog about later in the week, is especially rewarding. When I say I spent hours searching, I’m not exaggerating. I went out into three different forest areas on four different days and came back with just five mushrooms, one of which is tiny. Yet the excitement I felt when I saw the biggest one cannot be overstated.

There’s something about having this closer connection to my food that I really like.

Next spring’s challenge: tracking down the wild asparagus that supposedly grows in the Chelan area.

What do you think? How involved are you in obtaining and preparing the food you eat?

Cheese: Miscellaneous Notes

Some things I’ve learned.

I’ve been making cheese on and off for a few years now. I thought I’d take a moment to talk about some of the things I’ve learned.

Basic Needs

I started making cheese way back in 2013, when I took a cheesemaking class at a sheep farm in Dryden, WA. Back then, I was living in my RV and although I tried (and succeeded!) to make some cheese, space constraints were a real issue. Simply said, cheesemaking requires a lot of countertop and sink space. You use countertop to air dry the sanitized equipment and lay out the draining pan, which might need to be out for two days or more. You need sink space to be able to wash, rinse, and then sanitize everything that touches the cheese ingredients. When I moved into my new home two years ago, I had enough space to get back to it, so I did.

Countertop
My kitchen island this morning. The white tub is full of sanitizer that I used to sanitize the eight crottin molds draining on a clean dishtowel that I’ll need around noon. The pot on the stove has a gallon of goat milk forming curd for the crottin. Nearby, you can see the sanitized ripening containers waiting for the goat milk brie draining on another countertop (see photo below). I’ll use those other two tools (also already sanitized) to cut and scoop the crottin curd.

Of course, there’s always something else you need to do the job right. Stainless steel pots capable of heating up to 4 gallons of milk is one of them. I have an impressive collection now, along with large canning pots I can rig up as double-boilers. And I blogged recently about the tool I acquired to help me maintain the temperatures I need to hold the milk at while it forms curd.

Cheese Molds
Examples of soft cheese molds; photo from Schuller.us Dairy Technology website.

And molds! I never realized that there were so many varieties of cheese molds: brie, camembert, crottin, tomme, chèvre, pyramid — the list goes on and on. I try, whenever possible, to get molds that can do double-duty. For example, a brie mold with an insert and a weight on top can become a poor man’s cheese press.

I also needed a ripening area. I discovered last year that my small wine fridge, which I brought with me from my old Arizona home, maintained the perfect temperature for ripening most cheeses: 50° to 55°F. Unfortunately, it was small and I also had some good wine I wanted to store inside it. My sister and brother came to the rescue, buying me a new, much larger, thermostatically controlled wine fridge for Christmas. While I still use the old fridge for initial ripening — it’s inside a closet and can be kept dark — the new fridge gives me plenty of space for overflow — and to store that good wine.

Brie
One of the four wrapped bries currently ripening in my new wine fridge. They ripened for two weeks unwrapped and are now in the middle of another two weeks wrapped. I’ll be able to eat this next week and should probably finish them by June 30. (I’ll be sending one each to my sister and brother.)

Ingredients

Pasteurization and Homogenization

The milk you buy at the supermarket is usually pasteurized and homogenized.

Pasteurization is a process that heats the milk to kill harmful bacteria. In my opinion, you should avoid drinking milk that has not been pasteurized.

Homogenization is a process that prevents the milk’s fat from separating out of the milk. Homogenization is bad for cheesemaking because it can prevent the development of curd.

The main ingredient of cheesemaking is milk. Whole milk that has been pasteurized but not homogenized is best. It’s also difficult to find and can be very expensive. I priced up whole pasteurized but not homogenized milk at the local health food store the other day; it was $15/gallon. With a typical 10% to 20% yield, you can imagine how costly the cheese can be.

Of course, processed milk adds challenges for cheesemakers. I’ve known since that cheesemaking class that homogenization makes it difficult for cheese curds to form. To get around that, cheesemakers add a tiny amount of calcium chloride to each batch of cheese. But what I just realized recently is that there are different types of pasteurization and that “ultra-pasteurized” milk also may prevent good cheese curds from forming. I learned this the hard way when I failed to get curds in a batch of blue cheese I was making. It’s heartbreaking to have to throw away 6 quarts of whole milk mixed with a quart of heavy cream that simply won’t curd. So now I’ll be very careful to buy milk that isn’t ultra-pasteurized.

Cow’s milk isn’t the only variety that can be used to make cheese. Since there are so many goat and sheep owners around here, I decided to try getting my hands on some other milk. I placed an ad in Craig’s List. Within a few days, I got an email from a woman in Chelan with a goat. We arranged for her to give me a call when she had four gallons. On Saturday, I drove up to fetch it. We had a nice conversation about cheesemaking and milking goats and shipping goats up and down Lake Chelan on a barge. (Seriously, I can’t make this stuff up.) And I went home with four gallons of literally farm fresh raw goat milk — for $16. As I type this, I have four goat milk bries draining on my countertop and another gallon of goat milk forming curds for crottin. And I have a half-gallon of goat milk left for a batch of brousse or chèvre.

Goat Milk Brie, draining
Four goat milk bries draining on a countertop. They’ll drain for at least 24 hours at room temperature before I salt them, put them in ripening containers, and slip them into my wine cooler to ripen for two weeks. While ripening, I’ll have to turn them over every day and wipe away any accumulated whey. The four cows milk bries I made three weeks ago will be ready to start eating next week.

For the record, I did pasteurize the goat milk before using it to make cheese. There are several ways to do this, but I think the best is to get it up to 145°F and hold it at that temperature for 30 minutes. I did this in my homegrown cheese vat, helping the heating process by adding boiling water to the double-boiler’s water vat. I did all four gallons at once. When the 30 minutes was up, I lifted the pot of milk out of the double-boiler and put it into a sink full of ice water. As the temperature came down, I measured out two gallons of 88° (or thereabouts) milk for the brie. Later, I caught the milk at around 72°, which is what I needed for the crottin. So the pasteurization process really didn’t slow down my cheesemaking. The rest is in the fridge.

Culture Packet
Two sizes of culture packets. The larger one is labeled 7.8 grams and makes 25 batches of cheese.

Of course, milk can’t become cheese without the addition of cultures or other additives that enable it to ripen and/or form curd. Cultures come in tiny foil packets that you store in the freezer. A typical packet of something like Mesophilic Starter Series MA 4001-4002 — which is commonly used for many cheeses — might contains just a few grams of a powder that looks like yeast, but those few grams might be enough to make half a dozen batches of cheese. (Needless to say, you also need very tiny measuring spoons.) The cultures you buy depend on the cheeses you want to make. At this moment, I have about 8 different cultures in my freezer, all ready to be used.

You’ll also need calcium chloride and rennet. These are liquids that come in tiny squeeze bottles and should be stored in the refrigerator. They’re added separately, calcium chloride first, after dilution in water. Although the water out of my tap tastes fine, I suspect it’s not pure well water. (It’s also pretty hard.) So I use bottled spring water to dilute anything I add to my cheese. It would really suck if I ruined a batch of cheese because of some additive in my tap water.

Cleanliness Counts

Every single cheese recipe in my book starts with the instruction: Sanitize all equipment. I do this with a sanitizing liquid diluted in a tub of water I use only for this purpose. I get the sanitizer at the local restaurant supply place or Stan’s Merry Mart (really!) where they sell all kinds of things, including brewing equipment. If you’ve ever been in food service, you know that everything needs to be washed, rinsed, and sanitized. That’s why restaurants have sinks with three tubs. My sink has just two tubs so I use the plastic one for the sanitize step.

Why sanitize? To prevent unhealthy bacteria or other nasty stuff from growing in your cheese to either ruin it or make you sick when you eat it. I don’t take chances.

But I’ve also learned that the key to making cheese without losing your mind is to keep a clean, uncluttered workspace. To that end, I only take out the equipment I need just before I need it and I clean and put away the equipment I’m done using as soon as I’m done using it. After all, the active part of making cheese — heating milk, adding cultures and rennet, setting curd, cutting curd, draining curd, salting cheeses — can take days. That’s time when you must have equipment — and likely cheese — out in your work area. If you’re like me, your work area is in your kitchen, which is also where you prepare meals. Keeping your cheesemaking area neat and clean will make it easier to use your kitchen for other things.

I’ve also learned that clean towels make good countertop protectors. The woman who led our cheesemaking class warned us that whey is acidic and can stain countertops if not cleaned off promptly. My countertops are granite and I don’t know how much they might stain. But better safe than sorry. I use bath towels to cover large areas in the messiest stages of cheesemaking and dishtowels for smaller areas later in the process. When I’m done, I gather them up and toss them into the washer, before wiping down the countertops.

As for storing all that specialized equipment, I use plastic storage bins. One holds all the ripening containers, sanitizing bin, and miscellaneous equipment. Another smaller one holds all the molds. And each of the pots is covered with its lid and wrapped in clean plastic. Everything is stored in my cavernous garage, on one of the shelves I built to store things that can’t fit in my kitchen. This way, the only things that get dusty/dirty are the bin lids and outer plastic wraps.

And yes, I sanitize right before use — not when putting equipment away.

Resources

Finding cheese ingredients locally is damn near impossible — at least in this area. But there are plenty of online resources. Here are a few:

  • The Cheesemaker is a great site for a wide range of cultures and many cheese molds. This is my primary resource these days.
  • Cultures for Health has mostly fermenting supplies, but it does carry some cheesemaking items.
  • The Cheese Connection is based in the Seattle area and was recommended by the woman who led the cheesemaking class I took. It seems to be geared toward small cheesemaking businesses.
  • New England CheeseMaking Supply Co is popular for cheesemaking supplies, but I admit that I’ve never purchased anything from them.

I’ll likely add more links as time goes on. (If you have any resources to add, put them in the comments for this post. Be sure to explain why you like them. No spam, please.)

Note that most of these sites also have how-to information, recipes, and even free cookbooks for cheese. For example, if you get on the Cultures for Health mailing list, you can download a free, illustrated cheesemaking cookbook. The Cheesemaker is also very responsive to questions; I asked him about my failed blue cheese and he immediately responded and tried to help, even going so far as inviting me to call him.

I guess I should add here that I’m a beginner and am not a good resource for troubleshooting help.

Cheese: The Temperature Problem Solved

A creative solution for an annoying problem.

If you’ve ever made cheese — I’m talking about real cheese like brie or butter cheese or cheddar — you know that one of the challenges facing a cheesemaker is raising the milk to an exact temperature and holding it there — sometimes for hours at a time. Unless you have a temperature-controlled cheesemaking vat — which I still haven’t found for home cheesemaking — you’re likely sitting by the stove making minute adjustments to the heat under the pot of water that your pot of cheese is sitting in — just to get the temperature of that to the magic temperature. It’s a nightmare that really makes cheesemaking an unpleasant chore.

A while back, I discovered immersion circulators, which I blogged about here. The circulator heats water to a temperature you specify and is commonly used for sous vide cooking. Trouble is, I didn’t pay close attention to what I was buying and it was only after I got it home that I realized the lowest temperature was higher than I needed to make most cheeses. It wouldn’t solve my problem. (But I did put it to use making sous vide steaks. I like grilled better. I’m pretty good with a grill.)

I experimented with a brewmaker’s mat that I wrapped around the outside of the pot. That was a so-so solution. It worked, but awkwardly. And it only worked on the pot I used for 2 gallon batches of milk; it wouldn’t work for the pot I’d need to buy for 4 gallon batches.

The other day, while surfing Amazon for something else, I decided to look at immersion circulators again. That’s when I found one that went as low as 77°F — the lowest temperature any of my cheese recipes required — the Sous Vide Travellortech Precision Cooker Immersion Circulator. I bought it.

That was only half the problem. I needed a pot big enough to put the cheesemaking pot and the sous vide cooker in. I found one at Fred Meyer: a huge, 33 quart canning pot.

My Cheese Pot Solution
Here’s my cheese pot solution. I don’t even need a stove to use it.

So yesterday I started a batch of brie using 2 gallons of milk. I put the milk in a stainless steel pot and lowered it into the canning pot. I fastened the immersion circulator onto the side of the canning pot. I filled the big pot with warm water to a point slightly higher than the level of the milk in the inner pot. I put a thermometer in the milk pot, programmed the immersion circulator for 88°F, set the timer for 2 hours, and turned it on.

Temperature Setting
The immersion circulator quickly got the water up to temperature.

Because I’d started with warm water, the temperature quickly got up to 88°F. And held there.

The temperature of the milk read high until I stirred it. It eventually leveled out at 88°F.

I added the molds, calcium chloride, and rennet, stirring after each one. Then I put a cover on the pot and left it to sit for 90 minutes, per the recipe.

Milk Temperature
I can monitor the milk temperature through the glass pot lid using a thermometer clipped to the side of the pot.

Every time I checked it, it was exactly 88°F.

No stove babysitting. No wandering temperatures. This is the first time I’ll be able to follow a recipe exactly because I’ll be able to keep the milk the exact temperature I need.

Cheesemaking might actually get fun.

I measured the opening and I’m pretty darn sure I’ll get the pot for 4 gallons of milk into my cheesemaking contraption. Butter cheese in next on my list.

Total cost of this solution: Immersion Circulator: $79. Huge canning pot: $32. I already had the other pots.

Learning about Milk Fat

I learned something new today, thanks to a debate with a friend.

The other day, a friend and I were discussing milk.

I told her I preferred 2% milk but was trying to get to like 1% milk. To me, it was about reducing unnecessary fat and calories in my diet. I’ve been drinking 2% milk for years and actually now prefer its flavor and consistency over whole milk. Whole milk, to me, had become too rich, almost like a light cream. I wanted to start liking 1% milk in an effort to further reduce fat and calories for a healthy diet. I already enjoy fat-free yogurt; indeed, I don’t think I’ve had whole milk yogurt in years, if ever. (Do they even make it? I guess I could make my own.)

My friend was adamantly opposed to reduced fat milk. I gathered from our conversation that she thought they added things to the milk that made it less healthy when they removed the fat. Or that something about the actual process of making reduced fat milk caused it to be less healthy. In any case, she thought reduced fat milk was bad and didn’t want to hear anything else about it.

If there’s one thing I’ve learned, especially in the past three or four years, is that when someone is stuck with an idea in their head it’s no use debating the point. At least not without facts. And although I suspected there was nothing unhealthy about reduced fat milk, I had no evidence to prove my point. So I let the subject drop and we chatted about other things.

But this morning, when I sat down with my coffee and some time to kill before dawn, I set about finding some evidence to support my point of view.

How Reduced Fat Milk is Made

I Googled “How do they make reduced fat milk?” I got a number of search results. The first, from The Kitchn website, had the answer I was looking for: “How is Skim Milk Made?“. Here’s the pertinent info:

So how is skim milk made? Traditionally, the fat was removed naturally from milk due to gravity. If fresh milk is left to sit and settle, the cream — which is where most of the fat is — rises to the top, leaving behind milk with much less fat.

The quicker, modernized way of making low-fat and skim milks is to place the whole milk into a machine called a centrifugal separator, which spins some or all of the fat globules out of the milk. This occurs before the milk is homogenized, a process which reduces all the milk particles to the same size so that natural separation doesn’t occur anymore.

The article goes on to provide some other interesting information about milk and fat free milk. Among that information was a note about additives:

Federal law mandates that most skim milk has to be fortified with vitamin A and sometimes vitamin D. This is due to the fact that even though whole milk naturally has a fair amount of both, the vitamins are fat soluble and thus lost when the milk fat is removed during the skimming process.

Milk solids in the form of dried milk are also added since they contain proteins that help thicken the watery consistency of skim milk.

Not only was this likely the additives that worried my friend, but it also explained how some brands of skim milk were far more palatable than others: they likely added back more dried milk to thicken it up.

2% Milk
The only thing that creeps me out about Shamrock Foods milk is its extraordinarily long shelf life: the quart I bought last week is supposedly good until March. Could it be the plastic packaging?

Now I don’t know if the 2% milk I normally consume has a lot of vitamins or any milk fat added back in. The milk in my camper’s refrigerator now — remember, I’m on the road this winter — is from Shamrock Farms and says it contains “reduced fat milk, Vitamins A & D.” Nothing about milk solids.

So nothing I learned about the production of reduced fat milk has scared me away from drinking it.

Benefits of Whole vs. Reduced Fat Milk

Scrolling down in the same search results, however, brought up links to two different articles in TIME Magazine. I read them both. After all, I wanted to learn the truth — a truth that would either support or even change my own opinions.

  • The Case Against Low-fat Milk Is Stronger Than Ever from April 4, 2016 cites a study of people whose health had been tracked for 15 years. The conclusion was that, if anything, people who consumed whole fat dairy products were less likely to be obese or suffer from type 2 diabetes.
  • Why Full-Fat Dairy May Be Healthier Than Low-Fat from March 5, 2015 cites the results of over 25 studies that concluded that “people who eat full-fat dairy are no more likely to develop cardiovascular disease and type 2 diabetes than people who stick to low-fat dairy. When it comes to weight gain, full-fat dairy may actually be better for you.”

Huh.

Both articles suggested that there might be something special about the fat in dairy that works with our bodies to help them process the foods we eat and help us feel full. Dairy fat could actually be preventing us from eating less healthy sugars and carbs to feel sated. And these articles maintained that it was foolhardy for diets to recommend cutting (or eating) just one kind of nutrient — for example, low fat or fat-free diets — when the body naturally works with all consumed nutrients together.

I understand how these studies could have gotten these results. Back in the late 1970s and early 1980s when the fat-free diet craze was in full swing, stores were full of fat-free processed foods. I know because I still lived at home (or at least visited regularly) and saw that my mother bought them. She, like so many other people, thought that the answer to keeping weight under control was to keep as much fat out of their diets as possible. But rather than do this by eating naturally low fat foods like fruits and vegetables and whole grains, they did it by buying processed foods labeled “fat free.” They then consumed as much as they wanted, not paying attention to the ingredients that made this food taste good despite the lack of fat: mostly sugar. Calorie counts were sky high. It was around this time that I started reading labels and making food choices based on what I read. While I don’t have a perfect diet, I’ve learned to minimize my time in a supermarket’s middle aisles where all the processed foods reside.

The Calorie Argument

Okay, so what about calories? The articles both confirmed that one of the benefits of reduced fat dairy products was the accompanying reduction in calories. So I decided to see just how many calories I was saving by switching between whole, 2%, and 1% milk. (I really detest fat-free milk and generally only have it in lattes because I think it froths better. Fat free yogurt tastes fine to me.)

So I Googled “What is the calorie count for whole, 2%, 1%, and fat free milk?” The PopSugar website had the answer I sought: “Whole vs. Reduced vs. Low-Fat vs. Nonfat Milk.” Here’s the nutritional information that interests me for one 8-ounce cup of milk:

 Whole2%1%Fat-free
Calories15013011090
Total Fat (g / %)8 / 35 / 22.5 / 1~0 / 0

What’s interesting when you read data in the article’s table is that they all the same fiber, carbs, and protein but 1% and fat-free milks actually have more sugar — although admittedly it isn’t much more: 11g vs. 12g.

Now I don’t drink a lot of milk, although I probably do drink more than the average adult. I’ll go through a half gallon in about a week. Every cup of 2% is saving me only 20 calories over whole milk and a switch down to 1% milk would only save another 20 calories. Is it worth it? I don’t think so.

At this point, I sort of regret getting so used to 2% milk.

An Exercise in Critical Thinking

So what did I learn?

In a way, my friend was right: reduced fat milk isn’t any better for you than whole milk. And if she believed that there were additives, she’s right — although I’m not sure those additives make reduced fat milk any less healthy.

But in a way, she was also wrong: reduced fat milk isn’t really bad for you. It just doesn’t give the health benefits we’ve been led to believe.

As for me, I was wrong. There’s no real reason to switch to reduced fat milk. I have no evidence to show her. I have nothing to stand on for pressing my original point of view.

Will I change the way I buy milk? Probably not — at least for now. I really do like 2% milk. I’m used to it. To me, drinking whole milk is almost like drinking cream. I’m not so picky, however, that I’ll turn down whole milk if that’s the only thing available. I’m not worried about 2% milk hurting my health.

But 1% and fat-free milk have definitely become a little bit less attractive. No real calorie benefit and what’s with the added sugar? And what if milk fat really is good for you? Should I really be minimizing it?

And that’s what critical thinking is all about, folks. Gathering information and forming your own opinions after thinking about what you’ve learned. Even if you begin researching with a preconceived notion, you need to be ready to change your mind when the evidence clearly tells you your notion is wrong. You shouldn’t just look for evidence that supports your view. You should look for evidence that tells the whole story, the true story, or at least the story that properly conducted research and established facts support.

I sure wish more people would learn to think critically in today’s world.