And why you might want to do it.
As the folks who know me well or follow my blog know, I’m dieting again.
Back in 2012, I lost 45 pounds in four months and regained both my health and my self-esteem. Although I’ve managed to keep most of the weight off since then, it’s been creeping up slowly. I want to nip that in the bud so I’ve gone back on the same diet that helped me lose so much weight so fast nearly three years ago. I expect that two months of serious dieting should be enough to get back down where I was in September 2012.
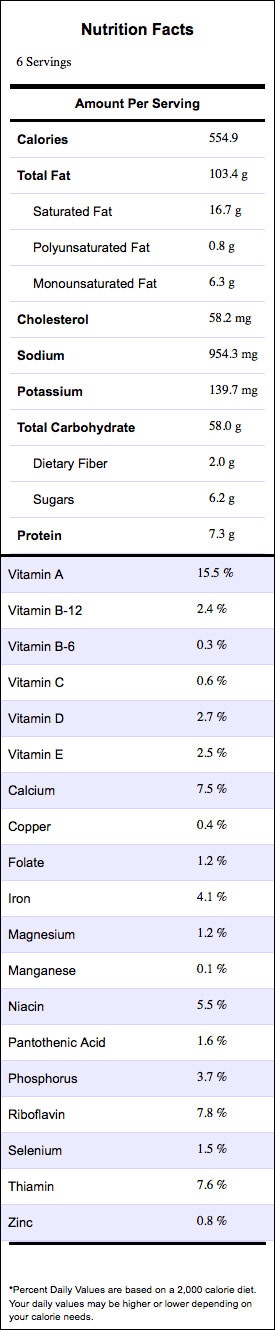
Calculating the nutritional info for an easy and yummy looking biscuit recipe a friend shared on Facebook makes it clear that this is something I need to avoid. (In case you’re wondering, this recipe’s ingredients are 4 cups Bisquick, 1 cup sour cream, 1 cup 7Up soda, and 1/2 cup butter.)
I know the reason I gained that weight back, which is important to prevent it from happening again:
- Portion control. Although the diet I was on basically “shrunk my stomach” so I couldn’t eat those big portions, over time, I stretched it back out by eating more and more. What can I say? I like to eat. And when you put a big plate of food I really like in front of me, I want to eat as much as I can. This is something I need to control once I’m back down to my goal weight again.
- Bad food choices. In general, I eat very well. Lots of fresh foods — not prepared foods — cooked simply. I grill or smoke most meats, I eat salads and fresh vegetables. But occasionally I make bad choices — usually at restaurants — that include fried or high-carb (or both!) foods. And every once in a while a friend will share a recipe online that looks too good to pass up and I’ll make it.
I believe that if you’re at a good, healthy weight and keep relatively active, short forays into the realm of bad food choices should be okay. Sure — enjoy a piece of pie or a flaky biscuit or a plate of pasta once in a while. But remember that portion control! And don’t do it every day.
That’s what I’ve learned over the past two years. Now if only I could remember that when you place my favorite food in front of me!
But how do you determine what’s a good food choice and what’s a bad food choice when it comes to preparing recipes? That’s where nutritional calculators come in handy. The one I use is on a site called SparkRecipes, but there are plenty of others. You enter the ingredients for the recipe along with the quantity of each item, indicate how many servings it creates, and click a Calculate Info button. The result is a display like you see here, which I calculated this morning for a four-ingredient biscuit recipe a friend shared. The numbers make it clear just how healthy — or unhealthy — a food choice the recipe can be.
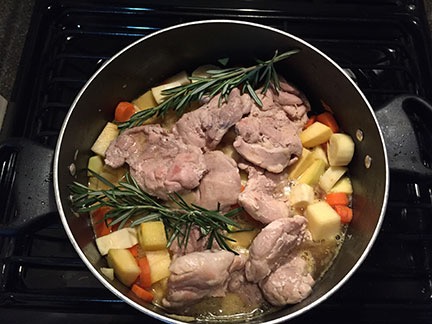
I began doing these calculations for all the recipes I share on my blog. I recently learned that by omitting part of a recipe — for example, the dumplings in the chicken and dumplings recipe I recently shared — or substituting one healthier ingredient for another, you can make a recipe healthier without sacrificing flavor. This can help you cook healthier meals for yourself and your family — something that’s especially important when weight-related health problems such as high blood pressure, high cholesterol, or diabetes is an issue.
Is calculating nutritional information like this worth the effort? What do you think? Isn’t your health worth a few minutes of time in front of a computer so you can make an informed decision?