Construction: New Kitchen Video Tour

It’s about 95% done and I love it!

On May 20, 2014, I began blogging about the construction of my new home in Malaga, WA. You can read all of these posts — and see the time-lapse and walkthrough movies that go with many them — by clicking the new home construction tag.

After losing a full day to an unscheduled (but lucrative) trip to Sacramento on Sunday night through Monday afternoon, I finally finished up the shelves in my pantry. That enabled me to put away a lot of the things that were sitting around my countertops, thus making my new kitchen presentable in photos and videos. I thought I’d show it off now, before I start my next big project.

Because I only had 1200 square feet of total space to play with, I had to limit the size of the kitchen. Somehow, however, I managed to create a good-sized, highly functional space.

Kitchen
My kitchen is now about 95% done. Most of what’s left to do is just trim.

I designed the kitchen space from scratch, carving an area at the end of my great room that shared a wall with my bathroom. The idea was to minimize plumbing costs by minimizing the plumbing runs. With the sink on that wall and the stove on an island, the refrigerator would be set into the adjacent wall, completing the “triangle” that’s so important in kitchen design.

The countertop length was limited by the fact that there’s a window at the end of that wall, but it’s still a full 11 feet long. The island is 3-1/2 feet wide by 7-1/2 feet long. Frankly, I think I have almost as much counter space in this home as I did in my old Arizona home with its extremely spacious kitchen.

Anyway, I’ll let you take a look at it for yourself. Here’s my narrated video:

It’s not quite done. As you saw in the video, I still have these little projects ahead of me:

  • Install under cabinet lighting.
  • Install trim around walls and cabinets.
  • Install transition trim between appliance floors (adhesive vinyl on plywood) and main floor (Pergo laminated hardwood planks).
  • Wrap finish (with wood trim) pantry doorway and hang pantry doorway curtain. (This is temporary until I can get a custom door, likely sometime next year.)
  • Install white trim on pantry shelves and paint shelf support ends and screws.
  • Hang pendant lamps.
  • Hang fifth track lighting fixture.
  • Put decorative baskets and silk plants atop cabinets.

As one of my friends pointed out not too long ago, the work never really ends when you build or own a home. I don’t mind. I have plenty of free time at home in the summer months and always need a project to work on.

Unpacking My Kitchen

What was I thinking?

Yesterday evening, I planned a little get-together with girlfriends to keep me company while I unpacked some (or all?) of my kitchen boxes. I’d packed well over a dozen kitchen boxes during my final months in Arizona and now that my kitchen cabinets and countertops were in, I didn’t see any reason why I shouldn’t start unpacking them and putting things away.

The Backstory

For those of you who don’t know the circumstances under which I left my Arizona home in the spring of 2013, let me give you a tiny bit of backstory. In 2012, while I was away in Washington for work, my husband told me he wanted a divorce and began living with a desperate old whore in Scottsdale. When I returned to Arizona, I found the locks changed on my home. I broke in, got the permission of the court to live there without him, and began what would become an extremely ugly divorce battle. My future ex-husband seemed anxious to get me out of the house — which he claimed he wanted to keep — but refused to agree to a reasonable settlement and even pushed back the original court date to delay things, mistakenly believing that I was as anxious to leave my only home as he was to get me out. (To this day, I have no idea how he could have made so many stupid mistakes.)

Meanwhile, other than making a few trips to visit friends and family and start a new job, I was pretty much stuck waiting at home, heartbroken, bored, and angry. I filled my time by packing up things I’d bought throughout the years — things I probably would have left behind if the bastard I’d married had settled. I blogged about this here. (Of course, if you want the dirty details on my divorce ordeal, you might want to read about my upcoming divorce book, tentatively titled Expensive Delusions: A Midlife Crisis Gone Horribly Wrong.)

Anyway, the longer I was stuck waiting, the more I packed. I was finally set free when he agreed to a list of the items I’d leave behind in exchange for me leaving the house. Agreeing to that list was the first — and so far only — reasonable thing he’s done in the past three years.

Nearly two years later, I have dozens of boxes stacked on pallets in my RV garage, waiting to be unpacked in my new home.

Kitchen Unpacking

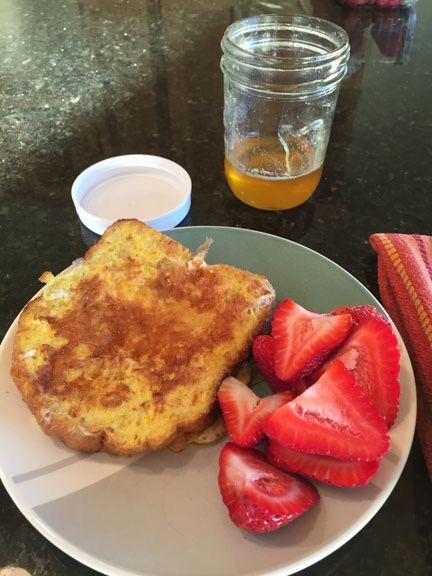
The kitchen unpacking was the obvious place to start. With the installation of the cabinets, appliances, and countertops, my kitchen is 95% done. All I need to do is finish the flooring (which I’ll likely do today), add the trim, put shelves in my pantry, and get my kitchen sink and dishwasher hooked up (which will be done Monday). I was already using the refrigerator to store some of my food and the stove and microwave to prepare some of my meals. It would be nice to cook with my good pots and pans and eat on my good plates. These were among the first things I packed — the things I knew I wanted with me when I built my new home — and I hadn’t laid eyes on them for well over two years.

I spent most of yesterday laying Pergo in my great room. I was really hoping to get the whole room done before my guests arrived, but by 3:30, I still had the far end of the room and much of the kitchen to do. I spent another half hour cleaning up and starting to bring up boxes. Then I took a shower and prepped to receive my guests.

Great Room
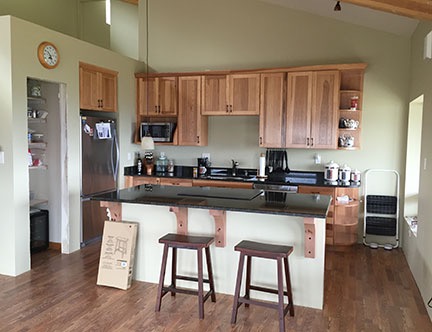
Here’s what my “great room” looked like before I brought up the kitchen boxes. I like to think of this as the calm before the storm.

Although I was hoping to do all of the unpacking and let my friends just keep me company, they dug right in. Soon, the floor was full of empty boxes, wrapping paper, bubble wrap, and unwrapped kitchen items. I was extremely happy to get those every day dishes and pots and pans unwrapped and put away. And pleased to find many of the things I’d forgotten all about — various vases, my canister set, hand-made serving plates, glass mixing bowls, stainless steel measuring cups and spoons — basically everything I’d need in my new kitchen. And even a few things I don’t use often but really like, like my three little teapots, which will look great on the shelves near my window.

I found my immersion blender, which I’d been searching for months ago, in the bottom of the box marked “Last Kitchen Box” — just where I thought it was. That’s also where I found the last bunch of things I packed: two coffee makers, my coffee grinder, a few mugs, and various things I was using right up to the last day I lived in my old home. Some of those things duplicate what I’ve been using while living in my RV; I’ll take the items that are in the best condition for my home and put the duplicates back in the RV.

But I also found things that I can’t believe I packed: a microwave rice cooker I didn’t use in Arizona and won’t likely use here, a sprouts spouter I hadn’t used in at least five years, several tiny milk pitchers, at least ten extremely uninteresting serving plates and bowls — the list goes on and on. There’s the white marble lazy susan that’s heavy and ugly. There’s the glass plates shaped like fish, which I remember once thinking that I had to have and then rarely used. There’s a pair of desert dishes shaped like a bunch of grapes. There’s a pair of very large Starbucks Christmas mugs. There are also duplicates — I can’t believe I packed three cutting boards, even though I know I left at least one or two behind.

I know I got rid of a lot of my things before I moved — the local thrift shop could have opened a whole room with the Jeep-loads of things I dropped by every week — but I definitely packed stuff that should have been given away.

And now it’s here.

On Being a Packrat

My friends and I got through most — but not all — of the kitchen boxes. This morning, I came back upstairs to the crazy mess I’d left the night before. As I sipped my coffee and gazed out the window at the brightening landscape around me, I gave it some serious thought.

Unpacking Mess
Looks like I have a lot of cleaning up to do this morning!

I know I live with a packrat mentality — it’s one of my problems. I think it comes from my early years, back before I was able to afford the things I needed. Back then — especially in college — I became a scavenger, always looking for things I could use in my life. My dorm room was a perfect example, with furniture, lamps, and even a rug that I’d scavenged from the trash area on moving day.

Plates
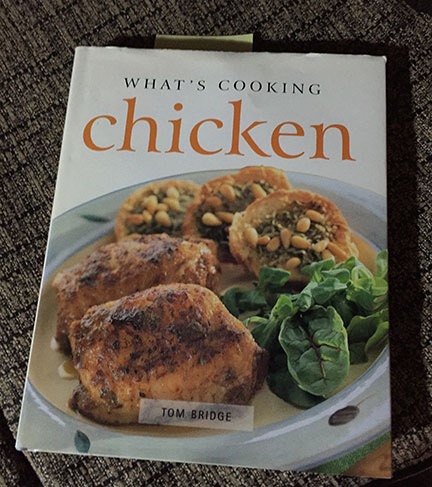
Nice plates, but do I really need them?

Even years later, when I lived in Arizona, I’d often encounter items I thought would be useful and save them. For example, I remember buying frozen crème brûlée that came in very nice flat ceramic plates that had a terra cotta look. I couldn’t see throwing out those plates. So here they are, in my new home, making me wonder what the hell I’m going to do with them.

Even today, it’s hard to pass up an item I can use as is or modify to repurpose for another use. As I type this, there’s a load of eight pallets in the back of my pickup truck. I use them to create things like raised bed planters. I have lumber and scrap metal left over from the construction of my building — I’ll use them to redo my chicken coop this summer. And don’t get me started on the empty wine, cider, and beer bottles — all raw materials for my glass work.

Anyway, last night I’d tried to put away all of the things I packed, but with the clarity that comes after a good night’s sleep, I realize that less is more. It’s time to unload those extra things — the things I should have gotten rid of while packing.

I don’t want to continue my cluttered packrat habits in my new home.

Besides, I have a lot more boxes to unpack.

How to Calculate Nutritional Information for a Recipe

And why you might want to do it.

As the folks who know me well or follow my blog know, I’m dieting again.

Back in 2012, I lost 45 pounds in four months and regained both my health and my self-esteem. Although I’ve managed to keep most of the weight off since then, it’s been creeping up slowly. I want to nip that in the bud so I’ve gone back on the same diet that helped me lose so much weight so fast nearly three years ago. I expect that two months of serious dieting should be enough to get back down where I was in September 2012.

Nutritional Info Example
Calculating the nutritional info for an easy and yummy looking biscuit recipe a friend shared on Facebook makes it clear that this is something I need to avoid. (In case you’re wondering, this recipe’s ingredients are 4 cups Bisquick, 1 cup sour cream, 1 cup 7Up soda, and 1/2 cup butter.)

I know the reason I gained that weight back, which is important to prevent it from happening again:

  • Portion control. Although the diet I was on basically “shrunk my stomach” so I couldn’t eat those big portions, over time, I stretched it back out by eating more and more. What can I say? I like to eat. And when you put a big plate of food I really like in front of me, I want to eat as much as I can. This is something I need to control once I’m back down to my goal weight again.
  • Bad food choices. In general, I eat very well. Lots of fresh foods — not prepared foods — cooked simply. I grill or smoke most meats, I eat salads and fresh vegetables. But occasionally I make bad choices — usually at restaurants — that include fried or high-carb (or both!) foods. And every once in a while a friend will share a recipe online that looks too good to pass up and I’ll make it.

I believe that if you’re at a good, healthy weight and keep relatively active, short forays into the realm of bad food choices should be okay. Sure — enjoy a piece of pie or a flaky biscuit or a plate of pasta once in a while. But remember that portion control! And don’t do it every day.

That’s what I’ve learned over the past two years. Now if only I could remember that when you place my favorite food in front of me!

But how do you determine what’s a good food choice and what’s a bad food choice when it comes to preparing recipes? That’s where nutritional calculators come in handy. The one I use is on a site called SparkRecipes, but there are plenty of others. You enter the ingredients for the recipe along with the quantity of each item, indicate how many servings it creates, and click a Calculate Info button. The result is a display like you see here, which I calculated this morning for a four-ingredient biscuit recipe a friend shared. The numbers make it clear just how healthy — or unhealthy — a food choice the recipe can be.

I began doing these calculations for all the recipes I share on my blog. I recently learned that by omitting part of a recipe — for example, the dumplings in the chicken and dumplings recipe I recently shared — or substituting one healthier ingredient for another, you can make a recipe healthier without sacrificing flavor. This can help you cook healthier meals for yourself and your family — something that’s especially important when weight-related health problems such as high blood pressure, high cholesterol, or diabetes is an issue.

Is calculating nutritional information like this worth the effort? What do you think? Isn’t your health worth a few minutes of time in front of a computer so you can make an informed decision?

Rosemary Chicken with Dumplings

One of my favorite recipes for a cold winter day.

A few times over the past year, I had an urge to make Rosemary Chicken with Dumplings. This is one of my favorite one-pot recipes, an extremely flavorful root vegetable stew that I distinctly recall making at least once in my big dutch oven up at my vacation property in northern Arizona.

Trouble was, I couldn’t remember exactly how to make it. The few times I tried to make it from memory, the flavor fell far short of what it should taste like. I needed the recipe.

Of course, the recipe was in one of my cookbooks. And my cookbooks were still packed, waiting for my new home’s kitchen to be done.

The other day, I could resist no longer. I went to the designated book box storage place in the garage (between my truck and Honda, if you’re curious), and went through the pile of boxes. The Cookbooks box was on the bottom (of course). I dug it out, cut open the tape holding it closed, and began to go through the cookbooks.

What's Cooking Chicken
I finally found the recipe in this cookbook. Like most of my cookbooks, it’s heavy on photos.

It would have been helpful if I could remember what book it was in.

In all, it took about 20 minutes to find the recipe. I brought it inside, made a shopping list, and picked up the ingredients the next time I was in town. Earlier this week, I finally made it. Although I was tempted to put it in my crock pot, I made it on the stove instead. Since one of my Facebook friends asked, here’s my version of the recipe.

Ingredients:

  • 8-10 boneless, skinless chicken thighs. I also trim off excess fat, which Penny gets to eat for dinner with her kibbles. The original recipe called for 4 chicken quarters.
  • 2 tablespoons safflower oil. I didn’t have any of that and although I usually use olive oil, I suspect that the oil I have might be somewhat rancid. So I used a tiny amount of vegetable oil.
  • 2 medium leeks, cleaned and chopped. The ones I wound up with were huge.
  • 2 large carrots, chopped. My local supermarket sells them loose! Don’t buy the baby carrots; they will likely turn to mush.
  • 2 large parsnips, chopped. I had to tell the checkout girl what this was.
  • 2 small turnips, chopped. I actually used one large one because I didn’t want to have to peel two.
  • 2-1/2 cups chicken stock. I normally use canned, but this time I used chicken bouillon dissolved in boiling water.
  • 3 tablespoons Worcestershire sauce. Of course I had that on hand. After all, I do occasionally make bloody marys.
  • 2 springs fresh rosemary. Back in Arizona, this grew in the yard. It’s on my list of houseplants for next year.
  • Salt and Pepper. I omitted the salt. You can always add it later, but you can never take it away.
  • 2 cups Bisquick. The original recipe called for self-rising flour and lard (of all things). This is a lot quicker and easier.
  • 1 tablespoon chopped rosemary leaves. Fresh is best.
  • 2/3 cup milk. I used 2%, because that’s what I have. Skim or whole would work, too. Heck, water would probably even work; that’s what the original recipe called for.

Instructions:

  1. Heat the oil in a large saucepan or stew pot and fry the chicken until golden brown all over. Remove the chicken from the pan and set aside. Drain off any fat left in the pan.
  2. Add the leeks, carrots, parsnips, and turnips to the pan and cook for 5-10 minutes, until lightly colored.
  3. Chicken and dumplings
    Here’s what it might look like right after putting all of the ingredients in the pan.

    Return the chicken to the pan.

  4. Add the chicken stock, Worcestershire sauce, rosemary sprigs, salt, and pepper and bring to a boil.
  5. Reduce the heat, cover, and simmer for about 50-60 minutes, or until the chicken and vegetables are fully cooked.
  6. In a bowl, mix the Bisquick, rosemary leaves, and milk until well blended. You should have a firm dough.
  7. Form the dough into 8 small balls and place on top of the chicken and vegetables. Cover and simmer another 10-12 minutes, until the dumplings have risen.

Serve hot.

If you follow this recipe as shown here, it’ll make 4 extremely flavorful servings of healthy root vegetables and chicken. The nutritional information I calculated indicates high calories but also high vitamins and minerals. If you skip the dumplings, you’ll bring the calorie and sodium counts way down for an even healthier meal.

This is a huge hit at potluck suppers — which we have a lot of up here in Washington state. Double the recipe and stir in some cooked egg noodles instead of the dumplings just before serving to make it easier to serve.

If you make it, let me know how it goes!

Making Greek Yogurt

It’s easy and it just makes sense.

I eat a lot of yogurt. I like yogurt for breakfast — especially with granola — and yogurt for snacks. I eat salad dressing with yogurt in it, enjoy frozen yogurt, and sometimes even eat flavored yogurt for dessert.

I buy plain, non-fat, Greek yogurt. Greek yogurt is basically the same as regular yogurt but with a lot of the excess whey removed. You know what whey is if you’ve bought yogurt or cottage cheese or ricotta in a large container and used only some of it: it’s the liquid that accumulates at the top after you’ve scooped some out.

Greek yogurt is more properly known as strained yogurt and is also called yogurt cheese or labneh. You can read more about it on Wikipedia.

Not All Greek Yogurt is Created Equally

Creamy, delicious Greek yogurt has become wildly popular. Unfortunately, that’s causing a serious environmental problem: an overabundance of whey, the by-product that must be discarded. As this excellent article about the problem in Salon mentions, there’s 2-3 ounces of whey for every ounce of Greek yogurt produced. This video explains the problem and potential solutions:


A quick video explains the problems with mass-produced Greek yogurt and some possible solutions.

The article also suggests that you can help the environment by making your own Greek yogurt (instead of buying it) and using the whey that’s produced in your own kitchen and garden.

What some Greek yogurt makers are doing to circumvent the problem is “faking” Greek yogurt by adding artificial thickeners. The article, “Greek Yogurt: What’s Real & What’s Not,” lists the actual ingredients of many popular plain Greek yogurts. You might be surprised to learn that your favorite creamy yogurt is made that way by the addition of thickeners like corn starch and gelatin. This is covered in articles like “Greek Yogurt Wars: The High-Tech Shortcuts vs. The Purists” on The Kitchn and “High-Tech Shortcut To Greek Yogurt Leaves Purists Fuming” on NPR’s The Salt.

Real yogurt should have just two ingredients: milk and active yogurt cultures such as S. Thermophilus, L. Bulgaricus, L. Acidophilus, Bifidus and L. Casei.

I don’t know about you, but when I buy yogurt, I’m not interested in buying corn starch and gelatin. Take-away lesson: Read the ingredients list and make sure you’re paying for what you really want.

Or make your own.

The Recipe

My wasband wasn’t a big yogurt eater, but he told me, time and time again (as we often do in long-term relationships) that his Armenian grandfather used to make his own yogurt. I was kind of impressed, mostly because I thought it was difficult to do. That’s until I stumbled onto a recipe posted by my friend Tammy on her blog. I tried it and had immediate success. Since then, I make about half the yogurt I eat.

Tammy’s recipe can be found here. It’s got lots of photos with the step-by-step instructions. I find myself searching for the recipe time and time again; for some reason I can’t remember the important temperatures. So I’ve decided to put the short version here, mostly for my own reference. I recommend you stop by Tammy’s site and read it there before you try it. And then leave her a comment telling her about your results. I think she’d like that. (Most bloggers do like comments.)

Tools:

I don’t usually include a Tools section in my recipes, but there are four that you must have (beyond what you might expect in a recipe):

  • Thermometer. I use an instant read meat thermometer. It needs to go up to at least 200°F. Temperature is extremely important in this recipe, so don’t try it if you can’t take an accurate temperature reading.
  • Whisk. I have a plastic whisk, but that’s because I use non-stick cookware. A regular metal wire whisk should be fine.
  • 2 1-quart mason jars with tight-fitting lids. Even if you don’t can your own foods, you really should have a few of these around your kitchen.
  • A small cooler taller than the jars. Make sure it has a tight-fitting lid.

Ingredients:

  • 1/2 gallon non-fat milk. I used to make this by the quart, but when I started “Greeking” it (see below), the yield was lower so I started making 2 quarts at a time.
  • 1/4 cup real plain yogurt with active yogurt cultures. Did you know that not all yogurt is just yogurt? I discuss that above, in case you skipped it to get to the recipe. I recommend the following Greek yogurts: Chobani, Dannon Oikos, Trader Joe’s, Athenos, and Stonyfield. If not using Greek yogurt as a starter, check the ingredients list to make sure the only ingredients are milk and yogurt cultures. This quantity, by the way, is more than Tammy uses. Let it get to room temperature.

Instructions:

  1. Heat the milk to 190°F, stirring occasionally. I do this in a microwave. I have a huge glass measuring cup that holds 1/2 gallon. I put it in the microwave and heat it on high. In my current microwave, it takes 20 minutes to get to 190°F. I know this by repeated temperature readings as I heated it. (My old microwave in Arizona had a temperature probe, which was probably its best feature — and definitely the reason I packed it when I moved. I’d put the probe in the milk, tell the microwave I wanted the milk at 190°F, and it would simply stop zapping when the temperature reached 190°. I’m looking forward to installing it in my new kitchen — despite the fact that it’ll be nearly 30 years old by then.) Of course, you can always do this in a pot on the stove.
  2. Remove the milk from the heat source and allow to cool to about 120°F. I do this by letting it just sit on the stovetop.
  3. In a small bowl, mix about 1/4 cup milk with the 1/4 cup yogurt. This smooths out any lumps and makes it easier to blend with the rest of the milk in the next step.
  4. Whisk in yogurt/milk mixture in to the rest of the milk. Mike sure it’s blended well, but try to minimize bubbles.
  5. Pour the milk mixture into the mason jars. Fill them to the very top. Then close them up tight.
  6. Place the mason jars into the cooler and fill the cooler with the hottest tap water you can get out of your sink. My water heater delivers 130°F water in my kitchen, which is just a tiny bit too hot for my hands — but otherwise perfect, in my opinion. Fill to the very top of the jars, almost so they’re floating in it.
  7. Cover the cooler tightly and set aside for 6-8 hours. When I made this in Arizona in the spring and autumn, I used to set it outside on the patio in the shade. In the winter, it stayed inside. The idea is for the water (and milk) to cool slowly.
  8. Remove the jars from the cooler and discard the water.

At this point, the jars should contain yogurt. You can pop them in the fridge to enjoy at your leisure or “Greek” it.

“Greeking” the Yogurt

My only gripe with Tammy’s recipe — or at least the way it usually came out for me — was that the yogurt tended to be very runny. I don’t like runny yogurt.

I started making yogurt right around the time I discovered Greek yogurt. I actually stopped making yogurt because I preferred Greek yogurt and didn’t know how it was made.

Then I did some research and discovered that all I needed was one more step: strain out the extra whey.

Greek Yogurt Maker
You can get this nice Greek yogurt maker for about $22 on Amazon.com.

While you could do this with cheesecloth in a strainer and make a big mess on your countertop or in your fridge, I went online to Amazon.com and bought a gadget: a Euro Cuisine Greek Yogurt Maker.

To “Greek” your homemade yogurt, add these steps to the recipe above.

  1. Refrigerate the yogurt. I suggest overnight to really chill it down and give it as much substance as it can get on its own. Just put the jars in the fridge.
  2. Empty the yogurt into a strainer lined with cheesecloth or a nifty Greek yogurt maker like the one I bought. If using a strainer, you’ll want a bowl beneath it to catch the whey.
  3. Straining Yogurt
    This yogurt has been straining in my refrigerator for about 90 minutes. The yellow liquid is whey.

    Let strain for 2-4 hours, preferably in the refrigerator. The amount of time you allow it to strain will determine how thick the yogurt is. I have, in the past, forgotten about it and let it go overnight. The resulting yogurt was too thick, almost like cheese.

  4. Remove the yogurt from the strainer and place it into a container you can seal. I use (ironically) old yogurt containers.
  5. Give the yogurt a good stirring. This will smooth out any lumps and make it creamier.
  6. Store in the refrigerator. Obviously.

The removal of the whey should cut the total quantity of yogurt in half.

If you’re wondering what to do with the whey, this page has some excellent suggestions. I give it to my chickens and blend it with water for my tomato plants. I also, on occasion, make it into ricotta. As you might imagine, its very high in calcium but supposedly tastes very bad on its own. I’ve been too cowardly to try it.

Cost Considerations

One of the most mind-blowing things about making my own Greek yogurt is the cost savings. Yesterday, I spent $1.69 on half a gallon of skim milk. I already had yogurt for the starter and can use the yogurt I made for the next starter, so there’s no additional cost. This half gallon of milk will yield about a quart of Greek yogurt.

The last time I bought Greek yogurt, it cost $5.89 for a quart. So I’m saving more than $4 every time I make it instead of buy it. With two quarts a week — my average consumption — that’s $416/year saved.

And you know what Ben Franklin said about saving pennies…

Flavoring Yogurt

I have two things to add here.

First, a while back when I posted on Facebook about making yogurt and included a photo, one of my friends commented to ask, “When do you add the flavor?” Well, there’s no reason to add flavor because yogurt already has flavor. It’s yogurt flavor.

However, if you like to add flavor, you can always mix in some honey or a spoonful of your favorite jam or preserve. I like apricot, which I keep around mostly for a condiment on grilled pork.

And that brings up my second point, also from Facebook. A friend posted an image of a bowl of yogurt with fresh strawberries on top of it. Her caption: “This is how you flavor yogurt.”

Yes, fresh fruit is the best way to do it. Don’t add sugar; add more natural ingredients. It’s more healthy for you and it really is quite tasty.

What do you think?

Do you make your own yogurt? Do you think it’s worth the time?

Share your tips, thoughts, and recipes (or links to recipes) in the comments for this post.