This year’s experience with the race.
Best in the Desert‘s Parker 425 off-road race is a huge event in Parker, AZ. Attended by thousands of people with hundreds of entries, the race begins just before dawn and ends — at least for some racers — after nightfall.
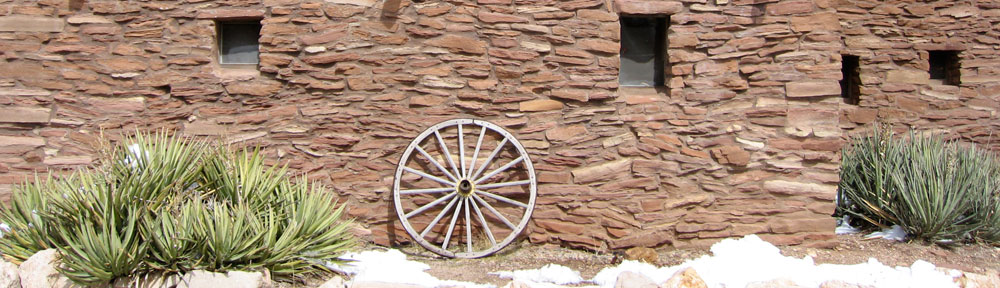
 The course stretches about 30 miles across the open desert east of Parker, zig-zagging on existing dirt roads, including more than a few power line roads. The land out there is mostly old sand dunes like those shown in this photo. (This photo was taken from about 800 feet AGL; the dots are bushes about 3-5 feet tall.) The land here is remote and mostly barren. A bold pilot could fly 50 feet AGL without fear of hitting anything. Except, of course, the power lines.
This was my third year flying at the race and, by far, my busiest. I flew for three separate clients and even took a local couple for a quick ride so they could photograph their business and home from the air. I learned a bunch of things that I want to document here, for my own reference and for other pilots’ consideration.
Navigating
Finding your way around the course can be a challenge. If you don’t stay on the track, you can easily lose it in the vast empty desert. This is especially true if there’s been some rain and there’s no dust. If there’s dust, you can see the racers from miles away with just a few hundred feet of altitude.
 Track locations are identified by mile number. There are no visible markers, though — that would make it too easy. Instead, if you’re lucky you have a copy of the course map and have secured it to something so you can consult it in flight. Remember, at least one door is off, so the wind is whipping around the cabin and loose paper is not an option. Although you could put all the mile markers in your GPS, that would make quite a mess. So I just have about 10 points in my GPS and I can use them to home in on the point I need to get to.
The Photographers
I flew a total of three professional videographers, one professional photographer, and three amateur photographers around the race course this year.
Let’s take a closer look at the video guys, since they’re the most interesting to me. We’ll call them A, B, and C.
- Two of the three videographers (A and B) were seasoned professionals with either prosumer or professional video equipment. They were a pleasure to work with. The third (c) was a young guy who was obviously very new to the game. He was doing video with a Canon DSLR hooked up to an awkward shoulder rig. His attitude was cocky and he didn’t seem able to either give or follow instructions. In fact, he didn’t seem very alert and I wonder whether his young mind is fully operational. (More on that in a moment.) After the flight, when we were settling up the bill (paid by his client), he told his companion that he was going to charge extra for the aerial work. (As if he’d paid for the helicopter.) I was so put off by his attitude and behavior that I will not fly him again — and that’s something I seldom say.
 One of the videographers (A) claimed he weighed 260 lbs. I added 10 pounds, as I usually do, for clothes and equipment. I then calculated my weight and balance several ways, hoping he’d choose a back seat location with his 190-lb still photography companion beside him. Earth to video professionals: If you want to do aerial photography from a helicopter, slim down. If you want OGE hovers and aggressive maneuvers, your pilot will need all the performance he can get.
- Only one of the three videographers (B) had ever shot video from a helicopter before. He understood the benefit of sitting behind the pilot so the pilot can see what he sees. He probably got a lot more and better video for his time because of the simple fact that he didn’t have to direct me. I could see the racer as well as he could. The other two videographers didn’t understand the importance of positioning. A insisted on sitting in the front, despite the fact that his heavy weight in such a forward position made us front-heavy (see W&B charts here), which, in turn, limited my maneuvers. The only reason C sat in the back was because he was accompanied by a still photographer and I had to put them both on the same side so they could shoot at the same thing at the same time.
- Because A sat up front, he shot at least 50% of his video through the front bubble window of the helicopter. I estimate that 75% of that video will be unusable because of glare.
 Only one of the videographers (B) had ever worn a harness before. I’d brought mine along and he was very happy to have it. He climbed right in and hooked up. I had to assist the other two with the harness. Tragically, C did not fasten the seatbelt behind him before sitting down and the buckle slipped out of the open door during flight. Dangling there in the slipstream, it did serious damage to the paint on the left side of the helicopter. I can’t imagine how he didn’t see or hear the metal buckle banging, but, as I said earlier, he wasn’t entirely there.
 One of the videographers (A) claimed he weighed 260 lbs. I added 10 pounds, as I usually do, for clothes and equipment. I then calculated my weight and balance several ways, hoping he’d choose a back seat location with his 190-lb still photography companion beside him. Earth to video professionals: If you want to do aerial photography from a helicopter, slim down. If you want OGE hovers and aggressive maneuvers, your pilot will need all the performance he can get.
 Only one of the videographers (B) had ever worn a harness before. I’d brought mine along and he was very happy to have it. He climbed right in and hooked up. I had to assist the other two with the harness. Tragically, C did not fasten the seatbelt behind him before sitting down and the buckle slipped out of the open door during flight. Dangling there in the slipstream, it did serious damage to the paint on the left side of the helicopter. I can’t imagine how he didn’t see or hear the metal buckle banging, but, as I said earlier, he wasn’t entirely there.
The Flying
The flying can be intense. I’ve written about it before, so I won’t go into very much detail here. Perhaps a more analytical look is in order. I can break the flying down into different phases or activities:
- Point-to-point travel. In most cases, the photographer(s) on board are interested in shooting just one or maybe a few specific vehicles. When they get on board, they often have a general idea of where those vehicles are. So if the photographer tells you the truck just passed mile marker 38 and you’re at the airport, you have to haul ass out to the middle of the desert to pick up the truck somewhere beyond mile marker 38. The best way to do that is to cruise at top doors-off speed — which is 100 knots for an R44 — in as straight a line as you can. Avoid the track to avoid other aircraft. Pick up the track somewhere around the mile marker where the truck was when you left the airport 20 or more minutes before and drop down into the next mode: search.
- Search mode. In search mode, you’re actively looking for a specific vehicle. You have the vehicle number and usually know what kind of vehicle it is (i.e., truck, buggy, jeep, etc.) and what color it [mostly] is. If you’re lucky, you have a photo of the vehicle — one of my videographers (B) had an excellent illustrated sheet that actually had photos of the four trucks we needed to find, all on one page. So in search mode, you drop down low enough to actually read the numbers on the roof or hood or side panel of each vehicle. The very best way to do this if you don’t know where the vehicles might be is to move backwards along the track so the vehicles are coming to you as you’re moving towards them. This way, you pass more vehicles more quickly. But if you’re playing catch-up, you’re coming up behind the vehicles. They’re doing 30 to 120 miles per hour, depending on the vehicle, driver, and road conditions, so there’s often up to four minutes between vehicles, especially after the first lap. The whole time, you’re watching out for other helicopters and obstacles while you and your spotter/photographer are trying to identify vehicles as you pass them. When you find the one you need, someone usually shouts out, “That’s it!” and you drop into the next mode: chase.
 Chase mode. In chase mode, you pair up with the vehicle, putting the photographer(s) in position to shoot. That often means dropping down to 50-100 feet over the desert floor. It almost always means matching the speed of the vehicle you’re chasing. On straight, smooth stretches of road — like one of the power line roads — the vehicle could be going over 100 miles per hour. On roads cutting through lava beds or through canyons or zig-zagging around high tension power line towers, the vehicle could be moving at just 30 miles per hour. The pilot’s job is to keep on the target, always watching out for obstacles and other aircraft, listening to the instructions of the photographer: higher, lower, faster, slower, right, left. It’s tricky when you don’t have brakes or 0-to-60-in-5-seconds acceleration capabilities. I prefer having the photographer sit behind me so I can see the action as well as he can, but that’s not always possible. With two photographers on the left side of the aircraft, I usually can’t see the vehicle — although I can often hear the sound of its engine and passing horn — through my noise canceling headsets and over the sound of the helicopter! — if I’m properly lined up with it. When the photographer has enough footage shot alongside the vehicle, he sometimes asks me to position myself for what I call photo mode.
- Photo mode. Let’s face it — minute after minute of footage shot alongside a racing vehicle can get dull after a while. A good videographer will vary his shots. So I might be asked to circle the vehicle or cross in front of it or behind it from a certain direction at a certain speed. Good videographers can envision the shots and I’ve done enough work with them to envision them, too. I also use photo mode in locations where the track bends and curves around itself. “The Python” at the Parker 425 is a perfect example. It’s supposedly 11 miles of track in an area roughly 1/2 mile by 1-1/2 miles in size, right next to the airport. The pits are in there, too. There are lots of banked curves, short straightaways, and huge humps in the road. Spectators all around, just ready to get hit by flying sand as they snap photos with their cell phones and feel the adrenaline surge with each roaring truck that passes. This is what the photographers want to capture — real action. And this is where an inexperienced pilot or an overweight aircraft is most likely to get in trouble. There’s hovering and tight turns at low altitude. Add a crosswind or tailwind and flying in photo mode is a recipe for disaster.
 Chase mode. In chase mode, you pair up with the vehicle, putting the photographer(s) in position to shoot. That often means dropping down to 50-100 feet over the desert floor. It almost always means matching the speed of the vehicle you’re chasing. On straight, smooth stretches of road — like one of the power line roads — the vehicle could be going over 100 miles per hour. On roads cutting through lava beds or through canyons or zig-zagging around high tension power line towers, the vehicle could be moving at just 30 miles per hour. The pilot’s job is to keep on the target, always watching out for obstacles and other aircraft, listening to the instructions of the photographer: higher, lower, faster, slower, right, left. It’s tricky when you don’t have brakes or 0-to-60-in-5-seconds acceleration capabilities. I prefer having the photographer sit behind me so I can see the action as well as he can, but that’s not always possible. With two photographers on the left side of the aircraft, I usually can’t see the vehicle — although I can often hear the sound of its engine and passing horn — through my noise canceling headsets and over the sound of the helicopter! — if I’m properly lined up with it. When the photographer has enough footage shot alongside the vehicle, he sometimes asks me to position myself for what I call photo mode.
Conclusion
This was my best Parker 425 ever, in terms of work. It was also my most costly: between the ferry time, which was only partially compensated, two overnight stays with meals, and the damage to the side of my aircraft, I’ll likely net zero profits for the trip. But it was a good experience and a lot of fun.
I really do love this kind of flying.
Note to Readers: If you have any photos or videos of a bright red Robinson R44 in action over the Parker 425 for 2008, 2009, or 2010, please get in touch. I’d love to show it off on this blog or the Flying M Air Web site.


