How sweet it is!
I started my beekeeping hobby in June 2013 and have been blogging about it periodically. If you’re interested in reading the other posts in this series, follow the
Adventures in Beekeeping tag. Keep in mind that the most recent posts always appear first on this blog.
On Tuesday, I extracted honey from my first beehive for the first time. The yield from this 6-week old hive was amazing — but I’ll get to that in a moment. First, some backstory.
Why I Extracted
The odd part about the whole thing is that I never intended to extract honey from this hive at all. I was told that I’d started late and that the bees would likely need any honey they made to get them through the winter. This was okay with me. I’m not interested in extracting honey and putting it in jars as gifts or to sell. I’m interested in comb honey, which hardly anyone seems interested in producing or selling. I’m also interested in increasing my hive count and producing nucs for sale to other beekeepers. And maybe next year getting serious about raising queens.

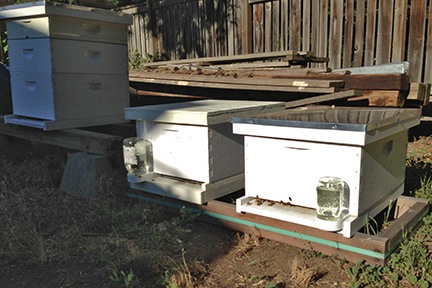
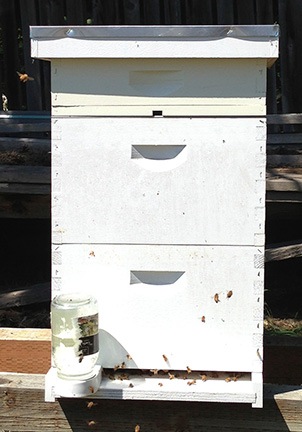
My first hive looked like this right before I extracted honey. The honey was in the middle box; the top box contains Ross Rounds.
But this particular hive had grown very quickly — so quickly, in fact, that I put a second deep hive box on it right after my first hive inspection. Being a new beekeeper, I really didn’t have a handle on the way colonies build. I was under the impression that if I put a deep hive box on a hive, bees would use it for brood and honey. The medium “honey” supers were for honey; I’d add one of those later.
Bees, however, don’t read beekeeping books or take advice from beekeepers. They do whatever they want. And this colony had used virtually all of the top hive box to store honey and pollen. Seven full frames plus two half frames of it. The tenth frame was partially drawn out with comb with some honey deposits. (This was all made in about a month. These were busy bees.)
Do you know how much a deep super weighs with 10 frames of honey in it? Estimates run between 50 and 80 pounds.
It’s for this reason that many beekeepers use only medium hive boxes. They want full boxes to be lighter and easier to handle.
But I want my hives to be compatible with accessories such as drone frames and in-hive feeders. And nucs, which nearly always come with deep frames in them. So I’d like all of my hives to have a deep hive box.
But just one of them. This hive had two.
Meanwhile, I’d done a hive split the week before and the bees from the new hive were living in a nuc box until I could get another deep hive box for them. It would cost $62 and I’d have to wait a week for it to arrive. The bees didn’t seem happy and I was eager to get them into more comfortable living quarters. I didn’t want to wait (or pay) if I didn’t have to.
The logical thing to do was to use the second deep hive box on my first hive. But that was full of honey. I needed to get rid of the honey. The only way to do that — without throwing away the frames — was to extract it.
So that’s what I set out to do on Tuesday.
Special Equipment
 To extract honey, you need a honey extractor. There are a few types and they range in price due to features and size. Prices start at about $200 and go up to well over $1,000. The expense of buying one of these units is one of the reasons I didn’t want to deal with extracting honey. Who wants to spend $800 on a machine that’s only used a few times a year and needs to be cleaned, maintained, and stored when not in use?
Fortunately, my friend Jim had an extractor and was willing to let me use it. He’d also hang around and walk me through the process. So that’s where I went on Tuesday.
 The only other special equipment needed was a pail to collect the honey, a stainer to separate out the wax cappings and anything else that wasn’t honey (don’t ask), and an uncapping scratcher, which I already had.
Pulling the Frames
My first hive is at Jim’s house, so it was simply a matter of removing the honey-filled frames from the hive and carrying them to the patio at the back of his house where he usually used the extractor. I suited up, opened the hive, removed the Ross Rounds box and queen excluder on top, and got to work. I’d brought along a clean nuc box to hold the frames five at a time.  The trick was removing the frames, using my bee brush to brush the bees off the frame and back into the hive, and putting the frame sans bees into the nuc box.
I wish I had photos of this process, but with uncertain weather — remember, I’m still on contract for cherry drying — and a general feeling of urgency about getting the job done, I simply forgot to set up my camera.
Jim was extremely helpful. As I prepped each frame, he stood ready with his hands on the nuc box cover. I’d pull out a frame and then run my brush gently over the frame surface. It was amazing how easy it was to simply sweep the bees away. Then I’d turn the frame and do the other side. And then go back to the first side where a few more bees had landed again. Then Jim would pull off the cover, I’d slip the frame in, and he’d cover it back up. We did this until the nuc box was full.
He ran the box back to his house while I pulled the now half-empty deep hive box off the hive and set it aside. I placed the medium hive box with its ten empty medium frames on top of the bottom box. When Jim returned, we continued, but now I brushed the bees into the medium box they’d be using for future honey stores.
We wound up with a total of seven frames that were ready for extraction. All seven were full and mostly capped.
Capping, by the way, is what the bees do to a full cell of honey. They create wax caps to seal them off. Beeswax, by the way, is completely edible, including the caps. (Bees also cap brood, but I wasn’t interested in any of that.)

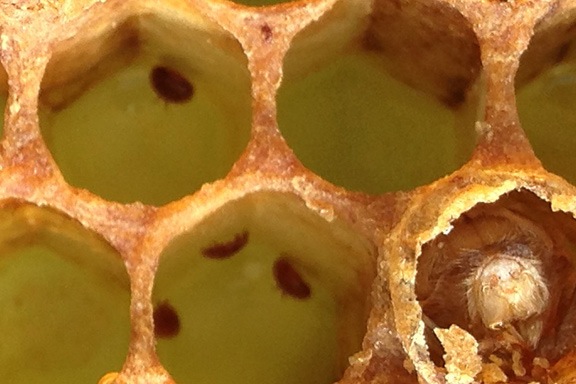
This closeup shot of a honey frame shows capped honey cells on top with uncapped honey cells beneath them. This frame would not be ready for extraction.
While Jim brought the nuc with the last two frames back to the house, I reassembled the hive, placing the queen excluder back on top of the new hive box, a spacer with an exit above that, and the Ross Rounds box above that. Then the inner cover and outer cover.
I left the deep hive box with the remaining three frames set aside. I was hoping that while I was busy extracting the bees would realize that they were no longer in the hive and would leave. Then I went back to my truck and stripped out of my bee suit. I wouldn’t need it to extract and it was a warm day.
Extracting the Honey
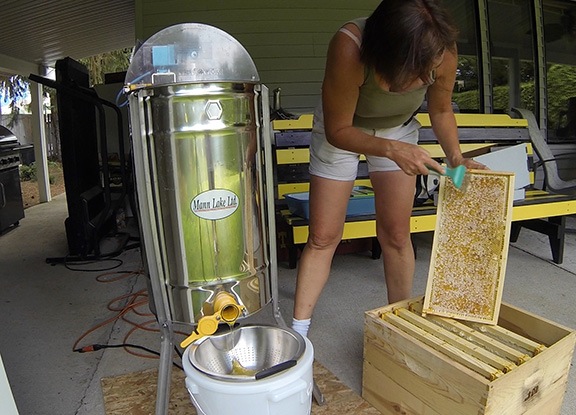
The extraction process was pretty straightforward. First, I used the uncapping scratcher to scratch away most of the honey caps. All I really had to do was puncture them, but I dragged the scratcher across the surface to do the job quickly. I then slid the frame into one of the extractor’s three slots with the scratched side facing out. I did this for three frames.

Here I am, uncapping one of the frames.
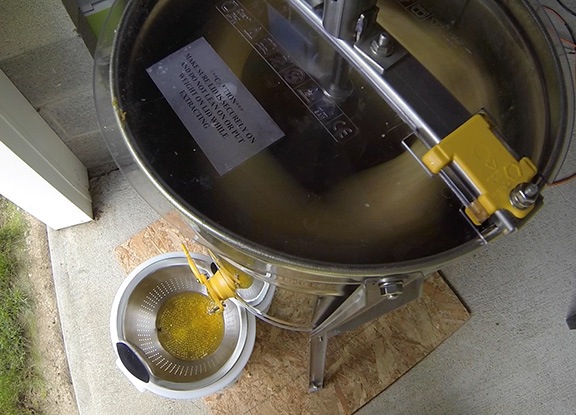
Next, we spun up the extractor. The machine spins the frames, using centrifugal force to get the honey out of the cells. The honey hits the side of the extractor and drips down into the extractor’s well.

The extractor spins the honey out of the cells.

Once the honey began flowing, it continued for well over an hour.
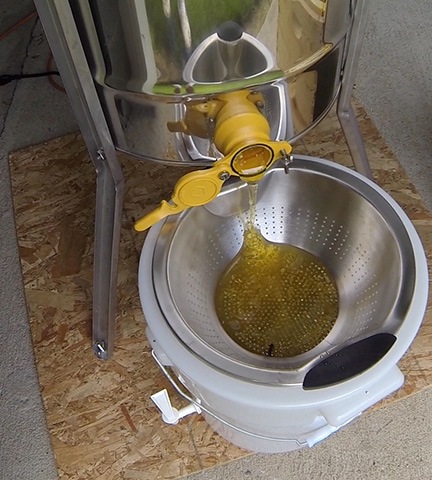
Jim opened up the gate at the bottom and let the honey drip into the strainer over a bucket. We watched as the first thick drip appeared. “Quick!” Jim said. “Get something to grab that first taste!”
The something was my less than clean finger. I captured the first drip and sucked it off my finger. It was heavenly. (Honestly, if you haven’t tasted fresh, raw honey you’re missing quite an experience. Warning: You probably won’t ever eat mass-produced, supermarket honey again.)
Jim complemented me on the color. It was a light yellow. I suspect there was a lot of clover content; there’s a ton of clover in the area near the hive.
When the first side of the frames were about half done, I stopped the extractor. One at a time, I removed the frames, scratched the other side, and replaced them facing the other way. Then I ran the extractor again, this time up to full speed. Jim had advised me to avoid full speed when I was running the first side to prevent the frame foundation from warping. After about five minutes, I flopped the frames again to get the remaining honey out of the first side.
Meanwhile, the honey just globbed out through the gate into the strainer. As I mentioned earlier, it was a warm day so the flow was pretty quick and smooth. By the time I’d finished the second group of three frames, the strainer was full with the honey dripping through it slower than it poured in. The wax cappings were clogging the strainer. We had to shut the tap and wait for the strainer to catch up. By then, it was clear that I had over a gallon of honey.
I still had one fully capped honey frame to extract. Doing so in the spinning extractor could be tricky since it would be out of balance when it spun, even if I put two empty frames in with it.
Besides, it was clouding up and I didn’t want to spend any more time than necessary away from base. I’d already gotten check-in calls from both of the pilots working with me. Rain was in the forecast for that evening and the next day. With a total of more than 230 acres of cherry trees still under contract, I had important responsibilities elsewhere.
Jim and his wife Kriss offered to keep the extractor set up and let the rest of the honey flow into the strainer when the strainer had caught up. I could pick up the bucket and strainer the next day and put the honey in jars at home. In the meantime, I could take the deep hive box and frames home so I could use them in my newest hive.
I commented proudly on Twitter and Facebook that I’d extracted a gallon of honey. Later that evening, Kriss corrected me: two gallons.
Putting the Honey in Jars
Early the next day, the two other pilots and I hovered over about 120 acres of cherry trees in Quincy, East Wenatchee, and Wenatchee Heights after thunderstorms rolled through. By 10 AM, the weather had cleared out. I was hosting a party that evening that included smoked beef ribs and I lacked one ingredient for the rub I was making. I needed to get the ribs on before 1 PM for them to smoke all afternoon.
And, of course, I still had to fetch the honey.
So I set out to run my errands, finishing up at Jim and Kriss’s house. I don’t know if they were home; I didn’t want to knock on their door and bother them if I didn’t have to. I just went out back. The honey bucket was there, covered up to keep it safe from bugs — mainly Jim’s bees.
I looked at the clear, thick yellow liquid in the bucket. Tick marks along the side indicated that it contained over two gallons of honey.
I left a 12-pack of quart sized jars and some money on the patio table, then took the honey out to my truck. As we’d agreed, I also loaded 10 medium hive boxes from the stacks Jim had bought from a retired beekeeper into my truck. They were in new condition, although unpainted and somewhat dirty. At only $7 each, I couldn’t pass up the deal.
Back home, I finished prepping the ribs and got them on the smoker. Then I set about putting all that honey into the quart- and pint-sized jars I’d bought while running my errands.
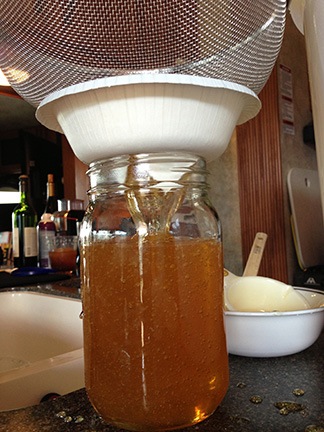
For some reason, I thought I needed to run the honey through a finer strainer to filter out the remaining tiny bits of wax cappings. In hindsight, I realize this wasn’t really necessary. All it added was another messy step to what was already a very messy job.

I’m not sure why I filtered the honey again. It really didn’t need it.
Trouble is, the spigot at the bottom of the bucket was too small for the honey to pass through. So all the honey had to be scooped up out of the top of the bucket. I used a half-cup measuring cup. I poured it into a strainer that I’d placed over a paper bowl fashioned as a wide funnel.
I’m not exaggerating when I say it took me about 90 minutes to go through it all. My guests arrived just as I was finishing up.
Everyone had a taste of honey. They all loved it.

The final product. (I’d already stowed my personal pint.)
My friend Cheryl and I arranged the jars on my countertop for a photo. The final tally was 5 quart sized jars and 11 pint sized jars.
I’ve already given away five pints.
The Aftermath
Clean up wasn’t difficult with lots of hot water to melt the honey. I’ll return Jim’s honey bucket and stainer today, along with a bunch of cherries I picked yesterday morning. I sure do appreciate him letting me use his extractor and walking me though the process. I’d offer him some honey to thank him — but I know he has plenty of his own.
As for what I plan to do with all that honey — well, I’ve been thinking of brewing some mead…
