A Walk in the Woods

Another day, another hike with new friends.

One of the few things I miss about Arizona is the hikes I did with the Phoenix Atheist Meetup Group (PAMG). This 1700+ member group has a small subgroup that goes hiking in Arizona almost every single Sunday of the year. I began hiking with them when I returned to Arizona in September 2012 after my fifth summer work season in Washington and hiked with them periodically throughout the autumn, winter, and spring months. With them, I explored the area around the Superstition Mountains, Sedona, Prescott, Flagstaff, and even Wickenburg. They’re a great group of people — smart, friendly, educated, and open-minded. I made a lot of new friends that last winter in Arizona and already miss some of them very much. If you live in the Phoenix area and are looking for a group to hike with, I highly recommend meeting up with them. Tell them Maria, formerly of Wickenburg, sent you.

Although there are plenty of hiking opportunities here in the Wenatchee area of Washington, finding folks to hike with wasn’t quite as easy. Wenatchee is a much smaller city than Phoenix — although it’s much larger than Wickenburg — and there aren’t as many meetup groups. I did join a few that sounded promising. Among them is the NCW Freethinkers, which is based in nearby Cashmere, WA. (NCW, by the way, stands for North Central Washington, the commonly used label for the area where I now live.

At a recent pot luck BBQ meetup in Wenatchee, I told the group about my hikes with PAMG. Another member had been thinking of hiking as a group. He rose to the challenge and came up with the hike we did Sunday, to Clara and Marion Lakes.

Getting There
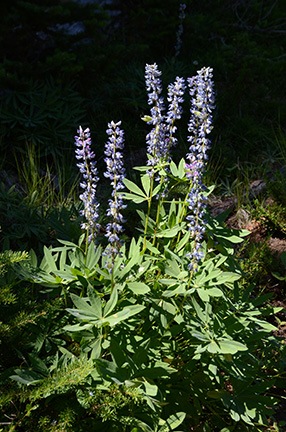
Lupine
Lupine is still blooming in the higher elevations near Wenatchee. A splash of sunlight illuminated this plant while leaving the forest behind it in relative darkness.
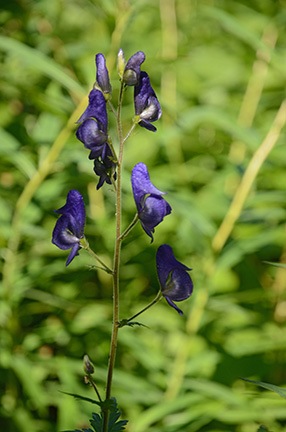
Western Monkshood
According to the National Audubon National Society Field Guide to the Pacific Northwest, this is Western Monkshood.
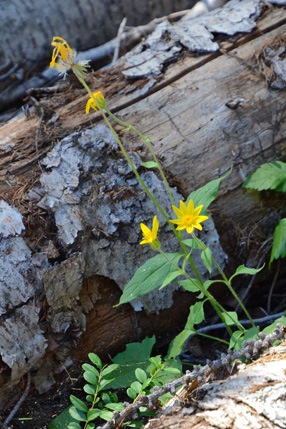
Heart-Leaf Arnica
According to the excellent Washington Wildflowers iPhone app, this is Heart-leaf Arnica.
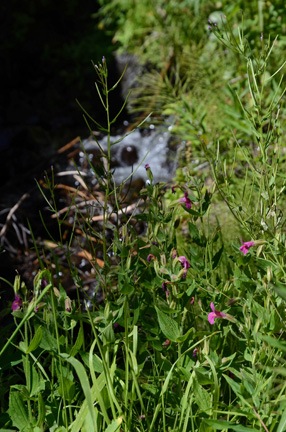
Purple Monkey Flower
This Purple Monkey Flower was past its peak of bloom alongside a stream. Still beautiful, though.

Getting there was quick and easy for me — I was less than 10 miles away.

The trailhead is at the Mission Ridge ski resort’s lower parking area. Just take Squilchuck Road until it turns into Mission Ridge Road and keep going to the end. I currently live about two miles off Squilchuck so I was likely the closest hiker.

The road winds up into the canyon, past orchards and into the tall pines. There are amazing views back into Wenatchee from most bends in the road. Along the way I passed the turnoff to Beehive Lake, which I’d explored by Jeep only a few days before, and another trailhead I’d hiked with Penny the previous year. It’s amazing to me how much there is to do outdoors so close to where I live.

I arrived right on time after handling a few bee-related chores earlier that morning. Four other hikers were waiting for me. There were two other dogs, too — a 120-pound Rottweiler and a smaller Border Collie mix that reminded me of my dog, Charlie, left behind in Arizona. (Poor Charlie probably spends far more time curled up on a dog bed in front of a television in a Scottsdale subdivision than running around, off-leash, in the woods.) While I chatted with the other hikers, Penny tried to make friends with the other two dogs. The Rottie ignored her completely while the Border Collie immediately began playing with her.

I could tell then that it would be a good hike for both of us.

The Hike

When it became clear that a sixth hiker who’d RSVPed would not be showing up after all, we hit the trail. It immediately began a relatively steep climb with occasional switchbacks in a dense alpine-like forest. There were pine and other trees and dense underbrush. The air was cool and the sound was hushed. Wildflowers typical of the Pacific Northwest — which I still need to learn! — added splashes of blue, yellow, red, and white along the way.

I took up a place near the rear of the group, stopping more than a few times to take photos along the way. Although my uphill hiking endurance is far better now than it was when I was a fatty, I still need an occasional rest stop to catch my breath on steep climbs. Framing shots with my camera offered a good excuse to do so.

The Rottie and his owner led the pack, setting a brisk pace for all of us. Meanwhile, Penny and her new friend, now off-leash, began a chasing game up and down the trail. I swear those dogs covered three or four times the terrain as the rest of us.

The trail leveled off when it intersected with the Pipeline Trail. That’s also where it crossed a small rushing stream of snowmelt coming from somewhere high above us on the mountain. After taking a short break near the stream, we continued the climb on the narrow trail up to the lakes. Either it wasn’t quite as steep here or I was getting used to it because I had no trouble keeping up and needed fewer and fewer photo/rest stops along the way.

After a while, we came upon an open marshy area. We thought it was Clara Lake, dried up. But a post-hike examination of my route (tracked via GPS) shows that it was just an unnamed marshy area.
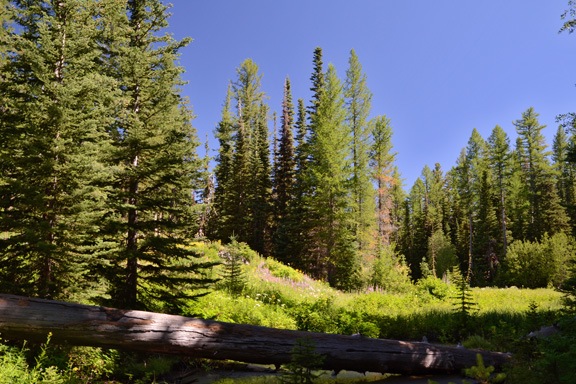
Near Clara Lake
Silly us. We thought this beautiful, flower-filled marsh area was a dried up Clara Lake, but that lake was still ahead of us on the trail.
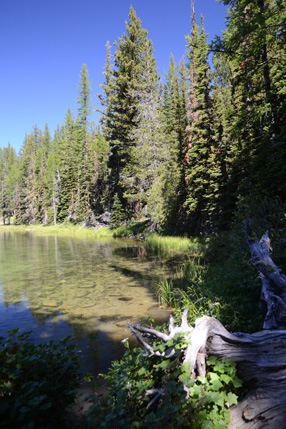
Clara Lake Shore
Along the shore of Clara Lake.

Swimming Rottie
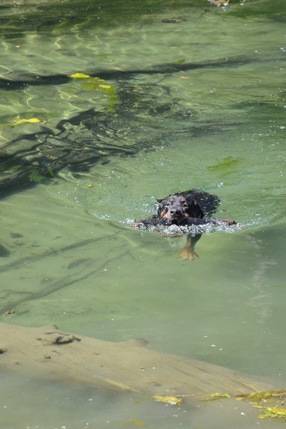
Not only did the Rottweiler (appropriately named Tanker) like to fetch sticks, but he didn’t mind swimming to get them.
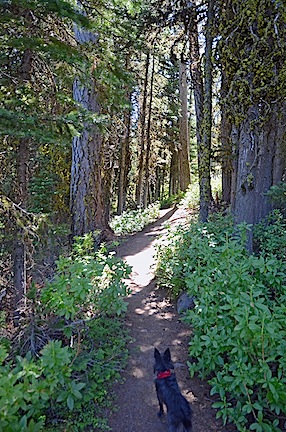
Penny the Adventure Dog
Penny, as usual, kept ahead of me on the trail. It was such a pleasure to walk in the cool shade of the forest. When I lived in AZ, I dreamed about hiking in places like this.

The lake we came to a short while later was Clara Lake. Surrounded by tall pines and bordered on one side by a slide of volcanic rock, the small lake featured clear clean water and a collection of floating logs. We paused for a while and watched Mike’s dog swim to fetch large sticks, then moved to a shady area on the other side of the lake for a rest and snack. Some of us wandered around the vicinity.

Because we thought we were at Marion Lake — the second of two lakes on the trail and our intended destination — we didn’t go any farther. Looking at my GPS track now, I see that another 1/4 mile up the trail would have brought us to another lake. Oh,well. I think I’ll make that another hike, perhaps in the autumn when the trees are changing color. There’s another trail to the lakes down from a forest road that’s not quite as long or steep.

We headed back the way we’d come a little while later. It was a lot easier — almost all downhill. But steep! My knees really felt it. (I fully expected to be in serious pain the next morning — especially in my calves — but my body surprised me and took the workout without complaint.)

As usual, the hike back was quicker than the hike up. We passed several mountain bikers along the way — they were all walking their bikes up the steep trail. I wondered where they planned to ride and whether the ride down would be as wild as I envisioned. I also thought of the trail’s winter use — for snowshoeing. That’s a sport I might need to explore if I decide to spend winters here. I’ve already decided to get a new set of cross-country skis and explore trails in the Leavenworth area.

Back at the trailhead, the group split up. Although I was invited to join the others for beers at a local microbrewery, I decided to head home for a shower and a little R&R instead. I’d been running myself ragged for the past week and needed a break.

Besides, I’d promised a winemaker friend that I’d come visit her for a tasting that weekend and the weekend was almost over. I still had plenty on my calendar for the day.
My Jeep Gets a Name

Courtesy of the State of Washington.

I’ve owned my 1999 Jeep Wrangler since June or August 1999. I bought it new from a Scottsdale dealership. The man who would become my wasband was away (again) at the time, so I made the purchase alone and picked it up with a friend.

The Black Junker

It wasn’t my first Jeep. I’d bought the first used, at my wasband’s recommendation. “Don’t buy a new one,” he’d told me. “It’ll just get all scratched up and you’ll be upset.”

So I bought a used black hardtop Jeep without air conditioning from one of his friends in New Jersey. We drove it across the country to Arizona together. I got sick along the way — it may have been altitude sickness from our drive through Colorado or dehydration because I simply don’t drink enough — and we wound up spending the night in Winslow, just four hours short of our final destination. (Or maybe I’m confusing that trip with the time we drove his old Mustang across the country?)

I sold the hard top and traded the full doors for half doors. We pulled out the boom box speakers — which I gave away to my neighbor’s kids years later. I may have replaced the stereo, which never worked quite right. I don’t remember. Frankly, I don’t want to remember that vehicle.

All I do remember is that damn thing absolutely refusing to start more than a few times when I drove it around town. If it wouldn’t start in front of the supermarket, it might not start 15 miles down a two-track, out of the cell phone service area. I wanted a Jeep for off-roading and it needed to be reliable. This one simply didn’t fit the bill.

Some advice is just plain bad. (I shudder to think of what my life would be like now if I’d taken all of my wasband’s advice over the years. After all, it hasn’t done much for him, either.)

I sold that black piece of junk before owning it even a full year.

The Red Jeep

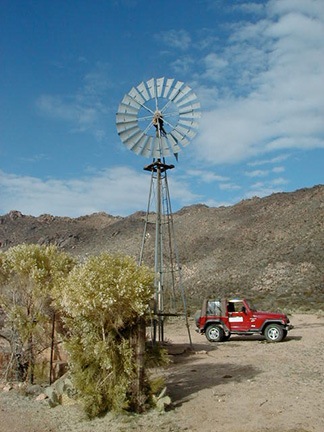
Jeep and Windmill
When I “rediscovered” photography in the late 2000s, I used the Jeep extensively to explore the desert with my camera. Windmills were one of my favorite subjects.

I replaced it with a brand spanking new 6-cylinder, 5-speed manual 1999 Jeep Wrangler with a soft top and air conditioning. It was “loaded stock” meaning that I got the best transmission, suspension, tires, etc. that were still considered stock. Afterwards, I added door steps, installed by my wasband. (I’m surprised he didn’t submit a bill to the court for labor.) I also bought a bimini top, but I only used it one season.

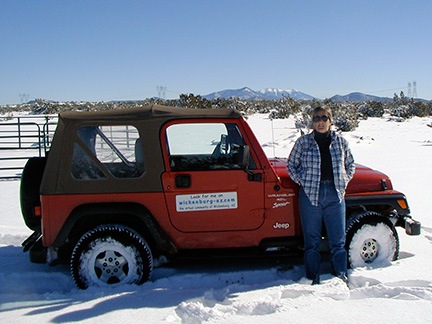
Jeep in Snow
My Jeep had no trouble driving 5 miles to a mesa top on unplowed gravel roads in 20 inches of snow.

I gave that Jeep quite a workout over the following years, taking it as far as Moab for some slick-rock climbing. I beat the crap out of it regularly. It’s been on back roads around Wickenburg and near Prescott and at the Grand Canyon. It’s been in deep snow and across flooded creeks. It’s been places I probably should not have taken it. But then again, isn’t that what a Jeep is for?

Most of the year, the side and back windows were off of it. It got rained on and in a lot.

Jeep Roads
Jack the Dog was a frequent companion on my Jeep excursions.

Sometimes I took off the doors. In fact, I lost the bolts that hold the door hinges on. Every time I took the doors off before driving up to Prescott it would rain or hail.

Oh, yeah. I scratched it, too. But I haven’t shed a tear about that. Arizona pinstriping is what those off-road scratches are called and my Jeep wears them like a badge of honor.

When I went away to Washington in the summer starting in 2008, I missed it. After all, I was stuck driving a big diesel pickup for months on end. I’m a small vehicle person; I like a short car with a narrow wheelbase and tight turning radius. The Jeep was all that and more. It was always good to come home to it and get it back out into the desert. This past winter, in fact, I even joined a local Jeep club and joined them for a few desert drives.

Jeep Drive
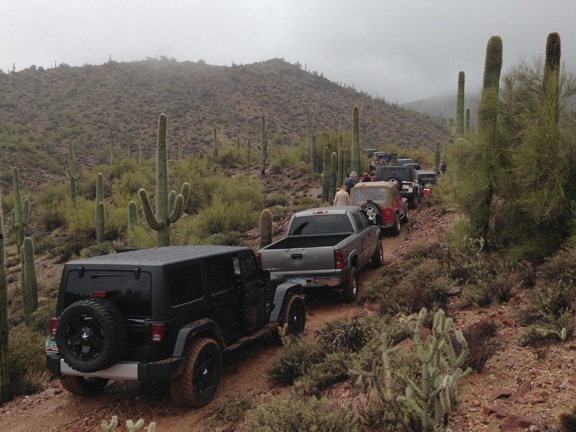
My Jeep, with me and Penny the Tiny Dog aboard, was one of about two dozen 4WD vehicles on this rainy drive through the desert near Wickenburg’s Vulture Peak in January 2013.

The Jeep Moves North

Through Nevada
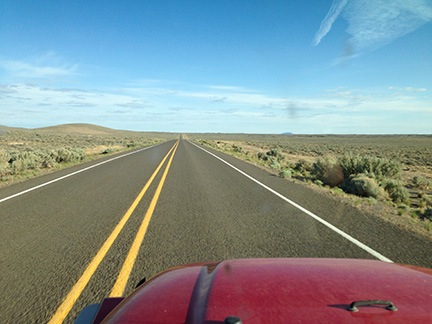
You don’t know straight, flat roads until you’ve driven north or south through Nevada.

I drove the Jeep from Wickenburg, AZ to Quincy, WA in May 2013. It was not a drive I was looking forward to and it was not a drive I enjoyed.

You see, a real Jeep is plenty of fun on dirt roads and two-tracks out in the desert or in the mountains, but it’s no fun at all on highways. My Jeep’s soft top tended to flap at highway speeds. The interior was loud. The ride was stiff.

I made it tolerable by wearing earbuds attached to my phone and listening to podcasts and music along the way. Penny just slept. I wondered whether the 1200 miles with noise like that would damage her hearing, but she seems to be okay.

Once I got the Jeep to Washington, I drove it almost all the time, leaving my big truck parked. It wasn’t a gas mileage thing — my truck gets way better mileage than the old Chevy I drove in previous years. It was just such a pleasure to drive something small and nimble. Something easy to park.

And, of course, once I got the Jeep to Washington, it made sense to register it there.

Alf the Jeep
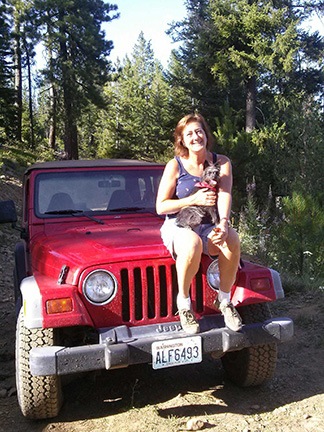
Here I am with Penny just yesterday after a drive around the forest not far from my home in Washington.

And that’s how it got its name: Alf. See? It’s right on the license plate.

Yes, the State of Washington issued plates for the Jeep starting with ALF. That’s Alf. Obviously that has to be the Jeep’s name.

You see, unlike some other people I know, I don’t name my vehicles. How can I? No name jumps out at me so I simply don’t give them a name.

But this name did jump out at me. And it’s easy to remember. And, somehow, it’s suitable for an off-road vehicle that gets the crap beat out of it regularly.

My Jeep has 52,000 miles on it and it’s 14 years old. I think we’ll be sharing a lot of adventures — now up here in the Pacific Northwest — for many years to come.

Wine Tasting by Helicopter

Let me be your designated driver.

I started doing wine tasting tours by helicopter in North Central Washington’s wine country back in the summer of 2011, but really got into full swing in the summer of 2012. Back then, I offered two-, three-, and four-winery tours. I’d pick passengers up at one winery and fly them to another. Then I’d wait around for them to finish and fly them to the next. Repeat until done.

I soon learned that doing a three- or four-winery tour was a really good way to waste an entire day of my time for very little financial return on that time investment.

And I don’t get me started on the couple from hell, who managed to turn a four-winery tour into a full day that included five wine tastings, forced me to do four deadhead flights, and pushed me over the edge when my nerves and emotions were already frazzled.

Still, it wasn’t until nearly a full week of seemingly nonstop cherry drying in June that I realized I really didn’t want to do wine tasting tours like that. I wanted a quick and easy day where I’d be compensated properly not only for the helicopter’s flight time but for for my time. A full hour of flight time with just one destination.

After doing some research, I realized that the best destination would be Tsillan Cellars Winery at Lake Chelan. I’d do scenic flights there and back with time on the ground for my passengers to enjoy a wine tasting and a meal in their very nice restaurant. The flight was outrageously beautiful and the destination was someplace I really wouldn’t mind spending a few hours of down time. Perfect.

On Sunday, I took three passengers to Tsillan Cellars. They were the same ladies who were supposed to do a four-winery tour late last summer with me. Unfortunately, the destination winemakers had pulled the plug on the scheduled date — for reasons I still can’t comprehend. (That was an eye-opening experience that taught me to be careful about who I partnered with for winery visits. I do not like disappointing my clients and won’t do business with people who disappoint me.) I offered this trip as a long overdue substitute and they agreed. I picked them up at Wenatchee Pangborn Memorial Airport at 11 and we made the flight in beautiful weather.

I had the helicopter’s nosecam set up with my new GoPro Hero 3 Black camera and it was running for the entire flight up there. On Monday, I edited the video down to a 2:45 promo with music and captions. I put it on YouTube. Here it is:

I haven’t finished updating Flying M Air’s website with information about the Tsillan Cellars wine tasting flights, but I hope to do it soon. And I hope to be doing lots of these flights throughout the rest of the summer and into autumn.

Bees: First Honey Extraction

How sweet it is!

I started my beekeeping hobby in June 2013 and have been blogging about it periodically. If you’re interested in reading the other posts in this series, follow the Adventures in Beekeeping tag. Keep in mind that the most recent posts always appear first on this blog.

On Tuesday, I extracted honey from my first beehive for the first time. The yield from this 6-week old hive was amazing — but I’ll get to that in a moment. First, some backstory.

Why I Extracted

The odd part about the whole thing is that I never intended to extract honey from this hive at all. I was told that I’d started late and that the bees would likely need any honey they made to get them through the winter. This was okay with me. I’m not interested in extracting honey and putting it in jars as gifts or to sell. I’m interested in comb honey, which hardly anyone seems interested in producing or selling. I’m also interested in increasing my hive count and producing nucs for sale to other beekeepers. And maybe next year getting serious about raising queens.

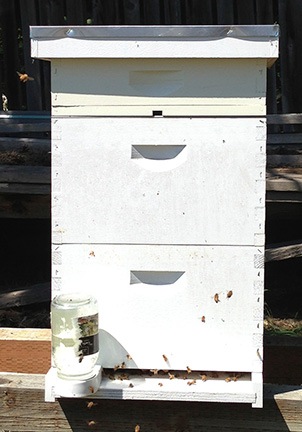
Hive #1 in Mid July 2013
My first hive looked like this right before I extracted honey. The honey was in the middle box; the top box contains Ross Rounds.

But this particular hive had grown very quickly — so quickly, in fact, that I put a second deep hive box on it right after my first hive inspection. Being a new beekeeper, I really didn’t have a handle on the way colonies build. I was under the impression that if I put a deep hive box on a hive, bees would use it for brood and honey. The medium “honey” supers were for honey; I’d add one of those later.

Bees, however, don’t read beekeeping books or take advice from beekeepers. They do whatever they want. And this colony had used virtually all of the top hive box to store honey and pollen. Seven full frames plus two half frames of it. The tenth frame was partially drawn out with comb with some honey deposits. (This was all made in about a month. These were busy bees.)

Do you know how much a deep super weighs with 10 frames of honey in it? Estimates run between 50 and 80 pounds.

It’s for this reason that many beekeepers use only medium hive boxes. They want full boxes to be lighter and easier to handle.

But I want my hives to be compatible with accessories such as drone frames and in-hive feeders. And nucs, which nearly always come with deep frames in them. So I’d like all of my hives to have a deep hive box.

But just one of them. This hive had two.

Meanwhile, I’d done a hive split the week before and the bees from the new hive were living in a nuc box until I could get another deep hive box for them. It would cost $62 and I’d have to wait a week for it to arrive. The bees didn’t seem happy and I was eager to get them into more comfortable living quarters. I didn’t want to wait (or pay) if I didn’t have to.

The logical thing to do was to use the second deep hive box on my first hive. But that was full of honey. I needed to get rid of the honey. The only way to do that — without throwing away the frames — was to extract it.

So that’s what I set out to do on Tuesday.

Special Equipment

Honey ExtractorTo extract honey, you need a honey extractor. There are a few types and they range in price due to features and size. Prices start at about $200 and go up to well over $1,000. The expense of buying one of these units is one of the reasons I didn’t want to deal with extracting honey. Who wants to spend $800 on a machine that’s only used a few times a year and needs to be cleaned, maintained, and stored when not in use?

Fortunately, my friend Jim had an extractor and was willing to let me use it. He’d also hang around and walk me through the process. So that’s where I went on Tuesday.

Uncapping ScratcherThe only other special equipment needed was a pail to collect the honey, a stainer to separate out the wax cappings and anything else that wasn’t honey (don’t ask), and an uncapping scratcher, which I already had.

Pulling the Frames

My first hive is at Jim’s house, so it was simply a matter of removing the honey-filled frames from the hive and carrying them to the patio at the back of his house where he usually used the extractor. I suited up, opened the hive, removed the Ross Rounds box and queen excluder on top, and got to work. I’d brought along a clean nuc box to hold the frames five at a time. Bee BrushThe trick was removing the frames, using my bee brush to brush the bees off the frame and back into the hive, and putting the frame sans bees into the nuc box.

I wish I had photos of this process, but with uncertain weather — remember, I’m still on contract for cherry drying — and a general feeling of urgency about getting the job done, I simply forgot to set up my camera.

Jim was extremely helpful. As I prepped each frame, he stood ready with his hands on the nuc box cover. I’d pull out a frame and then run my brush gently over the frame surface. It was amazing how easy it was to simply sweep the bees away. Then I’d turn the frame and do the other side. And then go back to the first side where a few more bees had landed again. Then Jim would pull off the cover, I’d slip the frame in, and he’d cover it back up. We did this until the nuc box was full.

He ran the box back to his house while I pulled the now half-empty deep hive box off the hive and set it aside. I placed the medium hive box with its ten empty medium frames on top of the bottom box. When Jim returned, we continued, but now I brushed the bees into the medium box they’d be using for future honey stores.

We wound up with a total of seven frames that were ready for extraction. All seven were full and mostly capped.

Capping, by the way, is what the bees do to a full cell of honey. They create wax caps to seal them off. Beeswax, by the way, is completely edible, including the caps. (Bees also cap brood, but I wasn’t interested in any of that.)

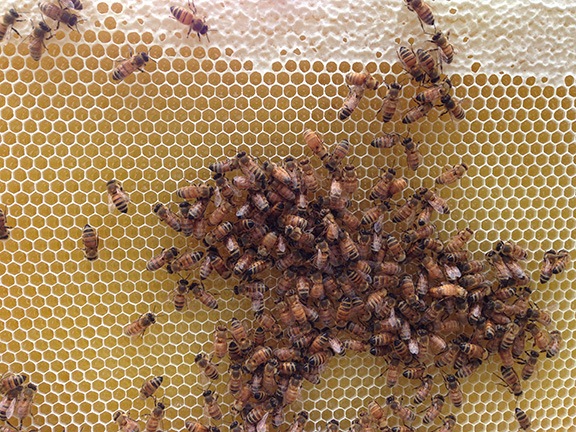
Honey Comb
This closeup shot of a honey frame shows capped honey cells on top with uncapped honey cells beneath them. This frame would not be ready for extraction.

While Jim brought the nuc with the last two frames back to the house, I reassembled the hive, placing the queen excluder back on top of the new hive box, a spacer with an exit above that, and the Ross Rounds box above that. Then the inner cover and outer cover.

I left the deep hive box with the remaining three frames set aside. I was hoping that while I was busy extracting the bees would realize that they were no longer in the hive and would leave. Then I went back to my truck and stripped out of my bee suit. I wouldn’t need it to extract and it was a warm day.

Extracting the Honey

The extraction process was pretty straightforward. First, I used the uncapping scratcher to scratch away most of the honey caps. All I really had to do was puncture them, but I dragged the scratcher across the surface to do the job quickly. I then slid the frame into one of the extractor’s three slots with the scratched side facing out. I did this for three frames.

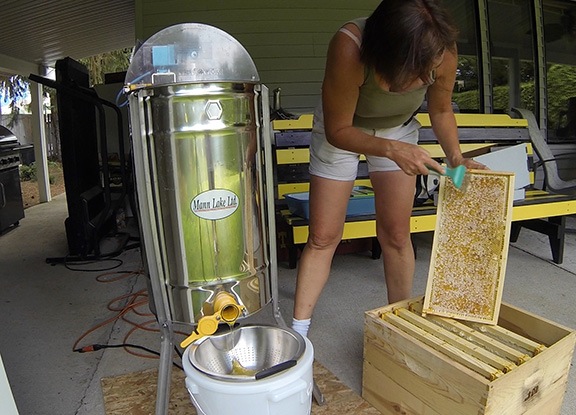
Uncapping Honey-filled Frames
Here I am, uncapping one of the frames.

Next, we spun up the extractor. The machine spins the frames, using centrifugal force to get the honey out of the cells. The honey hits the side of the extractor and drips down into the extractor’s well.

Extracting Honey
The extractor spins the honey out of the cells.

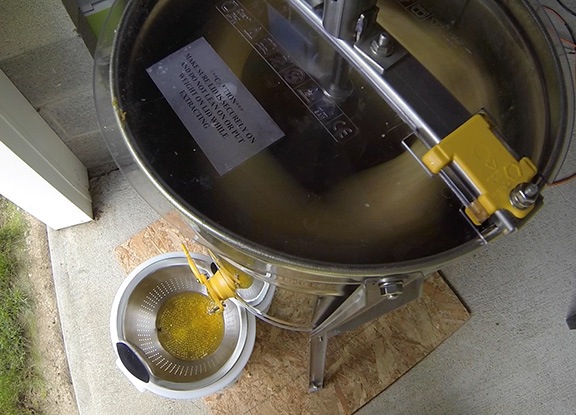
Honey Bucket
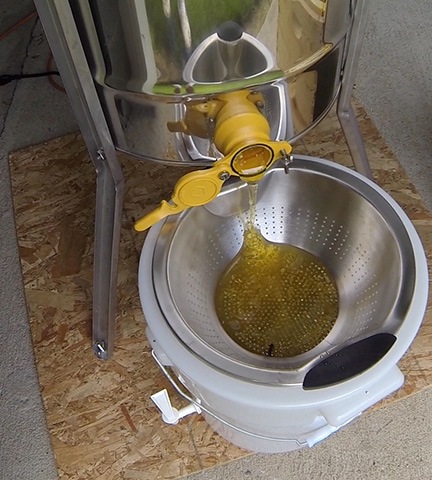
Once the honey began flowing, it continued for well over an hour.

Jim opened up the gate at the bottom and let the honey drip into the strainer over a bucket. We watched as the first thick drip appeared. “Quick!” Jim said. “Get something to grab that first taste!”

The something was my less than clean finger. I captured the first drip and sucked it off my finger. It was heavenly. (Honestly, if you haven’t tasted fresh, raw honey you’re missing quite an experience. Warning: You probably won’t ever eat mass-produced, supermarket honey again.)

Jim complemented me on the color. It was a light yellow. I suspect there was a lot of clover content; there’s a ton of clover in the area near the hive.

When the first side of the frames were about half done, I stopped the extractor. One at a time, I removed the frames, scratched the other side, and replaced them facing the other way. Then I ran the extractor again, this time up to full speed. Jim had advised me to avoid full speed when I was running the first side to prevent the frame foundation from warping. After about five minutes, I flopped the frames again to get the remaining honey out of the first side.

Meanwhile, the honey just globbed out through the gate into the strainer. As I mentioned earlier, it was a warm day so the flow was pretty quick and smooth. By the time I’d finished the second group of three frames, the strainer was full with the honey dripping through it slower than it poured in. The wax cappings were clogging the strainer. We had to shut the tap and wait for the strainer to catch up. By then, it was clear that I had over a gallon of honey.

I still had one fully capped honey frame to extract. Doing so in the spinning extractor could be tricky since it would be out of balance when it spun, even if I put two empty frames in with it.

Besides, it was clouding up and I didn’t want to spend any more time than necessary away from base. I’d already gotten check-in calls from both of the pilots working with me. Rain was in the forecast for that evening and the next day. With a total of more than 230 acres of cherry trees still under contract, I had important responsibilities elsewhere.

Jim and his wife Kriss offered to keep the extractor set up and let the rest of the honey flow into the strainer when the strainer had caught up. I could pick up the bucket and strainer the next day and put the honey in jars at home. In the meantime, I could take the deep hive box and frames home so I could use them in my newest hive.

I commented proudly on Twitter and Facebook that I’d extracted a gallon of honey. Later that evening, Kriss corrected me: two gallons.

Putting the Honey in Jars

Early the next day, the two other pilots and I hovered over about 120 acres of cherry trees in Quincy, East Wenatchee, and Wenatchee Heights after thunderstorms rolled through. By 10 AM, the weather had cleared out. I was hosting a party that evening that included smoked beef ribs and I lacked one ingredient for the rub I was making. I needed to get the ribs on before 1 PM for them to smoke all afternoon.

And, of course, I still had to fetch the honey.

So I set out to run my errands, finishing up at Jim and Kriss’s house. I don’t know if they were home; I didn’t want to knock on their door and bother them if I didn’t have to. I just went out back. The honey bucket was there, covered up to keep it safe from bugs — mainly Jim’s bees.

I looked at the clear, thick yellow liquid in the bucket. Tick marks along the side indicated that it contained over two gallons of honey.

I left a 12-pack of quart sized jars and some money on the patio table, then took the honey out to my truck. As we’d agreed, I also loaded 10 medium hive boxes from the stacks Jim had bought from a retired beekeeper into my truck. They were in new condition, although unpainted and somewhat dirty. At only $7 each, I couldn’t pass up the deal.

Back home, I finished prepping the ribs and got them on the smoker. Then I set about putting all that honey into the quart- and pint-sized jars I’d bought while running my errands.

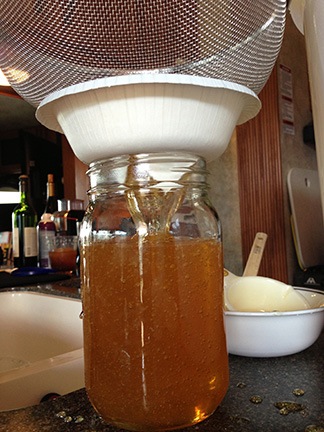
For some reason, I thought I needed to run the honey through a finer strainer to filter out the remaining tiny bits of wax cappings. In hindsight, I realize this wasn’t really necessary. All it added was another messy step to what was already a very messy job.

Filtering Honey
I’m not sure why I filtered the honey again. It really didn’t need it.

Trouble is, the spigot at the bottom of the bucket was too small for the honey to pass through. So all the honey had to be scooped up out of the top of the bucket. I used a half-cup measuring cup. I poured it into a strainer that I’d placed over a paper bowl fashioned as a wide funnel.

I’m not exaggerating when I say it took me about 90 minutes to go through it all. My guests arrived just as I was finishing up.

Everyone had a taste of honey. They all loved it.

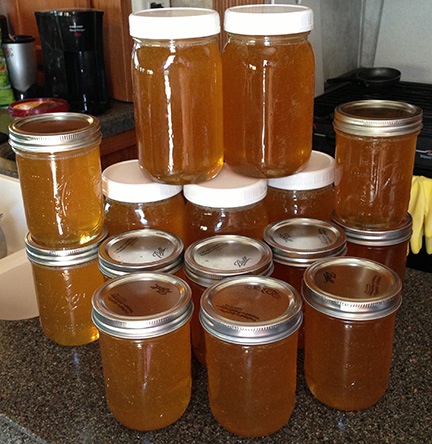
Honey Jars
The final product. (I’d already stowed my personal pint.)

My friend Cheryl and I arranged the jars on my countertop for a photo. The final tally was 5 quart sized jars and 11 pint sized jars.

I’ve already given away five pints.

The Aftermath

Clean up wasn’t difficult with lots of hot water to melt the honey. I’ll return Jim’s honey bucket and stainer today, along with a bunch of cherries I picked yesterday morning. I sure do appreciate him letting me use his extractor and walking me though the process. I’d offer him some honey to thank him — but I know he has plenty of his own.

As for what I plan to do with all that honey — well, I’ve been thinking of brewing some mead

Atychiphobia

The fear of failure.

I’ve been thinking a lot lately about why some people — including someone who was once very close to me — don’t achieve the things they purportedly want to in life. I’m talking about people who have dreams or goals and don’t work toward reaching them.

As anyone who knows me or reads my blog knows, I’m not like this. I’ve been called an “overachiever” (meant as an insult, if you can believe that) and a “Renaissance woman” (which I assume wasn’t referring to my Renaissance painting full figure). I set a goal and do what’s necessary to achieve it. Sometimes I fail but, more often, I don’t. The point is, I do what it takes — or at least try to — to make things happen.

Being like this puts me at a disadvantage when trying to understand people who aren’t like this. People who claim to have dreams and goals but then do very little or even nothing to make them happen. It’s almost as if they believe that just telling others what they want to achieve is enough. They don’t follow through — and they often don’t seem to have a problem with it. Or, worse yet, they blame others for holding them back — when, in reality, the only person holding them back is themselves.

Learned Helplessness

I was talking to a friend about this yesterday and how it relates specifically to a certain person no longer in my life. This friend was also in a relationship with a man like this — a man who never managed to achieve anything he supposedly wanted to achieve. Instead, her guy relied on her to help him through life, like an emotional and financial crutch. She said the condition he suffered from was learned helplessness and suggested that my guy had the same problem.

I looked it up on Wikipedia:

Learned helplessness is the condition of a human or animal that has learned to behave helplessly, failing to respond even though there are opportunities for it to help itself by avoiding unpleasant circumstances or by gaining positive rewards. Learned helplessness theory is the view that clinical depression and related mental illnesses may result from a perceived absence of control over the outcome of a situation.

This didn’t sound right to me. The person I was trying to understand did fail to help himself when there were opportunities to do so, but the rest of the description just didn’t fit. I thought for a while longer about what was likely holding him back and I realized that it was probably a fear of failure.

Fear of Failure

Wikipedia has an entry for that, too. It’s called Atychiphobia:

Atychiphobia (from the Greek phóbos, meaning “fear” or “morbid fear” and atyches meaning “unfortunate”) is the abnormal, unwarranted, and persistent fear of failure. As with many phobias, atychiphobia often leads to a constricted lifestyle, and is particularly devastating for its effects on a person’s willingness to attempt certain activities.

A person afflicted with atychiphobia considers the possibility of failure so intense that they choose not to take the risk. Often this person will subconsciously undermine their own efforts so that they no longer have to continue to try. Because effort is proportionate to the achievement of personal goals and fulfillment, this unwillingness to try that arises from the perceived inequality between the possibilities of success and failure holds the atychiphobic back from a life of meaning and the realization of potential.

By definition, the anxiety of any particular phobia is understood to be disproportionate to reality, and the victim is typically aware that the fear is irrational, making the problem a largely subconscious one.

This describes the problem perfectly: constricted lifestyle, unwillingness to attempt certain activities, unwillingness to take risks, unwillingness to try to succeed. The sad result is indeed that the sufferer is held “back from a life of meaning and the realization of potential.”

I think a lot of people suffer from this in varying degrees. But it really depends on the person’s imagination. Someone who lacks the imagination to come up with goals worth pursuing and does not pursue goals can’t be said to suffer from atychiphobia because they simply don’t have anything to potentially fail at. But someone who does have the imagination to come up with achievable goals and doesn’t pursue them — well, what can be holding them back if it isn’t a fear of failure?

You Can Only Blame Yourself

Failure is a part of life. While no one likes to fail, there’s no reason why a fear of failure should hold someone back.

If a goal is achievable and a good plan is made to work toward that goal, why not give it a try? By weighing risks and rewards — and the potential for each — a person should be able to make the decisions necessary to move toward any achievable goal. And by measuring levels of success, failure, and risk along the way, a person should be able to determine, on a day-by-day basis, how he’s doing and whether he’s likely to succeed.

The person I’m trying to understand shared many dreams and goals with me throughout his life. I was as supportive as I could be, actually helping him with brainstorming, writing, designing, and doing web work in a few instances when he began attempts to achieve some of these goals. But in the end, he simply stopped trying, abandoning file folders of incomplete notes in favor of “unwinding” in front of a television.

Being blamed for holding him back was particularly painful for me, especially since I was working so hard to build my business so it would support both of us. I wanted badly for him to achieve the kind of self-satisfaction that I achieved throughout my life. I wanted to see him free from financial burdens so he could have the time to chase down one of his dreams and make it a reality.

Unfortunately, I would never get to see that happen.

Move Forward

Meanwhile, I’ll continue formulating goals, evaluating them, and either discarding them or chasing them down. I’m looking forward to rebooting my life in a beautiful place that I love, surrounded by friends with plenty of work to keep me busy. I’m facing the challenge of designing and building a new home that exactly meets my needs. I’m building my apiary with solid plans for producing comb honey and other bee products by next summer. I’m forging new friendships and new relationships to take me forward in my life.

I’m not afraid to fail so I’ll throw everything I have at every goal I want to achieve.

How about you? What’s holding you back?