I take a trip back to my old stomping grounds.
Folks who know me well know that I’m not really from Arizona. I’m a New Yorker, born and raised in the New York City metro area. I lived half of my life in Bergen County, NJ: 15 years of childhood + 11 years as an adult. I also lived in Long Island and Queens, NY. I went to college at Hofstra University in Hempstead, NY and my first job out of school, which I held for five years, was for the New York City Comptroller’s Office which was based in lower Manhattan.
A New Yorker.
I moved to Arizona in 1997. I used to go back to the New York area once in a while. My brother and sister lived in northern New Jersey and my wasband’s entire family was in Queens. In all honesty, I didn’t enjoy those visits very much. We’d spend most of the time in Queens, with my wasband’s family, and I really hated the place — it was crowded and dirty and not a very pleasant place to be. (My apologies to friends and others who still live there.) When my sister moved to Florida, it was one less reason to go back.
In fact, the last time I was in the New York area was in 2009 (I think) when my sister moved to Florida. I was the surprise companion for her trip; I flew out on a whim and drove down with her in the convoy that included my dad and his wife with another car and moving van. I’ll never forget my dad’s face when I showed up in the restaurant for that last dinner in New Jersey.
Bad News
In mid-October, I got the phone call most people dread: a family member was very ill and likely to die soon. In this case, it was my godfather — the Catholic kind, not the mafia kind — who was also my mother’s first cousin, Jackie. Jackie was in his 80s and had been suffering from a series of health problems for the past few years. Things took a serious turn for the worst when he began chemotherapy for some cancer. He was bouncing from rehab to the hospital regularly and things looked grim.
Unfortunately, I couldn’t come as quickly as I wanted to. I had a meeting in Goldendale, WA that I couldn’t miss. It was on Monday, October 21, and since I didn’t know how long it would go, I booked my flight for the following day. I’d go for a week. My mom was driving up from Florida and we’d visit Jackie together. Although my cousin Rosemary, who lived near Jackie, warned me that he was nothing like the man I knew, I was prepared. I wanted to say goodbye. I wanted to help give him some comfort with family members around him in his final days.
I lucked out with the plane tickets. Even though I booked them only 5 days in advance, I was able to use Alaska Air miles to buy them. Alaska Air has the best frequent flyer program — a round trip ticket from Wenatchee, WA to Newark, NJ with only one stop (in Seattle) each way cost me only 25,000 miles and $10. That’s it.
I went to my meeting in Goldendale on Monday morning. I had to leave Malaga at 4:30 AM to get there on time. The meeting went until 10:30 AM. I was on the way home, only 30 minutes out of Goldendale, when my phone rang. It was my brother. Jackie had died that morning.
The Flight Out
I went anyway, of course. I already had my plane tickets and I’d have to pay to have them changed for a future trip — if I needed a future trip. I had nothing else on my calendar. Besides, my mother was still on her way — no one wanted to tell her while she was driving alone — and she’d be there that night. I’d be able to help her and Rosemary with Jackie’s house. And frankly, I needed a change of scenery. A week of autumn in New York with my family would be nice.
Penny and I were on the 6 AM flight from Wenatchee to Seattle on Tuesday morning. I saw the dimly glowing yellow “porch light” on my RV as the plane climbed out of Wenatchee’s Pangborn Airport.
Although it was clear on the east side of the mountains, Seattle was socked in with fog. I could see it down below us in the pre-dawn light; the lights of homes and businesses glowed right through the white cloud blanket.
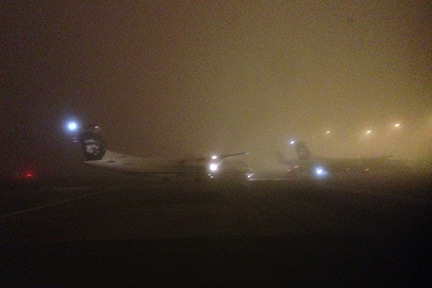
The fog was very thick on arrival at SeaTac.
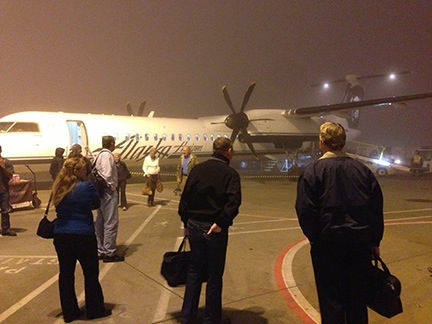
I snapped this photo as I left the plane at SeaTac. Reminds me of the last scene in Casablanca.
The pilots came in from the north and descended into the top of the fog bank. There was nothing but white out the window. The descent seemed to last forever with no sign of the ground. I have to admit I felt a bit reassured when the pilot applied power and we started to climb out on a go-around. He came on the intercom and said that they were having trouble with some “low visibility equipment” and that they were working to “sort it out.” We did a high, wide traffic pattern above the clouds before descending back into the fog. Remembering a flight to Santa Barbara that had been diverted to Fresno years before, I wondered where they’d divert us to if we couldn’t land in Seattle. Wenatchee? That would not be a good thing. But we touched down with only one small bounce. The pilot braked hard and turned off the runway. The fog was so thick I could barely see the terminal.
Penny and I had about two hours to make our connection. I’d purposely skipped breakfast so I could have it at SeaTac’s excellent food court. I bought a breakfast pizza at Pallino Pastaria and went to one of the rocking chairs by the big window to eat it. Outside, the plane I’d just gotten off of — and others just like it — came and went. Because of the fog, I couldn’t see much past that. On the way to the gate, I stopped at Beecher’s Handmade Cheese where I spent too much money on cheese and bread for my on-board meal. Then Penny and I boarded the plane for our 5-hour flight to Newark.
I had a middle seat. I really couldn’t complain when it cost me less than $5.
The flight was smooth. I read and ate cheese. Penny behaved — not a peep out of her on the whole flight. She really is good on the plane.
In Newark, Penny and I made a pitstop outside before heading back in to claim my baggage. One of the drawbacks of traveling with a dog is that I always have to check luggage. But that isn’t always a hardship since I can take as big a bag as I want. I took my big wheeled duffle bag on this trip — the lightweight one — and had packed it with gifts for family members: local wine and some honey from my bees. There was room to spare, but I suspected I might be taking a few things home with me.
Seeing the Family
My brother met me outside baggage claim. I hadn’t seen him since that dinner in New Jersey years before, when I drove with my sister down to Florida. He looked good. I think he might have lost some weight.
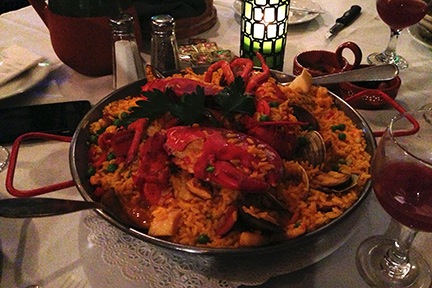
This plate of paella could easily have fed six people.
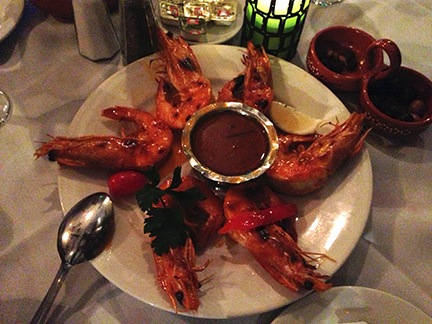
Heads on or off — these shrimp weren’t shrimpy.
At his house, I saw his wife and their two dogs. My mom, who’d spent the day with Rosemary, showed up a while later. We all drove into Newark, to one of the Portuguese restaurants, Vila Nova do Sol Mar. My brother goes there for lunch — in fact, he’d been there earlier in the day. Since he raved about the “gigantic shrimp,” we got an order as an appetizer. They were whole shrimp and very big. He and I shared a paella — although it was for two, it could have easily fed six people.
Afterwards, we headed back to my brother’s house. My mom took the guest room while Penny and I curled up on the living room sofa for the night.
At Jackie’s House
The next day, my mom and I headed up to Jackie’s house. He’d lived in Yorktown Heights in Westchester County. For some reason, my mom’s TomTom routed us over the George Washington Bridge and through the Bronx. I would have preferred the Tappan Zee Bridge to avoid New York traffic. Still, the later part of the drive was very pleasant, with lots of fall color and beautiful reservoirs along the way.
Jackie had lived in a rambling ranch house for at least 40 years. The house had fallen into disrepair — it’s funny how some old people just let their homes go — and it was stuffed to the gills with a mix of trash and treasure. (I blogged a bit about that here.) It fell to my mom and Rosemary to go through everything, discard the garbage, and sort out the rest.
I arrived on the second day of their task and it didn’t seem as if anything had been done. The next day, Thursday, when I returned after the three of us working all day Wednesday, it still didn’t look like anything had been done. There was just so much stuff.
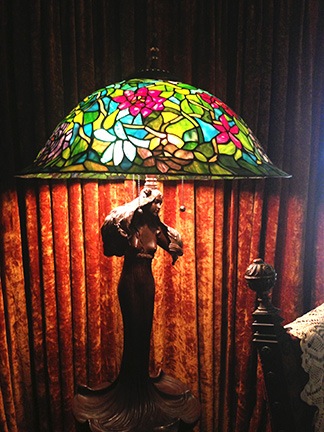
Here’s one of the many lamps in Jackie’s house. Although most of the lamps are table lamps, this is a standing lamp that’s part of a bronze sculpture.
Jackie had been an antique dealer. He dealt with real antiques, not the collectibles and retro crap you’d find in an “antique mall” today. Years and years ago, he and his partner had three shops at the house. The ones in the basement and the small building out back had lamps and china and bronzes and paintings and all kinds of really nice — and very expensive — things. The big building out back was full of antique furniture. Later, after Jackie’s partner left, he did most of his business at antique shows in Manhattan. He also dealt directly with a number of regular customers who often referred others. He was always very proud when one of his pieces were bought by a celebrity — or even when one stopped by his booth at a show.
Over the years, as he aged and tried to simplify his business, he began specializing in lamps. I’m talking about lamps made by Tiffany Studios, Handel, Jefferson, and Pairpoint. Lamps like these and these. I loved the lamps, but I especially loved the reverse painted lamps. Those are lamps with glass shades painted on the inside. When you turn on the light, the scene in the lamp comes to life. (I own two of these lamps: my grandmother gave me one before she died and I bought another from Jackie about a year later.)
Time went on and he auctioned off many of his best things. But he still had a bunch when I showed up with my mom on that Wednesday morning. I greeted my cousin Rosemary with a big hug and we got right to work.
I think the thing I miss most about New York is the food.
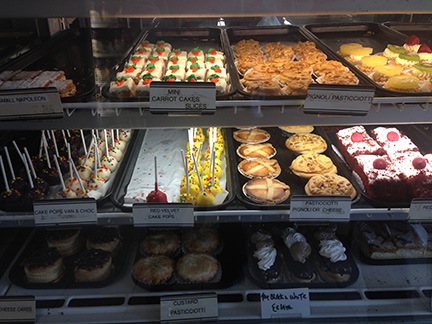
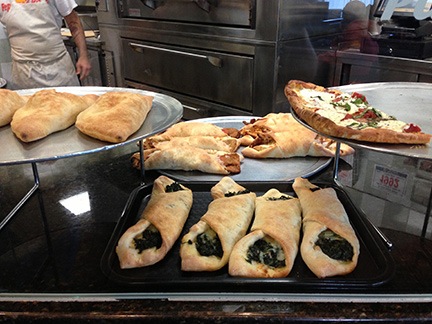
The only place I can get decent Italian pastry is in the New York metro area. Needless to say, I was starved for it. My favorite: custard pasticciotti.
By 2:00 PM, we were exhausted and hungry. We dropped off a dozen big bags of Jackie’s clothes and miscellaneous items at Goodwill and stopped at a real New York pizzeria for lunch: Peppino’s. Afterward, my mom and I went to Cafe Piccolo, an Italian bakery in Mahopac. We bought real Italian pastries and rainbow layer cookies.
We went back to work at Jackie’s house, but only stayed for another two or three hours. The whole time we were there, Penny went exploring around the house, never straying too far from me. I took her out a few times to do her business in the tall weeds and fallen leaves in the front yard. I remembered how the place had looked years ago with a neat trim yard out front and flowers in the planters. The road out front hadn’t been so busy then — but Jackie had lost at least one dog under the wheels of a passing car. I wasn’t going to let that happen to Penny.
It was getting dark when my mom and I headed to a hotel she’d booked in Armonk, about 30 minutes away. We weren’t hungry — lunch had been big. I dealt with email on my iPad and made some phone calls. By 9, my mom was asleep. I turned off the TV and nodded out, exhausted.
The next day, we returned for more of the same. I put myself in charge of the 1,500 VHS tapes he’d collected over the years, packing them up and placing an ad on Craig’s List to give them away to the first person who would come. (A woman came that evening and took them all.) Many of them were up in the attic and I burned plenty of calories walking up and down the stairs with Penny at my heels.
My mom and Rosemary went through the kitchen, sorting out garbage and Goodwill items. After another trip to Goodwill and lunch at the pizzeria, we went back for more. By that time, we’d made some real headway. We began sorting through items, gathering like items together. The dining room table became the candlestick holder depository. One of the bookshelves I’d cleared of VHS tapes was the place for crystal. Another bookshelf was for carnival glass. Lamps covered every horizontal surface in the living room; we’d even found power strips so we could turn them all on. Paintings were stacked against one wall. There was even a small table for soapstone.
Little by little, we were organizing whatever wasn’t garbage or for Goodwill. An auctioneer was coming on Saturday and he’d take away whatever he thought he could auction off — in other words, all the good stuff. What was left would be sold in an estate sale in the spring — although why they were waiting was beyond me.
Meanwhile, I’d packed up the lamp I’d always wanted and a bunch of American-made tools. (Jackie didn’t have any of that cheap Chinese crap; his tools predated what we can buy today.) I also chose a second lamp, although I didn’t get a chance to pack it. I helped my sister choose a lamp for herself based on photos I put on Facebook — she was in Florida and couldn’t come north to help out.
We headed out before five, exhausted again.
My Old Stomping Grounds
I rented a car and headed back to New Jersey. Although I didn’t think it was possible, I got lost along the way. It had been too long since I’d driven the route and it was so different. (Where did that mall on 287 near Nyack come from?) Darkness didn’t help. These days, I’m a nervous wreck driving at night.
Back at my brother’s house, they installed me in the guest bedroom. Although I got a decent night’s sleep, I was still up very early. I read with Penny curled up against me.
I spent most of the day working on a tribute to Jackie for my blog: “Dear Jackie.” (That’s where you can find more pictures of the lamps and information about the other things we found.) My brother had headed up to Jackie’s house to help out; his wife was working at home. She worked until afternoon, when we took a break to run some errands. I got a chance to shop at my favorite supermarket in the area, Wegman’s, where I bought more cheese — they have a huge cheese counter — and other goodies. Then we went to Dick’s Sporting Goods to buy some ammo. (My brother and his wife are active target shooters.) They were having a sale on the ammo my sister-in-law needed but they were limiting cases to one per person. So I bought one, too. (For her, of course; I have no use for ammo.) I also bought a nice set of Nikon binoculars so I could scan the cliffs behind my home for the mountain goats I sometimes hear knocking around up there. Coffee at Panera before heading home. Then a nice walk with the dogs.
The next morning, we had breakfast at a local diner — what a treat! (Did I mention that what I miss most about New York is the food?) My brother headed out for work while his wife and I packed up cheese and crackers and headed out with the rental car and dogs. I wanted to return the car in Westchester to avoid the $150 drop off fee. Dropping it off three days earlier would also save me more than $100 in daily rental fees. I’m saving up to build my home so every penny counts.
We stopped off for coffee and donuts at the Dunkin’ Donuts in Mount Kisco before heading back toward New Jersey. My sister-in-law was driving her Acura. I guided her to the one place I wanted to visit one last time: Peanut Falls.
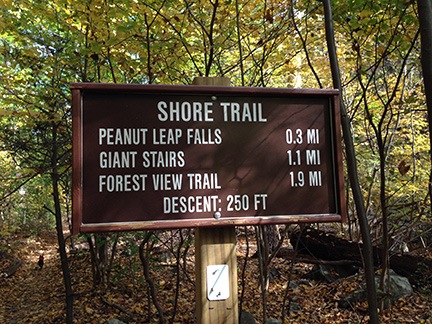
I’m pretty sure this fancy sign wasn’t here 20 years ago.
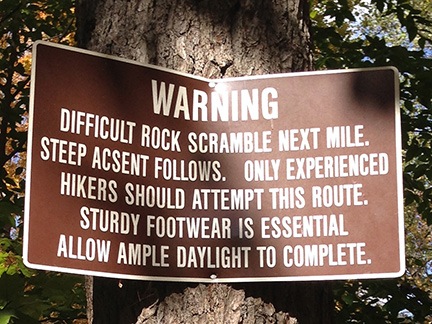
Oooh! Scary! Sheesh. I wonder if the liability lawyers cooked this one up.
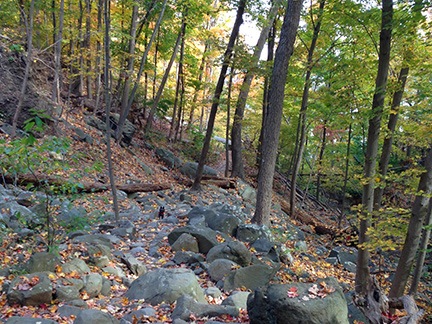
The trail was rough in places. Can you see Penny?
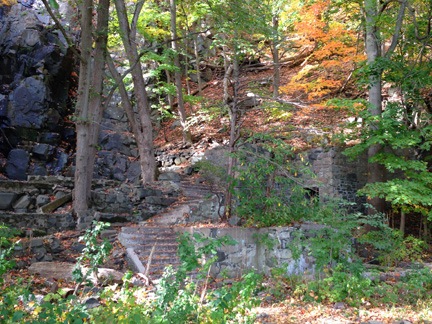
Here’s what the area at the base of the falls looked like in October 2013. The falls are on the left; only a trickle of water was falling this late in the season.
Twenty years ago, one or two of the pergola’s original columns were still standing.

Penny and I posed on the bank of the Hudson River for this shot.
Let me tell you a little about Peanut Falls. Twenty or so years ago, my former life partner and I somehow found out about a trail that went from route 9W near Nyack to the Hudson River. I clearly remember parking along the side of the road and walking through a break in a fence to get on a trail that wound through the forest along a creek. The creek came over a waterfall before forming a pool and joining the river. At this spot were also ruins. There were columns and benches and walls. I did some research years ago and found a book with information about the spot. Built by Mary Lawrence-Tonetti back in the early 1900s, it had once included beautiful sculptures. I left the book behind in my Arizona home so I can’t share any other information about it. In all honesty, I never though I’d get the opportunity to see the place again.
The area was different from what I remembered. There was now an official trailhead and even trail markers. We parked the car, got our dogs and picnic lunch together, and headed out.
It wasn’t long before Penny was off her leash, running through the woods while leaves fell all around her. It was a tiny big longer before my sister-in-law let her two Portuguese water dogs off their leashes. Soon all three dogs were bounding through the woods, meeting fellow hikers on the trail and having a great time.
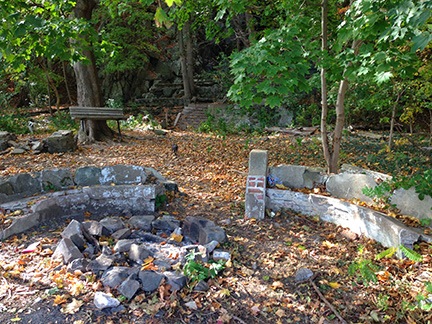
It was only a little over a half mile to the river. The falls weren’t running with more than a trickle and the spot had changed quite a bit since the last time I was there. Some research told me that Hurricane Sandy had done the final bit of vandalism that destroyed the ruins. Some of the benches were sill there and many of the walls closest to the falls were still in good shape. But that was it.
Another thing that was different: there were lots of other hiker coming in. Most of them were Asian — this part of New Jersey has a huge Asian population — and few of them stayed more than 10 or 15 minutes. Twenty years ago, the place was almost completely private — like a secret we shared with just a few others. Now it was public knowledge.
As we sat along the river having some cheese and crackers while the dogs wandered, I felt sad about the changes. But, in a way, I was also sort of relieved about them. It wasn’t the place I remembered from those hikes with the man I’d later marry. The differences I saw gave me closure — at least on this one place. It was as dead to me as my marriage — indeed, as dead as the man I’d loved and visited the place with all those years ago.
We posed for photos. I got a nice shot of my sister-in-law and her dogs along the river and she got a picture of me and Penny.
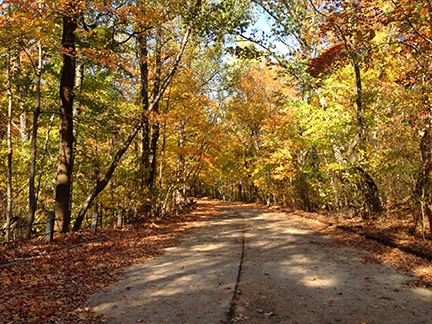
Part of the trail was on old Route 9W, an autumn wonderland.
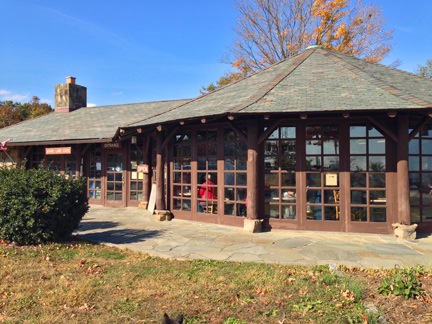
The snack bar at the State Line Lookout. How many hot cocoas did I drink there on early Sunday mornings in the 1990s? I’ll never know.
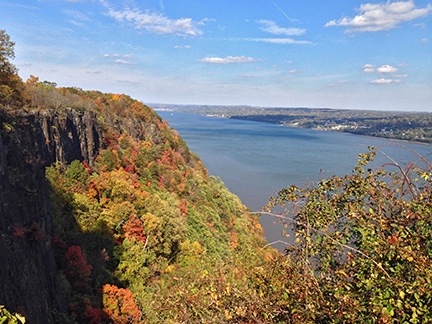
The Palisades and Hudson River. My trip was timed perfectly for peak color here. (I couldn’t do that again if I tried.)
On the way back, I suggested hiking south along the trail and old road to the State Line Lookout. This was a parking area with snack bar and view point on the Palisades just south of the New York/New Jersey border. Years ago, it had been the Sunday morning meeting place for the Sport Touring Motorcycle Club. We were members and we made almost every ride with them for at least five years in the 1990s. I can still remember those rides, most of which went north and wound along the Seven Lakes Drive area near Bear Mountain. I learned how to ride a motorcycle back in those days — and my fellow club members taught me how to ride fast on the twisty roads I grew to love.
We hiked back to the car along old route 9W. The dogs had one last chance to run loose. Then we were back in the car and heading to my brother’s house.
The Shoot
The next day we were up early for a trip to Old Bridge. My brother and his wife were participating in a shooting event at the Old Bridge Rifle and Pistol Club. I was coming along as a spectator. Penny would stay behind with the other dogs.
Let me take a moment to explain my views on guns. Yes, I’m pretty liberal. But no, I don’t really believe in gun control. Like the conservatives, I truly believe that if we limit access to guns, the only people who will have guns will be the criminals. I also don’t think that controlling guns will prevent lunatics from shooting up our schools. The crazies will always be able to get the guns, magazines, and ammo they need. Really. Unlike the conservatives, however, I don’t believe that we should all own guns because it’s our Second Amendment right. Or because we should take the law into our own hands (like certain Floridian neighborhood watchers). Or because the government is evil and we need to defend ourselves from “them.” I own a gun — a little Baretta 22 caliber semiautomatic which I keep in my home for personal security. Although I wouldn’t mind learning to shoot better, it’s not high on my list of priorities. All that said, I went to the shooting match because I was genuinely interested in how shooting matches worked.
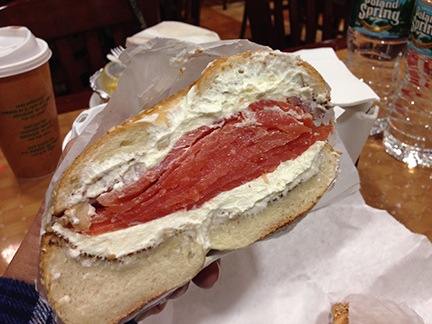
This is how you make a bagel with cream cheese. (Have I mentioned how much I miss the food in New York?)
On the way we stopped for breakfast at a bagel place. At first, I was disappointed: I’d really wanted a hot breakfast. But then my brain kicked in. New York bagel. What the hell was I thinking? Of course I wanted a New York bagel. I ordered it just the way I wanted it: sesame seed bagel, toasted (both sides), cream cheese, lox, a bit of red onion. You know how they made it? Exactly the way I ordered it. Imagine that!
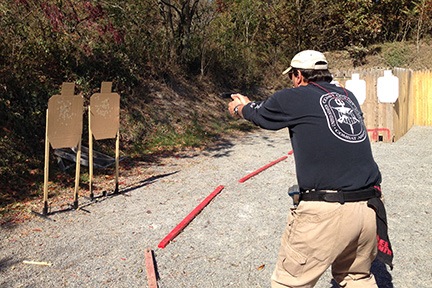
My brother, in action at the shoot.
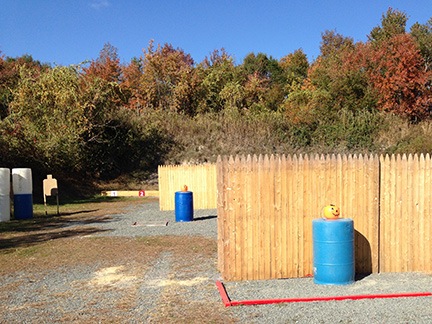
The left side of the pumpkin stage. Most of the targets were out of sight behind the fences. One of the rules of this stage: you had to start with your magazines in one or more pumpkins.
We were the first to arrive at the shoot. While my brother and sister in law helped set up the “stages” for shooting, I helped out with the registration. Soon, there was a constant flow of shooters coming in with forms and fees. Total count at the end was about 70. (Ladies, if you’re interested in meeting a man, this is the place to come. There were only 4 women at the whole event. Get a decent gun, learn how to shoot, and bag yourself a man.)
There were seven stages. Our squad of 10 people rotated through them like the six other squads of 10 or 11. It took most of the day. Some stages were pretty simple; others — like the pumpkin stage — were quite challenging. In each stage, shooters had to follow specific rules and stay within specific zones to shoot paper and steel targets. In some cases, shooting a target would cause another target to move, making it more challenging.
I helped out by taping up holes on the targets after scoring each shooter and resetting dynamic targets. I also picked up lots of brass. My brother loads his own rounds, so he was interested in recovering as much 40 caliber brass as he could. I left whatever other brass I picked up on the tables at each stage; someone took them because they always disappeared.
I had a good time and learned a lot about shooting matches. The people there were great — really nice. And safety was of utmost importance. The rules were followed and enforced by range observers. At the end of the day, we helped tear down the stage we finished up on. We hung around to talk with other shooters on other squads. But rather than go out to a diner with a group of people, we just went home.
A Day in New York, the Trip Home
The next day, Monday, was my last day in the area. I’d already decided to spend it in New York City. I had some personal business to take care of. But I also wanted to revisit the places that had been part of my life many years ago. Like the trip to Peanut Falls, I suspected that seeing them again, alone, would somehow give me some closure and help me move on.
My account of that day is rather long so I spun it off to a separate blog post.
My brother picked me up at the train station at around 6 PM and we went back to his house. After some discussion, the three of us decided to order out Italian food. A while later, the delivery guy showed up with eggplant rollatini for me, chicken parmesan for my brother, and a personal size pizza for my sister in law. The food was hot and good. (Ah, food in New York. Not only is it good, but it can be delivered.)
In the morning, my brother took me and Penny to the airport. Our flight was at 7:20 AM. I grabbed a breakfast sandwich at a coffee shop near the gate as boarding began. By some miracle, I’d been able to move my seat up to the window at Row 8. I settled in with Penny under the seat in front of me. A woman sat in the aisle seat. When the plane door closed, I realized there had been another miracle: the seat beside me remained empty.
The sun rose as the plane taxied out to the runway.
The flight was five hours and relatively smooth. I rented an entertainment device and used it to watch the Lone Ranger. It wasn’t very good, but it was better than I expected after reading so many reviews. It certainly kept me entertained.
As we approached central Washington, I looked down and realized that we would be passing just north of Wenatchee. I took a picture of the area from about 25,000 feet. My friend Jim, who is an airline pilot, sends me photos like this all the time, but I think this one is much clearer than any of his, especially after a trip through Photoshop to reduce the haze.
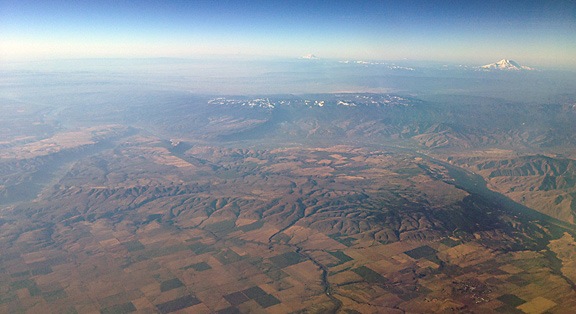
My new stomping grounds from 25,000 feet. You can clearly see Mt. Rainier and Mt. Adams in the distance, Mission Ridge (with snow), the Wenatchee area and Columbia River, Moses Coulee, Badger Mountain, and the Waterville Plateau.

As you might imagine from this clear shot of Mt. Rainier from an airliner window, the weather was amazing in Seattle the day I returned.
A little further along the way, I got a very good shot of Mt. Rainier. It’s rare that an airline window shot comes out anywhere near good enough to show.
We got into Seattle 30 minutes early. (Another miracle?) I hurried Penny outside for a pee, surprised that she’d managed to hold it for a total of about 6 hours (from the time I’d put her in her bag). I texted a friend who lived in the area. There was one thing I’d overlooked when I booked my flight: I had a 6 hour layover in Seattle. Yes, it’s true: I could have driven home. Twice. But the airline had my bag and I doubted that they’d put it on the connecting flight if I wasn’t on it.
My friend came to pick me up and we went out to an Indian restaurant not far away for lunch. Then we took a walk along a lake nearby, giving Penny a chance to run. We also hit a bookstore, where I wandered around with Penny in my arms resisting the urge to rebuild my library.
My friend dropped me off at 3. We went through security again and grabbed dessert at the food court. A while later, we were on the plane, heading toward Wenatchee. We were on the ground at 5 PM. I was home an hour later.
Some Final Thoughts
I didn’t realize how much I needed this trip until I took it.
Although I missed my chance to say goodbye to Jackie, I was strangely at peace about his death. All too often we try to prolong life far past the point where the quality of life makes it worth living. I’ve seen too many older people hanging on physically or mentally (or both), kept alive with constant pain and suffering through the use of medicines or machinery — simply for the sake of staying alive. Why do we do it?
Jackie had been ill for some time and his quality of life had definitely deteriorated beyond the point he’d find reasonable. Rosemary mentioned that he knew his time had come. He accepted that. He didn’t need to wait for me to come sit at his bedside and hold his hand one last time. He was finished with his life and he let it go. He was free from further pain and suffering. And I was happy for him.
He didn’t want a funeral service. He wanted to be cremated with his remains buried beside his grandmother’s in the family plot. Although I wanted to be present for that, his remains were not available until after I had to leave. I don’t think he would have minded. I don’t think he wanted a fuss.
I got some personal healing in my trips to Jackie’s house, Peanut Falls, and New York City. Everything was just different enough to be new to me — there weren’t any painful reminders of my life with the man I loved. It was good seeing family and friends, even if things didn’t work out the way we’d hoped. I left feeling tired but energized, refreshed for the work that lay ahead of me at home.
When will I go back? Who knows? Maybe never. And I think that’s why it was so important for me to do as many things as I did in that week. Just in case.


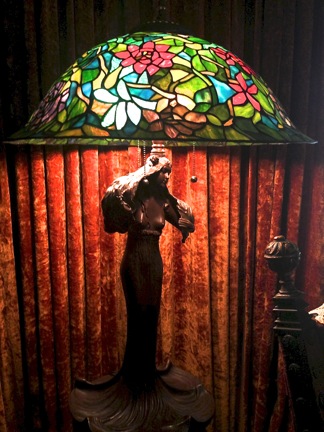
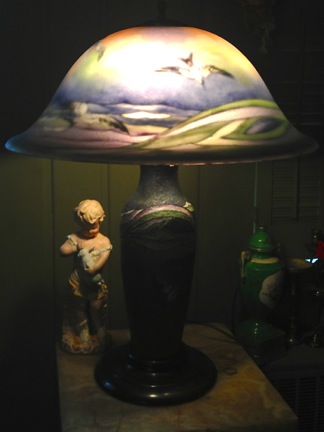
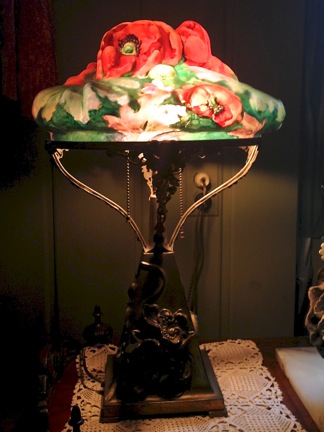
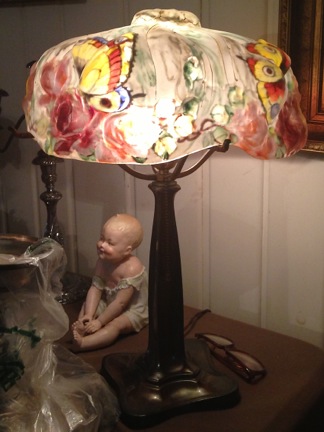


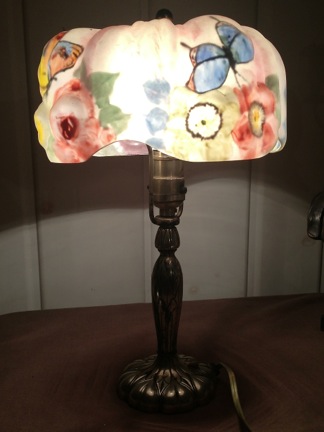 Just a few of your antique lamps. We lit them up and I photographed them to remember them forever.
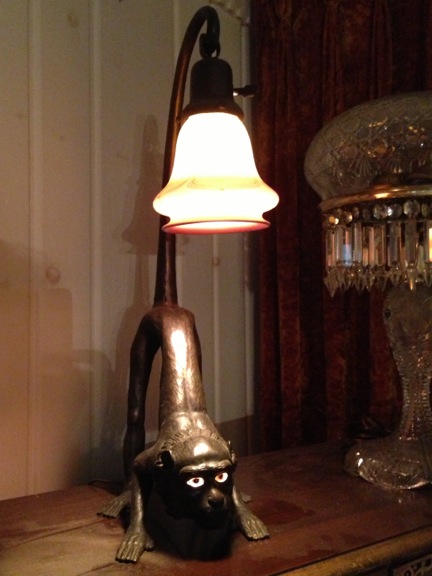 The monkey lamp. Yes, its eyes really do light up.
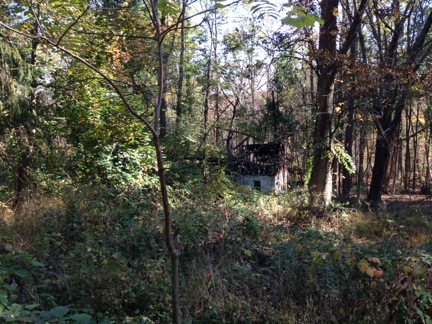 The backyard is nothing like I remember it.
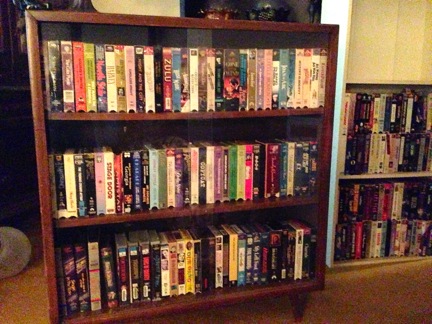 We found about 1,500 VHS tapes among your things. Why did you have so many? We’ll never know.
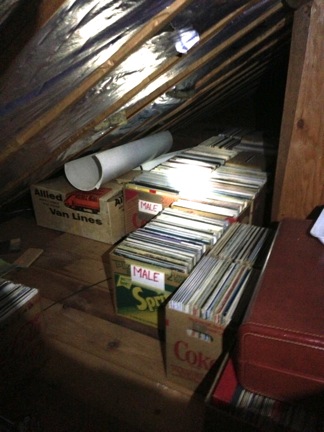 Every room of the house had boxes of record albums, but the attic crawlspaces were absolutely crammed with them.
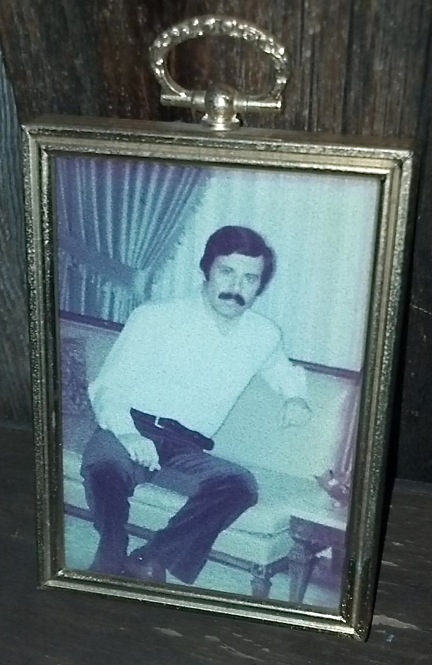
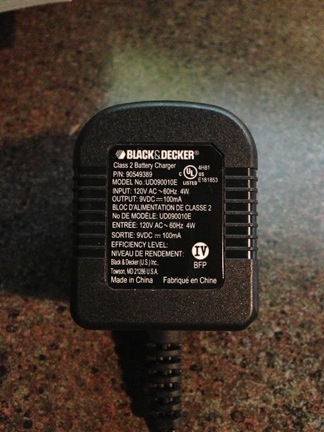
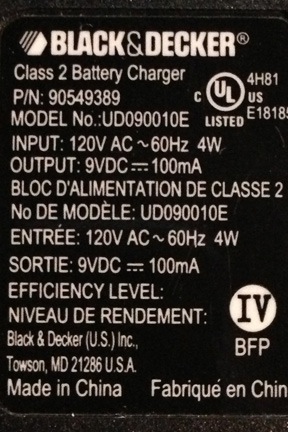
 This morning, I faced the challenge of finding the model number on a charger for my Black and Decker SmartDriver screwdriver — AKA, my girlie drill. The charger — which also doubles as a base for holding screwdriver heads — was zapped by a power surge and I needed to replace it.