Construction: New Kitchen Video Tour

It’s about 95% done and I love it!

On May 20, 2014, I began blogging about the construction of my new home in Malaga, WA. You can read all of these posts — and see the time-lapse and walkthrough movies that go with many them — by clicking the new home construction tag.

After losing a full day to an unscheduled (but lucrative) trip to Sacramento on Sunday night through Monday afternoon, I finally finished up the shelves in my pantry. That enabled me to put away a lot of the things that were sitting around my countertops, thus making my new kitchen presentable in photos and videos. I thought I’d show it off now, before I start my next big project.

Because I only had 1200 square feet of total space to play with, I had to limit the size of the kitchen. Somehow, however, I managed to create a good-sized, highly functional space.

Kitchen
My kitchen is now about 95% done. Most of what’s left to do is just trim.

I designed the kitchen space from scratch, carving an area at the end of my great room that shared a wall with my bathroom. The idea was to minimize plumbing costs by minimizing the plumbing runs. With the sink on that wall and the stove on an island, the refrigerator would be set into the adjacent wall, completing the “triangle” that’s so important in kitchen design.

The countertop length was limited by the fact that there’s a window at the end of that wall, but it’s still a full 11 feet long. The island is 3-1/2 feet wide by 7-1/2 feet long. Frankly, I think I have almost as much counter space in this home as I did in my old Arizona home with its extremely spacious kitchen.

Anyway, I’ll let you take a look at it for yourself. Here’s my narrated video:

It’s not quite done. As you saw in the video, I still have these little projects ahead of me:

  • Install under cabinet lighting.
  • Install trim around walls and cabinets.
  • Install transition trim between appliance floors (adhesive vinyl on plywood) and main floor (Pergo laminated hardwood planks).
  • Wrap finish (with wood trim) pantry doorway and hang pantry doorway curtain. (This is temporary until I can get a custom door, likely sometime next year.)
  • Install white trim on pantry shelves and paint shelf support ends and screws.
  • Hang pendant lamps.
  • Hang fifth track lighting fixture.
  • Put decorative baskets and silk plants atop cabinets.

As one of my friends pointed out not too long ago, the work never really ends when you build or own a home. I don’t mind. I have plenty of free time at home in the summer months and always need a project to work on.

New Bees, a New Bee Yard

I reboot my beekeeping efforts with two nucs in a new location.

I started beekeeping back in the spring of 2013. I’ve had mixed results.

Some History

I started beekeeping in June 2013 and have been blogging about it periodically. If you’re interested in reading the other posts in this series, follow the Adventures in Beekeeping tag. Keep in mind that posts appear in reverse chronological order, with the most recent first.

I started with one colony in 2013, caught a swarm, and then split a hive to end the season with three colonies. That first colony yielded about 2-1/2 gallons of honey with an early harvest. I was very encouraged. Late in the season, I moved my hives from their temporary homes in Wenatchee and Wenatchee Heights to my new home in Malaga. I set up an apiary or bee yard for them not far from where I was living in my RV and would build my home.

I lost two of the three colonies over the winter of 2013/2014 but the surviving hive, which I took with me to California for two months, was strong and I split it early. When I returned home, I added four packages in April and caught a swarm, ending the season with seven hives.

Unfortunately, I neglected my beekeeping duties that summer — mostly because I was kept so busy with the construction of my new home — harvested another 2-1/2 gallons of honey very late, and failed to treat for mites. My neglect did not go unpunished: despite moving six of the hives to East Wenatchee for the winter to avoid the Shadow Time at home, all seven of my hives died.

Cleaning Up

I retrieved the hives from East Wenatchee on their trailer, opened the boxes, and took a look. All of the boxes were full of dead bees and a lot of mold. (Yes, I know: I should have ventilated the tops of the boxes. I did mention my general neglect, didn’t I?) I thought it was the mold that killed them, but later decided it was probably a general weakening due to mites, which I hadn’t treated for prior to winter. (Lesson learned.)

I started pulling out frames and scraping them clean, keeping the comb to melt down wax. Some of the frames I’d bought locally at Coastal Farm and Ranch had been improperly brushed with wax, resulting in irregular comb that was a real bitch to extract honey from. I was determined to rewax all of the frames bought from Coastal before reusing them and needed the wax stores to do the job. But with so many dead bees and so much mold, most of it wasn’t worth saving.

I surfed the net to find some info on cleaning mold out of hives. Several sources said to simply reuse the moldy frames — the bees would clean it up. One source even had a video showing a moldy frame put into a hive and that same frame, a week later, cleaned up and being used by the bees.

Many sources suggested freezing frames to kill any pests that might be on them. That’s easy enough to do — I have a chest freezer that’s big enough to hold a few dozen frames at a time — but since my hives were out in freezing weather after the bees died, I don’t think it’s necessary.

Meanwhile, on warm days — and we had a few of them last week — the neighborhood bees, most of which are likely pollinators brought to the area for cherry pollination, came by and cleaned out the remaining honey. For a few days, the area around that bee trailer was buzzing with thousands of “robber” bees. It took them about a week to clean up.

Pollinators
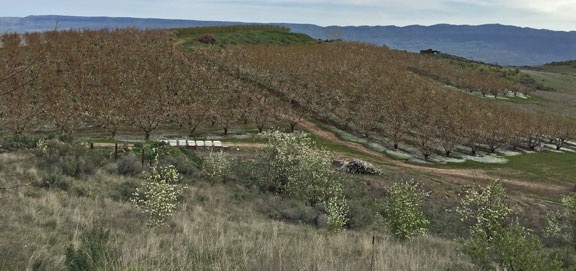
The pollinators are back! This orchard just off my street has blooming cherry trees and pollinator bees brought in just for the season.

I ordered four packages of bees from the supplier used by the beekeeping club I belong to: the North Central Washington Beekeepers Association. Unfortunately, they would not arrive until mid April.

I set up a hive box, base, and lid on the hive stand near my garden. That’ll be for my garden hive. And then I started to rethink where to put my new hives once I got them.

A New Bee Yard

I have ten acres of land here in Malaga. While about 30% of it is too hilly to accommodate bee hives and I’m using about 10% of it for my home, I still have several acres I’m not using. It seemed silly to put the bees so close to my home, in my view, when I could move them farther east on some land I wasn’t likely to use for anything else.

Lay of the Land
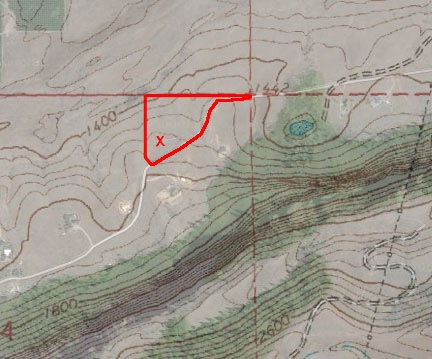
I threw together this hybrid topo/satellite map to show the lay of the land. The odd shaped red box is my 10 acre parcel; the south property line follows the road — hence the odd shape. The X is my homesite.

Understand that my lot has an odd shape. While its west and north boundaries run pretty much north/south and east/west respectively, its south boundary follows the road. Since the road winds northeast past my home, the farther you get on the east side of my property, the narrower the property is. At the very far east end, which is over a ridge and out of sight from my home, it’s only about 20 feet wide.

Before that point, however, right where the lot starts to get narrow, is a small ridge where my lot is about 100 feet wide. I know exactly where my property line is there because I had surveyors place a stake on the ridge back in 2013 before I bought the property. This is the easternmost part of my land that I can see from my home; I have to stand on that ridge to see beyond it. It’s also the part of my land that receives direct sunlight the longest.

I’d been considering that location as a site for my bee yard for a while and I drove out there a few times to take a closer look. The ground wasn’t exactly level and there were some sagebrush bushes, along with the bunch grass and wildflowers native to the area. But there were a few areas that were relatively clear and level and would be easy enough to get to with my ATV or Jeep or even the bee trailer. It would be a shame to carve in a two-track road with my tires, but it wasn’t as if the road would be long or I’d see it from my home. The ground was soft enough that I could probably even drive in a few T-posts, which I already had, and fence in the area to keep out large critters.

I let the information stew in my brain while I went on with my life.

Two Nucs from Wapato

I am not a patient person. The warm weather and abundance of wildflowers and orchard flowers were driving me nuts. If I had bees, they’d be out and about, visiting flowers, bringing home pollen and nectar, growing their hives. I could not only do a hive split in late May or early June, but I could probably even harvest some honey then — which was a good thing because I had less than a quart left.

Beekeeping 101: Nuc vs. Package

A nuc is a nucleus hive. It’s a cardboard box with an established queen and five drawn-out frames of honey and brood. It’s basically a small colony. You get it home, put the frames in a standard hive box with five empty frames, and the colony simply carries on, expanding into those frames you provided. This is the easiest way to get started.

A package is a box of bees with a queen in a cage. You dump the bees into a hive box filled with empty frames, put the queen’s cage between two frames with the cork replaced by a piece of candy or marshmallow, and cover up the box. The bees eat through the candy to release the queen and she starts laying eggs.

The main benefit of a nuc is that with capped brood already available, new bees will emerge from cells immediately; although a queen in a package should start laying eggs immediately, it’ll take three weeks for the new bees to start emerging.

So I started poking around, looking for bees. And I discovered that the Sunrise Honey Farm was selling nucs, with a pickup date down in Wapato on April 4.

To be fair, some people from my club had ordered nucs from Sunrise and they were delivered to Wenatchee the previous weekend. Somehow I thought the bees I ordered would arrive the same day so I ordered the packages, which were considerably less expensive. If I’d known that the nucs would arrive three weeks earlier, I would have gone with the nucs.

I did not want to drive to Wapato. It’s more than two hours away, south of Yakima. But I wanted an earlier start. So I called Sunrise and left a message. A few days later, they called back to say that they had a cancellation and there were two nucs available. I told them I’d take them. They told me to be in Wapato between 7 AM and 10 AM on Saturday.

I left home at 7 AM in my little Honda S2000 to make the drive. Along the way, I stopped down at Crescent Bar, where one of the cherry orchards I’m on contract to dry was in full bloom with bees on. I could not have timed it any better. When I arrived, the beekeepers were just pulling the last pallet of hives out of the orchard. I pulled over, rolled down the window, and chatted with the beekeeper, Eric, for about 10 minutes.

Wow. What an education! He told me that the cause of death in my hives was most likely nosema, although varroa, as I suspected, had probably weakened them, too. He recommended a product to apply at the end of honey harvest, before winter. He also suggested that I feed pollen late in the season when food sources were scarce. He said that doing these things should keep the bees strong enough to get through the winter.

I drove the rest of the way along a scenic route that took me along the Columbia River and then through rolling hills studded with farms and orchards. After a quick bathroom stop at a gas station five miles short of my destination, I pulled into a farmhouse driveway where I flatbed truck waited. It was just after 10 AM and there were just two nuc boxes on the truck’s bed.

I apologized for being late and they told me I was right on time. I gave them money and we loaded the two boxes into my car’s trunk. They didn’t fit, of course — my trunk needed to be about two inches deeper. So we used Penny’s dog leash to tie the trunk lid down. (Note to self: put bungee cord in Honda trunk.) We said goodbye and I headed home to Malaga; they headed back to their home in Spokane.

Hiving My Nucs

At home, I took the nucs out of the trunk and put them in the shade. One of them was buzzing loudly; the other was more subdued. I put the car away.

I was very pleased to see that the new nuc boxes were solid. In the past, I’d gotten boxes that the bees could escape from; it didn’t seem as if any were escaping from these.

It was only about 1 PM so I had plenty of time to get the bee yard set up and put the bees in their hives. Or at least I thought I did. The weather made me doubt that.

I used my ATV with its farm trailer attached to move a pallet, and several blocks of scrap wood posts, a level, and the beehive bottoms and tops out to where I planned to put the bees. As I suspected, I could drive the ATV right up to the yard area. I set up the pallet on the blocks, raising it about 8 inches off the ground. I was able to get it surprisingly level. I set up the hive bottoms and checked the level again. One rocked a bit; the pallet wasn’t perfectly flat. Some Pergo scraps under a corner would fix that. I positioned them on half the pallet, leaving room for two more hives. I’d have at least six by month-end.

On the second trip, I brought out the hive bodies with five relatively clean honey and brood frames in each.

By that time, the wind was blowing cold and hard. There was a storm moving in from the south toward Wenatchee. It might even be snowing up on Mission Ridge. Although it looked as if the storm might miss my place, who knew? I didn’t want to be out there with open beehives in a cold wind or rain. So I took a break and went inside for a while.

A friend called. He was in the area and asked if he could drop by. Of course!

We chatted, drank hard cider, assembled two of my three new bar stools, and tried them out. The storm never came. The sun came out and the wind died down. I kept thinking about my bees, eager to get them put away before nightfall. But I was enjoying my friend’s company. Still, when he said he had things to do at home, I didn’t stop him from leaving.

By that time, it was 5 and the sun was getting low. The wind had kicked up again, but not as bad. I loaded the bees, my smoker, and my hive tool into my Jeep. I suited up in my bee suit. Then I drove out to my new bee yard, backed the Jeep into the yard, and got to work.

I did one nuc box at a time. They were both filled with old, propolis-stained brood frames, with many capped brood cells. I didn’t waste time examining each frame or looking for the queen. In both cases, however, I did notice a queen cage fastened to a frame; I’ll need to make sure there’s no queen in each cage before removing them.

New Bee Yard
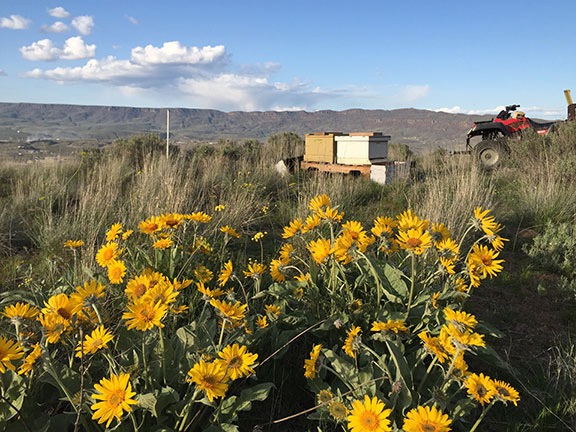
I used my ATV with its attached farm trailer to bring the hive components out to the new bee yard. There’s a lot of balsamroot in the area.

I have to admit that I’m a bit disappointed. Apparently, these nucs were created by taking brood frames with bees on them from the pollination hives and adding a caged queen. This is like a mix of a nuc and a package — the only thing that makes it better than the package is the inclusion of capped brood. The queen isn’t really “established;” she may not even be laying eggs yet. I need to examine the frames more closely on a warm day to see what’s going on.

Of course, some of the bees were left behind in the nuc boxes. That’s common. I left the boxes in front of the hives with rocks in the bottoms so they wouldn’t blow away if the wind kicked up hard again; the straggling bees might find their way into the hives. Or they might not and simply die overnight in the cold.

I realized belatedly that I should have fed them but I didn’t have any feed ready; I prepped some later when I got back in and put feeders at each hive this morning, before it warmed up. I also picked up the nuc boxes and put them away; they’ll come in handy if I have to capture any swarms over the next few months or if I want to do a hive split.

My Bee Yard
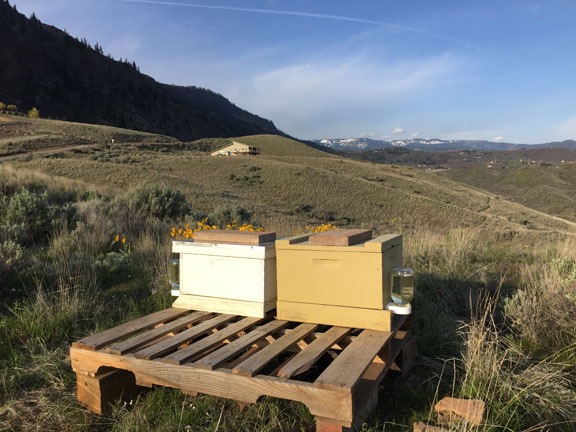
My bees are within sight of my home — and Mission Ridge, which is still snow-covered.

This Year’s Plan

I’ve decided to be a good and dedicated beekeeper this season. That means doing a hive inspection every 10 to 14 days, keeping copious notes about hive conditions, using integrated pest management, and making sure my bees are well fed and healthy before winter. I can’t use hot weather as an excuse to avoid a trip to the bee yard — I bought a vented bee suit at Mann Lake when I was there last month. I’ll also harvest honey on a more timely basis — as I learned last season, a late harvest is not fun.

I’m also working on some plans to put my bees in other locations, including a resort about 40 miles from here. If I get the resort contract, I’ll do some beekeeping seminars for resort guests when I do hive inspections there, thus earning some additional revenue to support this “hobby.” And that’ll open up a whole new market for honey sales.

I’ve already decided that if I have another total loss winter, I’ll give up as a beekeeper. But I think that if I do what I need to do to keep my bees healthy, I’ll have enough colonies next spring to continue without another bee purchase.

Wish me luck!

About the Wind Machines

An important part of crop protection.

The economy of this area of Washington State is based primarily on tree fruit production: apples, cherries, pears, and apricots. Indeed, Columbia River Valley around Wenatchee is one of the biggest apple producing regions in the world.

Fruit trees bloom in the spring, are pollinated by migratory bees, and form fruit. Throughout the summer, the fruit develops and grows. Months later, when the fruit ripens, it’s picked, sent to processing plants, and either shipped out immediately, as in the case of cherries, or stored for later shipment, as in the case of apples.

The timing of all this is determined by the weather and can fluctuate by several weeks every year. The trees get a cue from temperature to start budding and once the buds are formed, there isn’t much that can stop the seasonal progression.

Except frost.

Frost can kill flowers and developing fruit. A bad enough deep freeze over the winter months can even kill trees.

And that’s where frost protection comes in. Growers are deeply concerned about frost destroying a crop so they take steps to protect the crop from frost. In this area, they rely on wind machines to circulate the air in parts of an orchard prone to pockets of cold air.


This video shows wind machines in action at a pear orchard in Cashmere, which is near here. It looks to me as if the trees are in bloom. Unfortunately, the sound is turned off so you can’t get the full effect.

Wind machines look like large, two-bladed fans on a tall pole. Usually powered by propane, they’re often thermostatically controlled — in other words, they are set to turn on in the spring when the temperature drops down to a certain point. The blades spin like any other fan and the fan head rotates, sending wind 360° around the machine’s base.

The idea, of course, is that the cold air has settled down into pockets and that warmer air can be found around it and above it. By circulating the air, the warm air is brought around the trees and frost is prevented.

In California, they use helicopters to protect the almond crop from frost. (As a matter of fact, as I type this my helicopter is in California for a frost contract for the third year in a row.) The principle is the same, but the orchards tend to be much larger and I can only assume that it isn’t financially feasible to install and run wind machines in that area. (Hard to believe it’s cheaper to use helicopters, though.)

This year, some unseasonably warm weather has triggered a very early bloom. My clients tell me that their cherry crop is running 2 to 3 weeks early. Right now, cherries are in various stages of bloom throughout the area; apricots are pretty much done with their bloom. (Apples and pears will come next.) And since winter has not let go of its tenuous grip on us, the temperature has been dropping down into the low to mid 30s each night this week.

Well, not at night. It actually starts getting cold around 4 or 5 AM, as you can see in this weather graph:

Weather Graph
The National Weather Service weather graph page for this area shows the forecasted highs and lows over time.

The result: the wind machines kick on automatically when it starts getting cold: around 4 or 5 AM.

Want to hear what a wind machine sounds like close up? This video has full sound as a field man starts and runs up a wind machine. He’s wearing ear protection for a reason. Stick with it to see the spinning head on top.

Wind machines are not quiet. In fact, from a distance, they sound exactly like helicopters. And as they spin, they sound like moving helicopters — so much so that when I first heard them in action back in Quincy in 2009 or 2010, I thought they were helicopters and actually got up to see what was going on. I suspect that to someone on the ground, they sound exactly like a helicopter drying cherries would sound.

Although there aren’t any orchards on my end of the road, my property does look out at quite a few orchards, some of which have wind machines. There are at least 5 within a mile of me — I can see 4 of them from my side deck. I can also see others much farther out into the distance. And when the close ones are running, I know it. It’s not loud enough to wake me up in my snugly insulated home, but it sure did wake me up when I was living in my thin-walled RV outside. And it’s definitely not something you can pretend you don’t hear.

Fortunately, wind machines are a seasonal nuisance — much like other orchards noises: sprayers, tractors, helicopters, and pickers. Although frost season runs through May in this area, the machines only kick on during cold weather. Looking at the forecast, I can expect to hear them tomorrow morning and probably Wednesday morning, but not likely on Monday or Tuesday morning.

Weather ForecastNWS Wenatchee forecast for this week.

In the meantime, I’ve already gotten the heads up from my California client who might need me down there on Monday. After all, they don’t have wind machines.

For a helicopter pilot working in this area, wind machines are one of the obstacles that can be a hazard when drying cherries. They tower higher than the trees and their blades can be “parked” at any angle or direction. Although some growers will try to use wind machines to dry trees while waiting for pilots, my contract states I won’t fly in an orchard with wind machines spinning so they’re usually turned off when I arrive — or right afterwards. But if the blades aren’t parked, they can move. And one pilot I know learned the hard way about what happens when a helicopter’s main rotor blade hits a wind machine. (He’s okay; the helicopter is not.)

To sum up, wind machines are an important crop protection device that can be a bit of a nuisance with predawn operation in the spring. But I don’t mind listening to them. Like so many orchard owners in the area, my livelihood depends on a healthy cherry crop. If that means tolerating some noise 10-20 mornings out of the year, so be it.

A Springtime Hike in the Hills

Five miles is a heck of a way to start hiking season.

One of the benefits of being self-employed with an extremely flexible schedule is the ability to enjoy outdoor activities any day of the week. I abhor crowds so I try to do my hikes and bike rides and other activities when most folks are at work or school: in other words, mid-week.

My friend Susan is the same way. A retired attorney from the Seattle side of the mountains, she also likes to hike mid-week. So when a mutual friend introduced us last autumn, we seemed like a perfect match for hiking.

She got in touch last week when I was in California. I was crazy busy that week and expecting contractors to work on my home Friday and Monday, so we settled on Wednesday for a midday hike. The weather had been unseasonably warm, getting up into the high 60s every day, and the high desert landscape in the Wenatchee area was green and already studded with spring flowers. It would be an early start to the hiking season and, after spending too much time working on my home and traveling over the past few months, I really liked the idea of a day off.

I made a Home Depot/Lowe’s run in the morning with the thought of dropping off my purchases and meeting Sue at her home at 12:30 PM as planned. I didn’t expect to take nearly two hours in Home Depot and then wait 30 minutes in Lowe’s for them to bring my special order out. (Seriously: what is it with Lowe’s? This is the second consecutive time I’ve had to wait an unreasonable amount of time for them to bring an order out.) So when I got to Sue’s at 12:30, my Jeep was too full of lumber for Sue to fit. That meant running home to drop off my purchases. We didn’t get on the road to the trail until nearly 1:30.

Fortunately, the trailhead was close. To stay out of the wind, Sue had suggested Dry Gulch, which goes up a canyon. I wasn’t familiar with the trail names — I normally just hiked wherever there was a trail that looked good — and didn’t realize that I had hiked there once before with another friend back in the summer of 2012. It would be a bit of a climb and, since I suspected I was coming down with a cold, I wasn’t sure I was up to it. I warned Sue that I might not last very long and she said she understood. First hike of the season wasn’t expected to be long anyway.

Saddle Rock
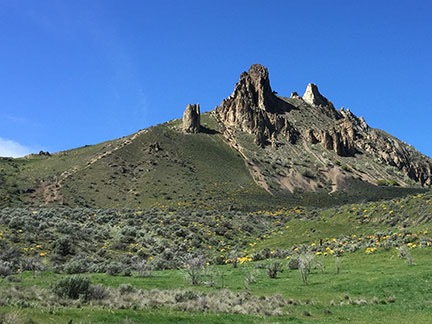
Saddle Rock, from the southern trailhead near the end of Miller Street.

The trail had a surprising number of people on it, including kids. That’s when I realized it was spring break week. Most people prefer the hike up to Saddle Rock, which shares a parking lot. It’s a steep, exposed trail, not suitable for our first hike of the season on a windy day. It has amazing, sweeping views of downtown Wenatchee and beyond, which is one of the reasons it’s so popular. Dry Gulch was good enough for me. I don’t need to hike up a mountain to get views.

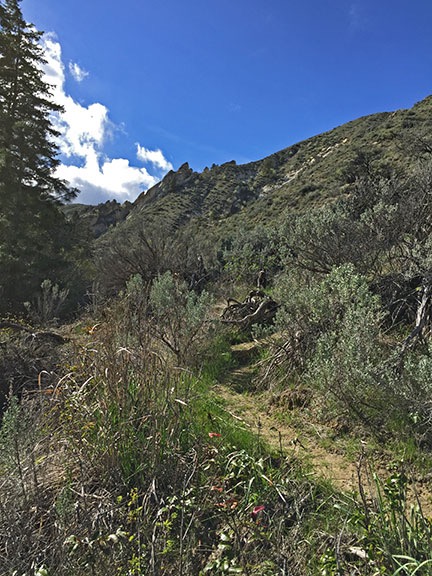
The trail climbs up an old road grade into a canyon crossed by one earthen dam after another. Up canyon from each damn is a dry (right now) pond. After climbing pretty steadily for about a mile, the trail crosses a larger dam. This is the point at which my friend and I had turned around back in 2012, going down a different trail. But Sue and I continued up the north side of Dry Gulch on a very easy, nearly flat trail that wound along the edge of the dry reservoir. (We basically took the green “A” trail on this map.)

Dry Gulch
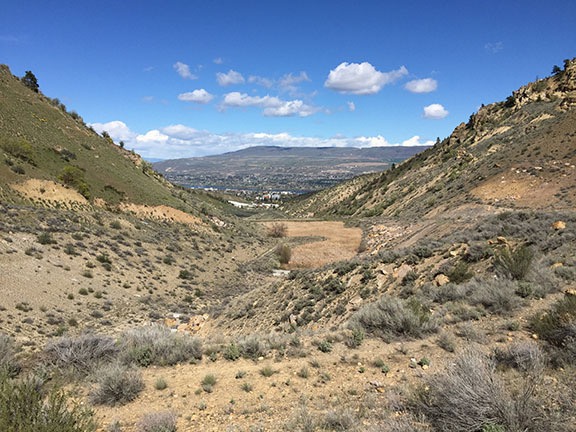
You can see down into Wenatchee from various points on the Dry Gulch trail.

Penny on the Trail
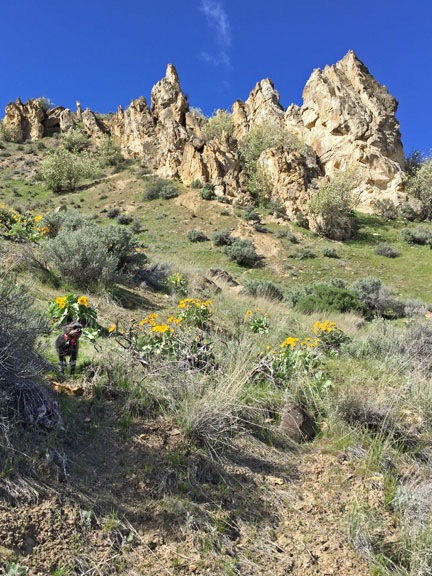
There are various rock formations on either side of the trail. This one was particularly beautiful, surrounded by blooming trees with green grass and balsamroot flowers at its foot. Can you see Penny?

As we hiked, we chatted about all kinds of things. Sue is really into geology and fossils and gave me a little lesson on the area’s rocks. She also pointed out a place where she’d found some good leaf fossils in the past. We took our time climbing the first mile of easy trail, making several rest stops along the way.

Penny spent about half the time leashed; once we got beyond where the other hikers were, I let her loose to run around a bit. There were marmots in the area making a bird-like chirping noise. Every once in a while, we’d catch sight of one running on the slopes. Penny obviously smelled them and even caught sight of a few of them on our return hike. I think her experiences with our barn cats, which are about the same size, taught her to keep her distance.

Lupine
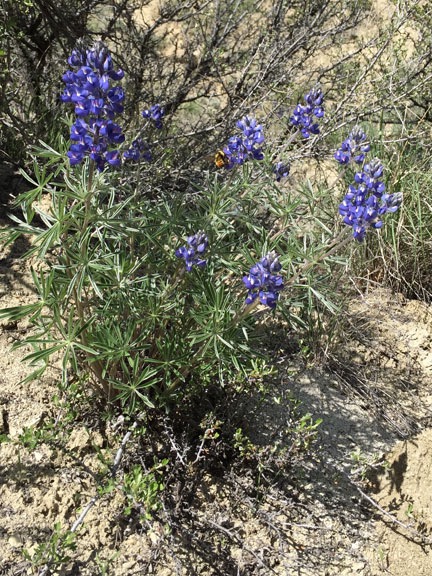
I was quite surprised to see lupine blooming up the trail; it’s just starting to come up at my home. Can you see the bumblebee?

After the dam, we turned left on the trail to continue up the gulch. This was, by far, my favorite part of the hike. The trail followed the edge of the reservoir but was much higher, looking down at it. After passing through a locked gate — we had to slide sideways between the rails — the trail narrowed and wound among balsamroot and lupines. We passed various signs of old mining activity, including low concrete walls at the mouths of side canyons. It was quiet — not another soul was on this part of the trail. We saw evidence of deer and elk — hoofprints and droppings. Cows and horses, too.The canyon narrowed considerably and the trail nearly dead-ended at an old dam. Its gate was gone and a trickle of water from upstream meandered through. It was cool and shady. A nice place for a picnic.

End of TrailThe trail continued as a narrow ribbon up into the canyon past the point where we turned back.

By this time, I’d had enough of the hike. I was surprised I’d come as far as I did — even though I didn’t know at the time how far we’d walked. About a quarter mile into the hike back, I remembered to turn on my GPS tracker. When I turned it off back at the Jeep an hour later, it reported a total of 2.2 miles. That brings the total length of the hike up to about five miles. Whoa. Not bad for a first hike of the season.

It had been a great hike — just the right length for me on that day. It’s unfortunate that my favorite part of the trail required a mile-long uphill hike to reach. I’d like to find more trails like that with trailheads easier to get to. I can hike all day on level ground or even downhill, but uphill has always been a bit of a struggle for me.

After dropping off Sue, I drove home and took a nice, long soak in my tub. An hour later, I was dead asleep in a two-hour nap. Let’s see if that rest is enough to fight off this cold.

Kind Words from a Client

Really made my day.

These days, I make most of my living doing cherry drying work in Washington State. It’s an extremely short season — I consider myself lucky to get 10-11 weeks of work — and 2015 will be my eighth season doing it.

Each year I’ve managed to build up my client base from the handful of clients originally contracted by the guy who brought me up from Arizona to help him in 2008. I now have a total of 10 clients managing 15 orchards. At the peak of the season, I hire three pilots to help me provide adequate coverage for all of it. This year, I might hire a fourth.

Each year, as cherry season approaches, I get more and more stressed. Will last year’s clients sign up with me again? Can I get more acreage to cover? Can I find enough reliable pilots to help me? Will a late-season frost wipe out half the crop, as it did in 2008?

Even when I have all the answers to those questions — usually yes, yes, yes, and no — and cherry season is under way, the stress doesn’t stop. I watch the weather incessantly — several apps on my phone with forecasts and a very good radar app to watch storms moving around the area. I stare at the sky and watch the clouds. I worry about my helicopter being fueled, preflighted, and ready to fly. I worry about the guys working for me and I worry about their helicopters. I worry about whether I trained the new pilots well enough and whether they’ll be able to find the orchards I showed them.

And when a weather event is possible, I worry even more. Which direction is the weather moving? How hard is it raining? Is it windy, too? Will it drench all of the orchards at once? Do my clients have people on hand to monitor the moisture and call me to fly? Will it stop raining early enough in the day to finish drying before it gets dark? Are my pilots really at the airport waiting to launch? Did the pilots get the GPS coordinates for the orchards so they can get there fast enough? Can that new pilot cover the acreage I assign to him effectively in a reasonable amount of time?

Then the rain happens and the phone starts ringing. I fire up my helicopter and launch, sometimes even as I’m dispatching the other pilots. I hover over the trees, at first trying to judge how wet they are after this particular event, trying to get my speed just right to dry them enough without wasting time. I do my job, stealing glances at the radar on my iPad so I know just which client will call next and when. I listen to the radio to hear from my pilots or other pilots in the area. I answer the phone and place calls, sometimes while still hovering within 10 feet of the tops of cherry trees.

Cherry Drying

And I’m always beating up on myself if I can’t get someone to an orchard as fast as I’d like. Last year, I felt that I’d failed one of my best clients. I even worried that I would lose his contract for this year. So this year, when I emailed him to ask if he wanted my services again this year, I pointed out where I could have done better and told him how I planned to handle it.

His response made my day (names changed to protect privacy):

ABC is very pleased with the opportunity to work with Flying M Air again for the 2015 season!

I’m sure that Joe can attest to this also, when the call is made to dry cherries you or a member of your team is on site drying within 15 minutes.

That’s a relationship that I want to continue!

All the stress and worry somehow seem worthwhile now. Our work is appreciated. I have another season full of clients to serve this year.

And the cherries are early. Can’t wait to taste some!