More about the Wind Machines

A few new videos.

Back in April 2015, I blogged about the wind machines commonly used for frost control in the Wenatchee Valley. Resembling tall fans, different versions of these machines can be found in agricultural areas throughout the west wherever frost — especially early spring frost — is an issue. Around here, they’re often in low areas subject to thermal inversions.

Wind Machine
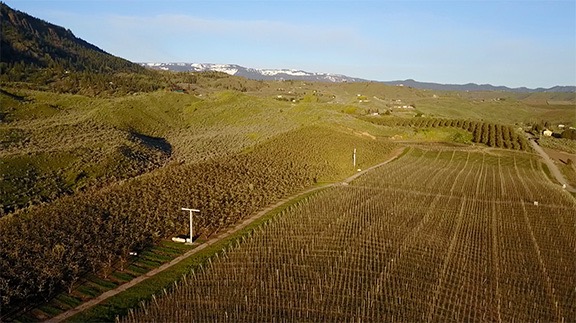
The wind machines that were running this morning. That’s the Mission Ridge Ski resort in the background. Photo shot with my Mavic Pro.

The machines are fans that generate wind. The blades spin fast — faster than you might think watching the video below — to circulate the air. The fan heads rotate to constantly change the direction of the wind. The net result is that the air is circulated, bringing warm air from above down into the crops.

In the almond orchards of California, they use helicopters to do this. I think it’s because the orchards are so big that they simply can’t install and maintain as many wind machines as they need. The helicopters are likely a lot cheaper in the long run, especially when you have a few years in a row when they’re not needed. I’ve been on frost control contracts for the past five winters now and have yet to turn a rotor blade over an almond tree. (Global climate change?)

This winter was particularly long, setting the tree fruit back two to four weeks. The cherry trees are still blooming around here; last year, the cherries were already beginning to redden in the orchards closest to my home. Nighttime temperatures at my home have been in the low 40s. But in the orchards below me, pockets of colder air form. And this morning, they got cold enough to trigger the temperature-set auto start feature on the wind machines in the closest orchards.

I don’t know exactly when they started. I was up at 4:30, reading before getting out of bed, and I didn’t hear them. But by the time I made my coffee at 5 AM, I could hear them faintly through the walls and windows of my my home. I stepped out on the deck for a better look in the predawn light. The sound was louder and I could see two of the machines to the west spinning. My ears told me that one to the northeast, which I can only see from a handful of spots on my deck, was also spinning.

Here’s the zoomed in video I shot with my phone. When I shut up, you can hear the wind machines.

I did a Periscope — that’s a live Twitter video — of the wind machines. A handful of people tuned in and I answered questions as they came up. I was frustrated that I couldn’t zoom in. I signed off, used the video feature on my phone to capture a short zoomed-in clip, and posted it on Twitter. Then the sun rose and the light got good and I did another Periscope that was mostly to show off how beautiful the area was. The wind machines droned in the background of my voice as I described various things and answered questions.

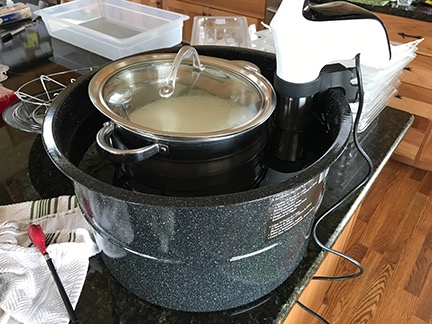
I went inside, washed some pots from cheesemaking, and listened to the radio. I could hear the wind machines faintly through the walls and windows. I was sort of bummed out that I couldn’t give people a better view.

Part 107 Explained
Want to become a commercial drone pilot? Start by learning all about the FAA’s Part 107. This book will help. Buy the ebook edition on Amazon or from Apple. Or buy the paperback edition on Amazon.

And then I remembered my Mavic Pro.

It took only two or three minutes to set it up. I launched it from my deck, got the video camera going, and sent it to the wind machines, stopping before it got so close that the wind could affect it. The light was beautiful and the image the Mavic sent back to me was clear. I hovered for a while to capture a good clip and then flew around a little, just taking in the view with the camera running. I stopped the video camera, took some stills, and then flew home for some more video of my home and the area around it.

Back inside, I made a fresh cup of coffee and spent a few minutes editing the video and setting it to music. It’s unfortunate that the Mavic doesn’t capture sound, but I understand why: it would be capturing its own buzzing sound, which isn’t pleasant. So music will have to do.

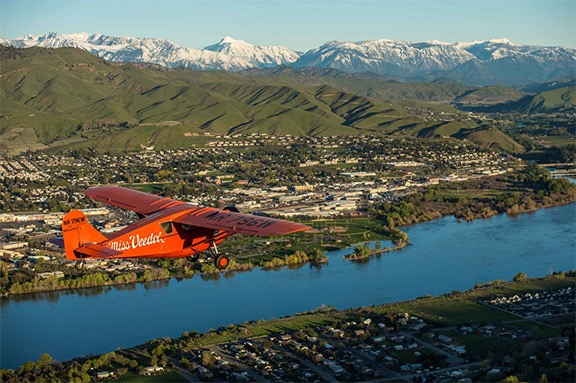
A side note here: I’ve been thinking a lot lately about how much I like living here. I realized — and I think I mentioned in one of those Periscope videos — that I like it here more than anywhere else I’ve lived. I’m not sure if it’s because of the place itself or the fact that I have a home with an amazing view built to exactly meet my needs or because after a stifling relationship that went on a lot longer than it should have I finally have the freedom to do what I want to do with my life and time.

Whatever the reason, I just want to remind readers that we all have just one life and it will eventually end. Don’t waste it stuck in a rut or in a place you’re not happy.

Flying with Miss Veedol

My first photo flight of the year.

Early Tuesday morning, I lifted off from the ramp at Wenatchee Pangborn Memorial Airport in East Wenatchee, WA on an air-to-air photo flight with Miss Veedol for Voortex Productions and the Wenatchee Chamber of Commerce.

The Miss Veedol was the first airplane to fly non-stop across the Pacific ocean. A 1931 Bellanca J-300 Long Distance Special piloted by Clyde Pangborn and Hugh Herndon Jr., it took off in Japan with 915 gallons of fuel, jettisoned the landing gear to improve aerodynamics, and crash landed 41 hours later at Fancher Field in East Wenatchee, making history. You can learn more about it and its eventual demise on Wikipedia and the Spirit of Wenatchee website.

I recommend you watch this in full-screen mode.

The Miss Veedol I flew with on Tuesday is a replica of the original aircraft that is based at Wenatchee Airport. This isn’t the first time I flew with it — we did a video flight way back in January 2014. Footage from that flight (and a few others) was incorporated into the amazing We Are Wenatchee Part I video. (This video still brings tears to my eyes; I’m so glad I live here and so proud to be part of the team that made the video. I hope you’ll check out Part II and Part III, too.) It was a difficult flight, mostly because it was bitter cold and I was having trouble keeping up with the plane.

But Tuesday was a completely different story. It was a gorgeous morning when we gathered just before dawn. I parked near Miss Veedol’s hangar and discussed the flight plan with my clients from Voortex Productions and Miss Veedol’s pilots. Then we split up. I got the helicopter going while they started up Miss Veedol’s big radial engine. The two photographers climbed on board — I had already taken their doors off — I backed the helicopter away from where Miss Veedol would be taxiing, and then I followed her down the taxiway while the photographers shot photos. By that time the sun was up, illuminating the plane’s orange wings and fuselage and casting long shadows. We circled the plane in the run up area, then moved beside it as it taxied to the runway. We took off in formation, with the helicopter slightly above and behind the plane.

The conditions were nearly perfect for the flight. Light wind, blue sky, gorgeous early morning light. It was just after 6 AM when we reached the river and headed up on the East Wenatchee side. The plane would go up one side of the river and down the other while a photographer and videographer captured images and footage.

Miss Veedol Over Columbia River
Miss Veedol with the city of Wenatchee in the background. The snow-covered mountains are the Enchantments, west of Wenatchee in the foothills of the Cascades. Most of the snow will be gone by late June. (I can see the tops of these mountains from my home.) Photo by Charley Voohris.

One of the most frustrating things to me when I do photo flights is that I can’t take photos. I see the shot but I don’t have a camera handy and, even if I did, it would be impossible to work it properly with just one hand. I have to wonder if the photographers see the same shots I do. I like flying with Charley because he usually does see the same thing I do — or something even better — and gets the shot.

Miss Veedol Over Shadows
I distinctly recall when we were in position for this shot because the shadows beneath the plane made its orange color really pop in the early morning light. Photo by Charley Voorhis.

One of our target areas was a rock formation called Saddle Rock at the top of a hill overlooking Wenatchee. Every time we do an aerial photo flight, we spend time up and around Saddle Rock. (You can see it in the closing shot of We Are Wenatchee Part I above — seriously, you must watch that video.) Part of our mission was to get photos of Miss Veedol around Saddle Rock. Charley succeeded in getting several really good shots as we circled Saddle Rock twice.

Miss Veedol Flies up a Canyon
Spring time is always green here, but this year it’s especially green with all the rain we’ve had. I followed Miss Veedol up this canyon on our second pass for Saddle Rock. I love the textures and contrasts in this shot. Photo by Charley Voorhis.

Another target area was the Senator George Sellar Bridge — which I usually refer to as the South End Bridge. We circled twice at the end of the shoot.

Miss Veedol at the Columbia River Bridge
Charley managed to perfectly frame Miss Veedol between the Senator George Sellar Bridge and the historic Columbia River Bridge. Photo by Charley Voorhis.

Our Flight Path
Our flight path, captured by Foreflight.

After circling the bridges, Miss Veedol headed back to the airport for a few touch and goes before taxiing back to her hangar. We went back for a few more shots at Saddle Rock. By that time there was just enough tailwind to make hovering flight a tad difficult pointing in the direction we needed to point but I think they got the shots they needed. We did a quick run to the north end of Wenatchee and then back to the south, circling Pybus Public Market once. Then it was back to the airport.

Total flight time was 1.3 hours.

I want to thank Charley Voorhis at Voortex Productions and the Wenatchee Chamber of Commerce for allowing me to show these photos on social media and in my blog. It was a great flight and I look forward to our next one!

My Flying M Nightshirt

A bittersweet story.

It’s true: I have a nightshirt with a Flying M logo on it. But there’s a story behind it and I thought I’d take a moment to tell it.

It all started back when I made a visit to my family back in New Jersey. It had to be in the early 2000s, but certainly after I got my first helicopter, an R22. This was back in the days when my mother’s brother’s family was still on good terms with all of us. It may have been when my grandmother was still alive or not long after her death in 2001 or 2002. (I don’t remember death dates; I see no reason to.)

My Uncle Frankie and Aunt Julie lived in Bergenfield, NJ in a typical suburban home on a narrow street. My uncle, who had been in the army during the Korean War, based in Alaska, had worked in a print shop before getting certified as a 100% disabled vet due to a back injury he’d suffered while in the Army. His wife was a typical old-school Italian homemaker. In fact, their household was very Italian in the New York kind of way, despite the fact their families had been in America since at least the 1920s.

They had two kids, Ernest (named after my grandfather) and Madelyn (named after my mother), who were a little younger than me and my sister. Ernest had been in the Marines right out of high school, married someone he’d met when he was in boot camp, had two sons, got divorced, left in the middle of his second tour of duty, and promptly got into serious trouble with the law. Madelyn married and had two daughters.

My Aunt Julie and her daughter Madelyn never really liked me or my sister. Simply said, our grandmother favored us over my aunt’s kids and she did a pretty poor job hiding it. I’m sure everyone has family dynamics like this and they always cause jealousies. My aunt and cousin were jealous of us and there was nothing we could do to head it off. They manifested their jealousies by talking down to us, criticizing us, and ridiculing us whenever they could. We dealt with it. They were family and although we didn’t like it much, we let it slide like water off a duck’s back.

We — I think I can speak for my sister, too — really loved our uncle, who was loud and outrageous and a lot of fun. I remember him staging a mock fight with my cousin Ernest on a visit I made with my first boyfriend back when I was about 18. Ernest had gone down into the basement and my uncle was yelling at him from the door in the kitchen at the top of the stairs. Then he pulled out a gun and fired a round down the stairs. It really freaked out my boyfriend, but the rest of us just laughed and laughed. The gun was filled with blanks.

But because of the friction from my aunt — which got worse and worse as time went on — I didn’t visit often.

We did visit one day in 2001 or 2002 and sat around the kitchen table for a nice Italian meal. My aunt was a good cook, although in later years she was a bit heavy on the spices. (The Italian word agita comes to mind.) She made a great eggplant parmesan, which might be one of the reasons it’s my favorite Italian dish. Making a good Italian eggplant parmesan is a lot of work, but if you want to taste one that’s just like my aunt’s (or mine), try Michael Angelo’s in the supermarket freezer section. I’ve tried a lot of eggplant and this is, by far, the best.)

Flying M Logo
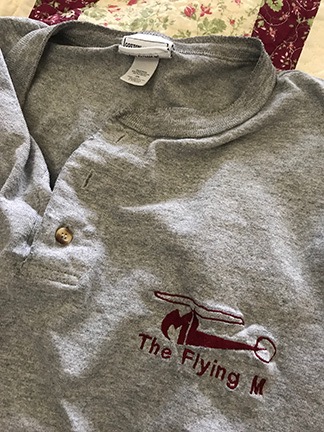
The Flying M logo includes both of my initials. Cool, no?

I was likely wearing one of the Flying M logo shirts I’d had made. The logo was designed by Gary-Paul Prince, based on a idea my wasband had come up with that incorporated my first initial in the design of a helicopter. Gary-Paul had managed to get both initials in. Back in those days, I was near the height of my writing career and had a lot of money to burn so I’d had the logo embroidered on a bunch of henley t-shirts, which I really liked to wear. My uncle liked the shirt and asked me for one.

Now at the time, my uncle probably weighed in at 350 pounds — at least. I obviously didn’t have a shirt at home that would fit him. So I told him I’d have one made and send it to him.

I got back to Arizona (where I lived at the time) and had another batch of shirts made. I made sure the embroidery people included one sized 3XL, which I was pretty sure would fit my uncle. After a week or two, I picked up the shirts, which came in a plastic shopping bag. I likely set it down near the door to my home and it likely sat there for a few weeks — I’m terrible about putting things away.

And then I forgot about them. For years.

You see, back then I had a cleaning lady who came every two weeks. She had apparently seen the bag near the door and decided it was better off about six feet north, on the other side of the door to the garage. She’d moved the bag into the garage where it was quickly hidden under other things that wound up in the garage. Out of sight, out of mind. I completely forgot about the shirts.

Time went on. My uncle died. I went to his funeral. It was the last time I saw my aunt and cousins. My aunt died a year or two later but I didn’t go to her funeral. I don’t think she would have wanted to see me anyway. I think my sister has been in touch with Ernest, but I haven’t communicated with either of my cousins since my aunt died.

Flying M Nightshirt
My Flying M nightshirt, now starting to show its age.

One day I was looking through a pile of stuff in the garage and came across a grocery bag with its handles tied tightly around something soft. I opened it up and found the shirts — including the gigantic heather gray one I’d had made for my uncle. I knew immediately what had happened.

I don’t throw away anything that has a use. Since I didn’t know any 3XL sized people, I decided to put the shirt into use as a nightshirt. It was comfortable and soft and very loose fitting.

And it’s still in my nightshirt rotation to this day.

The fabric is thinning and it isn’t quite as soft after so many trips through the laundry. The embroidered logo is puckered and there are tiny holes starting to form here and there in the cotton t-shirt fabric. I suspect that one of these days, I’ll have to throw it away.

But until then, it’s a reminder of my Uncle Frankie and some crazy good old days with family in New Jersey.

Cheese: The Temperature Problem Solved

A creative solution for an annoying problem.

If you’ve ever made cheese — I’m talking about real cheese like brie or butter cheese or cheddar — you know that one of the challenges facing a cheesemaker is raising the milk to an exact temperature and holding it there — sometimes for hours at a time. Unless you have a temperature-controlled cheesemaking vat — which I still haven’t found for home cheesemaking — you’re likely sitting by the stove making minute adjustments to the heat under the pot of water that your pot of cheese is sitting in — just to get the temperature of that to the magic temperature. It’s a nightmare that really makes cheesemaking an unpleasant chore.

A while back, I discovered immersion circulators, which I blogged about here. The circulator heats water to a temperature you specify and is commonly used for sous vide cooking. Trouble is, I didn’t pay close attention to what I was buying and it was only after I got it home that I realized the lowest temperature was higher than I needed to make most cheeses. It wouldn’t solve my problem. (But I did put it to use making sous vide steaks. I like grilled better. I’m pretty good with a grill.)

I experimented with a brewmaker’s mat that I wrapped around the outside of the pot. That was a so-so solution. It worked, but awkwardly. And it only worked on the pot I used for 2 gallon batches of milk; it wouldn’t work for the pot I’d need to buy for 4 gallon batches.

The other day, while surfing Amazon for something else, I decided to look at immersion circulators again. That’s when I found one that went as low as 77°F — the lowest temperature any of my cheese recipes required — the Sous Vide Travellortech Precision Cooker Immersion Circulator. I bought it.

That was only half the problem. I needed a pot big enough to put the cheesemaking pot and the sous vide cooker in. I found one at Fred Meyer: a huge, 33 quart canning pot.

My Cheese Pot Solution
Here’s my cheese pot solution. I don’t even need a stove to use it.

So yesterday I started a batch of brie using 2 gallons of milk. I put the milk in a stainless steel pot and lowered it into the canning pot. I fastened the immersion circulator onto the side of the canning pot. I filled the big pot with warm water to a point slightly higher than the level of the milk in the inner pot. I put a thermometer in the milk pot, programmed the immersion circulator for 88°F, set the timer for 2 hours, and turned it on.

Temperature Setting
The immersion circulator quickly got the water up to temperature.

Because I’d started with warm water, the temperature quickly got up to 88°F. And held there.

The temperature of the milk read high until I stirred it. It eventually leveled out at 88°F.

I added the molds, calcium chloride, and rennet, stirring after each one. Then I put a cover on the pot and left it to sit for 90 minutes, per the recipe.

Milk Temperature
I can monitor the milk temperature through the glass pot lid using a thermometer clipped to the side of the pot.

Every time I checked it, it was exactly 88°F.

No stove babysitting. No wandering temperatures. This is the first time I’ll be able to follow a recipe exactly because I’ll be able to keep the milk the exact temperature I need.

Cheesemaking might actually get fun.

I measured the opening and I’m pretty darn sure I’ll get the pot for 4 gallons of milk into my cheesemaking contraption. Butter cheese in next on my list.

Total cost of this solution: Immersion Circulator: $79. Huge canning pot: $32. I already had the other pots.

Free Bees, Courtesy of Migratory Beekeepers

Catch a swarm without even trying.

The cherry trees are blooming in the Wenatchee area and that means the bees are back.

Every year, thousands of beehives are shipped to the area and placed around orchards to pollinate the flowers. Apricots are first — although there aren’t many apricot orchards in the area. Then comes cherries and then apple and pears. The season has just started and it should go on for at least a month.

My friend Tina and her husband Bill have a cherry orchard in Malaga, not far from where I live. Although they usually keep one or two of their own bee hives, that’s not enough to pollinate their entire orchard. So they rented about 30 hives, which were delivered the other night, likely right from California. (Migratory beekeepers move bees at night when they’re all inside their hives.)

The other day, Tina excitedly texted me that the bees were swarming. Turns out that they’d found her empty bee hives — her bees had not survived the winter — and a swarm had moved into one of them.

If you’re wondering what all this means, you might want to read a post I wrote back in 2013, “Bees: Capturing My First Swarm.” It explains why bees swarm and what’s usually involved in capturing a swarm. But Tina didn’t have to do any of the work. The bees just moved into an empty hive on their own.

I told her she should put other empty hives out to see what else she could catch and she said she did. Then I asked if I could put one or two of mine out. After all, if more than one colony was swarming, it would be great to catch as many of them as we could. Great for the bees, since they’d get a new home easily. Great for us because we’d get free bees. And it didn’t affect the migratory beekeeper since the bees were going to swarm anyway. If we didn’t catch them in our beehives, they’d end up somewhere else.

Keep in mind that buying bees usually costs about $100 to $150 per colony, depending on how many you get and how you buy them. And where you buy them from, of course. Since it’s common to lose 50% of your colonies over the winter here, a lot of folks spend a lot of money buying new bees. I replaced 6 colonies one year and swore it would be the last year bought bees. Now I make new colonies through splits and try to catch a few swarms every summer.

So yesterday I cobbled together two complete hives with ten frames each. Each hive has a mix of frames from a failed colony — three of my eight colonies died or disappeared over the winter — and frames from extracted honey. There’s lots of room for a queen to lay eggs and lots of room for incoming bees to store honey and pollen. And even a little honey to get them all started.

It’s kind of like finding a roomy apartment, fully furnished with just the kind of furniture you like, and a fridge with food in it.

I put one hive near the one Tina had already caught and another right near where half the rented bees were set up. And then I left.

Today, I dropped off some spare equipment to help Tina set up a few more hives. Not complete setups, but hive boxes (also known as supers) and tops. She’ll still need bottoms and frames.

Free Swarm
In less than 24 hours, bees had moved into my empty bee hive.

This afternoon, Tina texted me: “Look what you got!” And she sent a photo of the hive I’d placed near hers with bees all over the front of it.

It looked as if a swarm was moving in.

I texted back, asking if I could pick it up on Friday morning so they’d have enough time to settle in. She agreed. Then I suggested that she put a box where I had that one when I moved it. Maybe she’d catch another one.

Robber Bees?
There aren’t enough bees around this hive box to assume a swarm has moved in. When I pick up the other one, I’ll take a peek inside this one.

She sent me a photo of my other hive, too. There was some activity around the front, but not much. Robber bees, perhaps, or maybe some bees just checking it out. Maybe she’ll send another photo tomorrow.

My beekeeping season has been off to a slow start. It only recently stayed in the 40s at night and we still have cool, rainy days. I checked the hives when I got home from my winter trip, just to see how many survivors I had and to seal up the dead hives so the other bees wouldn’t be tempted to rob. When I bring the new bees home, I’ll spend some time opening up my hives, shuffling frames, and seeing if I can spot the queens. I’ll do hive splits on my healthiest hives — I know that two are going like gangbusters — and put the splits on my little bee trailer. But rather than put four occupied hives on it before taking it up to Wenatchee Heights, I think I’ll try leaving one of them empty, just to see if I can attract any other migrants looking to settle down in the Wenatchee area.