Sinfully good.
Years and years ago, I had an Oster Kitchen Center. This was basically an electric mixer base that I could put a mixer, blender, food processor, and other attachments on. I really liked this thing, but decided to get all new appliances — Kitchenmaid, in fact — when I moved to Arizona in 1997. To say that Kitchenaid has disappointed me is an understatement. I really wish Oster would produce an updated version of that old Kitchen Center; I’d buy one.
One of the attachments I had for the Oster was an ice cream maker. It was the usual device: inner bowl fits into outer container that you fill with ice and salt. The whole thing sat on the base with a paddle inside and a cover on top. You turn on the motor and it turns the paddle while the ice chills down the ice cream mix you’ve put in the inner bowl.
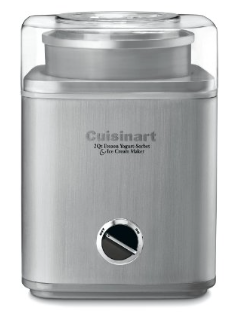
The Cuisinart Pure Indulgence Ice Cream Maker.
When I switched to Kitchenaid, I never replaced the ice cream maker. Until about a week ago. That’s when I bought a Cuisinart ICE-30BC Pure Indulgence 2-Quart Automatic Frozen Yogurt, Sorbet, and Ice Cream Maker. It’s a small countertop device that I store on a shelf in my garage. Instead of having a double bowl and having to deal with ice and salt, it has a single bowl that I keep in my chest freezer until ready to use. The liquid inside supercools and chills down the ice cream when I set the whole thing up and get it running. It claims to make ice cream in 25-45 minutes and I can confirm that it does.
Of course, it’s not the ice cream maker equipment that makes amazing ice cream. It the recipe for the ice cream that goes inside it. I found that recipe in July, when someone linked to an article titled “The Master Ice Cream Recipe” on the New York Times website. That recipe uses ingredients I can stand behind: real milk and cream, sugar, and egg yolks. A table below the base recipe offers flavoring options with additional instructions.
Kirk and I took the ice cream maker on its inaugural run last week. I made a simple vanilla ice cream, cheating a bit by using vanilla extract for the favor. (I don’t know about you, but I don’t keep vanilla beans around my home.) Along the way, I showed Kirk how to separate eggs without an egg separator. And because the eggs were from my chickens, the resulting ice cream was almost golden in color.
The flavor and texture were great, even though I probably should have kept it in the ice cream maker another 10 minutes or so. (Note to self: use timer.) Kirk liked it with the strawberry rhubarb jam he cooks up on demand with rhubarb from his garden, but although I love that mixture on pancakes, I preferred this ice cream plain.
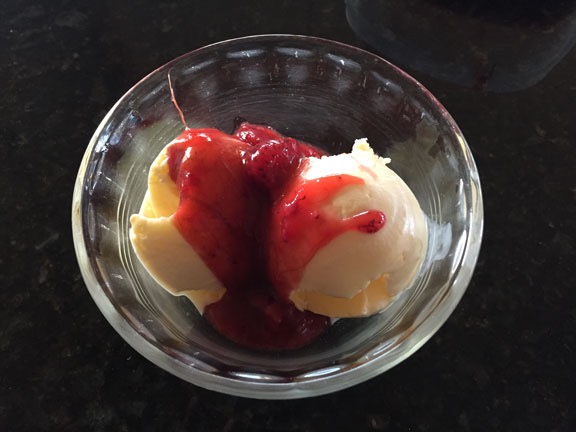
Home made vanilla ice cream topped with home made strawberry rhubarb jam.
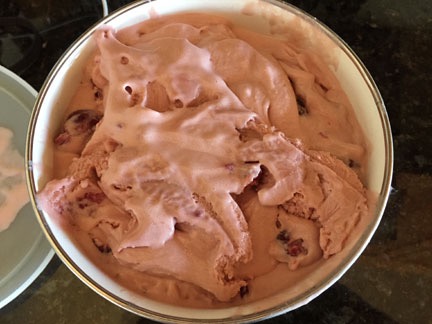
Home made cherry ice cream, made with eggs from my chickens and cherries I picked. (Have I mentioned lately how much I love living in orchard country?)
Yesterday, I whipped up a batch of cherry ice cream using the last few pounds of cherries I’d gleaned from client orchards. I followed the instructions in the Times recipe, but I skipped the step that blends the cooked cherries into a puree. I thought whole cherries would be more interesting. This morning, when I put the chilled ice cream mix into the ice cream maker, those cherries got a bit hung up on the mixing paddle. I froze it longer than the vanilla ice cream, scooped it into my dedicated ice cream freezing container, and put it in the freezer.
But not before tasting a big spoonful. Delicious!
Although the Times recipe requires some cooking, the ice cream maker came with recipes that don’t. I will eventually try some of them. I suspect they’ll turn ice cream making into a 1-hour activity instead of one that requires at least 4 hours for the mix to cool down after cooking and another 45 minutes to churn. That means it’s something you could easily do with your kids on a rainy day. Or dinner guests, while you’re munching appetizers before the meal.
The best thing about all this? I control exactly what goes into every batch I make. And although it isn’t that much cheaper to make than the premium ice cream I prefer, there’s a certain amount of self-satisfaction when you get to enjoy something you made from scratch.
 Ingredients:
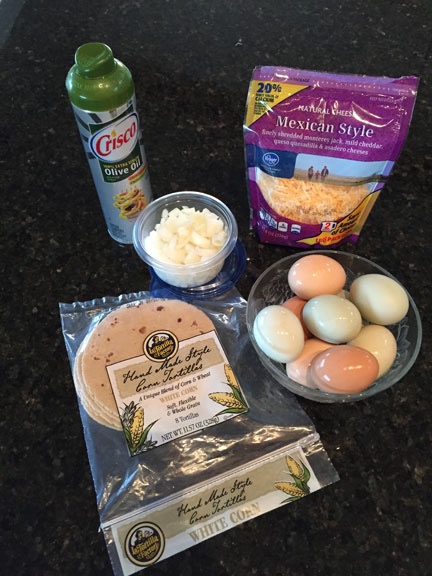 Small amount of oil or cooking spray. I usually use olive oil spray to keep the fat down a bit.
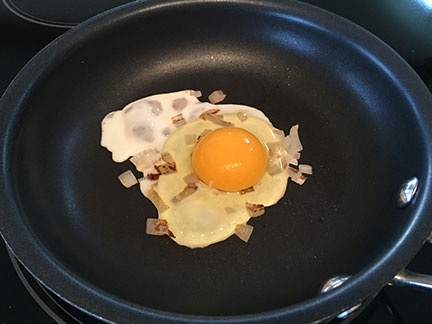 Gather the onions or scallions into the middle of the pan and drop an egg on them. You might want to use this opportunity to break the yolk so it cooks. I don’t scramble my eggs before cooking, but you could if you want to. Just make sure the egg stays together in the middle of the pan so it doesn’t get larger than the tortilla.