Slow-Cooker German Pork with Sauerkraut, Onions, and Apples

A twist on a family recipe…kind of.

My grandfather was German — born in Germany — and trained as a pastry chef. He owned a bakery in New Jersey and ran it with my grandmother until I was about 10 years old, when they retired to a life of leisure in their New Jersey home.

He was also an excellent cook who whipped up the real German dishes I grew up with. One of them was pork with sauerkraut. Years after my grandparents were gone, I got the recipe and whipped up a batch at home, which, if I recall, called for boneless country-style pork ribs. I’ve since lost the recipe and pretty much forgot all about it.

Until my friend Shirley shared a similar recipe on Facebook. That got me thinking about it. She linked to another recipe even more similar to the one I remembered. I decided to make it. I bought the pork. And then I got busy with other things (as usual) and forgot about making it (as usual). Fortunately, I’d put the pork in the freezer and when I was poking around in there thinking about what to make this weekend, I found it and remembered the recipe.

Pork w/Sauerkraut
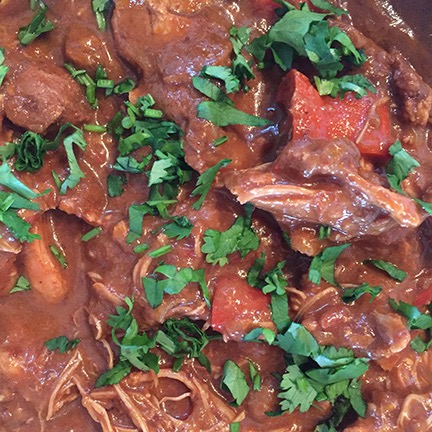
Here’s a closeup of my version of the finished dish. (Do you really need to see more than one picture?)

Of course, by then I’d lost Shirley’s recipes. Rather than trying to find it on Facebook, I did a Google search, came up with a few recipes that were similar, and zoomed in on one of them. But since that wasn’t really what I wanted to make — I don’t remember potatoes being in the dish — I fine-tuned it to make it into something similar but different.

Following me after all that?

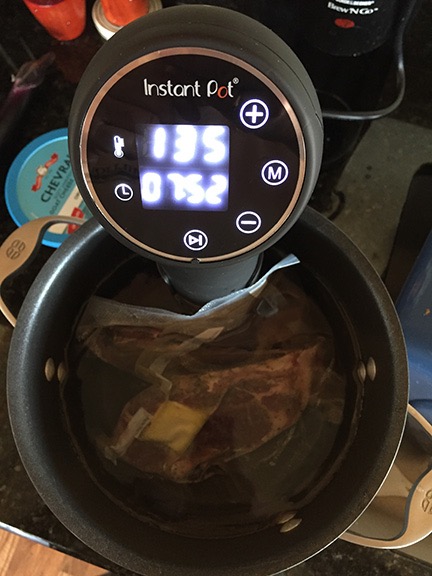
Anyway, here’s my version, which includes instructions specific to an Instant Pot. One of the things that sold me on Instant Pot was that it was a slow cooker, too; no need for multiple devices filling my pantry shelves.

Ingredients:

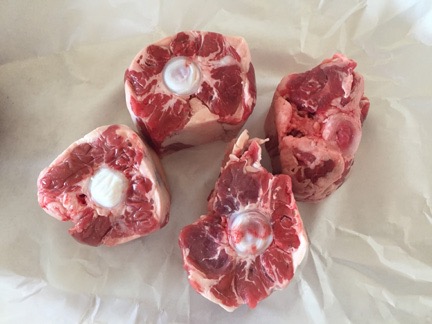
  • 1 2 to 4 pound boneless pork loin roast. This is not the same as a pork tenderloin. (I’ve said it before and I’ll say it again: do not waste a pork tenderloin in a slow-cooked or pressure-cooked recipe. It is naturally tender and is best grilled.) If there’s any visible fat on the roast, trim it off.
  • Salt and pepper to taste.
  • 2 strips uncooked bacon, chopped. I used buckboard bacon, since that’s what I had.
  • 1 tablespoon brown sugar. I bet you could substitute maple syrup or even honey.
  • 1 14 oz. can sauerkraut. Or whatever “standard” sized can or jar you find. You don’t want the big jar. Don’t drain it!
  • 1 large onion, cut into 1/4 inch wedges. That’s the way I cut them, anyway. I used regular yellow onions, but I suppose you can use any kind of onion you want.
  • 1 large apple, cut into 1/4-1/2 inch wedges. I used a Honeycrisp, because that’s all I had in the house. Silly me. I kept one segment for the cook. Quality control, you know.
  • 2 teaspoons caraway seeds. That’s the one part of the recipe that I definitely do remember, mostly because when I was a kid I hated caraway seeds and my baker grandfather would make me rye bread without it. (Talk about a spoiled kid.)

You know, if you’re really big on starches with your food, you could add potatoes. The original recipe called for 6 white ones, peeled and quartered.

Instructions:

  1. Season the pork with salt and pepper and set aside.
  2. Press Sauté on the Instant Pot and toss in the bacon. Cook it up to release its yummy aroma and fat. (Okay, so if you don’t have an instant pot, you’ll need to do this in a pot on stove.)
  3. Note about browning the meat:
    The recipe I based this (loosely) on instructed cooks to simply put the raw pork into the pot with the other ingredients and cook it. But my understanding is that browning meats helps increase flavor so that’s why I did it here — and nearly always do it in any slow cooker or pressure cooker recipe. I added the bacon merely as a source of tasty fat; you could, I suppose skip the bacon and use some sort of oil instead.

    Add the pork and brown on all sides. This could take a while. Be patient. Try to stir around the bacon so it doesn’t get all burned.

  4. Remove the pork and set it aside again.
  5. Deglaze the pan with about 2 cups of hot water. This means adding the hot water and using a wooden or silicone spoon to rub away the burned bits at the bottom of the pan. Along the way, the water will turn into bacon soup. (At this point, if you’re not using an Instant Pot, you might want to transfer everything in the pot to your slow cooker which you should then turn on high. And remember later, when you’re washing two pots, that Instant Pot users only washed one. Just saying.)
  6. Add the brown sugar and stir it in.
  7. Return the pork to the pan.
  8. If you’re including potatoes, I recommend putting them in the slow cooker around the pork right now.
  9. Add the sauerkraut (with all juices), onions, and apple. Just dump them in right on top of the roast.
  10. Sprinkle the caraway seeds on top.
  11. Cover and bring the mixture to a boil, then press Off. Then press Slow Cooker and adjust the temperature to Low and the Time to 6 hours. (If you’re using a regular slow cooker, you’ll probably need to cover it to get it up to temperature. Once it’s bubbling, turn the temperature down to low.)
  12. Slow cook 6 hours.
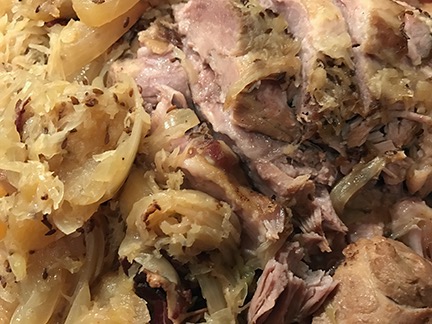
  13. Remove the meat from the pot, slice it as thin as you can (against the grain; good luck), and arrange it on a serving plate. Using a slotted spoon, scoop out the rest of the goodies and arrange them around the pork. You can put some of the juices in a milk pitcher or gravy boat for guests who might want to pour it over on their plates.
  14. Serve hot (duh), possibly with some crusty bread. Or rye bread, with or without seeds.

If you try this, please do let me know what you think.


Pressure Cooker Beef (or Oxtail) Barley Soup

One of my favorites, made quickly with a twist.

Oxtails
Oxtails, fresh from the butcher.

One of my favorite “comfort foods” is beef barley soup. I blogged my recipe last December; here’s the pressure cooker version that’ll get yummy barley goodness to your mouth quicker. But rather than use plain old stew meat, this time I used fresh oxtails that I picked up from a local butcher this past week. I whipped it up in my Instant Pot in about an hour.

Ingredients:

  • 1 tablespoon olive oil. The original recipe called for cooking spray. But why not use a little olive oil instead?
  • 2 pounds oxtails, trimmed (or 1 to 1-1/2 pounds stew meat, trimmed and cut into 1/2- to 1-inch pieces). You can make it with less meat, but if you have more, use it. It’ll make a heartier soup.
  • 3-4 large carrots, sliced. Carrots are a must-have in any meat-based soup.
  • 2-3 stalks of celery, sliced. I don’t care for celery, but it is part of the aromatic trilogy.
  • 1 large onion, chopped. The third member of the aromatic trilogy, I put onions in most soups and stews. I still have onions from my garden.
  • 1 large parsnip, sliced. If you can’t find parsnips, add another carrot or two, which is what I did today.
  • 1 medium turnip, cut into 1/2-inch cubes. I skipped this today.
  • 4 cups fat-free, low-sodium beef broth. Today I cheated and used water with bullion, which is the only thing I had.
  • 1 bay leaf.
  • 2/3 cup uncooked pearl barley.
  • 1/2 teaspoon salt. You can probably omit the salt if you don’t use low-sodium beef broth. I did, but then again, I’m trying to keep my salt intake down. Remember you can always add salt; you can’t remove it.
  • 1/2 teaspoon black pepper. Pepper is always good with beef.

Instructions:

These instructions are for an Instant Pot, but I tried to include generic pressure cooker instructions, too.

  1. Heat the pressure cooker for browning. On an Instant Pot, press Sauté.

  2. Heat oil in a heavy-bottomed pot over medium-high heat.
  3. Add oxtail or stew meat to pot and cook until browned on all sides.
  4. Remove meat from pot with a slotted spoon and set aside.
  5. Add vegetables to the pot; cook 6-8 minutes or until liquid almost evaporates.
  6. Return beef to pot with beef broth and bay leaf.
  7. Bring to a simmer and turn off the pressure cooker.
  8. Stir in remaining ingredients
  9. Cover and lock down the cover. Set the pressure cooker to high for 20 minutes. (On an Instant Pot, press Manual and set to 20.
  10. When pressure cycle is over turn pressure cooker off and allow pressure to release naturally. This should take about 15 to 20 minutes.
  11. Remove cover carefully, fish out bay leaf, and serve.

Oxtail Barley Soup
Oxtail barley soup. It was delicious!

Keep in mind that the longer you cook the pearl barley or let it sit in the hot soup, the more liquid it will absorb. The net result could be more of a stew than a soup. If you want a soupier soup, either reduce the amount of barley or increase the amount of broth.

This yields about six to eight servings, depending on serving size. I think it would be excellent with some crusty bread on a cold winter day.

Sous Vide Steak

An update to my post about exploring sous vide cooking.

Well, my new Instant Pot Accu SV800 Sous Vide Immersion Circulator arrived the other day and I wasted no time trying it out. I pulled two 1-1/2 inch thick New York strip steaks out of the freezer — they were from the quarter cow I bought last year — and defrosted them. I seasoned them with my prime rib rub (see below), which I normally use for roasting beef on my Traeger. Then I sealed each steak and about 1-1/2 tablespoons of butter in a pouch using my FoodSaver vacuum sealer.

Although my immersion circulator was supposedly designed to work with the inner pot of an Instant Pot cooker, it was too tall for mine. (WTF?) Fortunately, I have a tall Calphalon stew pot and it fit perfectly in that. I filled the pot with hot tap water to the bottom fill line of the circulator, plugged it in, and set the temperature for medium cooked beef: 135°F. Because my tap water is so hot (about 122°F in the pot, according to the circulator’s thermostat), it only took a few minutes to get to 135°F.

Sous-Vide setup
Not a very good picture, but you get the idea. The immersion circulator keeps the water at temperature. The steaks cook in the water in individual bags.

I dropped both steaks in. As I expected, the water level rose to about halfway between the upper and lower fill marks. I tried to set the circulator’s timer to 1-1/2 hours, but it reset itself to 8 hours. So I took note of the time and went about my business cleaning the garage.

An hour later, I came back. The steaks were no longer red. The butter had melted. There was juice in the packets.

I heated my propane grill to high temperate, brushed off the metal grill, and turned down two of the three burners. Then I put some cut up potatoes and beets from my garden, along with a cut up carrot, into my grill basket, set it on the grill away from the high burner, and closed the lid. I let them bake on mostly indirect heat for about 20 minutes, tossing them occasionally. I added a cut up onion from my garden.

I made a salad. For me, that usually consists of opening a bag of mixed greens and adding salad dressing. I like to cook but hate making salad.

When the onions were beginning to soften and the potatoes and beets were done, I brought one of the steaks out. I cut open the pouch and put the steak on over the burner set to high. I reserved the packet of juice.

I let the steak sear well on one side before turning it. Then it seared on the other. Total grill time was less than 4 minutes.

I plated the steak and veggies with some salad. I poured the pouch juice over the steak. I poured a glass of cabernet and sat down to eat.

A Sous Vide Dinner
My first sous vide steak with grilled garden vegetables and bag o’salad.

This was probably the most delicious, perfectly cooked steak I’ve ever eaten. Tender and amazingly juicy, it was just the way I like it: brown on the outside and pink but firm on the inside.

The interesting thing about cooking this way is that you can (with some exceptions) leave the steak in the hot water as long as you like before searing it. This makes it an extremely convenient method of cooking red meat for guests. The only drawback is that all meats in the cooker will cook to the same doneness. That means you can’t please someone who likes their meat rare while pleasing others who like theirs medium well — unless you do more than just sear those medium well steaks on the grill.

As for the other steak, I left it in its sealed pouch and put it in the fridge for another day. I would up serving it to a friend last night. I microwaved the pouch for about 30 seconds to get the juices liquified again, then put the steak on the grill and finished it up as I’d finished mine a few days before. My guest was very impressed.

Prime Rib Rub Recipe

Mix together the following ingredients:

  • 1/3 cup kosher salt
  • 3 tablespoons dry mustard
  • 4 teaspoons coarsely ground black pepper
  • 1 tablespoon granulated garlic or dried minced garlic or 1-1/2 teaspoons garlic powder
  • 1 tablespoon onion powder
  • 2 teaspoons dried thyme, crushed
  • 2 teaspoons dried oregano, crushed
  • 2 teaspoons ground coriander
  • 2 teaspoons celery seeds

This is good on any beef you roast or smoke. I first used it on a rib roast I prepared in my Traeger a few years ago and it was amazing. Now I always keep a jar of it on hand for seasoning steak and even hamburgers.

Exploring Sous Vide Cooking

As if I needed another new thing to explore.

Instant Pot Sous Vide Immersion Circulator
The Instant Pot Accu SV800 Sous Vide Immersion Circulator attaches to the lip of any suitably sized pot.

This week, I bought a sous vide immersion circulator. This is a device that you put in a pot of water and let it heat the water to the exact temperature you need for sous vide cooking. The one I got is from the Instant Pot people — the Instant Pot Accu SV800 Sous Vide Immersion Circulator — so it’s designed to go into that pot, but it’ll fit just about any large pot. I suspect I could even use it with one of my big, stainless steel cheesemaking pots if I needed to prepare a large quantity of food. I bought this with a “Lightning Deal” on Amazon for under $100; it basically gives me a sous vide cooker for a fraction of the price (and size) of a dedicated sous vide cooking device.

Sous vide — in case you’re not aware of the term — is a method of cooking raw food inside a vacuum sealed bag. Add the food and seasonings, seal up the bag, and then simmer it at a specific temperature for a few hours. Yes, hours. For certain foods — like steak — you’d then finish it off by searing it in a hot skillet or on a grill. You can learn more in an excellent article I found online at the Serious Eats website.

Although many people use zip-lock bags for this kind of cooking, a vacuum sealer with heat tolerant bags is preferred. I already have one of those so I’m all ready to go. I’m thinking I might try a steak tonight. (I have to admit that I’m already pretty good at grilling up steaks so this would have to greatly improve the flavor or texture of the meat for me to switch for steak.) If all goes well, I’ll explore other recipes. Anyone have any recipes for sous vide that they want to share?

I’m also wondering if I can prepare the food with seasonings in a bag, freeze it, and then defrost and cook it later.

But the real reason I bought it? I was thinking that I could somehow use this device to help me maintain certain temperatures needed when making cheese. A quick look at it, however, gives me the idea that submerging it directly in milk would probably not be a good idea. I’d have to stick to a double-boiler, which is okay; I could use the immersion circulator in the outer pot. Any thoughts?

If anyone reading this has experience with sous vide cooking and has a favorite recipe or two, please share it. I’m always interested in trying new things.

And sometimes I’m not sure that’s a good thing!

Instant Pot Chicken Mole

Another great recipe for my pressure cooker.

Chicken Mole
Chicken mole from my Instant Pot.

A friend came by for dinner yesterday. I expected her at 5 and worked down in the garage until 4:50 PM. I wasn’t worried about time; I was cooking up dinner in my Instant Pot and had all the ingredients ready. She kept me company while I got everything into the pot and we drank wine and snacked on caprese with tomatoes from my garden and fresh mozzarella while we waited.

Here’s my version of the Mole Chicken Chili recipe I found in my newPressure Cooker Perfection cookbook. I served it over white rice and it was delicious: slightly chocolatey from the cocoa, slightly sweet from the raisins, and with just enough heat to catch your attention from the chili powder and chipotle peppers.

Ingredients

  • 3 tablespoons vegetable oil.
  • 2 tablespoons chili powder.
  • 2 tablespoons unsweetened cocoa.
  • 3 garlic cloves, minced.
  • 2 teaspoons minced canned chipotle chile in adobo sauce. This stuff, which you can find in the Hispanic food aisle of your grocery story — assuming your store has one — is spicy! I’m not quite sure what I’m going to do with the rest of the can. Freeze it in a small container?
  • 1/4 teaspoon ground cinnamon
  • 1/4 teaspoon ground cloves
  • 2-1/2 cups low-sodium chicken broth. If you use a quart sized container, as I did, you can use the remainder with water to make the rice. If you use canned chicken broth, you can get away with using one can and making up the difference to 2-1/2 cups with water.
  • 1 14.5-ounce can diced tomatoes. I used 3 medium, very ripe fresh tomatoes from my garden.
  • 1 cup raisins.
  • 1/4 cup peanut butter.
  • 3 to 4 pounds boneless, skinless chicken thighs, with fat trimmed off. The original recipe calls for 4 pounds bone-in thighs.
  • Salt and pepper.
  • 1 onion, halved and sliced in 1/2 inch thick pieces. I used a red onion from my garden.
  • 1 red bell pepper, stem and seeds removed, cut into 1/2 inch pieces. In general, I don’t like peppers, but I’m trying very hard to like them so I included them.
  • 1/4 cup fresh cilantro, chopped.

Instructions

  1. Add 2 tablespoons of vegetable oil to Instant Pot and press Sauté to start heating.

  2. When oil is shimmering, add chili powder, cocoa, garlic, chipotle, cinnamon, and cloves. Cook about 30 seconds. (It will smell really good.)
  3. Stir in broth, tomatoes, raisins, and peanut butter. Be sure to scrape any bits of the dry ingredients off the bottom of the pan. (I have a silicone spoon I use for this and it does a great job without damaging any of my cookware.)
  4. Bring to a simmer and cook for 5 minutes.
  5. Remove the sauce from the pot and puree it in a blender. (I use an immersion blender, which does a great job.) Set it aside.
  6. Season chicken with salt and pepper.
  7. Heat 1 tablespoon of oil in the pot.
  8. Add the onions and sauté until softened, about five minutes.
  9. Stir in sauce, chicken, and peppers.
  10. Cover and lock pot; close steam vent.
  11. On the Instant Pot, press Off and then press Manual and set the time to 20 minutes.
  12. When the timer beeps, press Off. Do a quick pressure release and then carefully remove the lid.
  13. Stir in cilantro and serve.

The original recipe instructs you to leave the red pepper out in step 9. Instead, when the pressure cooking is done, you remove the chicken and shred it. While doing that, you cook the pepper in the sauce for 10-15 minutes and then add the chicken back in. My way is quicker and easier and I’ve found that the chicken shreds a bit on its own as it’s served. Also keep in mind that if you use bone-in chicken, you should increase pressure cooking time to 25 minutes.

This makes a lot of food. With rice, it fed both of us two servings and there was enough leftover to give my friend some to take home and feed me at least two more meals. We were too full for dessert!

If you make this, let me know what you think.