
The core recipe from the excellent article.
A few weeks ago, fellow author and Twitter/Facebook friend Jeff Carlson linked to a recipe with the comment that it was well-written. Wondering how well a recipe could be written, I followed the link to “How to Cook a Pot Roast: A Guide for People Who Want to Live, Dammit” on Deadspin‘s Foodspin column. And I discovered two things:
- Jeff was right. It was the most entertaining recipe I ever read. Don’t believe me? Head over there and read it for yourself.
- The recipe sounded not only easy but delicious.
So after finding a chuck roast in my freezer — left over from when my soon-to-be ex-husband bought half a local steer and had it butchered a while back — I decided to give the recipe a spin. (Okay, pun intended.)
The trouble is, although the recipe article is extremely entertaining to read, it’s not so easy to follow when you get into the kitchen and just want to make the damn thing. So I’ve distilled it down to its basic ingredients and instructions. This is how I’m making it tomorrow for some friends who are joining me for dinner. Pardon me if I’m vague about quantities; a real cook should be able to figure this stuff out.
But please, before you read and follow this recipe, treat yourself to the original article.
Ingredients
- Beef roast such as rump roast or chuck roast
- Salt and pepper
- Canola or vegetable oil
- Carrots (but not baby carrots), cut to finger length
- Celery, cut to finger length
- Onion, halved, or shallots
- Canned skinless whole tomatoes, crushed
- Cheap red wine
- Fresh rosemary and thyme springs, tied together with twine (if possible)
- Bay leaves
- Cornstarch
Instructions
- Unwrap the roast (and rinse if you like to do that kind of thing) but do not trim the fat.
- Season generously — more than you normally might think is right — with salt and pepper. Press the seasonings into the meat.
- Heat a heavy bottomed pot or dutch oven on high heat on your stove. If you have a ventilation fan, turn it on.
- Add one “glug” of oil to the pot.
- Thoroughly brown the meat on all sides. This should take 10-15 minutes. Meat should turn a deep, dark sizzling brown.
- Remove meat to a plate or tray. Do not drain off any fat in the pot.
- Reduce heat on stove and add carrots, celery, onion (or shallots), and tomatoes to pot. Cook for several minutes or until they start to brown.
- Return the meat and any juices that may have drained off into the pot.
- Turn the heat back up.
- Add a full bottle of wine.
- Add the herbs.
- Heat the liquid to a low boil and reduce heat to simmer.
- Cover and let cook 2-1/2 to 7 hours. (Really; the longer, the better.)
- With tongs, remove the meat to a serving plate.
- With a slotted spoon, remove the vegetables to a serving plate.
- Bring liquid remaining in pot to a full boil.
- In a separate dish or mug, mix some cornstarch with cold water to get a paste that’s smooth and just thin enough to pour.
- Drizzle cornstarch mixture into pot while whisking; stop when gravy in pot is desired thickness.
Serve with mashed or roasted potatoes. Or noodles (which is what I prefer). Or, as the author of the recipe heartily recommends, some crusty bread.
I’m making this tomorrow. If I’m feeling very energetic and ambitious, I’ll take pictures and insert them as appropriate here.
Now all I need is a good recipe for crusty bread….

 So I fell back on
 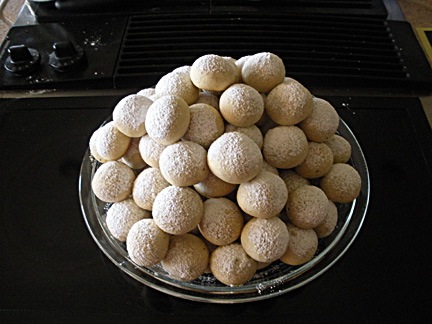 This year, they include “Snowballs.” This is a small spherical cookie made primarily of butter, flour, and finely chopped nuts, dusted with powdered sugar. Tasty without being too sweet.
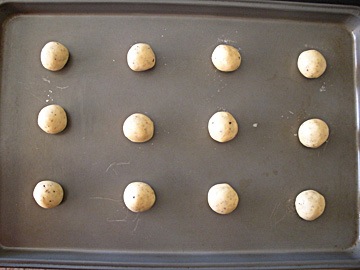 Place balls about 2 inches apart on an ungreased cookie sheet. Because these don’t flatten out, you can get quite a few on a standard sized baking sheet or jelly roll pan. Although my first sheet had only a dozen (see photo), I was able to get two dozen on subsequent baking sheets.
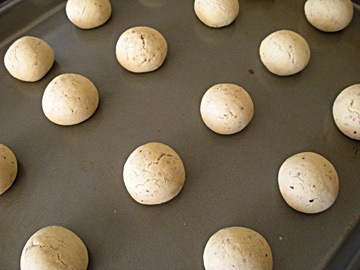 Bake for 8 to 10 minutes or until set but not brown. I judged that they were done when the tops began to crack ever so slightly.
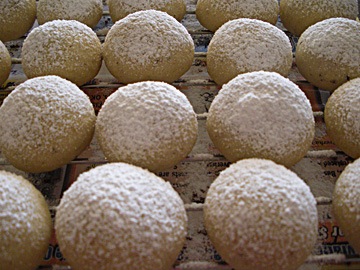 Immediately remove from cookie sheet and roll in powdered sugar. Now although I tried this, I soon discovered that this was a very messy way to go about coating them with sugar. So instead, I put them on a wire rack with some newspaper (okay, it was Trade-a-Plane) under it and used a tea strainer to sift powdered sugar over them.