I get to see — and participate in — the cheesemaking process.
There’s a cheese maker that comes to Wenatchee Valley Farmer’s Market held each Wednesday and Saturday at Pybus Market: Alpine Lakes Sheep Cheese. As you might imagine, I stopped at their booth tasted some cheese, and bought some. It was very good. I don’t know how I missed it, but my friend didn’t: a rack card that advertised a hands on cheese making class. I went back to the booth and talked to Katha (pronounced with a long a like Kate). The class was five hours long and cost $80. It wasn’t held regularly, like the rack card suggested, but if I could get at least three people to go, she’d do a class.
I immediately thought of my meetup groups and decided to suggest it to the Wenatchee Social and Outdoor Adventure Group. They’re really not big on “adventure” (despite the name) and I thought this might interest them. But I was quite aware that the price tag would likely turn more than a few people off. Still, I got one person to RSVP yes for the August 10 date.
Then I sprained my foot. I wasn’t sure if I could stand for five hours. And I’d failed to get three people.
But Katha assured me that if I was able to attend with my companion, she was willing to do the class with just two of us. So on that Saturday morning, I met with Jill and we carpooled up to Peshastin in my truck. We arrived at 10 AM.
Alpine Lakes has an excellent cheese making kitchen in a converted garage. It has all the things they need to keep the equipment clean and sterile, several cheese making vats in different sizes, draining trays on wheels to capture the whey, and a “cheese cave.” At least a dozen refrigerators line one wall. A set of sinks and dish draining boards make all-important sanitation easy.
Katha was prepared to make four kinds of cheeses: a soft fresh cheese (like cream cheese), a soft ripened cheese (like brie), a hard cheese, and ricotta. She’d already put various quantities of milk into pots or vats and was heating them. The milk was all fresh sheep’s milk from that morning’s milking. The quantities varied from 2 gallons for the fresh cheese to 20 gallons (I think) for the hard cheese.
She explained that each type of cheese used a different culture and required a different temperature. Some cheeses required a very specific temperature while others could be made within a range of temperatures. She let us measure out the powered cultures that came in a foil envelope stored in the freezer and sprinkle them over the milk surfaces. After waiting a short while, we used large skimmer ladles to draw the moistened culture down into the warm milk. After a certain amount of waiting time, we added liquid rennet diluted in a small amount of cool water. Again, we drew the rennet down into the milk, blending it well.
While we waited for the milk mixture to coagulate, Katha kept us busy. We visited her cheese cave — a room off the side of the kitchen with controlled temperature and humidity where cheese is left to ripen. The room was full of shelves where cheeses in various states of the aging process sat waiting for their time to come.
Katha pulled out a tray full of soft-ripened cheese and set it on a worktable. She showed us how the white rind on these cheese is actually a fuzzy white mold that gets more rind-like as the fuzz is pressed down onto the cheese when it’s wrapped. She put us to work wrapping the cheeses.
At around 11 AM, three more women showed up. Katha had been expecting them — they were last-minute participants. She caught them up on what they missed. Soon we were all taking turns wrapping cheese and coating hard cheese in wax.
Katha also pulled out some cheeses for us to taste. I think this was the best part. We tasted the cheeses she usually sells at the market and elsewhere, as well as a few new cheeses and even two cheeses she called “mistakes.” I liked the mistakes a lot — especially the blue-veined one. There was so much about this that I found odd — most of all that if you make cheese, you can’t immediately taste it to know how it came out. Some cheeses need weeks or months to ripen. These “mistakes” were good examples. She knew that she’d done something wrong — or at least something she hadn’t intended to do — but she wouldn’t know whether it would result in an edible cheese for months. I wondered how many other “mistakes” sat on shelves in her cheese cave.
Once the milk had coagulated, it was time to test it for a “clean break” — an indication that there were good, solid curds. Katha demonstrated and each of us tested one of the cheeses. We worked in shifts to cut the curd — large curd for the soft cheese and very small curd for the hard cheese. She had a huge rounded-tip spatula for curd cutting. The hard cheese, which was in the largest vat, required an extra step: curd cutting by dragging a huge wire whisk through it. This was quite a chore that required a great deal of arm and upper body strength. Who would have thought you could get good exercise making cheese?
Through the course of the morning, we scooped the various cheeses into various molds on the whey draining trays. The whey drained away into 5-gallon buckets beneath the trays. Katha told us that she feeds it to her pigs.

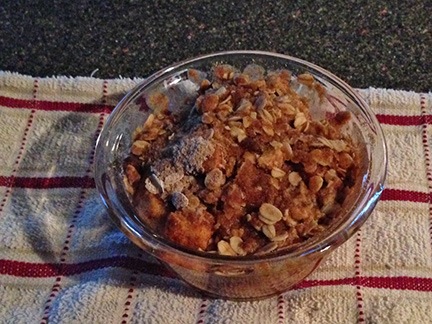
I enjoyed the fresh ricotta cheese for breakfast with fresh fruit.
She also uses it to make ricotta cheese, which is what we did next. She heated about 5 gallons of whey in the now-empty medium sized vat. The whey had to be heated to at least 200 degrees — but could not be heated beyond boiling because it would boil over and make a horrendous mess. It also had to be stirred the whole time. We watched it closely. When it reached the proper temperature, she turned off the heat and added a small amount of vinegar. Small curds immediately began to form. She poured off the contents of the vat into a relatively small cheese bag, letting the whey drain through onto a draining table. After draining and squeezing she had about a quart of ricotta, which she split among the five of us in small plastic containers. I ate it over the next two days with fresh cherries and blueberries from the orchard where I was living along with a small amount of honey from my bees. Amazingly delicious!
Katha took my classmates out to the field to visit with the sheep. Because of my sprained foot, I stayed behind, resting on a chair and munching on cheese.
There was more to the class but I honestly can’t remember the details. I waited too long to write it up. And for some reason I didn’t take any pictures! But I do remember paying an extra $20 at the end so I could take home a bunch of cheese — including those “mistakes” which likely won’t be for sale anywhere.
I’m extremely interested in cheesemaking and, since taking this course, have tried twice to make cheese. My first attempt was probably a success — but I won’t know for sure for another two weeks! My second attempt was a disaster, with a failure of the milk mixture to coagulate properly; I did get a lot of ricotta-like cheese to eat, though. I think my main problem right now is the size of my kitchen (tiny) and my inability to maintain proper “room temperature.” (Remember, I’m currently living in an RV and I detest listening to the constant hum of an air conditioner during the day or heater during the night.)
But I’m very glad I took this course. It taught me a lot about the basic steps of this complex process and what I should expect when I get things right. I recommend a hands-on course like this to anyone interested in making cheese.

 Sprinkle the topping over the apples.
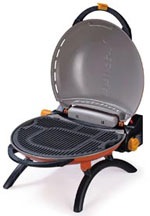 The Iroda O-Grill.
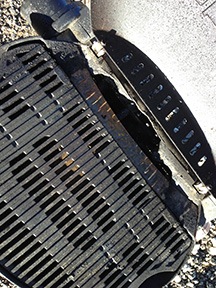

 My new O-Grill looks a lot like my old one, but it’s red instead of orange.
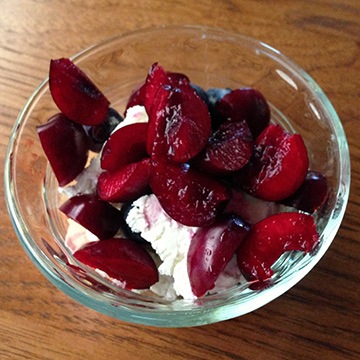
 There’s an excellent cheese shop not far from where I live: