All Pingbacks Must Die

I’ve had my last pingback spam.

Anyone who has a blog knows that the comment feature is what makes a blog stand out from a plain old Web site. The comment feature is what makes a blog interactive, it’s what gives readers a chance to share their point of view or additional information about a topic. It gives them a chance to ask questions and get answers.

The comment feature works with the pingback feature. Pingbacks (which are often referred to as trackbacks) are machine-generated “comments” that are added to a post when another blogger writes a post that links to it.

Huh?

Discussion AreaOkay, think of it this way. You’re blogger A writing post 1. Blogger B writes post 2 that includes a link to post 1. A comment appears on post 1 that links back to post 2. This is all done automatically in WordPress (my blogging platform of choice) if — and this is a big if — you left the Allow Pings option turned on for post 1. You can find the setting for this in the Discussion area of the Write Post administration panel.

Unfortunately, the pingback feature also makes it possible for sploggers to get free links to their sites. A splogger builds content on a blog by stealing it from RSS feeds. Their goal is usually to get hits on their Web sites, which are full of Google AdSense ads, but they sometimes are part of a “link farm” that boosts search engine ranking.

The problem lately is that my sites have been attracting more pingback spam from splogging sites than real pings from legitimate sites and bloggers. These must be manually deleted, since my spam prevention software doesn’t seem able to catch them all. And frankly, I’m a little sick of spending each morning deleting six to twenty of these comments.

So I’m going to stop writing posts with the pingback feature enabled.

And if you’re having this problem on your blog, I recommend that you do the same.

The Gravatars Are Back!

I add gravatars back to this site in a big way.

imageBefore I redesigned this blog, back in the days when it was still Maria Langer: The Official Web Site*, I added gravatars to the comments section of the blog. Gravatars are icons or avatars of individuals that are linked to their e-mail addresses. When someone with a gravatar posted a comment using his e-mail address in the appropriate field, the gravatar would automatically appear with the comment. If the gravatar changed in the future, it would also change on this site. Here’s what mine currently looks like.

This feature works with any site run by someone geeky enough to take the time and effort to set it up. With WordPress, it doesn’t take much time to do. Just the willingness to install and activate a simple plugin and modify some code in the comments.php file for the blog’s theme.

One of the reasons it took me so long to get this set back up was that I’m one of the few commenters who has a gravatar. I got a little tired of seeing [mostly] my face in the comments. It didn’t seem as if many other people were interested in this personalization feature.

Then Automattic (makers of WordPress) purchased Gravatar. I figured it would be more supported. And I was right. The Get Recent Comments plugin I use to list recent comments in the sidebar of An Eclectic Mind and Maria’s Guides support them. So I decided to enable that feature. From there, it took only moments to go the next step and put the gravatars back in the comments themselves.

So now it’s fully implemented on both of my main Web sites. And I’m encouraging people to go to Gravatar.com and get their own gravatars. And if you need help doing that, check out “How to Create a Gravatar” on Maria’s Guides.

I’ll be looking for your gravatars in the Comments of both sites.

* Read with tongue planted firmly in cheek.

Two Blogs? Again?

After over a year of soul-searching, I decide to spin off my book support topics to their own site.

I built my first Web site back in the mid 1990s. It was a simple site, created in HTML, that provided information about me and my books.

A [Very] Brief History of my Web Site(s)

The Internet was young back then — at least as far as the masses were concerned. Few people surfed. In fact, the whole idea of going online was so new and radical back then that my first book proposal, which was about telecommunications on a Mac, was turned down because publishers felt that there wouldn’t be enough people interested in it.

Anyway, as things heated up, I soon saw the benefits of putting more information on the Web. And then, in 2003, I discovered blogging. Surely my personal blog should be separate from what I write to support my books and articles, right? So I spun off a new site, LangerBooks.com, and published plain HTML Web pages with book promotional and support information.

Meanwhile, I fell in love with the whole blogging interface. There was no question in my mind: a blog was a perfect tool for presenting new content while automatically archiving old content. So I got LangerBooks.com into a blog format, with a separate blog for each title.

Back in those days (2003-2004), it wasn’t easy for me. I’d decided to blog with a program called iBlog that had a lot of promise. Unfortunately, its author wasn’t willing or able to keep up with technology. His software generated static HTML documents for each page of a blog. The more you wrote, the more cumbersome the whole blog updating process became. And, as those of you who read this blog regularly know, I can write an awful lot.

So in January 2005, I made the jump to WordPress. It was a big jump indeed, since I knew absolutely nothing about PHP or MySQL and very little about CSS. (What made it even bigger was that I was hosting my own blog on my own server.) I learned what I needed to know. One of the best things about WordPress is that you don’t need to know much to build a really professional looking site.

Around the same time, I decided that I didn’t want to maintain separate blogs for my books. So I brought all the books back under aneclecticmind.com and came up with some creative ways to keep Book Support topics separate from the rest of the site. Creative, yes. Effective, perhaps.

One Blog to Rule them All?

Of course, the whole time I was doing this, I was reading from “pro bloggers” about how important it is to keep your blog on just one topic. These guys were blogging to make money, I argued to myself. They weren’t in it because of a need to blog or a desire to provide additional information to book readers. So I pretty much ignored them.

But their advice was eating away at my brain in the back of my mind. After much thought, I realized that having too many widespread topics in my blog was preventing the blog from being more popular. For example, people interested in my flying and lifestyle posts — which, according to a poll on my site, is about 30% of the site’s visitors — were probably bored silly with my Mac OS and Excel and WordPress posts. And people interested in getting book support (16% of visitors) weren’t interested in wading through the other content to get the bits of information that could help them. This was preventing me from getting more site subscribers and regular readers.

So about two weeks ago, I decided to make the split.

Drumroll, Please

The question of how I did it is something I can discuss as a WordPress-related post. Let’s just say that I’ve done the basic work and have enough content in the new blog to open it to the public.

So here’s the formal announcement:

Support for my books and articles can now be found at the Maria’s Guides Web site: http://www.mariasguides.com/.

If you’re reading this post there, you’ve already found it. Otherwise, if you’re interested in articles, tips, and downloads related to my books about Mac OS, Excel, Word, and WordPress, please go check it out.

And yes, occasionally there will be cross posts, like this one. But I’ll try to keep that to a minimum.

Why Maria’s Guides?

A few years back, I made a false start on a line of eBooks. I abandoned the project, primarily because I got busy with other things that were more interesting (and lucrative). I’m thinking of revisiting the idea with shorter eBooks covering a wider range of topics. Maria’s Guides was the working title of the series and I own the domain name, so why not?

Web Site Redesign: Fitting in My Photos

With 90+ photos appearing randomly in my old site’s header, I wasn’t about to leave them behind.

Cutline
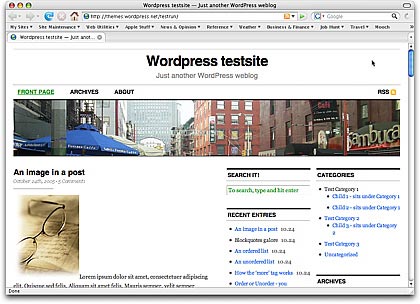
One of the reasons I chose the Cutline 3 Column Right theme for my site’s redesign is because I wanted a three column layout that was wider than my old site. Studies — including stats from all of the sites/blogs I operate — showed that the vast majority of Web site visitors have their screen resolutions set to 1024×768 or wider. I even use that setting on my little 12″ PowerBook. So the old site’s redesign was throwing away 200+ pixels of screen real estate that could be better used providing content or navigation features.

How Do I Use Those Images?

The problem I faced was the header image. Since I built my blog in WordPress nearly two years ago, I had been displaying images that I’d taken during my travels. The images had to be cropped and fit into pre-established format. I used the Random Header plugin to randomize the display. Over 18 months, I’d added nearly 100 images to the header image collection. I’d even begun writing about them in the About the Photos topic. They had become an integral part of my site and I didn’t want to lose them.

So while I continued working on my Leopard book during the day, this little problem was in the back of my mind. For days. One option was to rework the CSS and change the header image so it only took up a portion of the width and use the space beside it for a Web site description. Unfortunately, I don’t know enough CSS to do this successfully without spending hours on trial and error. With a deadline approaching, I couldn’t afford to waste time experimenting. I had to have an answer and be ready to implement it.

About the Photos Images

Then I remembered the smaller images I use in About the Photos to show the images I’m discussing. What if I put three of them side by side and displayed them with some sort of randomizer? Would they fit? What would they look like?

Example ImageThe images in question were 324 pixels wide. The space I had to work with was 970 pixels. 3 x 324 = 972. My luck, sometimes.

I reduced the size of three images to 322 wide and began some quick experiments to replace the existing header image (the street scene you see in the screenshot above) with the three images. I could get them to fit and they didn’t look bad. But I couldn’t get the spacing between them just righ. And I didn’t like the way they fit right up against each other.

A Short Film History Lesson

Then I came up with the film sprocket idea.

For those of you who began using a camera in the digital age and aren’t familiar with 35mm film, let me explain. Before everyone started using digital cameras, serious photographers used 35mm film. The film comes on rolls and has tiny holes along each side. A camera has gears that line up with the holes. You feed the film into the camera and it grabs the holes with its gears. A mechanical lever pulls the next blank piece of film from the film canister to the place in front of the shutter for the next photo. When the roll was finished, the photographer (or his camera) would roll the film back into the canister and the photographer would drop it off for processing. When he picked it up, he’d get prints and negatives. The negatives are the actual film, with inverse (or negative) images on them.

If a photographer had his own darkroom, he’d likely make a contact sheet. This was created by putting the negatives right against a sheet of photographic paper in the dark, then exposing the paper to light for a short time and developing it. The resulting images were tiny (at least they were from 35mm film) and clearly displayed rows of black boxes on either side of the image with black lines between them — like you see here in the header of my redesigned site.

So anyone who has worked with film should recognize these little holes. Of course, my images are considerably larger and wider, so they’re not exact representations of contact strip images. They’re just borrowing the idea.

When I modified the three images to include the borders and fake sprocket holes, I liked what I saw. I created a Photoshop action to modify the 89 remaining images so they were smaller and included the tiny black boxes and borders.

Randomizing

On my old site, the random header image was randomized with a WordPress plugin named Random Header. But since I had three images to show in my header, I needed a different solution. So I turned to the software I used on Flying M Air’s Web site to randomize some of the images there: Random File.

Random File enables you to display random files anywhere on a template. (If you use a plugin like Exec-PHP, you can even display them within posts.) What’s neat about it is that you can tell it how many random files — well, in my case, images — to display and it will display that quantity without repeating them.

After some fiddling around with the CSS used in header.php — remember, I’m no expert — I added the following code in place of the existing header image code:

< ?php $files = array(); for ($i=1;$i<=3;$i++) { $file = c2c_random_file('/wp-content/foldername/foldername/', 'jpg png gif', 'url', $files);
echo 'Random image #' . $i . '';
$files[] = $file;
}
?>

The result is what you see here.

The Hard Part Was Done

With the tough design decision done, I was ready to put the new theme into place. I did that on Saturday, taking most of the day to get it 90% functional. I’m pleased with the results.

Comments? Questions? Use the Comments link or form for this post.

January 3, 2009 Update: I’ve since updated my site’s Web design again and adopted a new theme that does not include photos in the header. So although this information may still be useful to WordPress users, there’s no live example for you to see what it looks like. Sorry.

Web Tools: Color Wizard

An online tool helps a non-designer pick a color scheme for a new blog.

I am not color blind. I know I’m not. I see colors and I know when certain colors look good together. But I can’t, for the life of me, come up with a color scheme on my own.

Color, of course, is a major part of any Web site’s look and feel. So when I found a blog post months ago that listed a few online color tools, I bookmarked them for later use. On Saturday, one of them came in very handy as I decided on a color scheme for my blog’s new look.

The Color WizardThe Color Wizard is a Flash application by Donald Johansson. This excellent online tool helps you find colors that work well together.

From the Color Wizard page:

The color wizard lets you submit your own base color, and it automatically returns matching colors for the one you selected.

It returns a set of hue, saturation and tint/shade variations of your color, as well as suggests color schemets to you, based on your color’s complementary color, split complementary colors, analogous colors and other variations. The color wizard also has a randomize function that lets you generate color schemes you might not have thought of on your own.

It’s the randomizer that helped me. I just kept clicking the Randomize button until I found a few schemes I liked. When I had about eight of them, I went back and reviewed each one, eliminating the ones I liked less until I had one I liked a lot. I then picked the blue color from the theme and generated another scheme from that, so I could get the colors I planned to use for my links.

What was also handy for me was the print feature. Although it’s not obvious on the application, if you right-click the Flash app, a Print option appears in the shortcut menu. I used that to print my two color schemes on my color printer. So not only can I visualize what the colors look like — or at least approximately what they look like; I don’t have a great color printer — but I have a document that clearly lists all the hex codes for all the colors.

I’m so pleased with the results that I clicked the Donate link at the bottom of the Color Wizard and used my PayPal account to send the developer some lunch money. (As usual, I urge everyone who uses great free software like this to thank the developer with a donation or at least a visit to his advertiser’s sites.)

Looking for a color scheme? The Color Wizard is a great place to start.