I spend a few hours making decorative paper for bookbinding projects.
I don’t know if I mentioned it here, but I’ve taken up another hobby (as if I didn’t have enough): bookbinding. So far, I’m amusing myself by making little notebooks and the occasional hard covered book with a purpose. I made my friend Jason a Guest Book for his boat and am in the process of making another one for my boat. I’m taking baby steps now, working on easier projects and honing skills before I get more ambitious. It’s fun. I especially like the sewing — yes, all of my books are hand sewn.
One of the things that’s commonly used in bookbinding is decorative paper. While it’s true that I can go out and buy pretty papers to use as book endpapers or covers — and I have, to a certain extent — I prefer to make my own. I want my books to be entirely handmade, except for the paper inside the covers. But I plan on making paper, too, and I’ll probably use it for book covers. One thing at a time.
Paste Paper
Paste paper is a type of decorative paper that’s created by covering paper with a mixture of wheat paste and (usually) acrylic paint. Wheat paste is nothing more than a mixture of flour and water, in the correct proportions, cooked for about 20 minutes.
It’s not difficult to do and it’s kind of fun. You can’t do it wrong. It’s cheap and easy enough to experiment and learn. I find it kind of relaxing, except cleanup. It’s easy enough to clean, but you have to clean the workspace after every sheet. That gets tedious.
Although I have space in my jewelry studio for bookbinding projects, I make paste paper up in my kitchen, on one side of my island’s countertop. This makes it easy to rinse sponges and clean brushes and other tools because the sink is right there. Although there is a bathroom downstairs near my studio, it has a tiny bathroom sink and really isn’t convenient. Why make things more difficult than they have to be?
Cheap Paper
Today I worked with extra large pieces of mixed media paper. I got a smoking deal on the paper at Hobby Lobby the other day. I really hate shopping in a Hobby Lobby — it’s about as close as I get to going to church — but it’s the only game in town around here. They stopped selling a lot of name brand, quality merchandise and, instead, sell their own store brands. The art paper is Master’s Touch and its wood pulp. (I don’t think they sell any cotton or linen paper at all anymore.) It’s pretty much junk and no professional artist would use it. But folks just getting started? Maybe.

I could not pass up this deal on large pads of mixed media paper.
I went in for sewing supplies and took a detour to visit the art paper aisle. That when I saw that the largest pads they sell for watercolor and mixed media — 18″ x 24″ — were on clearance for crazy low prices. This pad, which was normally $27.99, was on sale for $6.99. The watercolor pads, which normally sell for $45.99, were $10.99. How could I pass that up, especially with all the bookbinding stuff I’ve got going on? You can always cut large sheets smaller but you can’t make small sheets larger.
So I bought all they had: three watercolor pads and two mixed media pads.
The Process


If you’re interested in learning how to make paste paper, there are a lot of videos about it on YouTube. I think this one by DAS Bookbinding is the best intro, although he doesn’t get very creative. James Williams gets more creative in this demonstration, but his video is a bit verbose.
But if you don’t want to do it or watch a video, here are the basics:
- Put some wheat paste into a cup.
- Add paint and stir well to mix the color you want. I usually do one color at a time, but you can mix a bunch at once.
- Lay out your paper and use a clean sponge with clean water to soak it. If the paper was smaller and I had the right size bin, I would literally soak it in the water. (That’s the best results, in my opinion, but it’s tough to do with large paper. Also, not all artists wet the paper first. I follow DAS’s instructions; that guy knows what he’s doing.)
- Make sure the paper is completely flat on the work surface. This is important. If there are any bubbles under the paper, the paste will not spread properly on it.
- Use a brush or roller to cover the paper with colored paste. The way I make my paste, the color of the paper always shows through, but I like that. I use a brush and there are brush strokes.
- Use a variety of tools to drag or draw lines and patterns in the wet paste. This is where the creativity comes in.
- Lay it out to dry.
- While one is drying, you can clean your work surface and make another one. I made nine today.
- Once it’s dry, put it under a weight to flatten it; the edges want to curl.
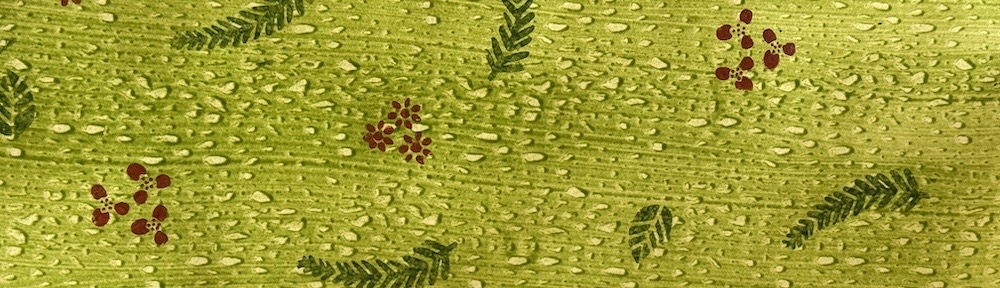
Although most folks seem to really like using a comb to make parallel lines and patterns on the paper, I’m not particularly impressed with that. Instead, I’ve found a pair of rollers that I use to make regular random patterns or I paint with swirl strokes instead of straight ones. I got fancy with one sheet, and used a roller on light green paint, let it dry, and then used stencils with two different colors to add leaves and flowers. (Unfortunately, it looks like Christmas paper, which was not my intention.) DAS Bookbinding has a video that demonstrates using a pattern roller and also demonstrates waxing and burnishing.
I’m satisfied with today’s efforts and now have enough large paper for any project.
Beeswax Paste
I don’t usually wax my paper right after it dries. Instead, I wait until I use it. I cut first and then wax. This way, I’m using less wax paste.
I make my own wax paste from beeswax (from my own bees) and mineral spirits. I got the basic instructions in this Annesi Bindings video. It’s basically 50% bees wax and 50% mineral spirits (by weight) melted in a double boiler. I cook it up right in the canning jar I store it in. If you cover it tightly, it lasts a long time.
Getting Creative
I read somewhere that retired people do things like this — take up creative hobbies. Until I read that, I didn’t realize I was following the pack.
But I really do get a lot of pleasure out of all my creative efforts, whether it’s writing, which I’ve done all my life, or making jewelry, fiddling around with watercolors, making decorate papers like these, or bookbinding. It’s just so relaxing and rewarding to make nice things with your own hands.
What do you think? What’s your creative outlet?
Discover more from An Eclectic Mind
Subscribe to get the latest posts sent to your email.
Hi. I’m curious, what do you mean by this? “ Hobby Lobby — it’s about as close as I get to going to church”. It’s confusing. Thanks
Have you ever been in a Hobby Lobby? They have an enormous selection of religious books and wall art — certainly more than any store that doesn’t specialize in that kind of merchandise.
Good to see you’re back on target.
Some of those paper effects are excellent.
Thanks very much.
I find myself easily distracted and sometimes I need to work things out in my head by writing about them. My struggles with social media are real, but unlike most other folks with the same addiction — because that’s truly what it is — I understand the problem. While I always thought the benefits outweighed the drawbacks, I’m starting to think differently these days.
As for the paper, I really do enjoy making it, but I think my next attempts will need to be more advanced. I also want to explore paper marbling, but it’s a pretty involved (and messy) process. I’m in no hurry to go there.