Getting down in the dirt.
Last weekend, I joined the Puget Sound Mycological Society (PSMS) for their annual Ben Woo Foray. Like last year’s event, it was held at a camp just northeast of Mount Rainier. But unlike last year, there weren’t many mushrooms to be found. There simply hadn’t been enough rain over the summer.
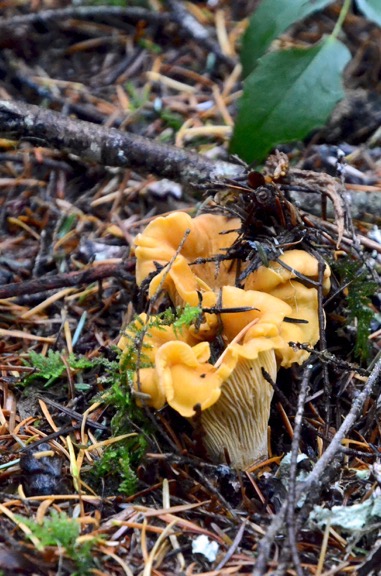
Here’s a golden chanterelle mushroom coming out of the duff. (They’re white where I find them on the east side of the Cascades.) After photographing this one, I cut it off and put it in my sweatshirt hood to take home. (I didn’t have a basket with me!)
But it wasn’t a complete bust. I managed to get enough chanterelles for a few breakfasts; I’ll finish the last of them this morning. And I’d signed up for the photography session, so that gave me a different purpose on Saturday afternoon.
There were about 20 of us in the group of photographers that set out to find and photograph mushrooms. We started with an extremely basic discussion of photography with topics that included shutter speed, aperture, and depth of field. Paul, the leader, also discussed the usefulness of reflectors to bring light into dark areas under a mushroom. I had one of my reflectors with me, but it was way too big to be useful for this kind of photography. (I know I have a small one somewhere; sure wish I could find it!)
He showed us some really nice and very artistic photos done by a member of the PSMS. If you can imagine framing a photo of a mushroom, these were the kinds of photos you’d frame. I found them inspirational — in other words, they inspired me to create good images.
I also learned about one of the drawbacks to my sturdy Manfroto tripod: the center column makes it impossible to get the tripod head very close to the ground, despite the fact that the legs can be released beyond their normal stopping point. This would make photographing mushrooms with the tripod a bit more challenging, unless I wanted to shoot down at them (which I usually didn’t). Of course, a tripod really is necessary due to the low-light conditions in the shady, wooded areas where mushrooms like to grow.
Then we went out to a predetermined place and hunted about for mushrooms.
As anyone who knows me well might expect, I didn’t stay with the group. In fact, I lost them twice. We didn’t walk very far and although I didn’t have GPS tracking turned on (via GaiaGPS, which I can’t say enough nice things about), I wasn’t in any danger of getting lost in the woods. Having my camera and tripod set up and ready to go really helped me focus (no pun intended) on photography as an activity. Also helpful: wearing the rain pants I’d bought on my way to the foray when I made a stop in Yakima. It was a real pleasure to kneel down on wet earth and not get up with soaking wet knees.
Most of the mushrooms I shot were very tiny and growing slightly above the ground nearby. That made it possible for me to set up the tripod and camera in a hole so I was nearly level with the subject. My goal, in most cases, was to highlight the mushroom(s) by focusing on them and letting the background go out of focus.
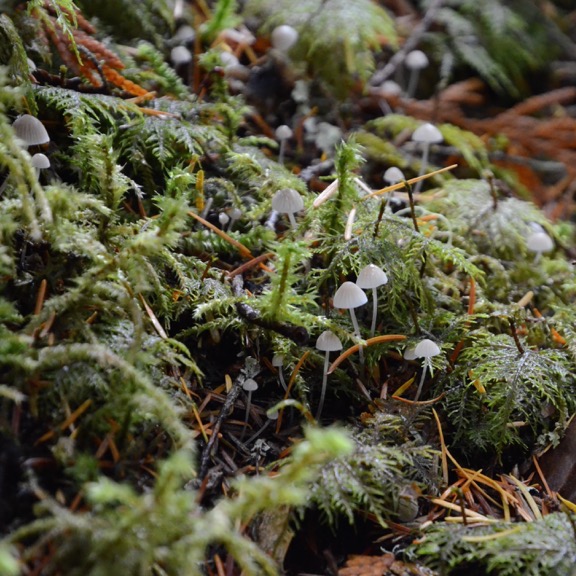
Some tiny mushrooms along the trail. None of these were more than 2 inches tall. They were growing out of moss and yes, those are fir needles around them.
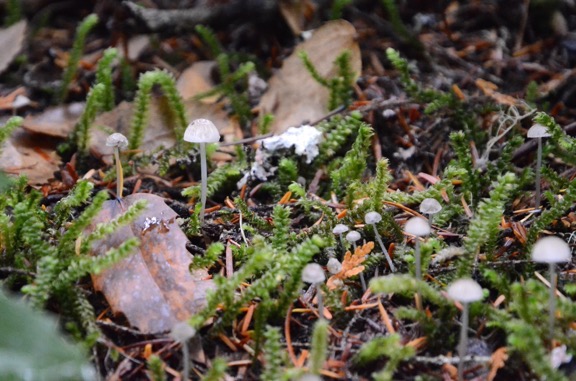
And more tiny mushrooms. I think I succeeded in getting that one mushroom in decent focus, but the white piece of lichen nearby creates a bad distraction.
For the shoot, I used my “go to” lens, an AF-S Nikkor 16-85mm ƒ3.5-5.6, which was one of the three I had with me. I did not have any fixed focal length lenses with me. This turned out to be the best lens (I had) for the job since I couldn’t get my big tripod anywhere near the mushrooms. In most cases, I had to zoom in to 85mm to get the closeups I wanted. I tried my 70-300 lens to see if I could get even closer shots, but was set up too close to get the mushrooms in focus. The forest isn’t a tripod-friendly place and it seemed silly to set up 10 feet away from mushrooms sometimes only 2 inches tall.
I don’t have a macro lens. This is something I need to remedy one of these days because super close shots would be nice — although I suspect that a really close look at some of the edibles I pick might make me less likely to want to eat them. (Think bugs.)
Anyway, here are a few of my shots from the trip. Are any of them worthy of being framed and hung? I doubt it. But it was good to get out with my camera and a mission again.
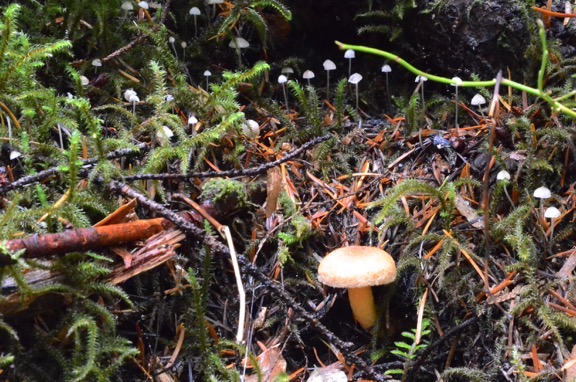
Another photographer and I saw these mushrooms at about the same time. She shot them from the left; I shot them straight on. Fortunately, they were growing at the base of a tree and I was able to get down into a hole in front of them. I think I could have done a better job focusing on the big one. And maybe some shade on the scene to avoid the glare? Experimentation is part of the learning process.
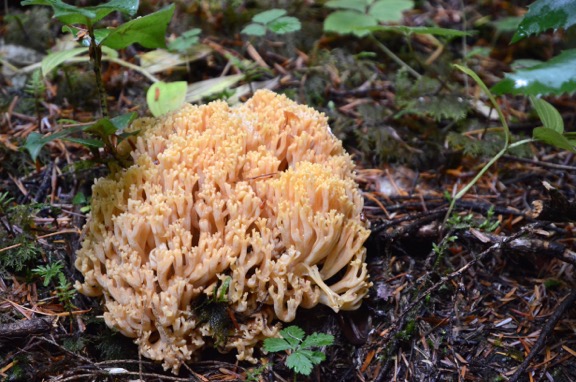
This is a coral mushroom — a beautiful specimen larger than a man’s fist — and it is edible. I didn’t find it so I didn’t get to take it home.
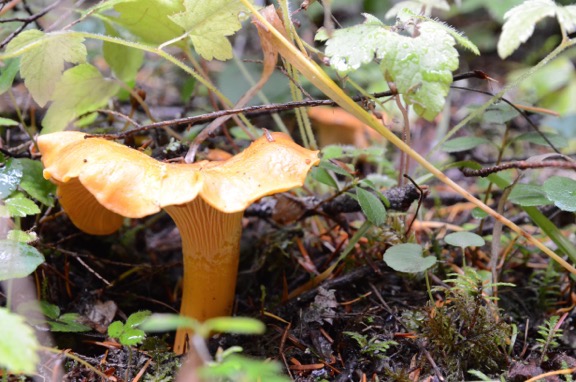
The leader of the group found two small and partially crushed chanterelles right along the roadside. But what he missed is this one and the slightly smaller one behind it. I had to lay prone on the ground with my camera in my hands to get this shot — and it isn’t even very good. Can you see the second mushroom to the right, out of focus? After everyone shot these mushrooms, I cut them off and took them with me.
Discover more from An Eclectic Mind
Subscribe to get the latest posts sent to your email.

Gorgeous mushrooms and photos! Wow! What a fun adventure!
Thanks, Shirley! I honestly think I could have done better, but this was a good start. It was nice to go out into the forest with my camera and a mission!
Nice shots, the mossy forest floor makes for an interesting backdrop. There’s a lot of detail in it, but the ubiquitous green of the mosses and ferns makes for good contrast with the lighter pastel colors of the fungi. I can see where a specialized macro setup with a low-angle tripod setup would be really helpful, especially with a low f-stop lens for the dim conditions.
I recently read a list of tips for off-beat camera work where they recommended using an old frying pan as a camera stand for beach photos. You just drill a hole in the center of the pan and bolt in a swivel and tilt ball mount, which you then mount your camera to. To use it, you just push the frying pan into the sand and then attach the camera, it’s super-stable and helps keep the sand out your equipment.
You might be able to fabricate something similar for forest-floor work, bolt a swivel and tilt ball mount onto a chunk of something that is heavy enough to stabilize the camera, but not so heavy it’s a PITA to haul around. Perhaps a piece of plywood, or a chunk of something cheap and stable, like a plastic cutting board. If it’s light colored or painted white you could get your low-angle reflector as well. Just plop it down close to your macro subject and prop it up with your pack or some rocks till it’s level enough to work with. It’s certainly better than setting your camera directly on the forest floor where it’s always damp or wet.
I like that idea a LOT. And it would be easy enough to do. I have plenty of scrap wood around here to experiment with.
The group leader suggested beanbags. I’ve actually made a few of them, although I don’t like lugging them around. I use a very small camera bag. I don’t want to be the person who carries around a lot of crap they rarely use.
I use a tripod plate on my tripod (https://www.amazon.com/Manfrotto-323-Connect-Adapter-200PL-14/dp/B000JLK5PU/) and camera bottom (https://www.amazon.com/Manfrotto-200PL-14-Connect-Mounting-4-Inch/dp/B001A1RMXG/). I suppose I could get one of those mounted on a board.
In the meantime, I just ordered a low tripod designed to hold my phone (https://www.amazon.com/Manfrotto-Stand-Universal-Cell-Phone/dp/B0169SORBO/); I think it’ll work with a DSLR, too. Of course, that would mean using a smaller lens; time to dust off the 50mm.
I’m hoping to do a lot of photography this winter when I’m down south. Of course, I say that every year…
Here is a ready made solution for your mount board idea. https://platypod.com/max/
I am really enjoying your blog. My daughter gave me a half hour dual instruction in a helicopter at Hillsboro Helicopter a few years so I have a small appreciation of what you are doing for a living. Thank you!
That’s very cool! A little pricey, but I bet it’s worth every penny. The question is, will I need it enough to make the $99 expenditure worthwhile.
Glad you’re liking the blog. I hope to blog more about flying soon. I just haven’t been flying much lately.