Bees: Post-Winter Results

One out of three isn’t bad.

I started my beekeeping hobby in June 2013 and have been blogging about it periodically. If you’re interested in reading the other posts in this series, follow the Adventures in Beekeeping tag. Keep in mind that the most recent posts always appear first on this blog.

If you’ve been following my blog, you may know that I brought my bees to California with me. After all, I’ll be here for about two months and it’s a heck of a lot warmer here than back home. Knowing that one of my three hives was already dead, I hoped to save the other two and get them an early start on the season.

When I set them up here in California, I discovered that although one hive — last year’s swarm capture — was very strong, the other hive was very weak. So weak, in fact, that when I opened it up a week later to check on it, the bees were gone. Bees from the healthy hive were robbing honey from the dead one.

So I was one for three. With an expected survival rate of 50%, I was batting below average. Disappointing.

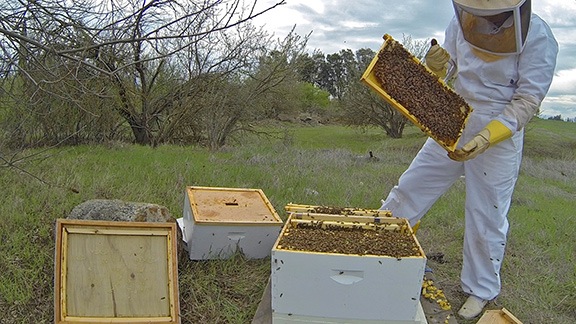
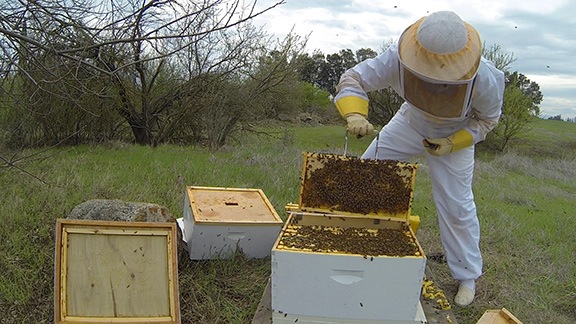
The surviving hive, however, was doing amazingly well. I saw that today when I opened the hive and inspected all of the frames. Although I couldn’t spot the queen, there’s plenty of brood in all stages of development in the middle of the hive. As I searched for the queen, I even saw several baby bees emerging from cells. One side of the drone frame is also almost full of capped drone cells. And the rest of the hive’s nine frames are completely built out with lots of stored honey.

Bees

Bees

Bees

I looked for signs that the bees might be planning to swarm, but there were none. I considered doing a hive split, but since I was unable to find the queen and I couldn’t actually see eggs in cells — I really need to either start using black foundation or wearing glasses during inspections — I decided not to risk it. At the rate at which the hive is growing, I expect the bees to start feeling crowded soon. I’ll check it next Friday — when I’ll pull the drone frame and pop it in the freezer — and if there are any swarm cells at all, I’ll split the hive.

One of the problems I had with the hive was its bottom. A friend of mine had made me some screened bottoms for about half the price I’d pay at Mann Lake, my favorite supplier. Unfortunately, he’d used 1/4 inch mesh rather than 1/8 inch mesh. Since the bees could get through 1/4 inch mesh, they’d basically begun using the bottom back of the hive as another exit. I didn’t think this was a good idea. The dead hive had 1/8 inch mesh. So I disassembled that hive, and put the live hive on top of that bottom. I then repositioned it so it was in the same place. I didn’t want to confuse the bees.

Beehive
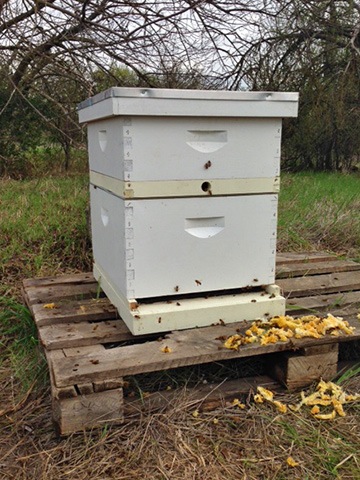
My surviving hive with queen excluder and spacer beneath honey super. The yellow-orange stuff in front of it is the burr comb I scraped off the honey frames. The bees will clean off the honey and then I’ll collect the wax and melt it down.

With the inspection done and the bottom changed, I put a queen excluder on top of the bottom hive box. That’ll keep the queen in the bottom but allow the workers to come upstairs. I then added a spacer with an entrance. I put the medium hive box on top of that. The box had been full of medium frames but, for some reason, the bees didn’t want to build out comb on the frames. Instead, they were building burr comb on the bottom of the frames.

When I brought the helicopter down to California last week, I brought down some other medium beehive frames I had, including a bunch that already had comb built out. I figured I’d swap in those frames. Maybe the bees would get the hint.

I topped off the box with the screen inner cover that’s always been on that hive and the outer telescoping cover.

I wanted to stop the bees from robbing the other hive, so I packed the other hive into the back of my truck. Later, I’d pack up the spare hive bottoms with their frames in black plastic garbage bags. It was the only way I could think of to keep the bees and ants out.

At this point, I have one very healthy hive that I’ll likely be able to split next week. I also have enough hive parts to build a total of three hives, two of which would have two boxes. And of course, Mann Lake is right in town if I need more parts.

I’m still hoping to find a swarm.

In the meantime, a local beekeeper has 176 hives for sale at a very good price. I’m hoping to buy a few before I head home in April.

Another Social Networking FAIL

Tip: When you wait five years to reply to a tweet, you’re doing it wrong.

Yesterday, a tweet addressed to me using Twitter’s @Reply feature appeared in my timeline on the Twitter app on my Mac:

Tweet from GotPrint

Thanks for my interest? What interest? I’d been using GotPrint.com for several years, but didn’t recall ever using Twitter to express my interest in the company.

Fortunately, the Twitter app (and Twitter.com, for that matter) makes it easy to see the original or “parent” tweet an @Reply is in response to. When I checked, I found the following Tweet:

Parent Tweet

Note the date on that tweet: December 10, 2007. Now note the date on this post: July 6, 2013. I tweeted about the company — not even using its Twitter name — five and a half years ago.

And they replied yesterday with a canned, spammy response.

Annoyed at being spammed, I responded:

Response

Apparently, the folks at GotPrint.com think I’m an idiot. Their response a short while later offered an unlikely and lame excuse:

Lame Excuse

Follow up? Five and half years later?

It’s far more likely that GotPrint.com got its hands on a Twitter bot that ran through all the old tweets that mentioned the company by name and generated spam like the message I got. While most people would likely ignore the message — because, let’s face it, most people don’t actually read the tweets on their timeline — I didn’t.

I replied:

Reply

And then I blogged about it here.

Why is this a social networking failure? Mostly because GotPrint.com — or the individual/organization it hired to handle its social networking — misses the point of social networking: engagement.

Social networking isn’t about gathering followers and spamming them with product info. Social networking is about making your company available for a dialog with your customers and potential customers. A timely dialog. (I complained about this in another blog post years ago, but I can’t seem to find the post to link to it. Sorry!)

The companies that use social networking effectively respond promptly and appropriately to social network mentions of their companies, especially when those mentions tag the company by its Twitter (or Facebook or other social network) name. They provide additional information when requested. They link to helpful documentation to solve specific problems. They provide customer service information when its needed.

They don’t generate automated responses using bots based on key words or phrases. They don’t come up with lame excuses when they’re caught doing something stupid (like responding to a 5-1/2 year old tweet). And they certainly don’t attack other social networking users who might have something negative to say about them (as Amy’s Baking Company so famously did earlier this year).

Twitter has been around for more than seven years now. Facebook, LinkedIn, and other social networks have also been around for quite some time. I find it incredible that organizations are still struggling to make social networking part of their customer service and marketing efforts. It’s pretty simple; why can’t they figure it out?

As for GotPrint.com, well, I’ll likely continue using them for my print marketing needs — which, admittedly is limited these days. But it isn’t because of the tweet I received from them yesterday. It’s because their price and quality meets my needs. If anything, yesterday’s tweet is a black mark against them — the only black mark so far.

And no, I won’t follow them on Twitter. In fact, if I hear from them again, I’ll likely report them for spam.

Expensive Delusions

When verifying the reality of a delusion gets expensive — and makes the deluded people look like fools.

I have to blog this. It’s the funniest thing that has happened since my divorce turned ugly last August.

The Back Story

As many readers know, I’ve been planning to buy and build a home on a lot in Malaga, WA. What some readers may not know is that back in July, when I thought there might be a chance of reconciliation with my estranged husband, I took him to see the lot I wanted to buy.

I envisioned us building a summer home there where I was making 80% of my income during three months. I envisioned him opening the bicycle repair shop he’d talked about on more than one occasion, possibly with bike rentals, along the nearby 11-mile bike trail in Wenatchee. I envisioned us living back in our paid-for Arizona home during the winter, taking it easy with a semi-retired lifestyle that would leave him plenty of time to fly his plane and build skills for his retirement career as a certified flight instructor.

I really thought that if he saw the land and the view that he’d envision the same life I saw for us. A life that didn’t include him being a slave to pay for a condo he didn’t need and I hated. A life with new, fun challenges in a beautiful place that wasn’t overrun with cheap retirees and rabid conservatives. A life with lots of recreational opportunities and a sunny future.

I didn’t realize then that he was already under the thumb of a desperate old woman who had seduced him with 30-year-old lingerie photos. I didn’t realize that he had stopped thinking for himself and was only doing what his new mommy told him to do.

That’s the back story: I found a 10-acre view lot in Malaga and I showed it to my future ex-husband, foolishly thinking he’d like it, too. Then I waited until the divorce was finalized and I got my settlement to buy it.

Fast Forward, May 7, 2013

My husband and his girlfriend/mommy managed to drag the divorce process out to April 2013. Other factors dragged it into May. On May 7, we had the first of two half-day sessions in front of a judge.

I was on the stand most of that time. During the cross-examination, their lawyer — I can’t really call him my husband’s lawyer since his girlfriend/mommy has been giving most orders to him since at least November — asked me a curious question:

“Isn’t it true that you own a home in Washington state?”

The question really took me by surprise. Me own a home in Washington? If that was the case, then why would I be living in Wickenburg, AZ, in a home filled with memories of a life I’d lived with the man I loved? The home I’d been locked out of by the man who obviously now hated me and had been harassing me since my return in September?

I answered truthfully: “No.”

He pressed on: “Isn’t it true that you have been living most of the past six months in Washington?”

I might have laughed. “No,” I replied. Other than a few short trips to Washington and California and Florida, I’d spent most of the past six months stuck in Wickenburg. Packing.

Afterwards, I talked about that question with my lawyer, family, and friends. It had seemed so out of left field. Did they honestly think I was living in Washington? If so, my testimony, under oath, should set them straight.

At least that’s what I thought.

Another Court Date

After another delay, we had our final appearance before the judge on May 31. My future ex-husband testified. Although most of his testimony was irrelevant and complete waste of time, he did manage to convince me that he’s become quite a liar. Or he’s more delusional than I thought.

My favorite piece of fiction: That during the six years of our marriage, he’d helped me with my helicopter business at least 100 times. That’s quite a feat for someone trapped in a 9 to 5 grind who uses his vacation time to visit family in New York and spends most of his other free time watching television. I was able to get back on the stand and insert a dose of reality for the judge’s consideration.

When we left the court, we all let out a sigh of relief. Now that it was in the judge’s hands, it was finally over. They’d finally stop harassing me.

At least that’s what I thought.

The Abuse Continues

The first indication that I was wrong came the day after the court appearance. He transferred the the balance of our joint checking account, which has always been equally contributed to and used for household expenses, to his personal checking account.

It’s not the money that bothered me. Frankly, it isn’t worth spending time worrying about the $445 that was my share.

What bothered me was the fact that the account was being used to pay our sole joint liability: the home equity line of credit. When the automatic payment came through, the payment would bounce and the account would be charged $35.

I knew this for a fact because I’d been watching my husband’s old checking account, which I could see when I logged into Bank of America. He’d drained that, too, but had stupidly forgotten to stop automatic payments from that account. Since September, he had bounced five checks and had been hit with a $35 fee for each one. (I knew because I still got low balance alerts for that account with all the others I monitored. That’s how I found out immediately about his withdrawal from the house account.) Some people just can’t manage their own finances. Good thing I was in charge of paying the bills all those years.

So by removing the money from that account, he’d set us up for bank fees and a possible hit to our credit scores for late payment of a loan.

And let’s not ignore the fact that he had no legal right to remove any funds from that account without the permission of the court unless it was to pay for house expenses. This money was true joint funds used for a specific purpose. Half the money was mine. He was stealing from me.

What a freaking idiot.

Amazing that it took him less than 24 hours to prove again how stupid he could be.

And Now for the Funny Part

On June 5 — still less than a week from that final court date — I was sitting at an outdoor restaurant, having lunch. I’d just spent the morning traipsing all over that 10-acre lot in Malaga with two surveyors, identifying property corners and the northern property line. I wanted to make sure I could visualize what my future 10 acre lot looked like. I wanted to see what land I had to work with.

(I was very pleased with the results. The lot appears about three times the size I’d visualized, working from incorrect corner markers.)

As I sat eating lunch, I checked my email. And that’s when I saw the latest bit of nonsense from my husband’s side of the divorce: They were insisting that I had already purchased the lot. In fact, they insisted that I had closed in January and that I was already developing it!

I really didn’t have any idea where they’d gotten these specific details. Although the email communication I’d been forwarded — from my husband’s mommy/girlfriend to their lawyer to my lawyer — mentioned tweets, I can’t remember having ever tweeted anything about having bought the land. Why? Well, I’d never bought it. So how could they have information about a closing date? And what made them think I’d started developing the land?

An earlier email message answered one of those questions. Apparently, back in early April 2013, they’d hired an “investigator” to snoop around the property I planned to buy. He’d photographed an RV (not mine) and cargo trailer (not mine) on a lot with a view a lot like the one I’d soon have. He’d provided details about septic system takeouts and obvious earthwork. The investigator’s report and some of the photos were included in the email forwarded from my husband to his lawyer to my lawyer. This was their proof that I’d lied in court — that I owned a home in Washington and was building on it!

Click play to cue soundtrack for this hilarity. (Many thanks to Facebook friend Dean for offering up this very appropriate music track.)

The only problem is, the photos showed the lot next to the one I was planning to buy.

You cannot imagine how hard I laughed when I realized this. My husband and his girlfriend/mommy had spent hundreds of dollars hiring an “investigator” to photograph my future neighbor’s property!

How they screwed this up so badly is beyond me. Who gave the investigator the address? Where did it come from? That has to be a story in itself.

How Delusions Become Costly

You realize that to find out what property I own in Malaga, all a person has to do is go to the Chelan County Assessor’s Office website and do a parcel search for my last name. If my husband or his girlfriend/mommy or their lawyer or the investigator had spent about 5 minutes doing this, they would have concluded that I didn’t own any land in Malaga or anywhere else in Chelan country. And if they thought they got the county wrong, they could have done the same for Douglas and Grant countries.

Did Dr. Tyson know I’d written about delusional people when he tweeted this more than 3 years later?

But the trouble is, they weren’t interested in reality. They were interested in producing evidence to back up their delusion.

They were convinced that I owned land in Washington. That was their delusion.

Maybe they did try a property search. They would have come up empty. But in their deluded minds, they knew I had property in Washington. They would have made excuses for why the tax rolls didn’t reflect their idea of reality. Perhaps they hadn’t been updated lately. Perhaps I’d bought the land in someone else’s name. Perhaps the Chelan County Assessor’s office was conspiring against them to hide the truth about me and my vast Washington real estate holdings.

Hey, anything is possible when you don’t rely on facts.

So they hired an “investigator” and told him where to take photos. Maybe they told him approximately where the lot was and he did some “investigating,” coming up with the only lot on that side of the road that was being developed. Having an RV on it must have sealed the deal that it was my lot, even though the tax rolls said it was owned by someone else.

Never mind that the RV on the lot wasn’t the one I owned, the one he claimed in court to have installed $5,000 to $9,000 of improvements in. (Another lie.) It wasn’t even the same make and model. And even though the “investigator” took photos of the Washington state license plates on the RV and the cargo trailer, no one had the idea to run those plates and see who they were registered to? If they had, they’d see that they were registered to someone other than me. Probably the people who owned the lot.

But that would shatter the delusion. Can’t do that. Delusional people only want evidence to support their delusions.

And apparently, they’re wiling to pay to get that evidence.

What Now?

Well, I’ve informed all parties that they investigated the wrong lot. I made it quite clear how amusing I think this is and how incredibly stupid I think my husband, his girlfriend/mommy, their lawyer, and the “investigator” are. I haven’t heard anything more about it.

But I suspect they don’t believe me. After all, they are delusional. I said in court, under oath, that I did not own a home in Washington. I said this on May 7, 2013. I did not lie in court.

But they obviously didn’t believe I was telling the truth then, under oath. So why would they believe me now?
Bees: Choosing and Buying Equipment

I consider and order my first hive and related equipment.

I started my beekeeping hobby in June 2013 and have been blogging about it periodically. If you’re interested in reading the other posts in this series, follow the Adventures in Beekeeping tag. Keep in mind that the most recent posts always appear first on this blog.

Once I’d decided to move forward with beekeeping, it was time to buy equipment. Unfortunately, there were many options to choose from. Without going into an in-depth discussion of how bees live and thrive — I’ll let you read up in the books like I did — I’ll go through my equipment choices and explain why making decisions isn’t so straightforward.

Deep vs. Medium Hive Bodies

My Hive
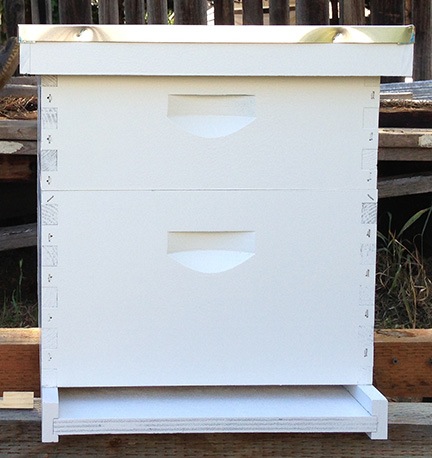
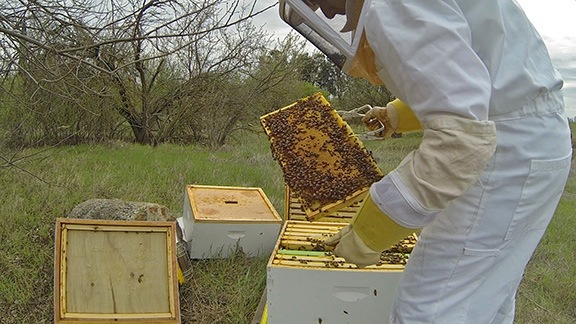
This simple beehive consists of five parts (top to bottom): telescoping cover (with aluminum roof), inner cover (not visible), medium hive body, deep hive body, hive base (with entrance for bees).

A hive body is the box that contains the bees. A bee hive consists of one or more hive bodies, each filled with vertically hung frames.

In general, beekeepers — and I hesitate to say “most beekeepers” because I really don’t know — use so-called deep hive bodies at the bottom of the hive and medium hive bodies at the top. A deep hive body holds frames that are 9-5/8 inches tall; a medium hive body holds frames that are 6-5/8 inches tall.

From my research, I learned that the benefit of medium hive body over deep hive body is weight; consult the table for details. It’s for this reason that medium hive bodies are usually used at the top of the hive for “honey supers.”

Hive Body Weights

This table, created with data from “Beehives, A Guide to Choosing the Right Size Boxes,” shows the difference in weight for a hive body full of honey at each standard size.

 10-frame8-frame
Deep80 lbs64 lbs
Medium50 lbs40 lbs

Seems like a no-brainer, right? Get all medium hive bodies so I can more easily lift them when necessary. The trouble is, the queen bee seems to prefer laying eggs in deep hive bodies. So there’s a possibility that a hive consisting of just medium hive bodies might not be as productive as one with deep hive bodies.

I consulted my friend in Vermont, who has been doing this for years. He recommended deep hive bodies at the bottom and medium hive bodies at the top. The “traditional” way.

10-Frame vs. 8-Frame Hive Bodies

Hive bodies can also hold either 10 frames (the traditional size) or 8 frames. Again, the main difference between these sizes is weight; consult the table.

Another no-brainer, right? Well, the way I saw it, the larger boxes would give the hive more room to grow so I’d have to add hive bodies less often to prevent swarming. Giving the bees more horizontal space would also eliminate the need to give them more vertical space — I wouldn’t be building bee towers. That’s the way I saw it, anyway.

Wood vs. Plastic

Hive boxes and frames are available in wood or plastic. The plastic boxes seemed to have more insulating properties for the winter, but all the beekeepers I talked to scoffed at the idea of using anything but wood.

Assembled vs. Unassembled

Hive bodies and frames come assembled or unassembled. They also come painted or unpainted. Frames come assembled or unassembled. Coated or uncoated. With foundation or without foundation. You can save money by buying hive components unassembled and putting them together yourself and then painting them or coating them with wax (as necessary). (You can also build your own bee hives from scratch, but I certainly didn’t want to go there.)

This was definitely a no-brainer for me. I’d buy them fully assembled and painted/coated.

Other Hive Parts

I’d also need some additional parts to each hive:

  • Frames. This is where the bees build their honeycombs, rear their brood, and store honey and pollen. They hang vertically in the hive bodies and usually include a wax-coated foundation on which the bees can build. There are a lot of frame foundation choices, but I think it’s best to start with whatever is standard.
  • Inner and outer covers. This protects the bees from the elements. Because each hive body is open on top and bottom, the top one must be covered.
  • Bottom board. This provides a base for the hive and an entrance for the bees. A reducer enables you to adjust the size of the opening.
  • Hive stand. This is a platform to keep the beehive off the ground. Most people build makeshift hive stands out of cinderblocks and scrap wood, although you can buy fancier ones.
  • Queen excluder. This keeps the queen from moving up into the part of the hive that’s reserved for honey storage.
  • Mite screen. This helps control varroa mites. (That’s a whole discussion in itself.)
  • Feeder. When you first get your bees, you have to feed them a 1:1 sugar water solution to keep them going until they can find their own source of food. You do this with a feeder. My vermont friend recommended an entrance feeder, although I’ll likely need to switch to a top feeder in the winter time.

The Importance of Sticking to Standards

Over and over, in every beekeeping information resource I consulted, the importance of standards was stressed. It’s pretty simple: you want your equipment to follow standards because you will be mixing and matching pieces down the road.

Some of the books also mentioned that standards aren’t always followed to the letter. They suggested finding one source of equipment and sticking to it. This would ensure uniformity so all the pieces fit together properly.

Sure, there are lots of pretty beehives out there, designed for gardens or patios or even inside an urban home. They’re more for show than for actual bee rearing. They usually don’t have standard parts so they’re not very practical if you’re serious about beekeeping.

Other Equipment

The hives are the homes for the bees. But other equipment is also necessary to keep bees. I had to get that, too.

  • Bee suit, gloves, hat, and veil. These items protect me from the bees themselves. I don’t think I’m allergic to bee stings, but who wants to take chances?
  • Smoker. Beekeepers use cool smoke to calm bees. I’d need a smoker for each time I opened the hive and manipulated the frames.
  • Hive tool. This is a specialized metal tool used to pry frames apart, scrape away accumulated propolis and wax, and work with the hive components.

Placing My Order

Although my Vermont friend had suggested Betterbee as an online source of beekeeping equipment, the local beekeeping group I joined suggested Mann Lake. They said Mann Lake had quick turnaround time and free shipping for orders over $100. I went with Mann Lake.

I had a choice of placing my order piecemeal (a la carte, so to speak) or ordering a kit. If I ordered a kit, I could order a complete beekeeping kit, which included everything I needed (other than the bees), or just a hive kit, which included a complete hive and still required me to order the other things I needed.

The Bee Kit
This is the bee kit I ordered. (No, it didn’t come with the guy.)

With so many choices to make, I decided to keep it super simple and order the Deluxe Traditional Starter Kit, which included four 10-frame hive bodies (two deep and two medium), 4 frames (in appropriate sizes, inner and outer cover, bottom board with reducer, bee suit with zip-on veil, hat, gloves, queen excluder, smoker, smoker fuel, hive tool, bee brush, and a book titled The Backyard Beekeeper. I also ordered an entrance feeder and a drawer-style varroa screen.

Now that I’d finally made the plunge into this new hobby, I couldn’t wait to get started. More on that in another post.

Inappropriate Solo Training Landing Zone?

How about preventing accidents by making conditions easier for new pilots?

I stumbled across this brief preliminary accident report in the NTSB database today. Here it is in its entirety:

The pilot who held a commercial pilot certificate with single-engine land airplane ratings was receiving training to obtain a helicopter rating. The pilot had 31 hours of helicopter flight time and the accident occurred on his second solo flight. The pilot reported he was attempting to takeoff from a wet grass area when the accident occurred. He stated that when he increased the collective to lift off, the helicopter began to roll to the right with the right skid still on the ground. He moved the cyclic to the left and the helicopter responded by rolling to the left with the left skid contacting the ground. The pilot then applied right cyclic and the helicopter again rolled to the right. The right skid contacted the ground and the helicopter rolled over onto it’s right side. As a result of the accident, the main rotor blades and the helicopter fuselage were substantially damaged. The pilot reported that there were no preimpact mechanical failures/malfunctions that would have precluded normal operation.

The accident aircraft was a 2003 Robinson R44 Raven II.

Those of us who have soloed in Robinson (or other small) helicopters know that balance varies greatly depending on how many people are on board. We learn to fly helicopters with two people on board: student pilot and instructor. The helicopter is usually quite balanced with two people on board. I don’t have the exact numbers for this particular flight, but using my R44 as a guide and assuming the pilot and instructor were each 200 pounds with 1/2 tanks of fuel, the weight and balance envelopes should look something like this:

W&B with 2 On Board

If you’ve never seen one of these, let me explain. The longitudinal weight and balance chart shows where the weight is distributed front to back. The pink line represents the main rotor mast. With two 200-pound people on board in the front seat, the center of gravity is forward of the mast. This is pretty normal for an R44. The lateral weight and balance chart, which is what we’re more concerned with in this analysis, shows how the weight is distributed side to side. The 0.00 mark is dead center and, as you can see, the with/without fuel points are very close to the center. In other words, it’s laterally quite balanced.

Now take the instructor out of the left seat. With everything else remaining equal, here’s what the weight and balance envelopes look like:

W&B with 1 on board

First of all, the center of gravity shifts aft. That makes a lot of sense. After all, there’s 200 pounds less weight up front. When I fly, this is extremely noticeable, especially at my new, slimmer weight. The helicopter actually lands on the rear of its skids first; on pick up, the front of the skids come off the ground first.

Laterally, there’s also a big change — and again, that’s what we need to focus on here. Without that 200 pounds of weight on the left side of the aircraft, the center of gravity shifts quite a bit to the right. The heavier the pilot is, the more to the right the weight shifts. So although I used 200 pounds in my example, if the pilot was 250 pounds — which is still legal in an R44 — the weight would shift even further to the right (and slightly forward). When the pilot attempted to lift off, the left skid would rise first.

Again, I don’t have the exact numbers. You can play with this using any reasonable numbers you want. It won’t change the conclusion here.

Now read the description of the accident events and put yourself into the pilot’s seat. He’s taking off so he’s lifting the collective slowly, getting the helicopter light on its skids. The left skid comes off the ground first because that side of the aircraft is lighter. This feels to the pilot as if the helicopter is rolling to the right while the right skid is still on the ground.

Stop right there. This is where the terrain comes into the picture.

The pilot is on wet grass. The accident report didn’t say mud so we won’t assume a sticky surface. But it certainly isn’t smooth. We don’t know how long the grass is or whether it’s uniform or has clumps of thick weeds. The question we should be asking is this: was the right skid “stuck” and creating a pivot point? The answer to that question determines the appropriate action:

  • If the right skid is indeed “stuck” and creating a pivot point, the correct action to avoid dynamic rollover would be to lower the collective. In other words, abort the pick up.
  • If the right skid was not “stuck” or creating a pivot point, the correct action would be to adjust the cyclic to assure there was no lateral movement (as you’d normally do in a pick up) and continue raising the collective.

An experienced pilot would know this. An experienced pilot would have done dozens or hundreds or thousands of solo pickups. He’d have a feel for the aircraft or, at least an idea of what to expect and what to do.

But this wasn’t an experienced pilot. It was a student pilot with only 31 hours of flight time — almost all of which was with a flight instructor beside him — on his second solo flight. So he used the cyclic to stop what he perceived as a roll. He may have been more aggressive than he needed to be, thus causing the helicopter to come down on the left skid. Then another adjustment to the right. The right skid hits that grassy surface and the helicopter rolls. Game over.

So my question is: What the hell was he doing taking off and landing on wet grass?

Flight instructors can reduce the chances of accidents like this by setting up their student pilot solo flights with easy flight conditions. That includes smooth surfaces for takeoff and landing. If this had happened on a nicely paved airport ramp or helipad that was free of surface obstructions like cracks or tie-downs, this accident may not have happened at all. There would be no question about a pivot point because none could exist.

You might also question whether the flight instructor properly taught the concept of dynamic rollover and what to do if it’s suspected on takeoff — lower the collective. And whether the flight instructor made it clear that there should be no lateral movement on pick up or set down. Yes, I know that’s hard for a new pilot to do — especially with only 31 hours — but it’s vitally important, especially on surfaces that could snag a skid.

Which brings me back to my original point: why was he taking off from wet grass?

Fortunately, the pilot was not injured, although the helicopter was substantially damaged. I think this accident makes a good example for teaching about dynamic rollover. With luck, instructors and students will learn from the mistakes here and avoid them in their own training experiences.

Of course, another possibility is the the student pilot simply was not ready to solo.